WW2 F15A Ford w/Breda in Italian service 2025-03

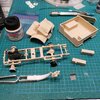
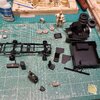
Most main components primed. Went with the rattle can Aqueous black surfacer... because I have it.
Will hand prime smaller ones as the build continues.

I'm thinking about the paint scheme, which would probably have been updated in the field by the Italians. And possibly in a hurry.
17448572366662914530224256622418.jpg
A bit daunted by bends to the grill to do, bottom right.
 
Last edited:
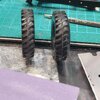
So, seams on rubber tyres. What to do?
Last time, I had some resin tyres on standby, so no issues.

This time, got to pay the piper. X5

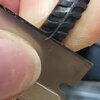
After reading up a bit, I squeezed it so that the seam bulged, then cut off with a razor blade. Then some clean up with 400 grit.
I've also read that you can freeze them, or use rotary tool sanding drum.

Thoughts?

17449296458683863806082851529668.jpg
 
Freezing them didn't work at all with the Trumpeter tyres I used on my recent Piranha, but you have nothing to lose by giving it a try with these ones — who knows, maybe it does work with the rubber these are moulded from.
 
Did a couple more with the razor blade last night, very carefully as not to land in the "it's finally happened " thread!
Think I'll pop them in the freezer, and try the 'socket in the pocket' trick for sanding.
Cheers
 
20250418_132828.jpg
20250418_133106.jpg

... so, freezing didn't seem to make much of a difference, maybe a bit easier to 'orange peel' the tyre with the blade, with less breakage.

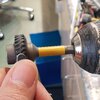
Drill mount works nicely;
I realized that it's better to have the tread angle as in the photo, rotating away, kinda same principle as planing with the grain on wood.
This rounded sanding stick worked best, allowing to concentrate on the 'crown' of tyre and not remove too much from the tread.

All in all, for a perfectly moulded tyre with a seam, the drill set up was great.

If the two halves of the tyre are a little offset, holding and squeezing the tyre with one hand ( to bulge the crown), while adjusting the angle of attack of rounded sanding stick with the other hand yields a better result, and less loss of adjacent tread.

I have spoken. This is the way. ;)
 
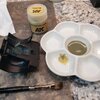
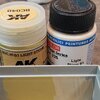
Hmmm, will have to scratch my first idea, didn't realize my Mr Hobby Aqueous primer would not be happy with AK light stone acrylic paint, with just a touch of AK 'high compatibility thinner to enhance the flow off the brush. :oops:

17450095147705697656295812068309.jpg
You can see how poorly it went down, and how much of the Black came back when I cleaned the brush in the thinner.
So I tried the other side with paint straight from the pot.
The black came back.
Bummer. Really like the primer, had no issues with figures painted in Vallejo.

So I remembered I had a LifeColour British camo set.
It goes on no problem, though pretty thin, and will require several coats.

These are the two, both labeled 'no°61 Light Stone'!

17450107882665246456329556243901.jpg
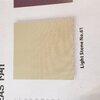
Here is a photo of the colour swatch in AK 'REAL COLORS OF WW2'

17450113880457806290712129065975.jpg

Looks like I'll have to wing it, with my own mixture of Vallejo paint at hand.
 
Yeah , that's hot thinner . very solventy :D .
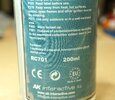
check out the ingredients on the label
 
hot thinner
Nothing on the label, will have to look up online.
Just the usual 'highly compatible' (not) and use it and you'll die health warnings. On the upside, it is also 'non-toxic' ( how does that work?), and odorless. So a silent killer.
 
You can see how poorly it went down, and how much of the Black came back when I cleaned the brush in the thinner.
These bottles of AK paint are lacquers. Try to brush those over anything that's already dried, and you'll be taking it off. AK 3rd Gen paints, that come in eyedropper bottles, are water-based and won't do that.

was shocked AK put what they did on the label
Shocked? How come?
 
Shocked? How come?
Hard to find SDS info online for AK , much less printed on the bottle .
Not shocked that AK no longer puts that info on the packaging .

I could swear that the first bottle of it I had also listed butoxyethanol on the label .
Fortunately , for all of mankind , that naughty data has been removed --- saving ink too . Think of the weight savings to the packaging from less ink on the label .
less weight , less fuel needed for shipping . less greenhouse gasses , more birds and garden gnomes .
 
... been outta town for a bit, back at the bench.
Multiple coats of this Lifecolor light stone (I under estimated how light it would be, especially with the black primer). Got the engine in, and test fitted the cab.

The air filter too high to fit under inside cab cowling... then remembered an early version of the kit with lotsa resin that had instructions to chop it. Found the pdf, and sure enough, chop!

They neglected to tell the plastic kit engineers though...

17456318877511347314507205426595.jpg

... so I'll have to adjust the filter, no biggie.

17456319752698230994786965264389.jpg
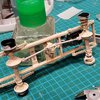
... fuel tanks, powertrain, headlamp housing; then dash detailing, grill, seats, wheels and doors to paint.

Assembly still a long way off, need to assemble and paint Breda, and other Italian and gun related mods.

Search as I might, have not found a photo or description of a CMP F15 bed to know if it should have the non-skid plates like on the cab floor. Sure seems like it should!
 
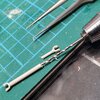
So the drive shafts are not sized to fit, that is left to the modeler to figure out. The instructions say: cut part if needed.
Needed.
But I'm hesitant, because the two ends will have to fit flush, and to their attachments.
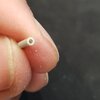
Safer to drill out one end and slide the other in, that way a good fit should be assured.
Should.

Back with the drilling already!

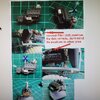
20250426_011226.jpg
20250426_011338.jpg
20250426_012436.jpg
Enough for tonight!
 
Multiple coats of this Lifecolor light stone
Lifecolor paint is really poor to brush-paint with. I bought some bottles years ago mainly because they had the colours I wanted, and had to brush five coats of RLM 79 Sandgelb (a kind of khaki colour) over light blue Airfix plastic to get rid of the plastic colour shining through.

Every other Lifecolor paint I tried brushing with after that did much the same. However, I later tried spraying a pale sand colour (could be Light Stone, I'm not sure anymore) and it covered quite well in one coat.


Write your reply...

Latest posts

Back
Top