VW Samba Bus

spud

Irish and proud of it :)
Joined
Jun 29, 2011
Messages
6,918
right this is the kit i wanted teh other one will be a side project,

now this is what im after kinda anyhow ;D
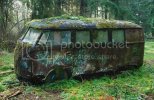
410883271_8d750f008d.jpg

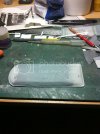
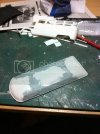
ive started off by blocking the roof windows and that big sunroof, this will take a big chunk of work i recon to get right.
IMG_0703.jpg

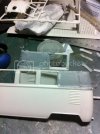
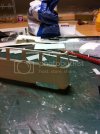
ill also need to do the same to teh back two windows here, The rear quater window will be a pain in the mellons to do i think some clean up and more filling tomorrow on the roof.
IMG_0704.jpg
 
i presume you mean both vans, to that Of course but the other one will be done now and then
 
Looks like ya got a lot of work to do on the roof !!!

Chris.
 
I'M IN!!! :eek: Woo Hoo!! Tis going to be a good one Spud!!! That driver's hatch is some killer chipping!!! 8)
 
Sure do chris,I think that's the bigest job

Good to have ya on T, the whole bottom left would seem to have a lot of chipping,

Any sudjestions on what I can use to replicate that moss?
 
I owned a couple of those old micro buses over the years and I can tell you that there could and would be rust all around the bottom where the body meets the pan. I doubt you could over do the damage. I've been thinking about buying this kit just because It is one VW I wanted but never owned. I'm interested in how well it goes together.

Have fun! ;D
 
thanks ace, my brother owned the flat bed version and boy was that a cold yoke
 
Spud you could use some of the flockings from the likes of www.treemendusmodels.co.uk to make the moss ,and use the AK Interactive green slimes to help the colour blend ;)

Chris.
 
perfect chris ill save that for later use :)

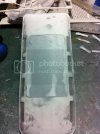
done some more filling on the roof......actulay lots :) mainly to get teh shape, the top should be ok once sanded but the windows seem to be taking a bit more mabe i should have used milliput on them..
IMG_0705.jpg
 
Did you put the windows in the roof ?? Thats a lot of sanding mate :eek:

Chris.
 
lol no i didnt even think of doing that lol would made filling them easier. i did put strips of evergreen in tough
 
D'oh !! yeah the windows would have taken the shape for you better ...not to worry tho ' Im sure it'll work out fine ;)

Chris.
 
ughh :eek: the windows kept sinkinking so riped them back out cleaned them and will tackle it again with the glass in place tomorrow. the big hole on the roof seems ok, i have it a once over so some more sanding tomorrow will tell if its goof enough
 
using the glass was a great idea to fill the holes. i had to sand off the mold around the glass wich was a pain,
IMG_0713.jpg

then i tackled the sides i put the flass in the other night so i filled this so ill have plenty of sanding to do soon
IMG_0712.jpg
 
So let me get htis straight spud....your taking a clean model...cutting it up so you can putty it up, so you can sand it smooth...just so you can paint and weather it beat to death so that you end up with something really nice?? Outstanding Sir!!! Making soem nice progress there...keep it going buddy!! ;)
 
lol sounds about right T, i must admnit this filling lark is a pain in teh arse, after all the work i put in it sank some how so more putty .. yeppie.. ill be lucky if i dont need more putty before i finish the roof ;D

on the plus side i ordered these today and with some magical luck ill have them for friday if not then prob some time in the new year

AK Interactive - Slimy Grime dark
AK Interactive - Slimy Grime light
AK Interactive Heavy Effects Acrylic Fluid
AK Interactive Wet Effects Fluid
AK Interactive Worn Effects Fluid
 
Ohh, I like that list there!!! I don't a one of them yet! :eek: Looking forward to seeing you tear into these on this!!!
 

Latest posts

Back
Top