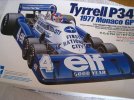
Tamiya Tyrrell P34

CitizenSwift

New Member
Joined
Mar 5, 2013
Messages
20
I've been out of the game for quite a while, so this a bit of a baptism of fire!

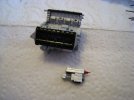
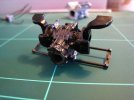
I started building this P34 about five years ago and this is about as far as I got...

8541584002_2ca2876795_z.jpg

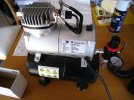
8541585400_1bb3bd798b_z.jpg

I also picked up a nice little compressor for a bit of added incentive :)

8541587634_f95423d2ca_z.jpg

I'm looking forward to sharing my progress with you. Your expert criticism is welcome, of course!
 
Thank you Spud. Yes, I agree. As interesting as it was, the four wheel steering was so effective they had to ban it sharpish! Typical F1 ;)

On to today's progress...

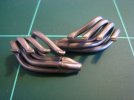
I spent most of the time putting together these buggers... I heard they were fiddly but wow...

8543441873_13a3853d2d_z.jpg
8544545920_7993545f35_z.jpg

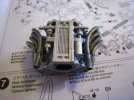
I dry fitted them to the engine block to ensure they'd be in the right position when the glue dried. As you can see the part that links them all together does not fit well. There are some unpleasant mold lines too which I should have sanded off before I put it together. It was such a fiddle though, I don't think I'll be going through that again :(

I'll fill those gaps though. Anyone know what filler I should use?

Here's the transmission. The brake housings have an ugly join running up them in this picture. I sanded them off a bit ready for painting.

8543444721_01379f6171_z.jpg

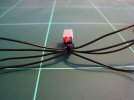
After pulling the HT leads through the distributor cap a little too forcefully, I pulled out the retaining bar that runs up the middle :( Thankfully just folding the HT leads in half and securing them with a bit of super glue seems to have done the trick...

8544544396_298b106cee_z.jpg

I made up a wash of thinner and some X-1 to pick out the detail on the engine block which you'll see in the next update.

After watching all the amazing builds on this site I feel like a total clod. If anyone's got any advice that you think might help me get a better result, I'd love to hear it :)
 
Love this car. Funny to think it actually won some races .
have you tries liquid paper for filler ? Works quite well for small gaps.
 
Thanks for the tip Rookie. I'll try liquid paper next time...

Ok, first off here's my reference picture...
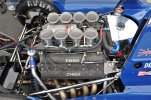
8566825683_d39d7c2a0d_z.jpg

I'm pretty pleased with how the exhaust manifolds turned out. I used a Tamiya weathering kit and gave them a good rub with the Burnt Red to give them that oxidized look...
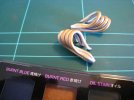
8567931086_d423ff5715_z.jpg

I'm not so happy about anything else I managed to do this weekend. I masked off the engine head plates (apologies if my terminology is incorrect) and gave them a coat of flat black so they looked a lot more like the photo (pretty good I thought)...
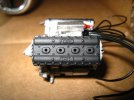
8567932682_f0a0d1785f_z.jpg

But then I tried to pick out the 'FORD' lettering by dry brushing Tamiya Flat White over it. Unfortunately it speckled a load of paint on other stuff and the lettering looked crappy :(

I then brushed (not airbrushed) flat black over the top again and masked around the lettering so the dry brushing only hit the area I wanted. The result... Poor IMO...
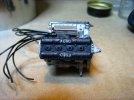
8566832187_315189fcb4_z.jpg

The Tamiya Flat White felt like dissolved chalk dust :( I tried painting the lettering with a fine brush but the paint kept clumping and wouldn't go smoothly onto the surface even when I thinned it.

Now it looks a lot worse than after I just airbrushed flat black over it.

On to painting the brake ducts and pads on the transmission assembly (I'd sprayed it with X-10 gun metal which I thought looked pretty good too), but when I opened X-18 Semi Gloss Black it was ROCK SOLID!

One trip to the hobby store and a new bottle of X-18 later and I'm thinning it and brushing it on to the relevant parts... Again, the paint goes on HORRIBLY. It's drying so quickly, even thinned, a skin is forming over the top quicker than I can use it. It didn't go on smoothly at all, I had to sand it off again.
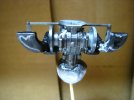
8567929606_6c4e4acbc0_z.jpg

It seems like every time I use a brush it comes out badly. What am I doing wrong? Should I have airbrushed the parts before I put the transmission together? How much assembly should you do before painting?

Feeling a bit discouraged, I decided to knock it on the head for this weekend. I made a few other rookie mistakes as well, like accidentally mixing enamel thinner with acrylic paint *facepalm*. I'm not going to give up though.
 
Tamiya paints need retarder for brushing effectively, or so I've heard, other wise they are rubbish. I have slowly built up a collection of Vallejo paints for brushing they work perfectly and can be thinned and cleaned with water . i only use Tamiya for the AB . The 2 work fine together, however I find the Vallejo paints go on a painted or primed surface much better than just bare plastic .

Progress looks good so far, keep at it.
 
Thanks for the tip, Rookie. I picked up some Vallejo paints over the weekend. I'm in the middle of moving house though so no chance to work on it this week :(
 
A cool car and a big fav of mine. Keep up the work on it i look forward to seeing more.
 
Thanks Shayne, I've been moving house - it's been a gruelling experience. Hopefully I'll get my kit set up this weekend and have some more to show :)

Did you build your Tamiya Tyrrell yet?
 
CitizenSwift said:
Thanks Shayne, I've been moving house - it's been a gruelling experience. Hopefully I'll get my kit set up this weekend and have some more to show :)

Did you build your Tamiya Tyrrell yet?

Not as yet, i have both versions which i will do the Monaco 77 car and the Japanese 76 with wets....i just need more days to build and not work.... ;)
 
Any news on this bud? I am looking to get this kit myself so seeing you suffer will help me not lol. Nice work so far.
 
@pitstop Thanks for your interest. Moving house was way more disruptive than I expected so I haven't had time to get my bench sorted. I should be back in the saddle soon :)
 

Latest posts

Back
Top