Tamiya Merkava Mk 1

Joined
Sep 25, 2011
Messages
804
Well, I'm moving my contest build to the shelf of doom for a while, just to get it off my mind. Here's my next build...
P6200724.jpg
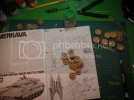
Saw this in my LHS for only $30, so I picked it up. What the heck, a Tamiya tank kit for that cheap?! Can't go wrong there! And the most painful part is already half-done!

What to do with this... it'll be good practice for some really heavy desert weathering, gonna try to get the heavy anti-skid coating these tanks seem to have by stippling some Gesso (thanks for the tip, Norm!) , and I'm gonna try my hand at some metal tracks too. The Mk 1's used Chieftan tracks, right?

Happy modelling! ;D
 
i have this kit in progress as well (see my sig for link).

hmm, side by side Merkava builds, this will be interesting! ;D looking forward to seeing your build!
 
Getting back to this one!
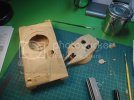
P8280735.jpg
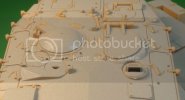
Just attaching the bigger parts that'll get the anti-skid texture. I've masked off some small bits with masking fluid, but I still have a ways to go on that!

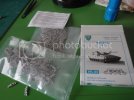
P7040734.jpg
And some cool Friulmodel tracks!
 
Frills rock, I find dress maker pins the best for linking them,

Give them a good wash in vinegar or nail polish remover to get rid of the mold release.
 
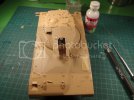
Masking's almost done:
P8290724.jpg
From the pics I've seen on Prime Portal, they applied this stuff EVERYWHERE. Really, the only parts that appeared to be free of anti-skid were hinges. And that's about it.
Just a little masking tape around some engine grilles, the side skirts, and the vertical sides of the turret, and we're ready to rock some textured paint! I'm using some outdoor deck paint from a spray bomb with some grit to it.
 
great to see this project continuing, i lost the drive on my Merkava and maybe this build will inspire me to get it finished!
 
thats one lovely build you've got going here ;D


great stuff so far mate,

keep it up !
 
Thanks for the comments, everyone! However, I have to be completely honest... for a Tamiya kit, I was expecting better moulding. Now, I know it's an older mold and the detail still looks OK, but the sprues suffered some mold slippage, especially the "B" sprue. I was hoping to have construction finished by the end of the week, but the amount of seam clean-up some of these parts need is really pushing back the timeline I had envisioned. To be brutally honest, I kind of got lazy on the suspension springs and suspension bumpers, and I'm hoping that the side skirts hide most of that. I sort of picked and chose the best molded suspension parts, gave them a good sanding, and put them at the front & rear of the hull, in case they're visible.

I hear that the main gun isn't the best fit, either. To top it all off, it's got the same problem the new MaK 'rubber' hoses have: a juicy seam right along some molded rib detail. :'( Any hints or help tackling it would really be nice right about now! :D

Wish me luck!
 
ND, i had the same problem with my build, what you can do is make a DIY Flexi-file out of some stiff wire. then make a few sanding strips in various widths and use that to file the seam between any detail. it also preserves the round cross-section when sanding

this is what i made (from a coat hangar) and different strips of various widths. with a sufficiently small strip, you should be able to sand between detail. otherwise, i scrape with the back of am xacto blade
DSC_4508.jpg
 
The weekly update...
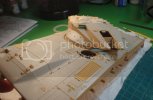
P9160724.jpg
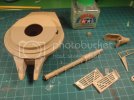
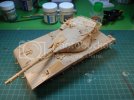
The turret was a pretty bad fit with some alignment issues, and requires some seam filling. The main gun was molded in halves, and where the two pieces mate up, there are some misalignment and pitting issues. I cleaned it as best as I could, and rebuilt some of the pitted and sanded-off detail around the bore evacuator with thin plastic strip and Mr. Surfacer. And the turret basket had some juicy ejector pin marks that needed some filling. Still a ways to go before assembly and the paint booth, unfortunately.

I was all gung-ho with Andrei's suggestion of a round sander, until I realized that the main gun has support strips that run along the length of the barrel. Thanks for the idea again, but it would create more problems than it would solve, in this case.

One final note: As I assemble my metal tracks, they are starting to bend into the hull (the side where you insert the pins). I had just ran out of brass rod and had switched to Tony Lee's suggestion of sewing pins when it started to happen. I'm thinking of switching back to brass rod/music wire to try and rectify the issue. Anything I should be mindful of to avoid this? Thanks again, everyone! ;D
 
Despite the issues you have had it sure looks fantastic ND...if you dont mind me calling you ND? :) What did you do for your anti slip coating? Looks awesome! ;D

Thanks,
Gary
 

Latest posts

Back
Top