Storm on the horizon... Hasegawa 1/48 F-16I Sufa

Carsenault

New Member
Joined
May 7, 2009
Messages
845
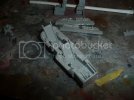
Well with the Jagdpanther safely parked on my bookcase its time ro start the Sufa. Kit is the recent Hasegawa F-16I Sufa. To that Ill be adding Aires multimedia cockpit set and resin wheelbays. Weapons will be from the box and from the Skunkworks Isreali weapons set #1. For now I plan to use the kit decals, they are actually printed quite nicely.
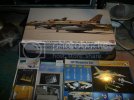
001.jpg

Not much to show yet, just been cutting away the kit instrument panel coamings to make way for the new resin ones. Ill take some pics tomorrow of the Aires cockpit tub. This has to bethe nicest resin detail part ever cast. Absolutely superb detail.
 
This is one wicked kit, Carsenault with the AM parts this would be great... even saw WIP on the net

cheers!!
 
Just discovered that the cockpit set I have is for a different F-16 variant, a block 40 which has a different heads up display and front instrument coaming. So Im debating purchasing another cockpit set so I can get the proper coaming and HUD, or just pressing on using the resin coaming and the kit HUD. I should be able to make the kit part look a little better with a little careful work.
There may be a few other small differences in the side consoles but that wont be noticed unless an F-16 pilot or crew chief has a look.

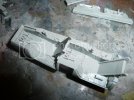
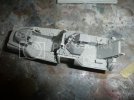
Took some pictures of the cockpit set, not sure who mastered it but he/she or they had to have intimate knowledge if the F-16 office.

007.jpg
004.jpg
005.jpg
003.jpg

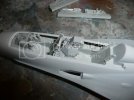
And after a short session of careful sanding and carving I was able to get it fitted to the upper fuselage section. Now I need to remove the huge casting block so the lower fuselage section will fit also.

002.jpg
 
Quaralane said:
Looks like a beautiful cockpit

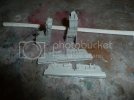
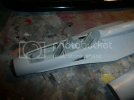
It is really nice. Wish I was a better photog, those pictures do not do it justice. Ill snap a few more once I get it primed maybe. After much sanding and grinding, I got the big pour block reduced enough to fit the cockpit neatly between the fuselage halves, Also worked on the installation of the wheel bays, the main gear bay was a snap, all I had to do was scribe away along the inner crease, then remove the ceiling from the kits's gear bay, then sand the sides smooth and bevel the outer edges of the kits gear bay opening. The whole new gear bay fell right in. The Nose gear was a different matter. I have the upper ceiling sanded so thin you can see color through the resin and its still thick enough to interfere with the kits intake trunking. I'll either omit the trunking and cover the intake with a FOD cover or use a spare intake trunking/nose gear piece from another kit. leaning on the FOD cover right now.
 
Nice little project you got there. That's going to build up into a factastic kit. I'll def. be following along on this one.
 
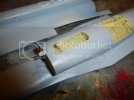
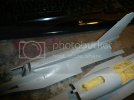
Here's the results of day one... Not only did I get the wheelbays and cockpit tub fitted, but also got the Sufa's spine and tail assembled. I was a bit worried about the spine, but it fit liek a glove. Ill wait til after I get the wings attached and faired in before I permanately attach the spine and conformal fuel tanks.
With any luck Ill prime the cocopit and gearbays today and maybe work on a few sub assemblies too.


005-1.jpg

006-1.jpg

007-1.jpg
 
That kit looks great. Nice detail on the resin parts. I really like that kit but how does the fit look so far. Any major issues. Let me know how it goes together if you dont mind.
 
Forgot just how much fun Aires photo etch can be.., been working on the ejection seats all morning and all I've accomplished is the ejection handle and 2 shoulder belts on on of the seats. Lost a few little parts to the carpet monster along the way. Fortunately, I have a QuickBoost F-16 seat I can use as well. Its basically an exact copy of the Aires seat but with the belts and harnesses already molded in place. Ill only have to complete 1 Aires seat that way. Makes for less work and spare parts.
 
Finished assembling both seats. Was nearly crosseyed after finishing up with all the nano-scale photo-etch parts. I love the Aires cockpit sets but next time I will order the corresponding Quickboost seat(s) to go with it. I test fitted the quick boost seat, and it slides right into place just like the Aires.

Quickboost on the left, Aires on the right...
023.jpg
-
Got a primer coat of Mr Surfacer 1000 put down on all the resin parts as well in preperation for the painting to come soon.
-
Instrument panels, still need to add the guages, they are supplied as seperate parts using pe and printed acetate sheets.
-
022.jpg
-
021.jpg
-
Here are the side panels, lots of detail there, should look really nice once I get a pinwash and some drybrushing done.
-
020.jpg
-
As I hoped, the great detail of the cockpit tub is more visible with a coat of primer over it. Cant wait to start detailing this.
-
018.jpg
-
016.jpg
-
019.jpg
 

Latest posts

Back
Top