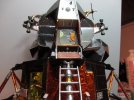
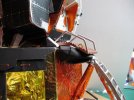
Revell 1/48 Lunar Module
- Thread starter Jim2001
- Start date
fumblethumbs
New Member
- Joined
- May 22, 2011
- Messages
- 963
Once again Jim, outstanding detail work on the LEM. Percision plus.
Anybody wanna buy a boxed LEM kit......
Where'd I put those knitting needles......
Anybody wanna buy a boxed LEM kit......
Where'd I put those knitting needles......
myhobbyroom
Member
- Joined
- May 14, 2009
- Messages
- 189
Fantastic detail.
MilitaryAircraft101
New Member
- Joined
- Apr 4, 2011
- Messages
- 454
looks great jim

RocketSilo
New Member
- Joined
- Jan 22, 2011
- Messages
- 392
Amazing Job !,,very inspirational
Jim2001
Member
- Joined
- Jun 11, 2009
- Messages
- 58
Someone here asked me about my windows and I thought I'd post the artwork. It's in PDF format and all you'd have to do is print it to an inkjet printer onto inkjet transparency film. Then paint them white on the backs and you've got some decent windows. Mind you, you can't see through them but perhaps with a little modification... 
The docking target is included. I printed this to glossy photo paper, mounted it to styrene sheet and then cut it out.
[attachment deleted by admin]
The docking target is included. I printed this to glossy photo paper, mounted it to styrene sheet and then cut it out.
[attachment deleted by admin]
RocketSilo
New Member
- Joined
- Jan 22, 2011
- Messages
- 392
Jim , thanks for the drawing , I have 2 of these models and they would really help out !
And thanks for posting this build as well.
And thanks for posting this build as well.
Jim2001
Member
- Joined
- Jun 11, 2009
- Messages
- 58
Here's how I'm making the shrouds for the upper leg supports. I started with a paper template and curled it around a paintbrush. I had to refine it several times to get the shape just right.
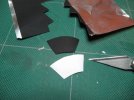
I then transfer it to my Pyromark (which is flat black lacquer sprayed onto aluminum tape, which is then stuck down to the back of some thin gold foil.
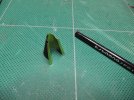
It's curled around a paintbrush and the edges are bent out as shown.
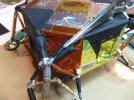
Its then held upside down in place on the support with a pair of tweezers and CA glue is then run into the seam.
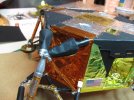
The shroud is then turned around to face the correct orientation (seam down) and it's crumpled a little.
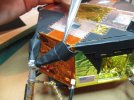
A second smaller rectangular piece is then slid under the first shroud. This is the hardest part and takes me several minutes to fuss this into the correct location and introduce the crumples.
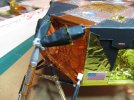
A thin piece of Kapton tape is attached to the edge of the first shroud, and voila! 2 more legs to go!

I then transfer it to my Pyromark (which is flat black lacquer sprayed onto aluminum tape, which is then stuck down to the back of some thin gold foil.

It's curled around a paintbrush and the edges are bent out as shown.

Its then held upside down in place on the support with a pair of tweezers and CA glue is then run into the seam.

The shroud is then turned around to face the correct orientation (seam down) and it's crumpled a little.

A second smaller rectangular piece is then slid under the first shroud. This is the hardest part and takes me several minutes to fuss this into the correct location and introduce the crumples.

A thin piece of Kapton tape is attached to the edge of the first shroud, and voila! 2 more legs to go!
ModelMakerMike
"It's Slobberin' time""
- Joined
- May 28, 2011
- Messages
- 1,838
Jim2001,
you, my friend are.....Off da hook!!!!!
That is an incredible amount of detail....Bordering on insane. ;D
It is extremely awesome!
;D ;D ;D
you, my friend are.....Off da hook!!!!!
That is an incredible amount of detail....Bordering on insane. ;D
It is extremely awesome!
;D ;D ;D
Similar threads
- Replies
- 11
- Views
- 846

