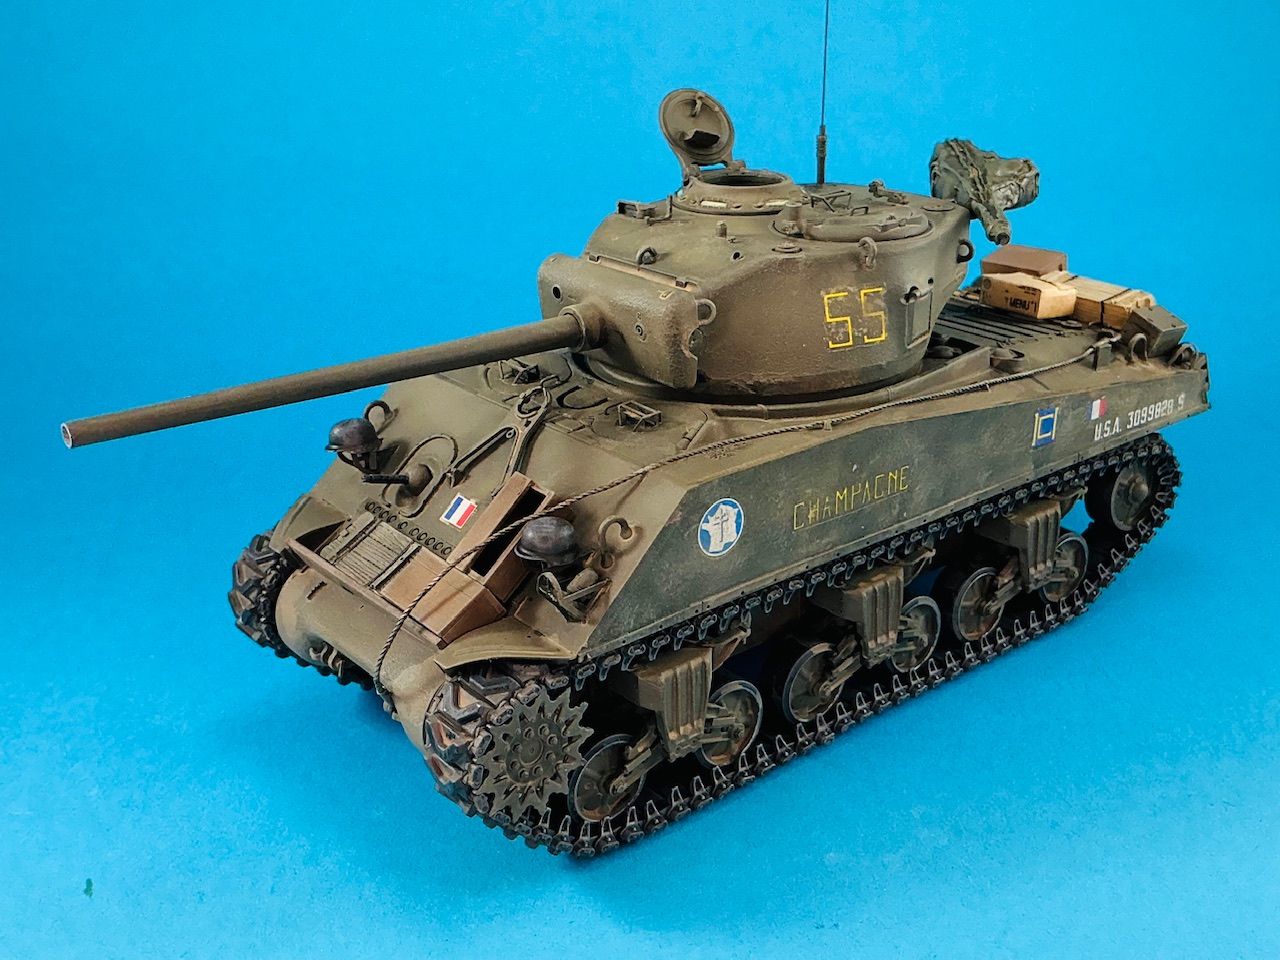
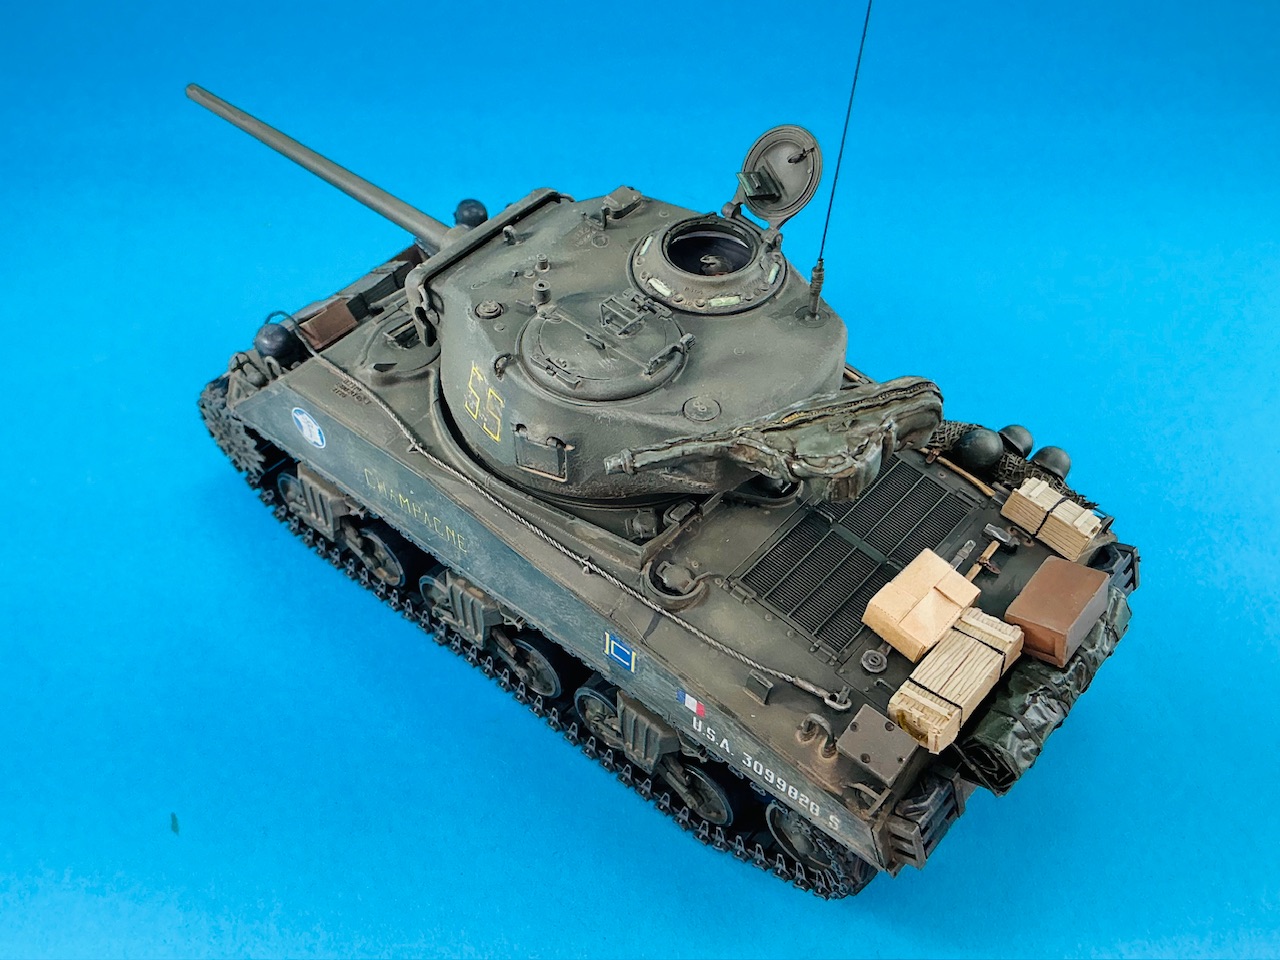
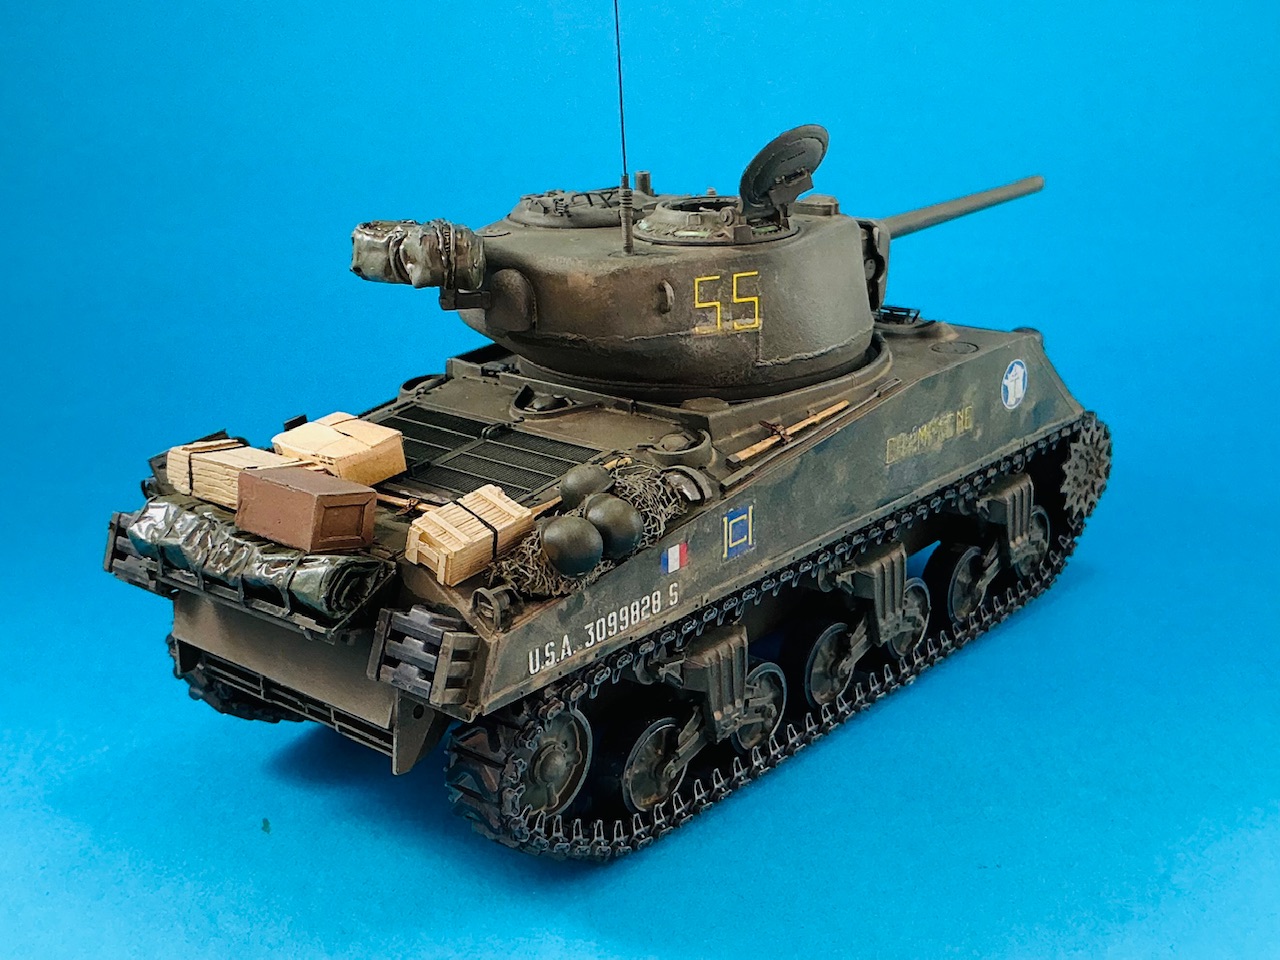
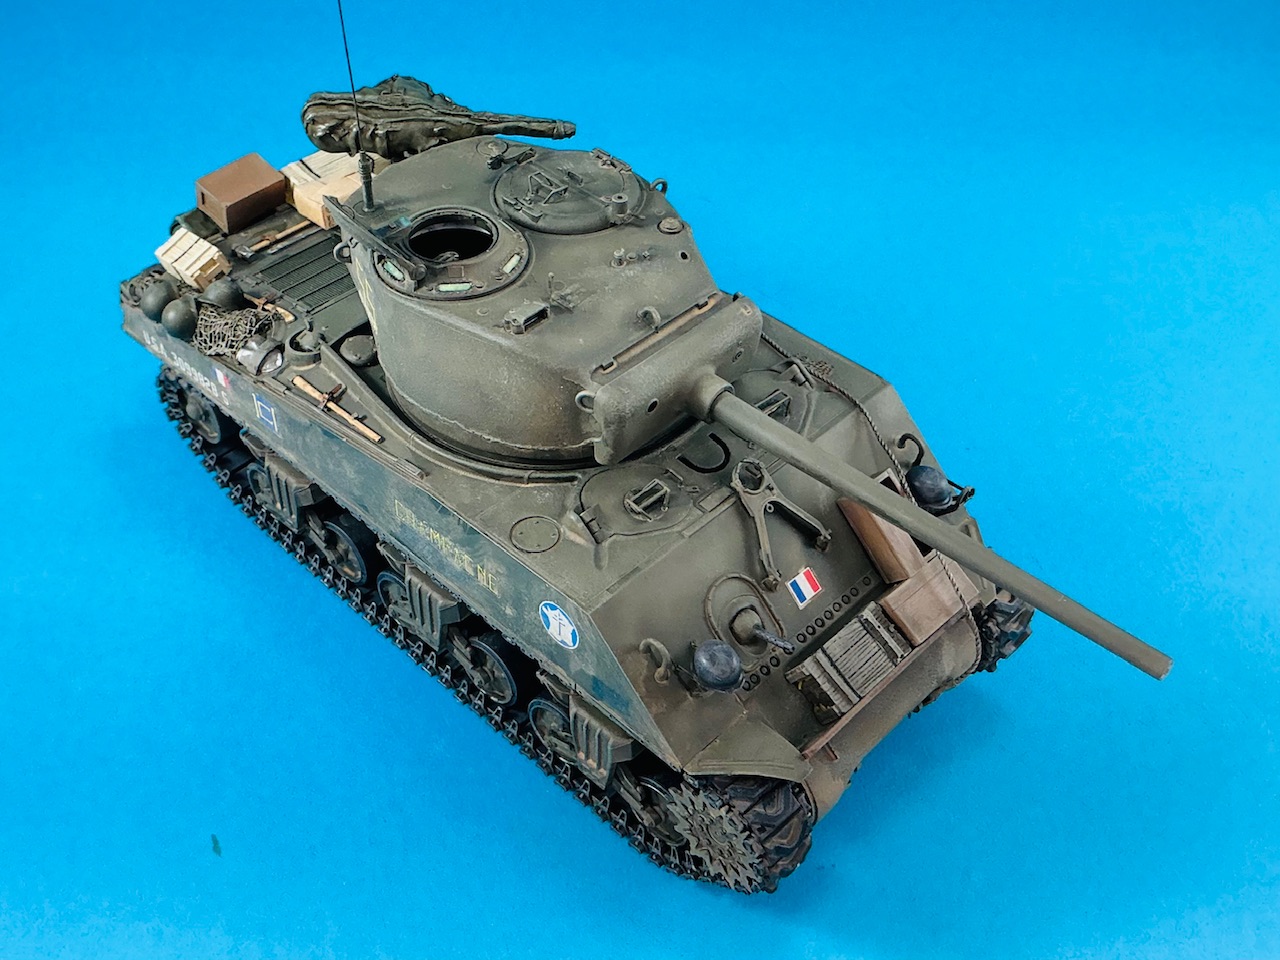
Quick, Champagne!

Scale Model Addict - Model Tips, Guides, Tools & Tech, Tutorials, and Community

Help Support Scale Model Addict:

Yes, ice crystals typically form when it's 30 degrees¹ above freezing ;) The comment about cleaning is because I don't like cleaning intricate, finicky things that won't work properly unless you're thorough, like airbrushes. It's not too bad if the thing worked well, but if I'm already frustrated by it not working as it should, then having to clean it even more thoroughly than normal, only annoys me more.


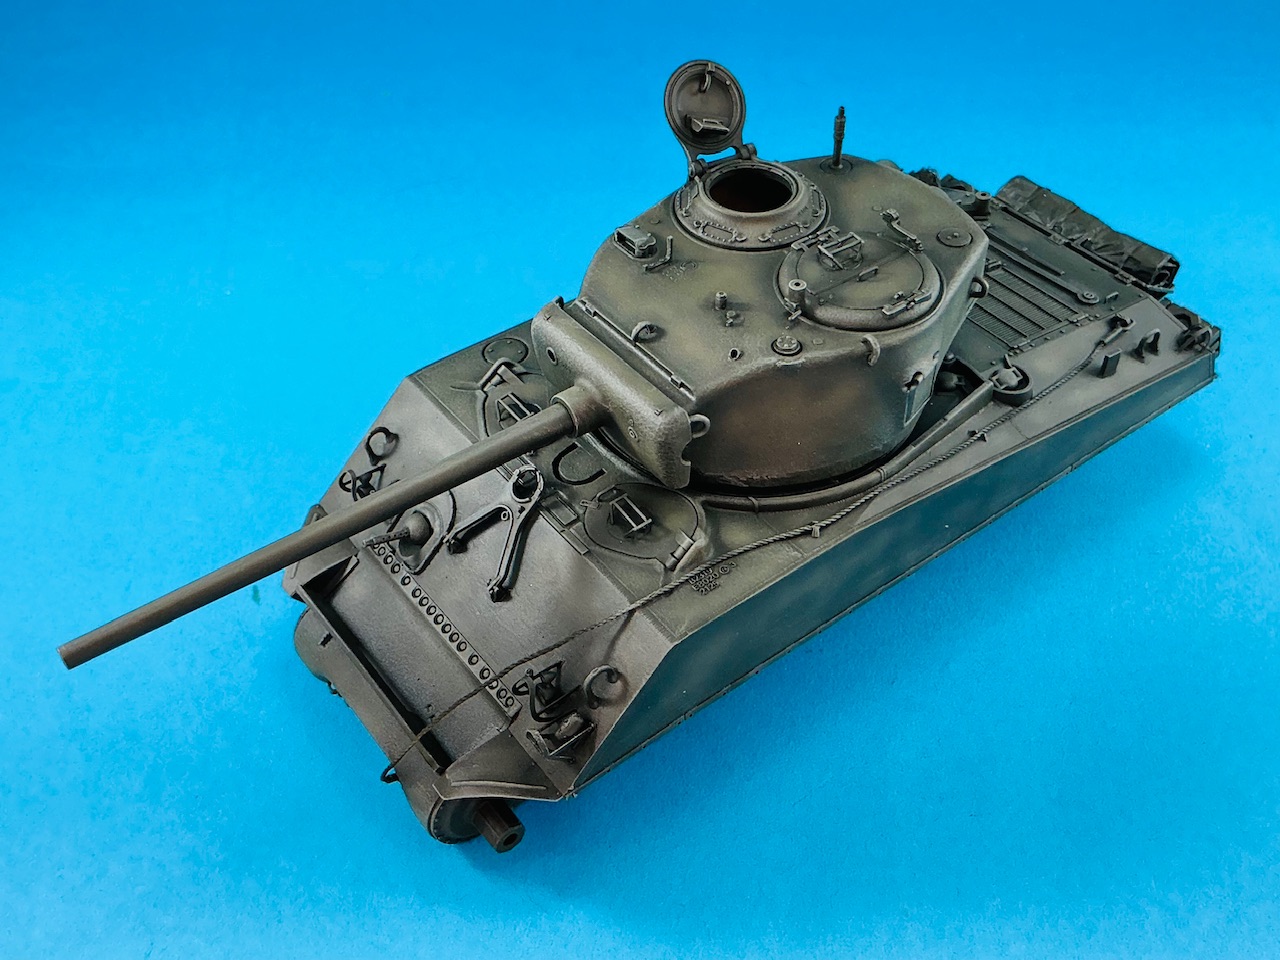
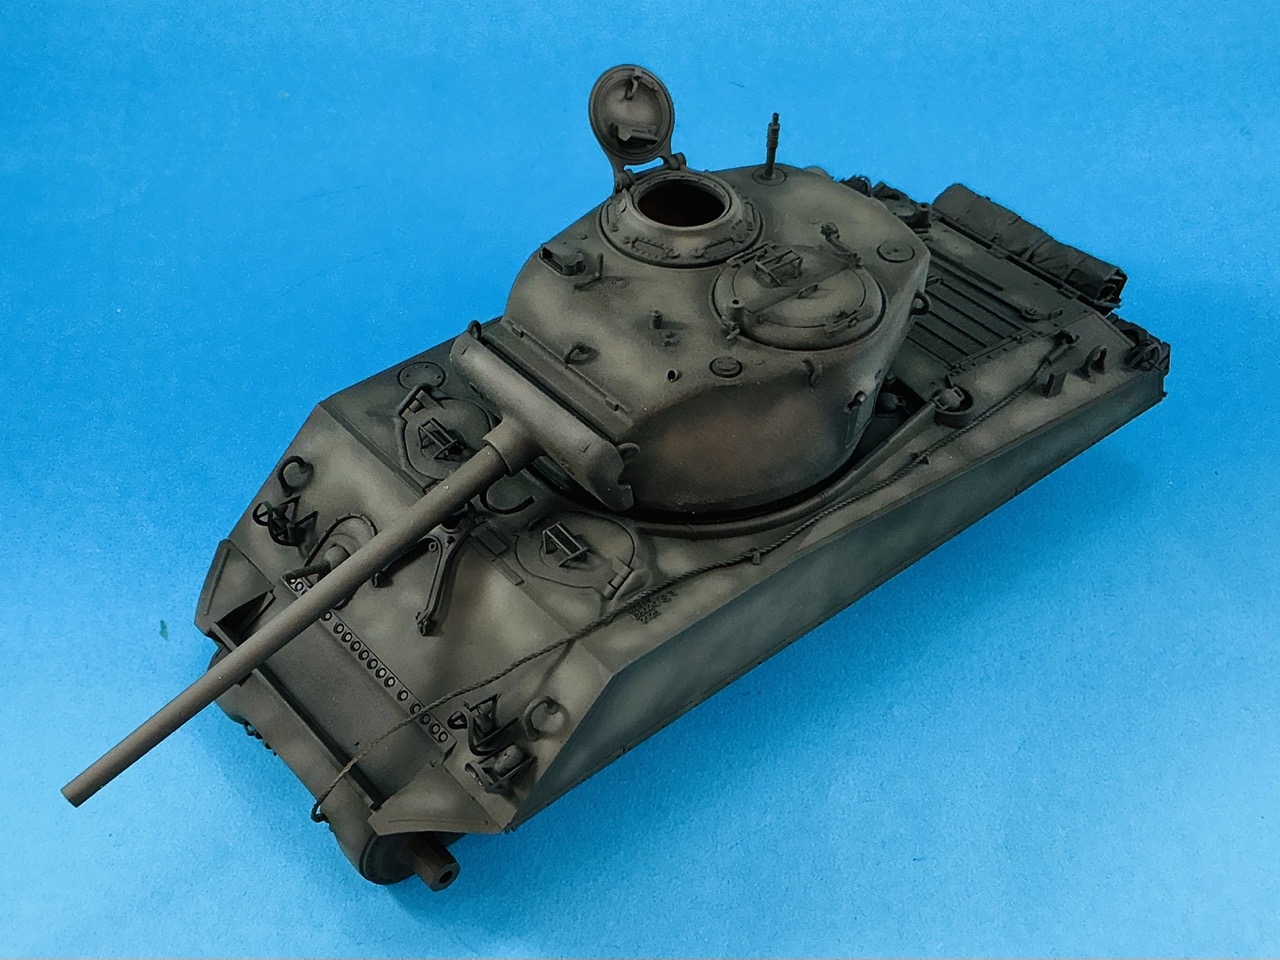
Second attempt, with Tamiya XF-62 plus XF-88 Dark Yellow 2 (more of the former than the latter), thinned with isopropanol, which went through the airbrush quite well:
IMG_4308.jpeg


I first sprayed lighter patches in my usual manner, and then added a bit more XF-88 to enhanced the highlights on the horizontal surfaces and towards the top of sloping ones.

The gun has now also been installed, but it falls forward because it can freely pivot on the pins that go in from the outside. After taking the photo, I glued a bit of sprue along the bottom on the inside to fix the gun with the barrel more or less horizontal. (The kit includes a full breech, but I didn't fit that — maybe it would have balanced the gun if I had?)


¹ 54 American degrees.
 
Yes, ice crystals typically form when it's 30 degrees¹ above freezing ;) The comment about cleaning is because I don't like cleaning intricate, finicky things that won't work properly unless you're thorough, like airbrushes. It's not too bad if the thing worked well, but if I'm already frustrated by it not working as it should, then having to clean it even more thoroughly than normal, only annoys me more.


Second attempt, with Tamiya XF-62 plus XF-88 Dark Yellow 2 (more of the former than the latter), thinned with isopropanol, which went through the airbrush quite well:

View attachment 191294

I first sprayed lighter patches in my usual manner, and then added a bit more XF-88 to enhanced the highlights on the horizontal surfaces and towards the top of sloping ones.

The gun has now also been installed, but it falls forward because it can freely pivot on the pins that go in from the outside. After taking the photo, I glued a bit of sprue along the bottom on the inside to fix the gun with the barrel more or less horizontal. (The kit includes a full breech, but I didn't fit that — maybe it would have balanced the gun if I had?)


¹ 54 American degrees.
Love the color
Modulation!
 
It's largely the photo, the camera again screwing with the colours fairly badly. The contrast isn't as bad IRL, but the camera app makes the tank look clearly darker than it actually is in the first painted photo, and worse in the one with highlights.

However, since I'll also be adding a dirt wash later, the highlights will probably get toned down a bit anyway :)
 
maybe it's just so cold there you had ice crystals forming!
LOL! We had our 1st 100+ degree day of the year here, nothing for late July or August, but still early into the summer for that.

Jakko, does the AB have a removeable nozzle? Can you clean it with a dental/periodontal brush, or maybe (carefully) with a filament-printer nozzle cleaner? I say carefully since these are often brass. Maybe try spinning the needle while lightly seated? It sounds like there's either a bad seal or you have particles clogging it, which is hard to imagine with inks.
 
We had our 1st 100+ degree day of the year here, nothing for late July or August, but still early into the summer for that.
Last week, several days were reported here as the warmest nth May since records began. Since about yesterday, though, the weather has fairly drastically changed, so that it looks like autumn outside at the moment.

does the AB have a removeable nozzle?
Yes, it comes with three different sizes due to the three needles. It must have been clogged at some point because I couldn't blow any air through it with my mouth, but after it went into the ultrasonic cleaner, I could. I'm leaning towards the paint being the problem, but I haven't tried the same paint in my Iwata (which has an 0.2 mm needle) since this happened to try and confirm this. However, that airbrush has always sprayed the exact same paints I tried in the new airbrush well enough.
 
As an Amazon Associate we earn from qualifying purchases. Product prices and availability are accurate as of the date/time indicated and are subject to change.
Not normally, but I may have to try something like that if this keeps up. The thing is, this airbrush is brand new — all that went through it with that 0.3 mm needle in, was some water with ink and maybe five drops of premixed airbrush paint, immediately after which I sprayed water and suitable airbrush cleaner through it until that came out clean. As it clogged up right away again after ultrasonic cleaning, I suspect the paint is the issue — or perhaps the combination of airbrush and that particular type of paint. But making sure means experimenting with two different airbrushes, both of which then need to be cleaned, and if there's one thing I hate about modelling, it's cleaning bloody airbrushes :)
More likely it was incompatibility of two or more of the things you sprayed, rather than between the airbrush and something you sprayed. Could you be more specific about the paint brand? Did you clean the airbrush before first use? One would think a new-in-box airbrush would be clean, but that is not necessarily true. What brand and model of airbrush was it?

Lacquer thinner is generally made as a universal solvent. As such, it is a blend of multiple solvents, whatever the maker decides to put in it. As such, there is no fixed or standard composition, even from the same manufacturer. That is why it is dangerous to the airbrush seals—one or more of those solvents might attack the material of the seals. For that reason, it should be the cleaner of last resort.

Things like this are also a good reason to stick to one type of paint, and clean thoroughly between types and even brands. Forty-odd years or more ago, paint was simple from the user point of view. That changed with the advent of acrylics. Coating science and technology became drastically more complex, slowly at first, but now at an ever accelerating rate.

Also curious as to the brand of the new airbrush.
 
More likely it was incompatibility of two or more of the things you sprayed, rather than between the airbrush and something you sprayed.
What I had put through it, in order, was:
  1. Water with Indian ink.
  2. AMMO/Mig No. 112 SCC15(Brit 1944-45 Olive Drab) airbrush-ready paint, no thinner.
  3. Tamiya XF-62 Olive Drab thinned with isopropanol.
  4. AMMO/Mig No. 0068 IDF Green airbrush-ready paint, no thinner at first, then thinned with some water and eventually also with some flow improver added.
  5. Vallejo Model Air 71.043 US Olive Drab airbrush-ready paint, again first no thinner and then with some water added.
Nos. 1 and 2 were one right after the other, with the 0.3 mm needle. No. 3 was with the 0.5 mm needle a few days later, and a few hours after that, I tried first No. 4 and when that totally failed, No. 5, both with the 0.3 mm needle again. After each, I had flushed and rinsed out the airbrush until only plain water or airbrush cleaner came out anymore.

Did you clean the airbrush before first use?
No, unless you count spraying maybe a millilitre of plain water before I added a drop of ink into the water that was still in the airbrush.

What brand and model of airbrush was it?
Good question :) It says "Sagud" on the side, and the box has a sticker that informs me the manufacturer is Linhai Weitai Pneumatic Tools Co. Ltd. of Linhai, Taizhou, Zhejiang, China. Not sure it actually has a model, though another sticker on the box says "SD-116B G" which may or may not be a model number. As I mentioned elsewhere, this is the very cheapest pistol-trigger airbrush Amazon showed me the other week.
 
More likely it was incompatibility of two or more of the things you sprayed, rather than between the airbrush and something you sprayed. Could you be more specific about the paint brand? Did you clean the airbrush before first use? One would think a new-in-box airbrush would be clean, but that is not necessarily true. What brand and model of airbrush was it?

Lacquer thinner is generally made as a universal solvent. As such, it is a blend of multiple solvents, whatever the maker decides to put in it. As such, there is no fixed or standard composition, even from the same manufacturer. That is why it is dangerous to the airbrush seals—one or more of those solvents might attack the material of the seals. For that reason, it should be the cleaner of last resort.

Things like this are also a good reason to stick to one type of paint, and clean thoroughly between types and even brands. Forty-odd years or more ago, paint was simple from the user point of view. That changed with the advent of acrylics. Coating science and technology became drastically more complex, slowly at first, but now at an ever accelerating rate.

Also curious as to the brand of the new airbrush.
I've not had that experience with lacquer thinner and my orings. I only use lacquer thinner- from Home Depot. I buy it by the gallon. I've been spraying a year now and replaced my oring twice. To me that's not a bad trade-off.
 
What I had put through it, in order, was:
  1. Water with Indian ink.
  2. AMMO/Mig No. 112 SCC15(Brit 1944-45 Olive Drab) airbrush-ready paint, no thinner.
  3. Tamiya XF-62 Olive Drab thinned with isopropanol.
  4. AMMO/Mig No. 0068 IDF Green airbrush-ready paint, no thinner at first, then thinned with some water and eventually also with some flow improver added.
  5. Vallejo Model Air 71.043 US Olive Drab airbrush-ready paint, again first no thinner and then with some water added.
Nos. 1 and 2 were one right after the other, with the 0.3 mm needle. No. 3 was with the 0.5 mm needle a few days later, and a few hours after that, I tried first No. 4 and when that totally failed, No. 5, both with the 0.3 mm needle again. After each, I had flushed and rinsed out the airbrush until only plain water or airbrush cleaner came out anymore.


No, unless you count spraying maybe a millilitre of plain water before I added a drop of ink into the water that was still in the airbrush.


Good question :) It says "Sagud" on the side, and the box has a sticker that informs me the manufacturer is Linhai Weitai Pneumatic Tools Co. Ltd. of Linhai, Taizhou, Zhejiang, China. Not sure it actually has a model, though another sticker on the box says "SD-116B G" which may or may not be a model number. As I mentioned elsewhere, this is the very cheapest pistol-trigger airbrush Amazon showed me the other week.
Ammo-MiG may have interacted with residual rubbing alcohol- it can cause it to clump.
 
Could be, though I would have expected it to have evaporated by then.


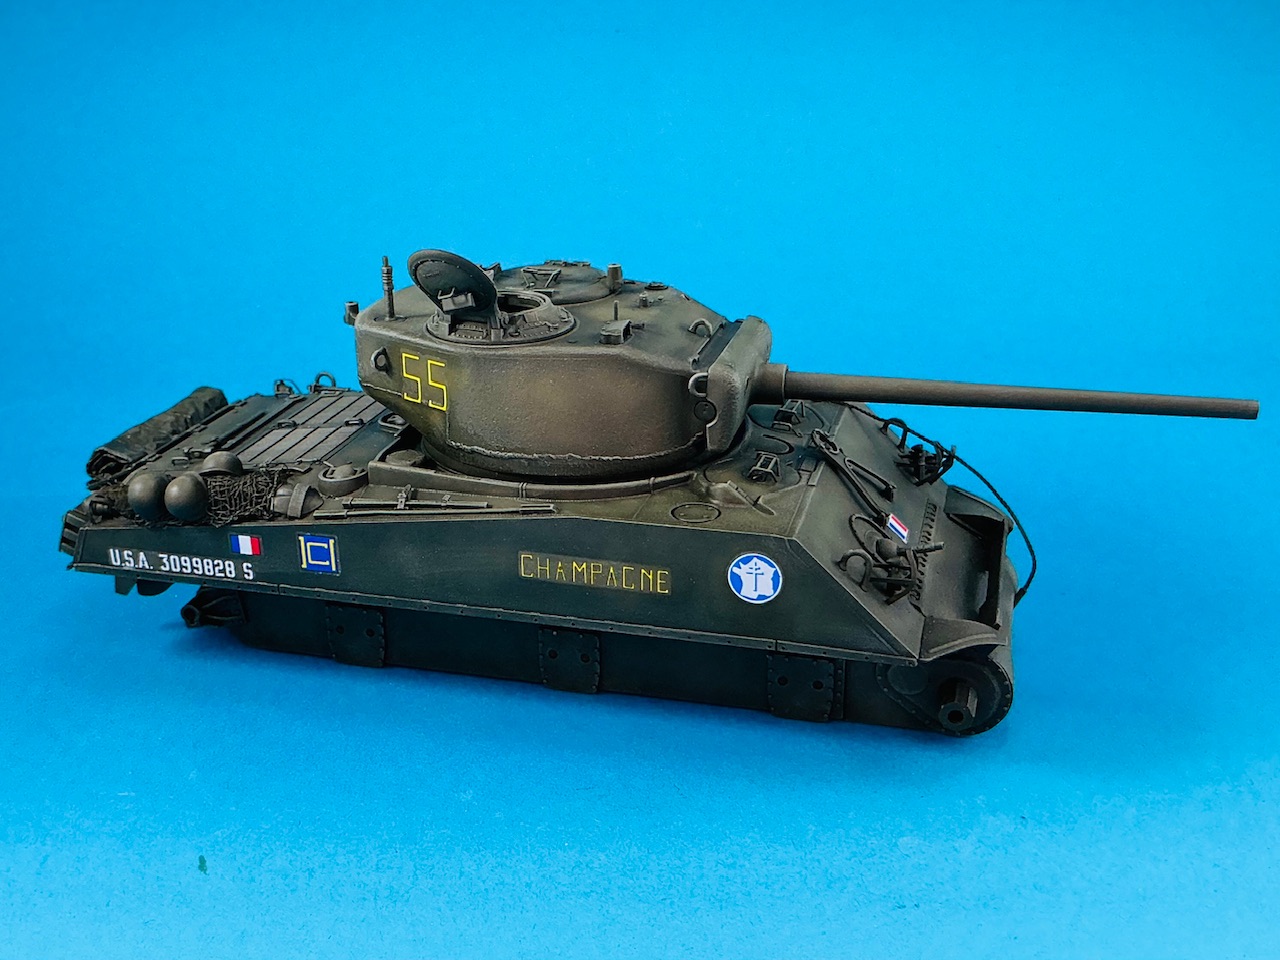
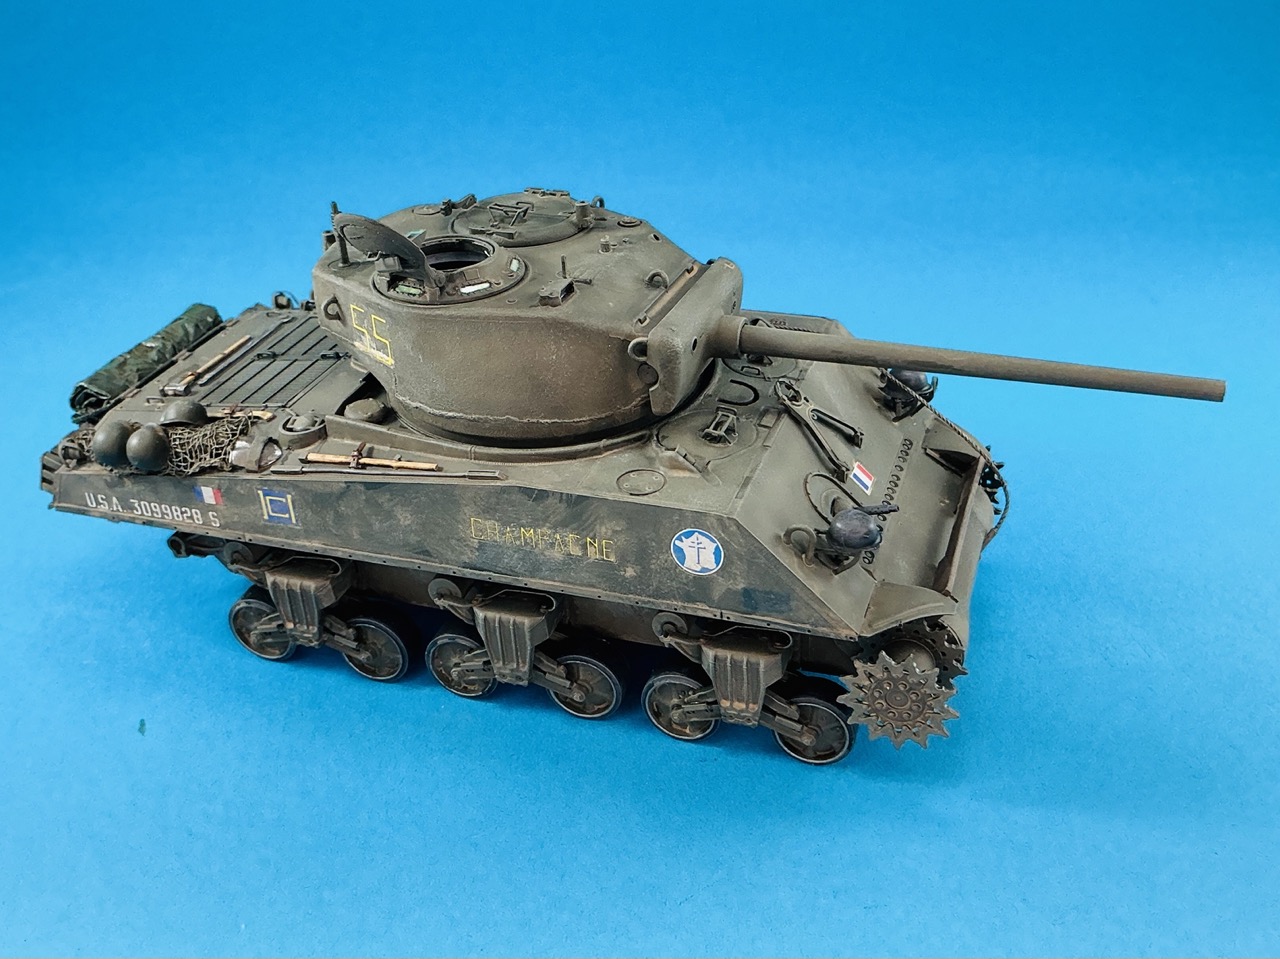
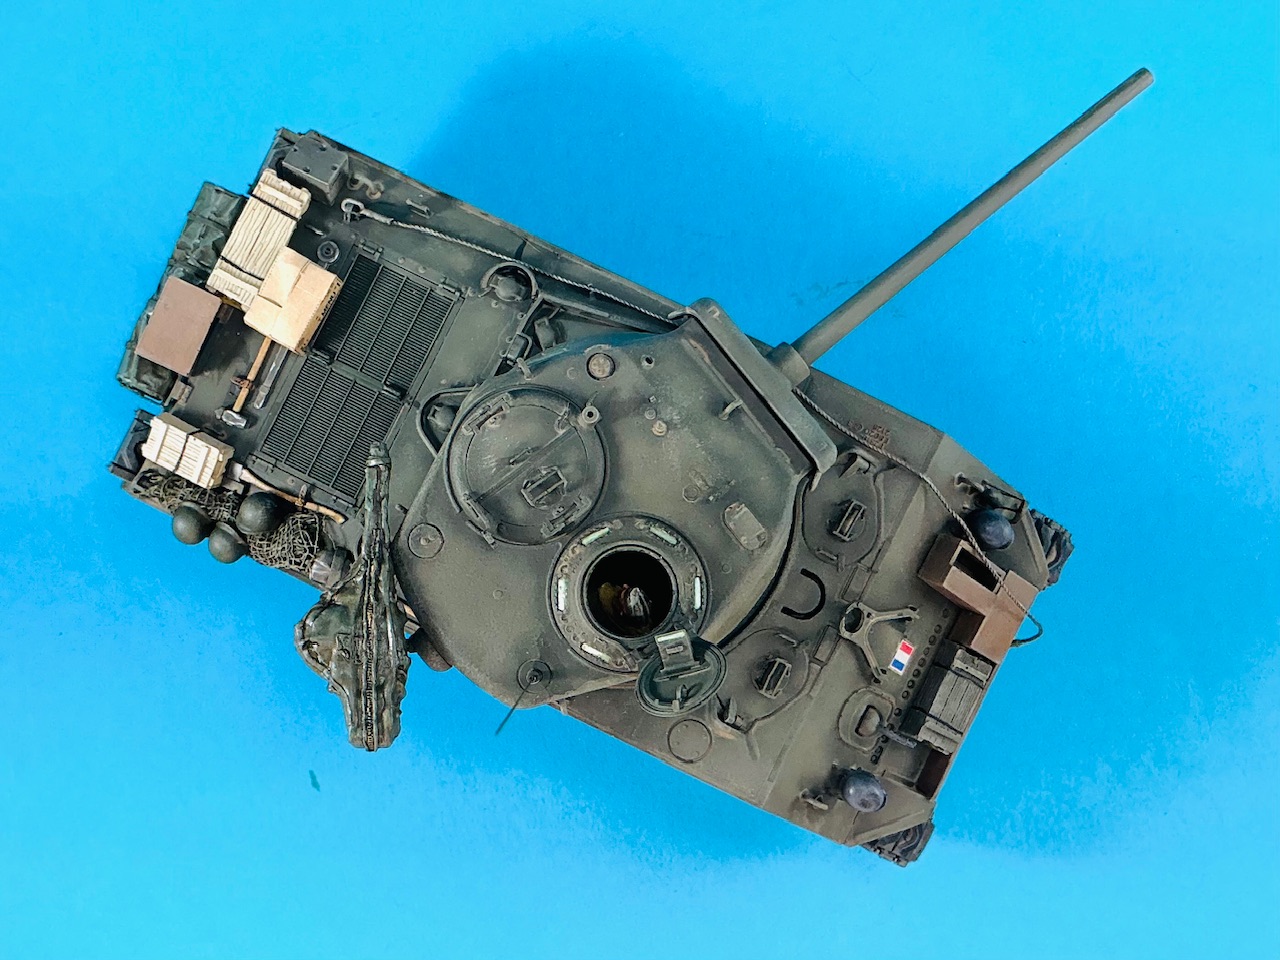
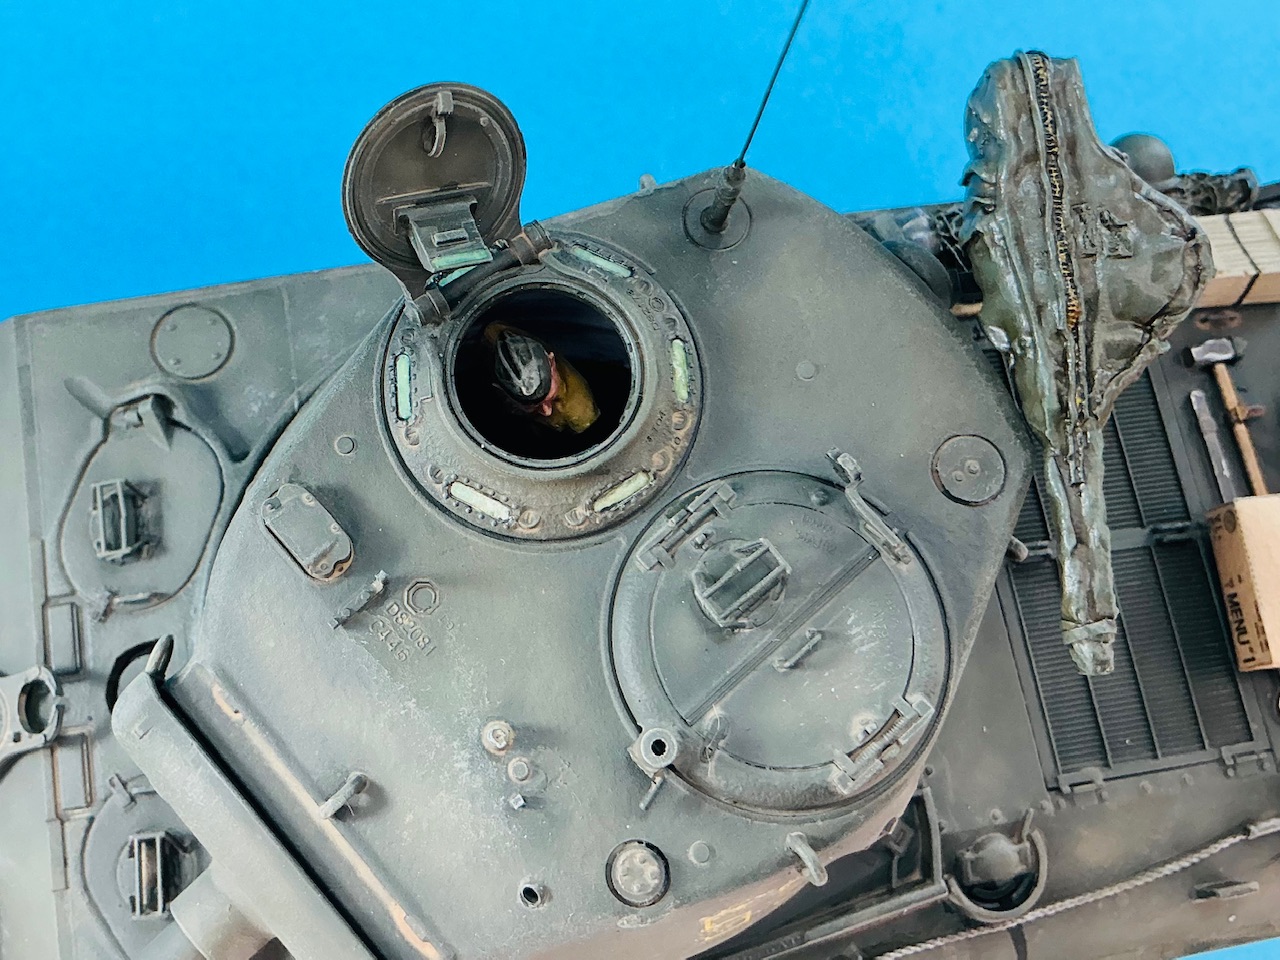
Champagne has now had a wash (thinned Army Painter Soft Tone) and two layers of drybrushing (first with AK 3Gen olive drab and then with Revell Light Olive):

IMG_4312.jpeg


Then came the markings, by Star Decals:

IMG_4313.jpeg


And indeed, silvering … Someday, I'l really need to learn to try first with a decal I don't actually need, but it's too late for that now. Other than that, the markings aren't totally accurate: the letters of the name are too thin, the registration number is too wide, the blue squares on the sides a little too large, the white border shouldn't be around the flag on the glacis plate and Star Decals gives you two more blue squares, matricules and a weight class disc, all of which were not on the real tank (and so are also not on my model). But these will have to do.
 
silvering
Put a name to something and you see it everywhere.
I was three years back into the hobby when I saw a mention of it on the interwebs. Then I couldn't unsee it on all my builds. :(

I had a civics teacher in highschool who fancied himself pretty cool... He'd grab hold of your desk and lean into you while making some clever remark.
Then I noticed that one of his (70s) sideburns was longer than the other.

The dude was toast for the entire school year! 😅
 
I believe silvering is inevitable.
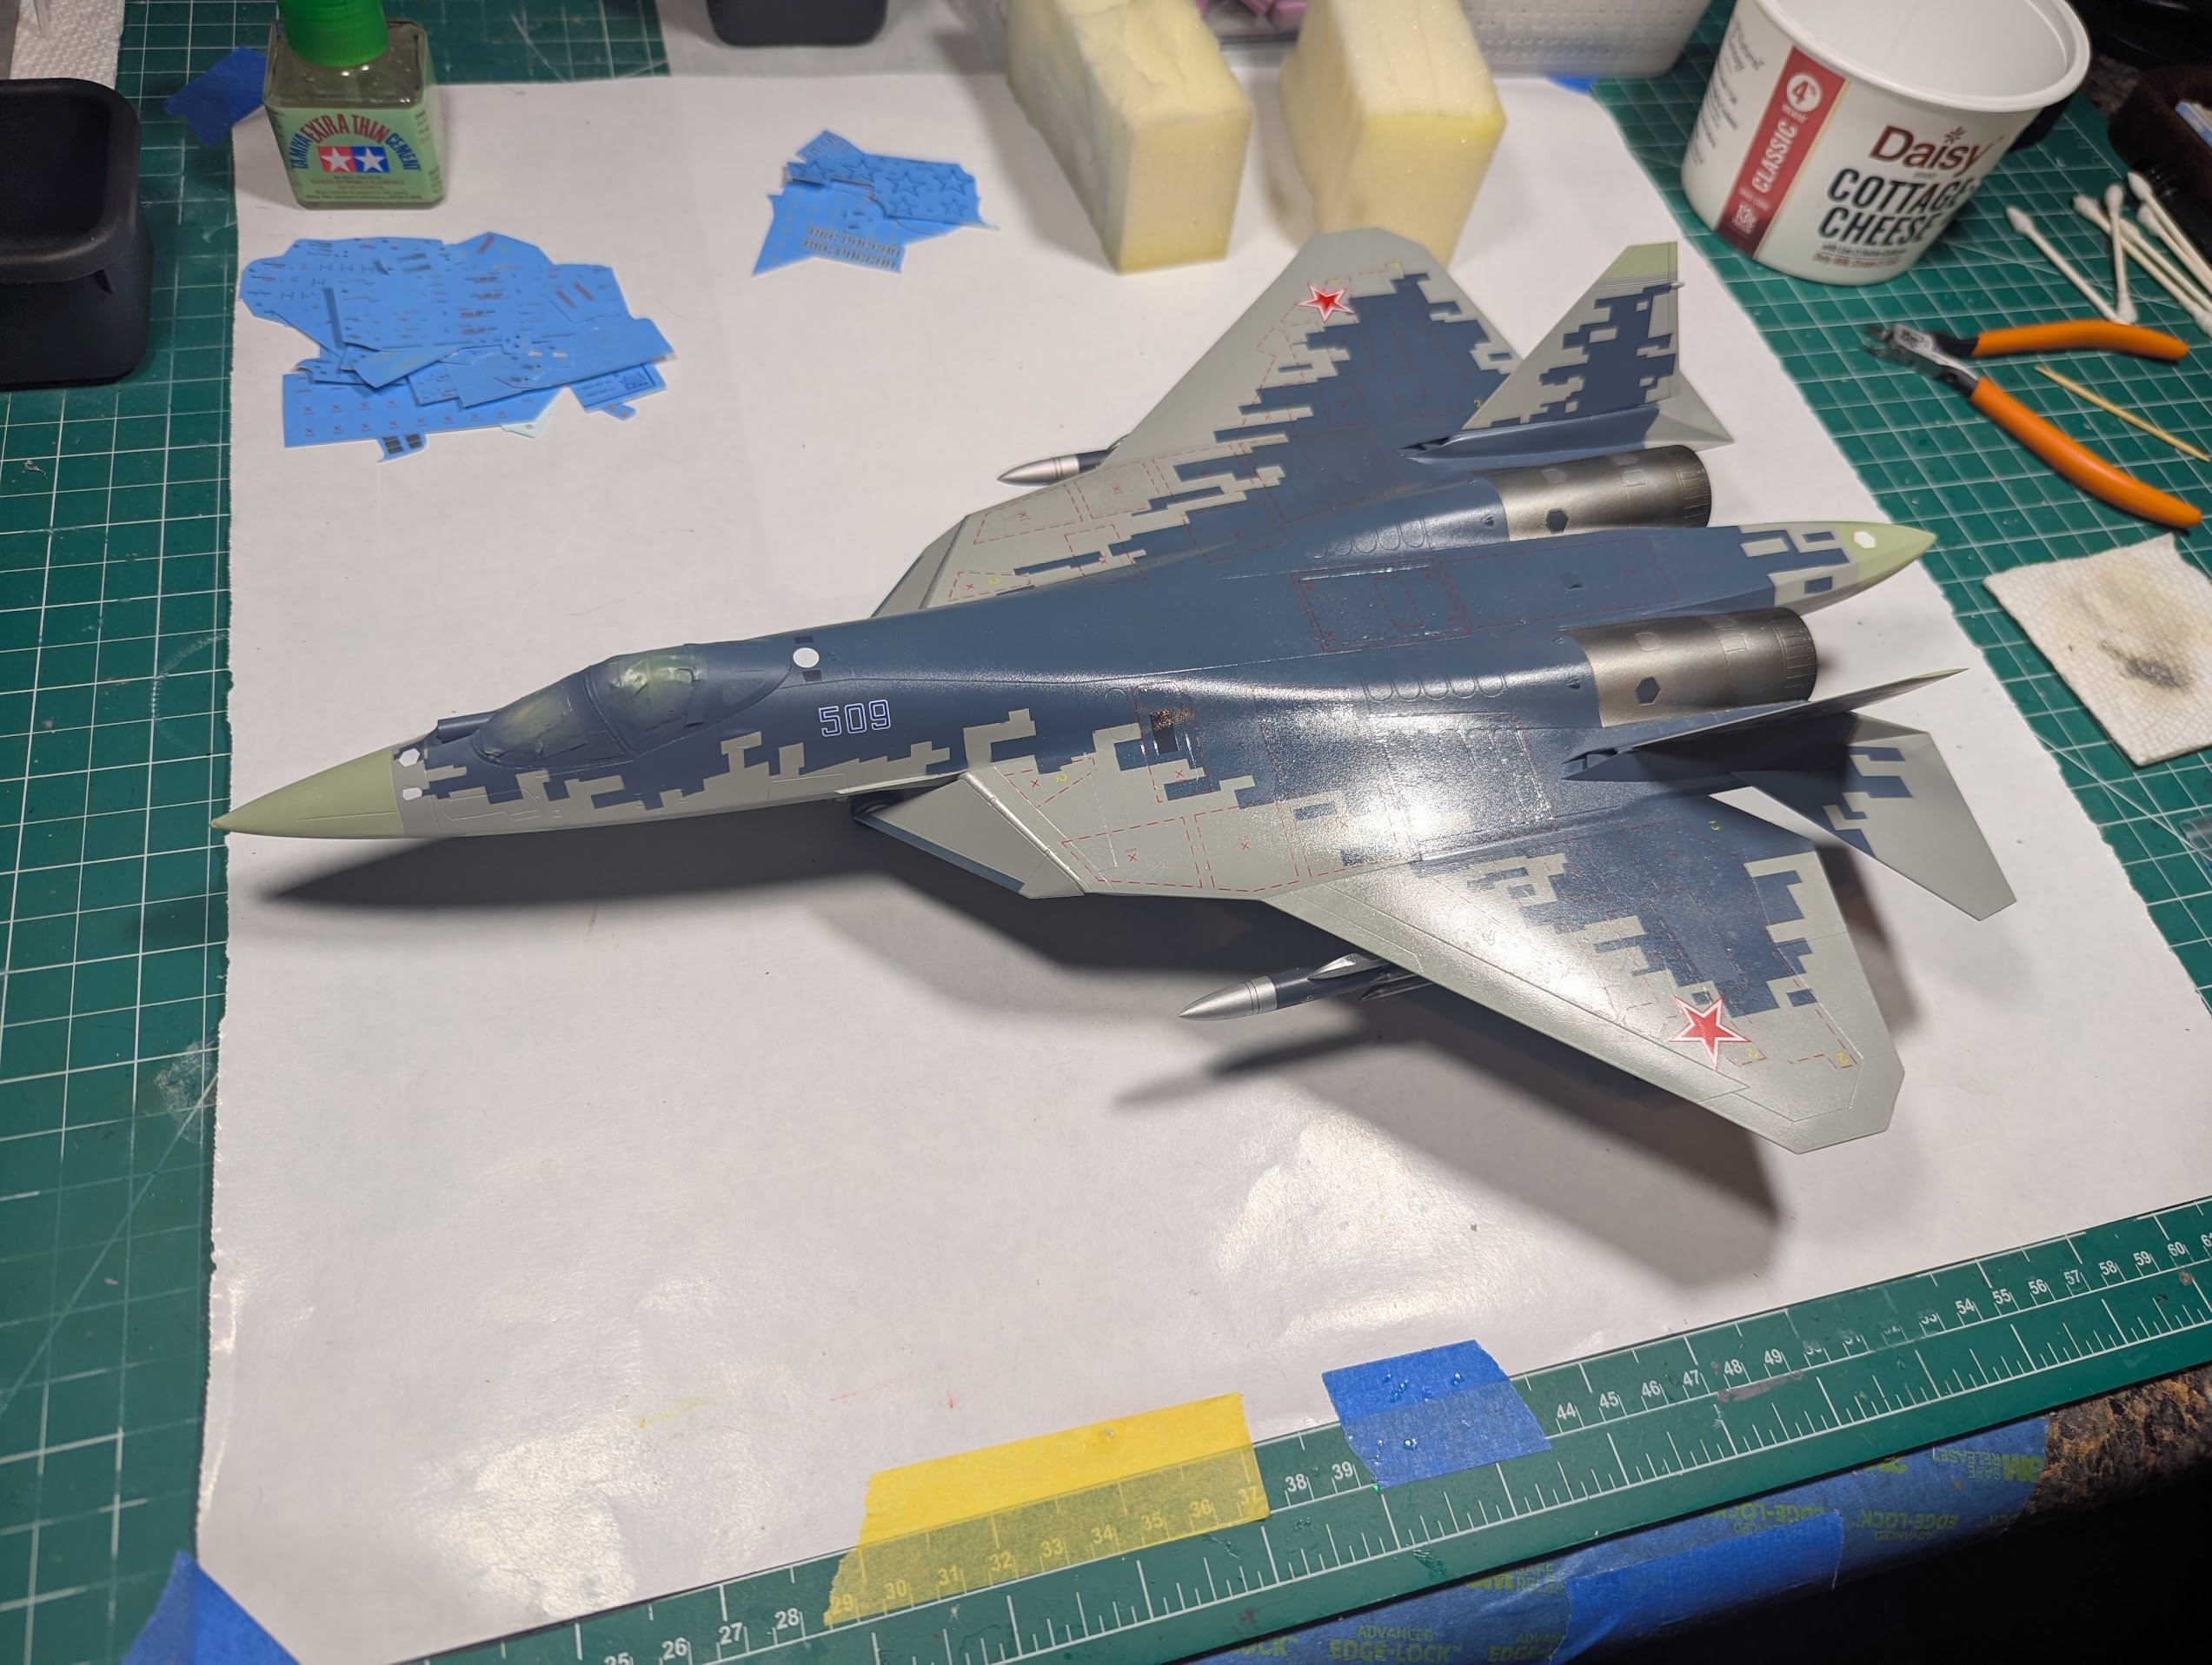
It is something I struggle with too. Would not say inevitable, it seems to be a problem on one and not the other. Sometimes catasrophically bad as in this SU-57. In this case I think it was due to the sheer size of the carrier film, but with patience and solution it should have laid down.

1780522174612.png


Because of that I'm sayin (hoping) it is not me, I'm blaming the stickers. I seldom build two kits from the same maker twice in a row, and have not nailed it down to one or 5 of them, it might also be to age, I buy old kits at model shows or off evilbay. Sometimes they are yellowed sometimes they shatter, but about half the time I struggle with silvering. A lot of folks complain about "thick" Tamiya stickers, but they allow me better results, probably because they're durable.

Just putting that out there to say don't give up, there has to be a solid and reproducible explanation.

Looking at Champagne here, the only issue I see is the name itself, and the lettering is (intentionally) crude. I'd consider pulling that up with cellophane tape and hand painting it. OR... Claim that the crew overpainted some olive drab over the previous name and put this on top. But Jakko being Jakko could never live with that unless he had a historical photo showing that, and we all love him for it, at least I do.
 
I would have expected it to have evaporated by then.
Not necessarily. Isopropyl in small, enclosed spaces (like the inside of an airbrush) can sit there forever, it seems. At 90% concentration, it's also hygroscopic, meaning it takes up water from the air. I've cleaned an airbrush with isopropyl, put it up, then sprayed air before the next day's session, and had liquid dilute alcohol come out. The day before, I had sprayed it dry. Before you ask, yes, there is a water trap in the line.
 
I guess another thing to experiment with, is adding some isopropanol to the paint in question, see what happens …
Check for compatibility first. Put some isopropyl alcohol 90% in a clean glass jar. Add a drop of the paint and observe what it does. If it does anything but disperse, it may be incompatible or marginally compatible. Next, mix a small amount of paint with the alcohol at the dilution ratio you want, and pour it out on a glass plate. smear it around and see if it acts like thinned paint. Then let this paint cure on the glass. Once cured, try to scrape it off with a razor blade. It should come off in continuous peels. Anything else means it's not compatible.
 
I didn't mean put the two into the airbrush, I meant pretty much exactly what you said: a drop of one and a drop of the other on a palette or something to see what happens :) (I do have a bit of a background in the basics of this, having studied chemical engineering for two years over thirty years ago :) )
 
🤮😱😭

(still wish I had paid a little attention in 9th grade)
You think that's bad—try geochemistry—"geochemical constant" a variable that changes slowly enough or consistently enough to be measured within an order of magnitude. Variables? We have a Sagans worth of variables! Which billion would you like? :eek:o_O
 
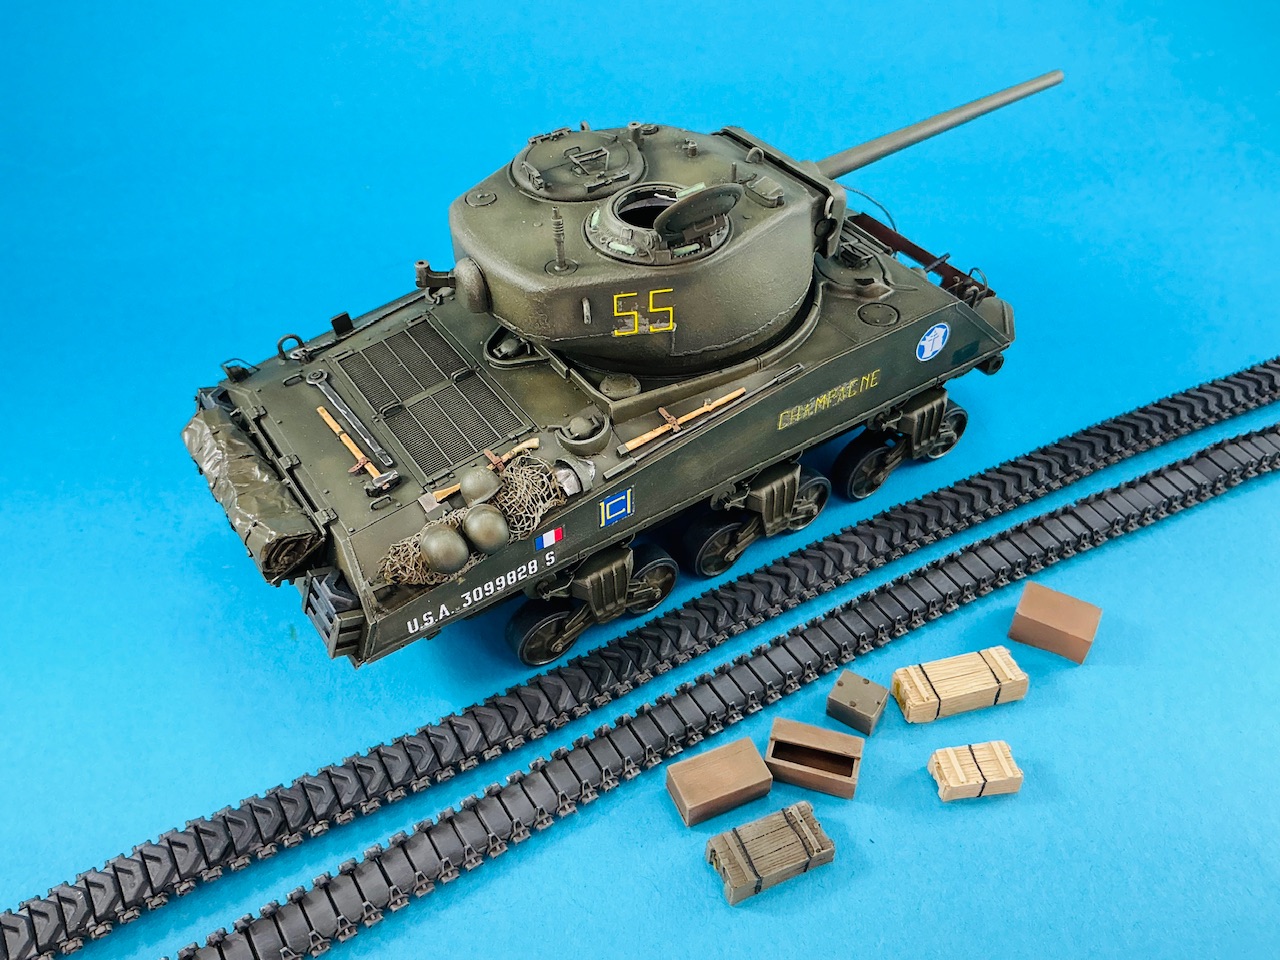
Busy with the wheels, tracks, tools and stowage:

IMG_4320.jpeg


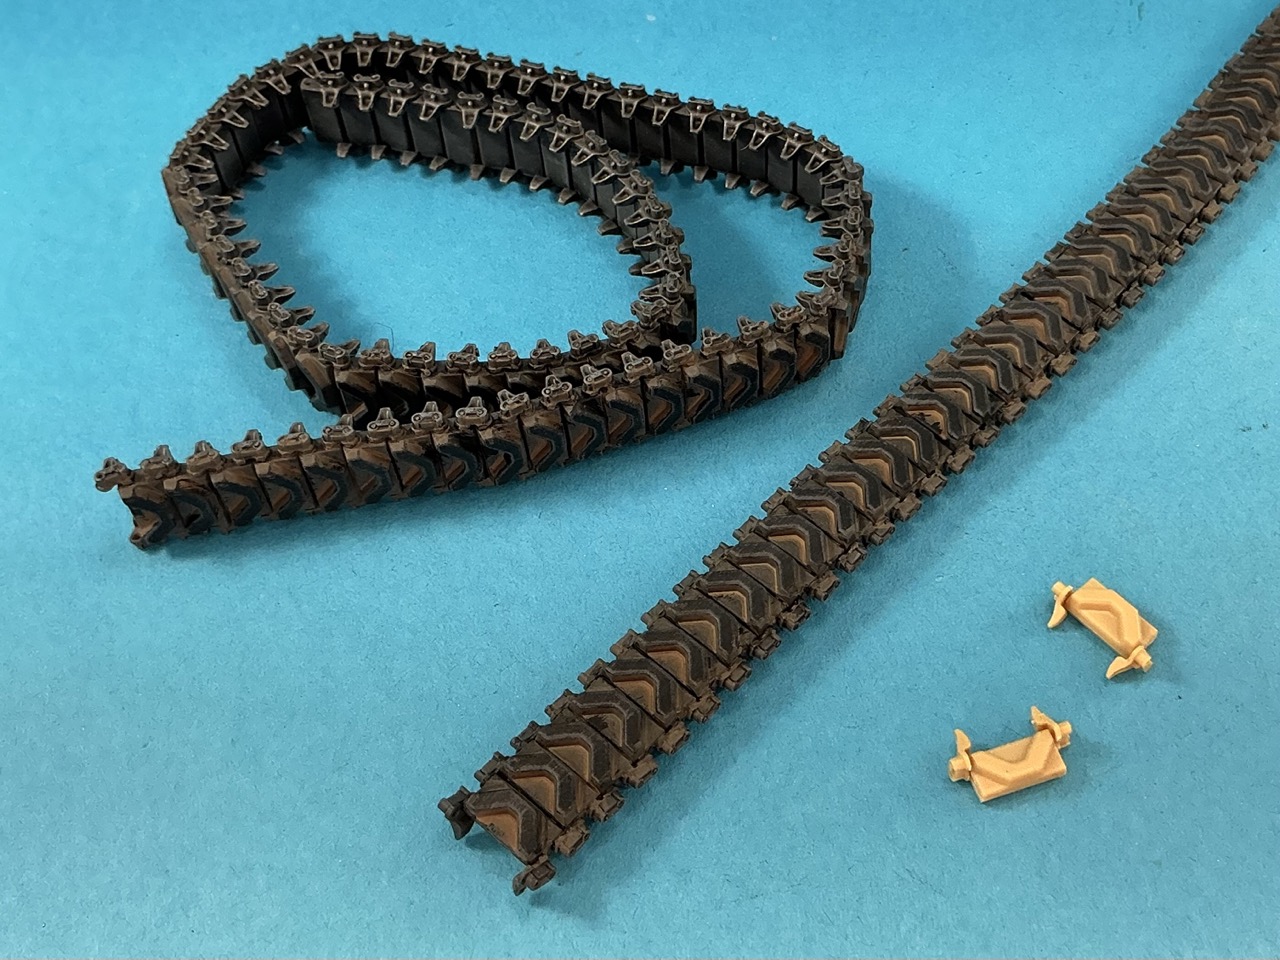
On the tracks, I first brushed a coat of Army Painter Strong tone on the steel parts, to give some depth, and then drybrushed them with medium grey, light grey and then with a medium metal colour, Games Workshop Boltgun Metal. The rubber parts, and the tyres on the wheels, I painted grey (the tracks already were sprayed that) and given a wash of Tamiya XF-1 Flat Black. Once that was dry, I drybrushed the insides of the track and the tyres with dark and medium grey (not the outside, that will be painted later but differently). I also painted the rims of the wheels with Boltgun Metal.

The wooden crates are various shades of brown, sand and olive drab, with a darker wash and a lighter drybrush to bring out the details. The camouflage net is Tamiya XF-49 Khaki with a darker wash brown wash and a tan drybrush.

The tools on the tank were painted Boltgun Metal for the metal parts, with Army Painter Dark Wash over it and then highlights with silver. The wooden parts are some shade of natural wood (I forget which) followed by a darker wash.
 
IMG_4327.jpeg


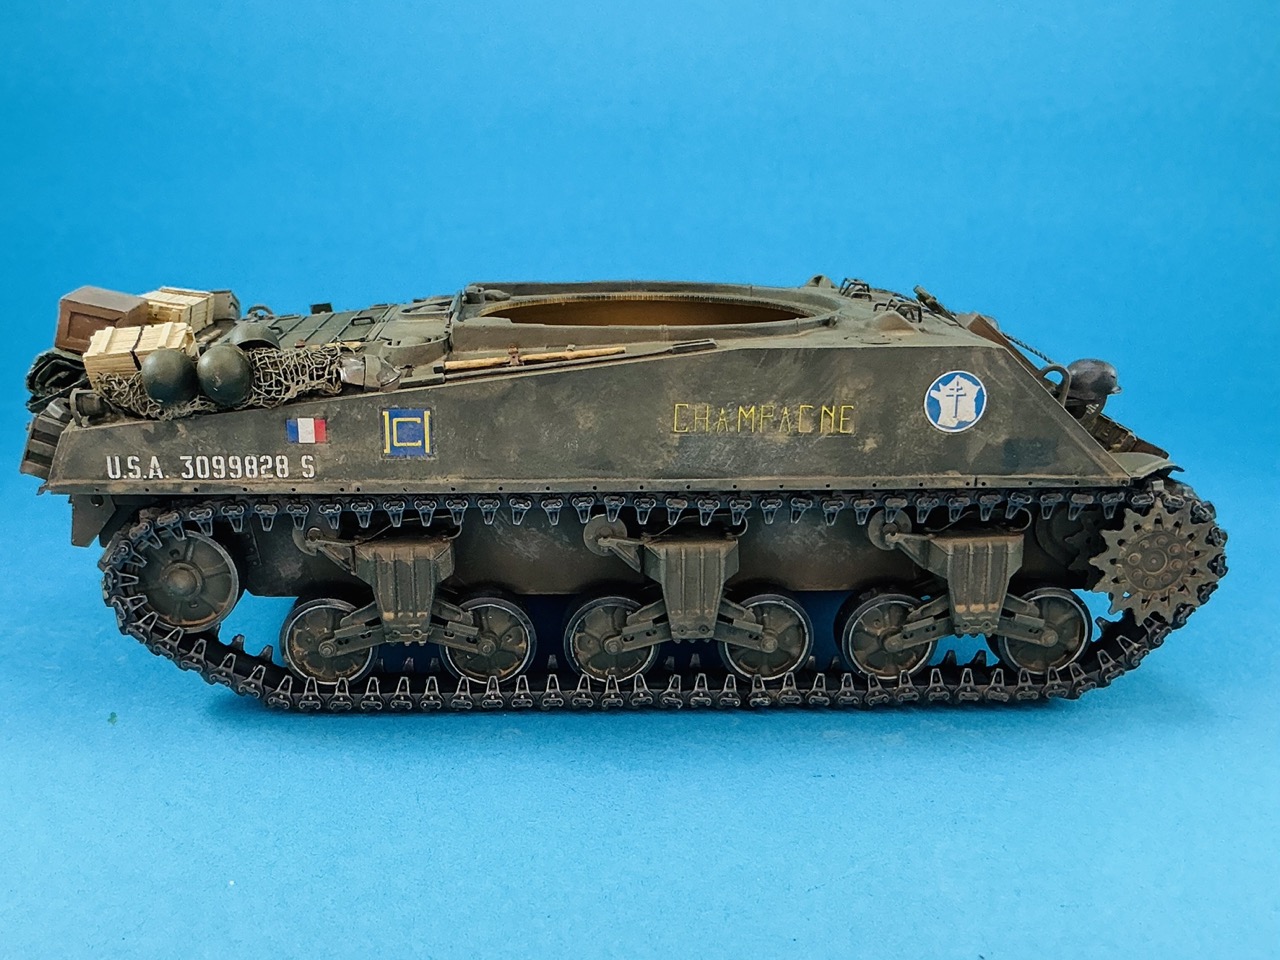
After glueing the bogies to the tank, I put a wash of Tamiya XF-52 Flat Earth over the whole model, thicker on the underside than up top. That also hid most of the silvering, I'm glad to say. After that wash, I also drybrushed a paler dirt colour in places, mainly where the crew would walk and on the rear and sides, where the tank would get extra dirty. It perhaps still needs some work to look more convincing.

Painting of the tracks is also done:

IMG_4326.jpeg


… or so I thought :( I gave the outside a thick was of XF-52 to represent dirt and dust, then painted the chevrons with matt black and drybrushed them with dark grey. I actually wanted to paint them dark grey, but after trying three or four different pots and bottles with various shades of that, all of them gave too little contrast with the dirt, so I resorted to plain black.

And then I went and fitted them to the tank. That's when I really started to get fed up with tracks a little … As mentioned earlier, I had made them to the length Meng recommends, 78 links, and when I test-fitted them they appeared to be a link too long. However, they seem to have shrunk in painting, because I could barely get the ends together with the idler wheel turned all the way forward — where it shouldn't be in the first place. So I made two more links, which I painted and added to the tracks after taking the photo above.

But at least the tracks now fit:

IMG_4328.jpeg


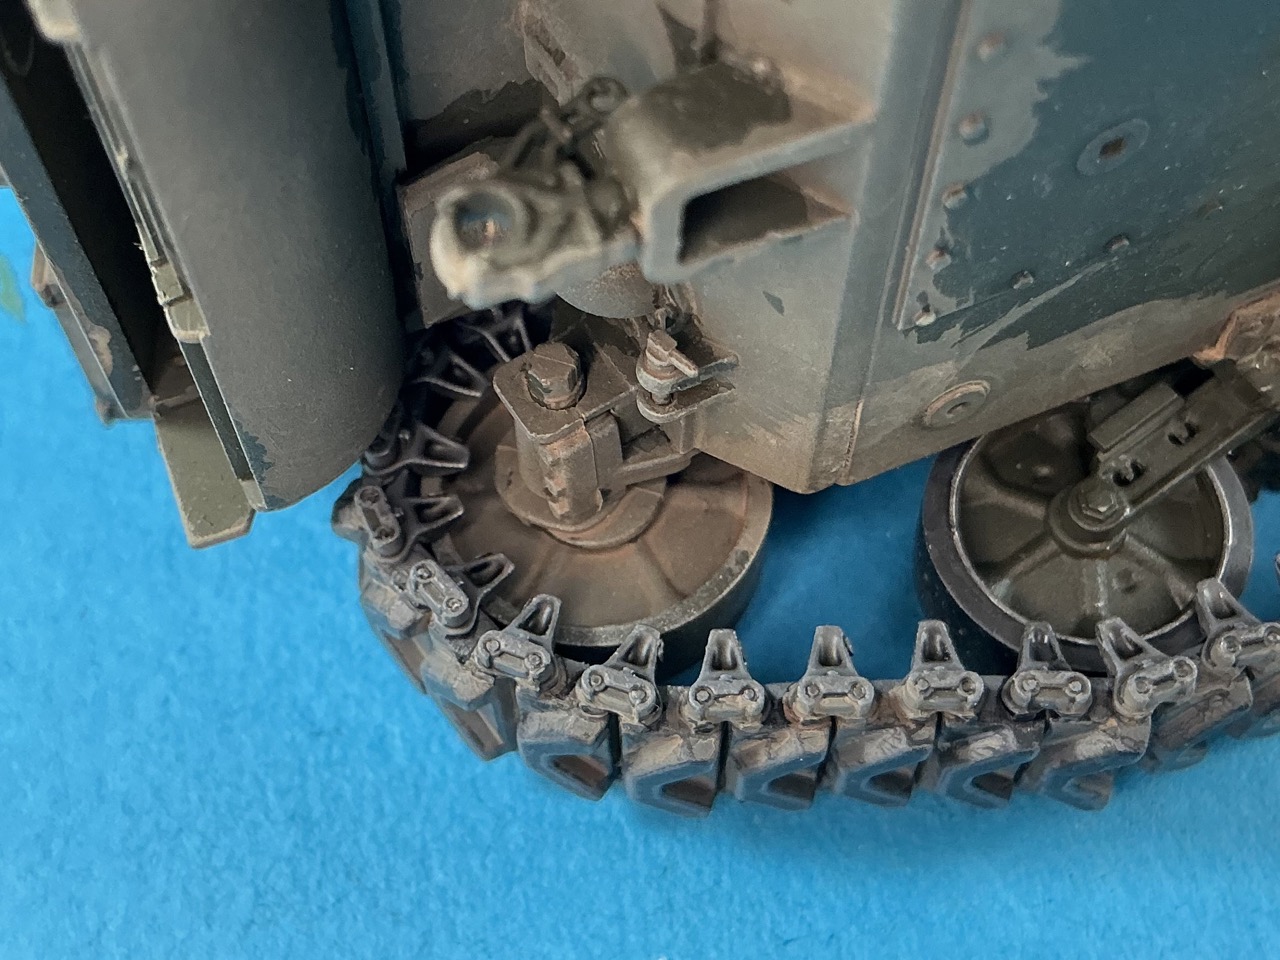
The idler wheel is still loose, and much too far forward:

IMG_4329.jpeg


Per the real tank's manual, it should be between vertically down and horizontally to the rear, but here it's diagonally down forward. But that will be solved soon by turning it on its axle like on the real tank, and then putting a drop of glue onto it once the track is properly tensioned.

You can also see in the previous photo that I glued the stowage to the tank, and also painted a dark rectangle towards the front of the side plate, that is visible in some photos of the real tank.
 
Due to my recent aversion to painting figures (poor fine motor skills, trouble seeing up close well enough anymore, difficulties in getting the shadow colours right, too laborious …) I decided to try something else: base colour, drybrushed highlights and a wash for shadows, in that order, for each area separately (face, jacket and cap). This hasn't turned out too badly, so I may just finish the infantry for my Comet cruiser tank the same way :) Ideally in the next two days, as I have a very big meeting to go to on Saturday, to I would like to take these models …
 
Just curious, how many have you built?
Someone happened to ask me that recently on another forum too :) So let me repeat myself here …

IMG_4338.jpeg


The last five or six years, in random order:
  • Crab Mk. I
  • Sherman V ×2
  • M4A3E2
  • M4A3 (76 mm) HVSS
  • M4A1 (75 mm) dry stowage
  • M4A2 (75 mm) large hatch
  • M4 (75 mm) DV I didn't build this myself, but painted it after it was given to me
  • M4A3 (76 mm) VVSS back to the eighties (Tamiya M4A3 hull plus Italeri 76 mm turret)
  • BARV
  • M4A3 (90 mm) HVSS what-if
  • Sherman III
  • M4 (105 mm) HVSS
  • M4A3 (76 mm) VVSS that's this one
Plus under construction/on hold the T6 prototype and an M32B1 tank recovery vehicle with T1E1 mine roller.

From longer ago it's hard to remember all of them, but last century I built at least a couple of Tamiya M4A3s and Italeri M4A1s, plus combinations of those two, and I converted a combination of them to M4A3E2. Oh, and I also built the Italeri Priest Kangaroo, M32B1 and M36B1 at various times, as well as Tamiya's really ancient M10 3-inch GMC.
 
Back
Top