Panzerjager I

noname

New Member
Joined
Jun 16, 2010
Messages
1,487
Hey folks, got a third entry on the go. I've always liked these little tanks. They just have a nice look to them. Just a tiny little thing with a whole lot of pieces. This is going to be a captured AFV as I know of at least one of these had been used by the Russians. I still have two or three ideas for a paint scheme but you probably won't see that until the end.

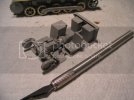
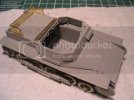
Got most of the chassis finished and am starting the interior. Mind you I'm still working on my first entry. But I'm having fun going back and forth between subject matter. I'm just happy my interest is evenly divided between them and I haven't got bored with one of them yet. YAAAAYYY!! ;D Here is what is done so far on the my 1/35 Dragon Panzerjager.
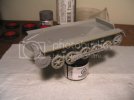
Picture491.jpg
 
Thanks Quaralane. The interior is almost complete.

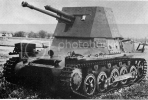
Here is a picture I found on the internet for some of you who may not be familiar with this little self propelled gun.
panzerjaeger-i-01.png
 
Watching all of these armor builds is like a small history lesson. Nice subject!
 
Im quite fond of these little things ;D, will follow with interest .

Chris.
 
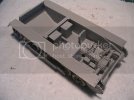
Look! I've got that tiny little interior done.

Picture493.jpg

I'd detail it more but I don't have any idea what all goes in there, and besides I don't think alot of it will be seen when the rest of the build is complete. I will paint it up and weather it just because I'll know it's there. :D
Here is the interior fitted into the lower hull. I think it would be best to paint it by itself though don't you? Ya that's what I was thinking.

Picture494.jpg

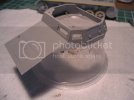
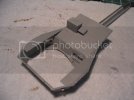
Now here is a pic of the top and bottom side of the upper hull. ALOT of detail here to add. All of the armour on this top part was added as seperate pieces. Plus some clear pieces in the hatches or little windows (whatever they are called). The clear pieces are not solid glass like you'd think but just like a window frame. You should be able to see them in the pic. Any idea why they did this? I know I don't know. ???

Picture495.jpg
Picture496.jpg

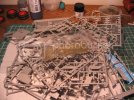
And I still have all these pieces to go! Well, not all of them will be used but most!

Picture497.jpg

I welcome all comments. And appreciate any help.I'm still a tad new to the military models. This is my first Dragon kit and only like my fifth military model. Where is the engine hood on this thing anyway? :p
 
Yes it is a nice kit. From what I can gather this is what you can expect from most Dragon kits. It calls for a little patience and I would NEVER think of throwing something like this at a beginner.

I like the PE screen/rack on back. That would never look right in styrene. I not a pro at it so it's not perfect but it will do.

Picture499.jpg
 
You may not be a pro, but it looks good!! And that is what counts at the end of the day!
 
This build looks like a lot of patience is required, especially with the PE.

It certainly does look good.

Thanks for sharing your progress.
 
Nice clean build Noname. Looks like your rolling right along buddy.

There is actually not much else that goes in the inside of that little guy, other than nuts and bolts to the suspension, wiring and linkage for steering and to the motor. I built the Italeri kit years ago when it was first released and completely scratched the interior and motor area. But like your thinking, most is unseen when done.
I still have the Nuts and Bolts book on that little guy, so if you need pics let me know buddy.

scratchmod
 
Moving right along there! Shaping up nicely! Keep up the great work! ;D
 
Thank you for all the interest and nice comments guys.

That is nice of you to offer Scratchmod. I'm thinking that everything forward of the driver's seat won't even be seen. i don't know if they expect a person to leave the top unglued for removal to show the inside or what? But I will certainly be glueing mine together. Wont' get a perfect fit otherwise.

I've got a few other Dragon models in my stash so at least I know what I'm in for. It's the painting, weathering and the end result that I'm working towards. ;D
 
Yep anything that far forward won't be seen. On mine I left the upper hull and rear roof deck lose to show the interior. Yep the fun part is the painting and weathering, looking forward to seeing what you do.

scratchmod
 

Latest posts

Back
Top