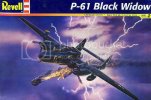
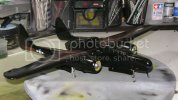
P-61 Black Widow - 1/48th Monogram – Revell

Ferris928

New Member
Joined
May 7, 2009
Messages
623
boxart1.jpg
Well, off we go (again) into the skies…

I’m sure many of you have seen this kit in the hobby stores for years. The first release of this kit was in 1974 (the year I was born). It’s one of those venerable kits; you know, those kits that will never go away and keep popping up in a new box every few years. Same molds – different box. I’m not sure about the decals though. My decals are pretty bad. Thankfully there are some aftermarket decals available (Soon to arrive with some weighted resin wheels from www.spruebrothers.com).
For as old as this kit is, it’s the only P-61 in 1/48. I guess AM Tech was planning on releasing one in 1/48, but they went under before that could’ve become a reality. Too bad. They were going to have all new tooling. :'(
doable.jpg

I’m building the kit for my self, but also for a friend who, like me, has always loved the kit and plane. He told me that he started one years ago and /it didn’t work out between us.’ I built one long ago as well, and it didn’t survive past building. And it wasn’t done very well. So now that my modeling skills are better, I’m gonna take another stab at it. Also, maybe it might encourage him to start building again too. (Doubtful, but there’s still hope.)

Opening the box.
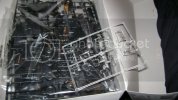
I was a little confused and disappointed. Everything was bagged up, except the clear parts. Thankfully the clear parts weren’t scuffed or damaged. And the decals I was strongly disappointed in. The box side photos show red walk boundary markings for the wing top that aren’t on the sheet and the decals look much better that what were printed before me. Granted, I knew that this was an old kit and I’d probably have to get new decals anyways, it was still a little bit of a let down. One would think that with a new release, they’d up date the decals at least.
DSC00882.jpg

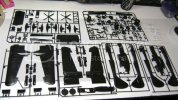
The sprues.
They looked good in their raised detailed goodness. I wasn’t too concerned with dips and low points in the pieces, unless there were very noticeable ones. Of which there wasn’t.
DSC00983.jpg

So after degreasing everything with Simple Green and drying them off, I set out to begin to set up the sub assemblies for paining and such.
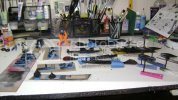
DSC00993.jpg

A word of advise if you plan to ever build this kit, check everything piece for problems. That is, even though there wasn’t a huge amount of flash (A bit there was), there were ‘build ups’ along the joint lines for the two tail booms and wings. That edge along the part where you have the male and female plug type things...brian not functioning...can't think of words. It would be smooth for most of it, then I’d come across some bumps along that area. (If that makes sence) Moral of the story, look over every part carefully. I should've taken a pic of them.

Here I’ve started with lead weight for the nose, by the time I’m done this will be full.
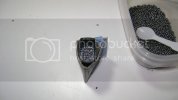
DSC00988.jpg

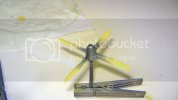
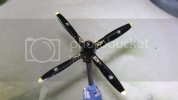
Prop blades get a base of white then yellow. After I future them, I’ll mask the tips and paint them black.
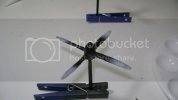
DSC01005.jpg
DSC01008.jpg

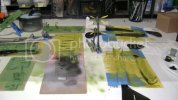
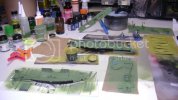
The main fuselage interior I’m paining GREEN zinc chromate and the side gear bays and inner engine housings YELLOW zinc chromate. From my available research (Many books and the net) I can’t find a color picture of the inside of a finished P-61. All the instructions say is Zinc Chromate, not green not yellow. I found an article on Interior Colors of aircraft during WWII and it’s not much help, beyond saying it’s both colors. So, since I figure I can’t go wrong with it, I’m taking it. Though I did find a color pic of a trio of P-61’s two had were Very weathered. The black paint was heavily chipped and worn away; you could see that they were primed in YELLOW zinc chromate.

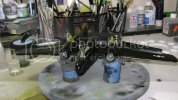
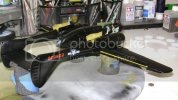
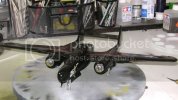
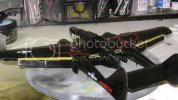
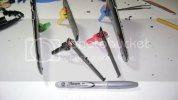
So, I’ve done the interior colors, drop tanks and landing gear. Also I took a silver sharpe and went along the edges of the wings and flaps to see where I need to fill in.
DSC00991.jpg
DSC01089.jpg
DSC01090.jpg
DSC01091.jpg
That’s my progress so far.
Thanks for checking it out.
Cheers!
 
Ahhh, the old Black Widow.

I built one of those too in the dark ages. I remember it surprised me detail wise, had no idea Monogram ever did anything that well detailed. First kit I ever built with positionable flaps. I dont have it here with me anymore, im sure its in a landfill somewheres. :'( Gonna have to get another one sometime, Id liek to see what I could do with it using all the skills i've learned since the first time I built it.

You've done some great work so far. Check Zotz decals, I believe they recently released some new P-61 decals.

edit: sorry, no so sure about the Zotz decals in 1/48. But im sure if you look around you should be able to find some decent markings.
 
First, i must say that I LUV your sig pic! 'nom nom nom!!!'

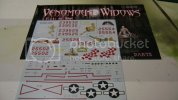
Ok, model stuff... The decals are the Zots 1/48 Venomous Widows #2. I found a review of them on ARC and the wheels i found while paruzing Spruebrothers' site. Figured i'd give'm a try. Also, the kit wheels aren't weighted. Normally, i'm not too fussy, but they look so much better. :)
You're right also about the flaps, no hacking them off or leaving them with this kit, hoefully I can get all that done right as well.
 
Great progress, glad to see another Black Widow in progress!

I built this one, too, as a kid, when it was a brand-new offering in Monogram's catalog, and believe me, I was blown away by the detail. I cut my teeth on the earlier kits, like the USN aircraft, and when I first got the P-61, and TBD, and the 4-engined bombers, it was like opening the door to another world. Today's modelers may gretz about the raised panel lines, and sure, there may be fit issues with the canopies, but I see this kit, and I still see that kit that I opened back in '78. And Shep Paine's diorama was just excellent!

I'm looking forward to following along with your progress!

Brad
 
Thanks guys!

I know it may have sounded like I was complaining about the kit in my opening post. I’m not…well sort of not. I love the plane and I like the kit. I just wish that someone would bring it up to modern specs. Actually, I’d like for Monogram-Revell to update all their ‘older’ kits. I know it’s not financially feasible or realistic for them, but I can still dream. I too, love the older Monogram kits. I’m planning on doing many more of them. Also, they’re more financially feasible for me at this time. I just don’t want to take out so many raised panel lines. It can be such a senseless slaughter…

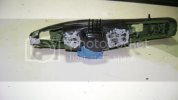
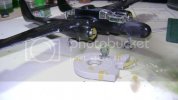
Progress so far: Futured interior cabin and wheel bay pieces, did some weathering with oils on them, then dull coated. Added the final bit of nose weight, it’s no longer a tail sitter, that I can guarantee. And finally got to some assembly. Then proceeded to fill gaps and such. I spent most of the time sanding and filling and more sending to get a decent smoothness.
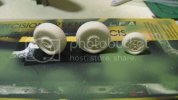
Lastly, my after market decals arrived along with my resin wheels. Fussed with those a bit too.

Nose
DSC01093.jpg

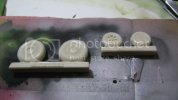
Wheels
DSC01095.jpg

Used sprue to fill in where the clear stand was supposed to go.
DSC01107.jpg

Tamiya putty to help smooth out the top.
DSC01109.jpg

Tamiya putty to help smooth out where I closed the gun bay.
DSC01112.jpg

After some assembly. Note to others who want to make this kit, same the seats for after you’re done sanding and before you attach the canopies. That way you won’t knock the thing out of the cockpit like I did.
DSC01114.jpg

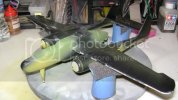
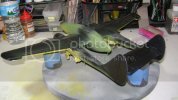
Belly pic.
DSC01115.jpg

That’s about it for now.

Thanks for checking it out!

Cheers.
 
Hi, Ferris, it's great to see it coming together!

May I ask, why did you choose to model your Widow with the radome closed, instead of displaying the radar gear? Was it more that it was the best solution for adding weight to balance the aircraft?

Best regards,
Brad
 
Yes. It's more or less the only place to put weight to keep the tail up. Unless you put a pin in the front wheel and have a base of somekind (or use the clear stand post that comes with the kit. I think when they designed the kit mold-wise, they didn't really design it to have the nose closed. It didn't line up and I had to get a little creative on blending the body to the nose.
Also, having the nose closed significantly reduces the chances of it being knocked off.
 
Scott Girvan said:
Coming along nicely. Great build thread.

Thank you sir!

Confirming what I said earlier, this kit was made to have everything positioned open. The canopies had noticeable gaps when closed and it looks like when things dry, I’ll be back at it with the sanding stick.

But on a somewhat humorous note… after I finished with the cockpit canopy, I noticed a little something I forgot to do. Something I mentioned, a few posts ago to do. I forgot to put the gunner’s seat back into the cockpit.
DSC01118.jpg
There were a few expletives spoken when I realized this. I sat and pondered, do I take the canopy off and do all that over again, or do I just leave it? I still haven’t decided on what to do. Any suggestions?

But, I got the wheels off the runner and sanded down, need to paint yet.
DSC01121.jpg

And here are a few shots of the decal sheet and the nose art I will be using.
DSC01122.jpg
DSC01123.jpg

I hope it’s not too racy for SMA.

Thanks for checking it out and following along.

Cheers.
 
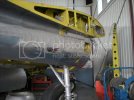
This is a little late now, but I have some pics of the P-61 undergoing restoration at the Mid-Atlantic Air Museum in Reading, PA. You were wondering about the interior color, but yours looks pretty close to the color they're using, recognizing, of course, that they've repainted the interior with new zinc chromate paint.

Here's one shot from last year:

P-61restore2.jpg

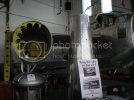
and another, showing the color:

P-61restore4.jpg

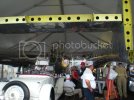
and this one, from this year, they displayed the Widow out on the apron, under a tent:

7-5P-615.jpg

They expect to have her airworthy in another 5 years.

I love your build! You're making me eager to break my kit out of the stash and start, too ;)
 
@The Baron; Very interesting! Can you post the link to that?

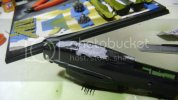
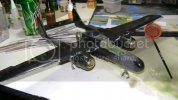
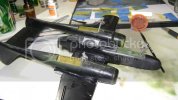
Here’s my progress so far:

I masked the canopies, wheel bays, and engines; and painted the interior green for the cabins. Then I pained the wing areas around the flaps and such. I also stripped the front gear doors of the yellow Zinc and did them in green zinc to make it match better. I also painted a few areas to help fill in any scratches around the seams. Lastly, brushed a little future on the painted wing interiors to help avoid any paint coming off after masking.

DSC01125.jpg
DSC01126.jpg
DSC01130.jpg
DSC01131.jpg

Thanks for checking it out!
Cheers!
 
Hi, Ferris, here's the URL for the MAAM's page on their P-61 project:

http://www.maam.org/p61.html

They have a ton of photos and other info, both on P-61's in general and on the restoration project.

The ones I've posted are pics I took at the WWII Weekend at the museum back in June.

I noticed that they're using two different colors, the more yellowish green in the photos I posted, and a darker color, close to Master Modeler's Interior Green, in the crew pod. I'd love to see contemporary interior shots, from the 40's.
 
Thanks Baron. Some of those pics are great, can’t wait to see the bird finished.

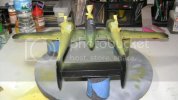
Ok, Update so far.
Painting and gloss coats are done, decals are done. The nose art was particularly finicky since my ‘new’ knife blade didn’t want to cut. I eventually used a small scissors, which didn’t give me a the clean cut I was looking for, but I think I managed to save it.

A few post ago I mentioned having to use filler around the nose because the parts didn’t match up, Well I guess that was ‘operator error.’ I somehow placed the piece that holds the nose gear in the wrong position. This then caused the nose gear doors to not line up correctly. Watch out. But all in all things are coming along. The wing tanks I wasn’t satisfied with, so I stripped them and will redo them.
Here’s a few pics.
DSC01179.jpg
DSC01173.jpg
DSC01175.jpg
DSC01176.jpg
DSC01177.jpg
Looking at the different interior color for the flap area, I’m not enthused about it, but it’s going to stay the way it is.
DSC01178.jpg
DSC01180.jpg

Getting close! Cheers!
 
Am I the only one having trouble with fitting and weight issues? I saw that you put lead in the nose but the glueing and fit are horrible. Is that just my kit or are all of them like that?
 
69CorvairGuy said:
Am I the only one having trouble with fitting and weight issues? I saw that you put lead in the nose but the glueing and fit are horrible. Is that just my kit or are all of them like that?

It's not you. I tried building one 30 years ago and am not in a hurry to try again.

It can be done from what I'm told.
 
What a nice build to follow. I just got a chance to take a look at it. I am very impressed. This looks like it will be a nice addition to any collection.
 

Latest posts

Back
Top