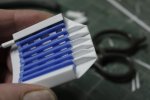
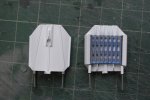
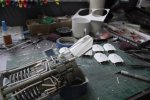
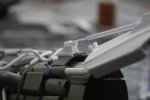
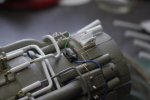
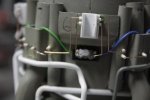
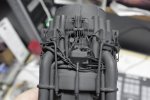
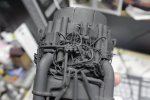
NYLON GAG MK 1 - FINISHED

Re: NYLON GAG MK 1?

Your engineering background really shines thru! I mean, evereything looks like it would actually work in the real world. Truly inspiring work! :)
 
Re: NYLON GAG MK 1?

Man, I have no words!!! :eek: :eek:
Hell, the real engines don't always look as realistic as these ones! ;D
I'm once again taking my hat off in front of your scratchbuilding skills, sir
 
Re: NYLON GAG MK 1?

Yip, this is outstanding Gag.

Like Sol, I'm lost for words too! Just masterful scratchbuilding and great ideas going into this. :eek:
 
Re: NYLON GAG MK 1?

Wow Gag that looks incredible. Just great watching this come together. Love the level of detail in your scratch building. I'd like to buy you a shot....here's to primer!

[attachment deleted by admin]
 
Re: NYLON GAG MK 1?

Glorfindel said:
Wow Gag that looks incredible. Just great watching this come together. Love the level of detail in your scratch building. I'd like to buy you a shot....here's to primer!

Cheers !
 
Re: NYLON GAG MK 1?

Discovered the tread today and must say: Great scratch action here!
I love that you show so many pictures - very hefull, inspirational and educational.
Keep it coming!!!
 
Re: NYLON GAG MK 1?

Ello Herdsters,
Hope everybody is well and working frantically to finish your 2012 BSC builds, i have been following along with about 50 or so and i must say the standard is exceptional. I have looked at some of the finished photos that Scott has posted and picking just one winner from each catagory is going to very difficult this year. Many congratulations to everyone who competed and finished their builds.

Thank you so very much, once again, for your kind words, to have so many people, who's work i admire so much, give me such praise inspires me like you wouldn't believe. ;D

So, once again we look at the detailing of the engines. All together now "PIX"

I was never happy with the rear nozzel deflectors, they looked very plastic (which they are, but in a bad way)
so i set about adding some small details to diguise them a bit.

First i added a piece of 0.5mm sheet to the back (X8).
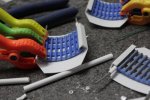
Picture%2520934-012.jpg

I then added 3 piece of 'U' channel to the top, being careful to allign them with the existing ribs.
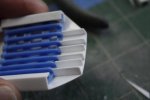
Picture%2520941-012.jpg

I then chamfered the ends down.

Picture%2520938-012.jpg

I then added more 'U' channel to cover the ends of the side supports & removed one of the U's legs
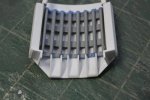
Picture%2520943-012.jpg

Everything was sanded smooth and then a quick test fit to see how we were looking.

Picture%2520945-012.jpg

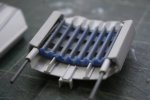
I then turned my attention to the back of the deflector, where i added 'T's, half round, small 'U' pieces of syrene for my details.
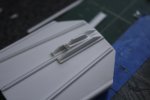
Picture%2520947-012.jpg

This is how both sides finished up.
Picture%2520954-012.jpg

Picture%2520955-012.jpg

Picture%2520956-012.jpg

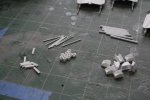
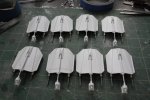
I then concetrated on the telescopic adjusters for the back of each deflector.
I made 8 of everything, i dry assembled them and then dry fit one on the engine just to make sure it had the look i was after.
Picture%2520962-010.jpg

Picture%2520963-010.jpg

Picture%2520961-010.jpg

Picture%2520958-012.jpg

Picture%2520959-011.jpg

Everything is dry fit at the moment but it is exactly the look i was after.
Also, i got hold of some fine gauge wire, which i plan to add for control lines on the engines and maybe attach them to the adjusters, i will have to see what looks best.
I now have the dilemma of what to paint and when. I think i will have to do it in small sub-assemblies and then try not to get too much glue everywhere when i put them together. ;D

Thats as far as i've got this week.
Your comments are always welcome.

Thanks for stopping by.


The Nylonator. 8)

[attachment deleted by admin]
 
Re: NYLON GAG MK 1?

Hey, Nylonator !!!!!
Stop already!
You are totally insane....and Thank God for it!
This is simply incredible.
I tend my resignation, and will no longer scratch-build.....

Maybe not.
;)
 
Re: NYLON GAG MK 1?

Good Evening,

Thanks for the comments guys, i realy appreciate them ;D

Just a short update to a lot of realy fiddly stuff, that at times nearly resulted in me launching these things against the wall, but i just about kept my head........................... just' ;D

So, here we go....

Basically added more hydralic lines, oil lines and any other type of line i could squeeze in.
Started with the 0.016wire from the back of the telescopic adjusters.

Picture%2520015.jpg

Picture%2520018.jpg

Then glued wires into 'H' profile styrene

Picture%2520020.jpg


Added a small piece of 'U' and fixed to the base unit of the adjusters

Picture%2520023.jpg


Then just threaded the wire thru all the other stuff

Picture%2520026.jpg


Picture%2520027.jpg


Then primered it all up,
Deflector vanes.

Picture%2520043.jpg


Then the main units.

Picture%2520005.jpg


Picture%2520006.jpg

Picture%2520007.jpg

Picture%2520001.jpg


They are alot blacker in real life than in the photos.

Now comes the scary part, painting the bloody things. My paint skills are very poor so i hope i don't mess them up too bad.
Any suggestions on colours to use would be appreciated, i'm thinking mainly metallic grey, gun metal, silver, copper, gold and some blends of these.

Comments welcome

Gag


[attachment deleted by admin]
 
Re: NYLON GAG MK 1?

It's the sheer amount of construction work that you put into this model that makes me respect you ten fold!

I mean, I love the paintwork a lot of our forum members do, but I see making a model from basic elements -
formed, shaped, the works, a much more grueling and much more impressive task. I mean, when one just
literally builds the model, surely one feels a greater attachment.

Do continue to impress sir, do continue! ;D
 
Re: NYLON GAG MK 1?

That detail is very, very awesome. It sure adds a TON of interest.
 

Latest posts

Back
Top