new putty

J

Just Mike

Guest
I'm going to the hobby shop in a few days. Going to be picking up some squadron. Haven't tried it in more than 10 years. I stopped because it melted the plastic I was working on. Also, I found that it dried very fast especially around the tube's nozzle (? - where it comes out) It was the green kind. I don't know if there's a difference between the green and the white.

I hear that the white is better for filling seams and whatnot. I can't imagine then what the green would be used for.

Anyway, if you have any tips on working with the squadron, please let me know.

Thanks!
 
Personally all I use is the Squadron green or Mr. Surfacer 500/1000 for finer stuff.

Tried the Squadron white, and didn't like it, too grainy and dries faster than the green. Mine has never dried up at the cap, been using the tube I have for quite a few years, and it is still like the day I opened it.
 
I don't know about the squadron green, but the squadron white can be thinned with acetone based fingernail polish remover. I do this all the time. You can mix them and make the white really smooth and easy to work with. This will work even if the putty is dried out. I have also taken a Q-tip, dipped it in the polish remover and used that to smooth out the end product to reduce sanding.

After I am done with it, I have started using a top coat of Mr. Surfacer to finish up the spots that the putty can't get to.
 
I've used both and prefer the Green version. White shrinks too much and you have to reapply it.

Tamiya putty is really great, but apparently it no longer meets California (maybe the entire US) health standards. It is being reformulated, and I really hope the new version doesn't suck.
 
I use green squadron putty or Bondo brand automotive glazing & spot putty just stay away from the UV cure. The bondo putty comes in larger tube that I have had for years and have used on more then just models and can be thinned and smoothed with acetone. Experiment and find what works best for you. ;D
 
There are always options if you don't have putty, in fact I use this method a lot because there is no shrinkage, no cracking and the bond between plastic and plastic can't be beat.

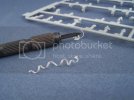
Simply shave some plastic off the sprue, use liquid cement to attach (and re apply to soften if needed) and then sand as you normally would.

Works great and you have an endless supply within the kit box.


seamscraper.jpg


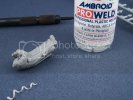
seamapp.jpg


seam2.jpg


seam5.jpg
 
I use the Squadron white, auto filler and the surfacer 1000. I use liquid cement to thin and smooth the white putty. Everyone has his or her own preference so it's basically what works best for you.

scratchmod
 
ScaleModelMadman said:
There are always options if you don't have putty, in fact I use this method a lot because there is no shrinkage, no cracking and the bond between plastic and plastic can't be beat.

Simply shave some plastic off the sprue, use liquid cement to attach (and re apply to soften if needed) and then sand as you normally would.

Works great and you have an endless supply within the kit box.

I forgot about this technique I've used it a few times myself creates a really strong bond specially between stubborn joints. I have a jar of plastic sandings that I will mix with liquid cement and spread like regular putty. Works great!
 
Who is California to tell me what products to use and what not to use? Have you seen LA in the afternoon?

Anyway, I'll try that Tamiya stuff as well.

And that excess plastic idea, brilliant! I recently had an idea like that by taking some sprue and some parts that I wouldn't be using (very small) and melting them all in a disposable polypropylene (polyethylene, perhaps?) measuring cup, waiting a few days and it became a big gob of goo. Tried working it with my fingers. Just got everywhere and wouldn't come off. Tried scraping it off with an exacto, just wound up nicking my finger and wouldn't heal. That's why you saw me with a band-aid around my thumb in some videos.

Oh, I didn't get to applying it to any seams. It dried up.

Right now, I exclusively use Bondo glazing and spot putty. I'll sand it smooth then check - the seams come back 9 times out of 10. That's why I'm looking to get something else.

I suppose I could take a little responsibility and state that I don't exactly take the time to make sure the joint squeezes out a little melted plastic. I just glue and clamp. Time for a change in that practice.

I'm also looking forward to trying that Mr. Surfacer stuff! Costs as much to ship it as it costs but, hey.
 
I use Squadron white, and use acetone as the solvent for it--manly acetone, from the hardware store, not nail polish remover, ooh, ooh, ooh! Seriously, it's a stronger solution in most cases, than polish remover, and often, polish removers have scents added to them.

I use two methods with the putty. I'll either apply the putty to the seam, and use a cotton swab dipped in acetone to smooth it out and remove the excess, or I'll put a dab of putty in a well on my ceramic palette and add acetone with an eye dropper, and mix it into a liquid, kind of a homemade Mr Surfacer.

I've also tried automotive putty, but found it too hard to mix in the right ratio, in such small amounts, and get the right mix to cure properly.

On metal figures, I've used Miliput, and Elmer's wood filler, as well as solder. But working with metal figures is a different animal altogether.
 
Jingles said:
AKE said:
Tamiya putty is really great, but apparently it no longer meets California (maybe the entire US) health standards. It is being reformulated, and I really hope the new version doesn't suck.

Wait, they're reformulating a Japanese product to meet American standards? Are you sure?

"Tamiya America released a statement on Thursday concerning its efforts to update some of its products to comply with U.S. Consumer Product Safety Commission standards. This is reflected mostly in label updates and not a reformulation of products.

Ah. Didn't know that was online. I read what I think was the same letter at my LHS. May of missed the part about changing labels. Although I wonder exactly what "mostly" labels is. Certainly it wouldn't take months to change some label stickers.
 
AKE said:
Jingles said:
AKE said:
Tamiya putty is really great, but apparently it no longer meets California (maybe the entire US) health standards. It is being reformulated, and I really hope the new version doesn't suck.

Wait, they're reformulating a Japanese product to meet American standards? Are you sure?

"Tamiya America released a statement on Thursday concerning its efforts to update some of its products to comply with U.S. Consumer Product Safety Commission standards. This is reflected mostly in label updates and not a reformulation of products.

Ah. Didn't know that was online. I read what I think was the same letter at my LHS. May of missed the part about changing labels. Although I wonder exactly what "mostly" labels is. Certainly it wouldn't take months to change some label stickers.

Most of Tamiya's labels aren't as simple as adding on a new paper label over the existing one (although they could have done that for existing stock in the US already), as most of their labeling is actually part of the package, and not a paper label. All their spray paint, putty, primer....labels are all part of the package itself, rather than a label added on after the product has been packaged.
 
Ah ! But I tell ya what is better than th Tamiya or th Squadron.

Mr.Dissolved Putty from Gunze ( which is different than Mr.Surfacer 500 & th like). It can be thinned with Lacquer Thinner. I've thinned it to a "wash" before to fill some hard to reach places.I've even used it with a 3-0 paint brush with great seamless results ! I swear by this Stuff. It dries to a smooth finish (No Sanding), It's also self leveling ! I've filled gaps, & made realistic weld seams. It's a staple on My bench !

http://www.largescaleplanes.com/reviews/NonKit/GunzeSangyo/MrDissolvedPutty/MrDissolvedPutty.php
While the article mentions that He used Iso Alcohol & water to clean up. I've found best results with Lacquer thinner.


KEN > Great little technique with the styrene shavings. I'll keep that in mind !
 
Does nobody here use Aves? http://www.avesstudio.com/ I use the apoxie sculpt for just about all my projects. Unless I just need a dab for a pinhole or something. I have a tube of the squadron on hand for those applications.

The Aves stays workable for a couple hours and can be wet sanded and cleaned up with water.
 
Much too hard for seam applications. Before you know it, you've sanded away all the aves and the seam is back. Too much ghosting (the sanded aves is still visible under the primer or paint.)
 
I have never had that problem. I roll it into a thin rope, soften the surface with some water, set it in, smooth over with wet fingers, allow to dry, and wet sand. Beautiful!

If you need it softer, they have a solvent that goes with the line.
 
I am giving it a try tonight with a model. I haven't used it before but I have seen many use it on YouTube.
 
One tip that helped me is to let it set up for about 15 mins after you mix it so it is not so sticky and easier to work with. You can also use rubbing alcohol to smooth it over with ur finger.
 
Just Mike said:
Too much ghosting (the sanded aves is still visible under the primer or paint.)

So, I gotta ask... What kind of primer are you using? Because I have never had this problem. And many of the people I have talked to haven't either.
 

Latest posts

Back
Top