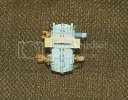
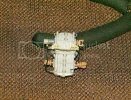
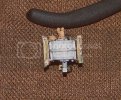
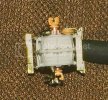
My Scratchbuilt Transfer Case for the Hobby Boss M1070 HET

Mr. Goch

Member
Joined
Sep 5, 2011
Messages
38
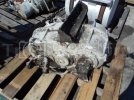
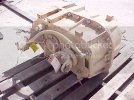
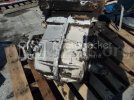
I wasn't happy with the way Hobby Boss modeled the transfer case for this kit. As a matter of fact, they got it completely wrong. This is what the Oshkosh 55000 Series FAD Transfer Case is supposed to look like:
55000TransferCase_zps353a2f21.jpg

399252_4_zps4122237c.jpg

399166_1_zps79bf39c0.jpg

399252_2_a_zps1c7a9b78.jpg

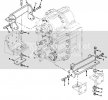
Sooooo, I decided to pull out the good ole TM 9-2320-360-24P for reference
TransferCaseMount_a_zps37436456.jpg


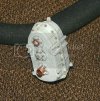
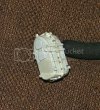
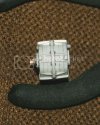
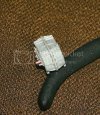
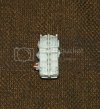
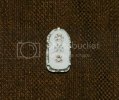
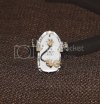
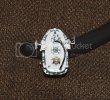
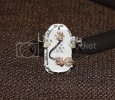
and build me own:

IMG_3783_a_zpsb6736a81.jpg

IMG_3782_a_zpse2f611c5.jpg

IMG_3781_a_zps83292ffa.jpg

IMG_3780_a_zpsfe5db437.jpg

IMG_3779_a_zpscdd1eb9c.jpg

IMG_3778_a_zps64832666.jpg


It's still a WIP; but, everything found on the real McCoy will be on this hunk o'styrene. I've got a few more details to construct and it should be finished within the next couple of days.

All comments and critiques are welcome.
 
Looks outstanding! From what I see you hit it right on. I assume you layered the styrene then carved to shape?
 
what does teh kit part look like next to it. and will it even be seen? if not seem like over kill for such a small part, but it does look really good
 
Thanks for the comments, guys. ;D

Well Spud, the transfer case is located directly underneath the rear wall of the truck cab. Sure, it isn't visible from a topdown perspective; but it can be seen when viewing the finished model from the sides and from underneath. Besides, I was getting into a rut and decided to do something to pique my interest again. ;D

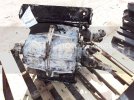
Here's a comparison of the kit supplied transfer case and mine:

IMG_3784_zps30c9dcdb.jpgIMG_3778_a_zps64832666.jpg

You be the judge. ;) :)

A cursory inspection of the kit part shows that it's nowhere close. HB even placed what's supposed to be the air shift chamber (that's the doodad seen in the lower right of the schematic in my OP) on the wrong side of the transfer case (on the back, facing the rear axles). It's supposed to be to the right of the lower front bearing cap.
 
That's a nice bit of work- cheers! Thanks for posting all that sweet, sweet reference, Mr Goch- it will come in handy.
 
Thanks for the kind comments. ;D

@Opabennett:

Sorry for not responding directly to your question. I thought I did; but, I didn't notice the omission until I posted. In a nutshell, I couldn't find the "edit" button. ::)

Anyways, I cut out a template out of 1.5mm styrene sheet. It would've been a bit messy to use a solid block to model it. Or, as was the case, I didn't think of it. I used the template to cut seven identical blanks, which were then cemented to each other. Using a sanding drum, I got the overall outline; then, I used sanding sticks and files to get the casing's shape. CA'ing two lengths of 0.5x1mm styrene strips together, I cemented them, seam side up, around the the housing to simulate the flange, followed by cementing an additional 0.5x1mm strip as a "cap" over this. I was then able to file and sand the flange to obtain the final contours of the transfer case. I used Masterclub resin hex bolts with washers to simulate the capscrews around the flange. If you have a chance to get them, I highly recommend Masterclub nuts and bolts. From armor to autos, they're the best (plus, they're inexpensive compared to similar products).

I originally made the transfer case mounts out of styrene. Unfortunately, they just didn't look correct, due to the thickness of the plastic. So, I'm fabricating new ones out of brass sheet and angles in order to obtain the correct scale look. Yeah, I know it's a bit anal/OCD; but, what the hey, I might as well go the whole nine yards and get it "right". ;D
 
Mr. Goch said:
Thanks for the comments, guys. ;D

Well Spud, the transfer case is located directly underneath the rear wall of the truck cab. Sure, it isn't visible from a topdown perspective; but it can be seen when viewing the finished model from the sides and from underneath. Besides, I was getting into a rut and decided to do something to pique my interest again. ;D

Here's a comparison of the kit supplied transfer case and mine:

IMG_3784_zps30c9dcdb.jpgIMG_3778_a_zps64832666.jpg

You be the judge. ;) :)

A cursory inspection of the kit part shows that it's nowhere close. HB even placed what's supposed to be the air shift chamber (that's the doodad seen in the lower right of the schematic in my OP) on the wrong side of the transfer case (on the back, facing the rear axles). It's supposed to be to the right of the lower front bearing cap.

big difference
 
Re: My Scratchbuilt Transfer Case for the Hobby Boss M1070 HET: COMPLETED!!

I finally completed the transfer case. Here's the dilly-o:

IMG_3847_a_zpsf5a23d15.jpg

IMG_3848_a_zps14f242b2.jpg

IMG_3846_a_zps516244e4.jpg

IMG_3850_a_zps1e429ae7.jpg

IMG_3851_a_zps643a1ff1.jpg

IMG_3853_a_zps68c28467.jpg

IMG_3854_a_zps2a774267.jpg

IMG_3857_a_zps67c9e30f.jpg
 
Thanks, man. The end result was worth the severed blood vessel in my thumb while working on it.

Note to self:

put down the chisel blade if you feel the urge to sneeze. ;D
 
lol.

hey Mr Goch, are you going to share the rest of the build with us :)
 
I plan to, Spud. There are a couple more areas which need some attention before I start this one. I don't want to have to go back after the fact, if you know what I mean. :)
 
ah good man. i have the kit my self but doubt it will get done this year so i want to see as many being done as i can, i wont be going to as much detail as you tough :D
 
AAAAGH! Stop me before I scratchbuild again!!!

I placed a self-imposed red line on how far I'll go with corrections. Otherwise, I'll end up doing something stupid like increasing K&S Engineering and Plastruct stock values by scratching the entire kit. It's an OCD thing I share with my kid. ;D

Seriously though, my focus is set on the dashboard (the angle, hence the overall shape, is totally wrong), the CPK panels under the cab and the longitudinal panels which are on either side of the engine/tranny and are supposed to attach underneath, and on either side of, the center console. The kit parts look like friggin' 4x8 sheetrock panels. That's when I'll call it a wrap and will finally start the process of infusing my sinuses with the aroma of chloroform (Dichloromethane/acrylic solvent, to be exact) welding all those styrene bits together.
 

Latest posts

Back
Top