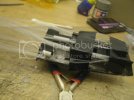
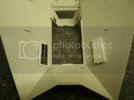
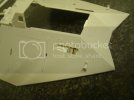
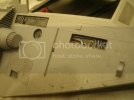
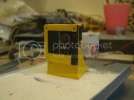
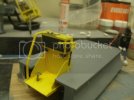
my mpc snowspeeder dio

peza

Member
Joined
Jun 27, 2012
Messages
612
eh up all,
here is an old build but new to you folks,
i got myself an old mpc snowspeeder at a model show years ago as a break from the big bird(the 32"millennium falcon).
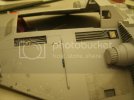
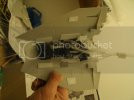
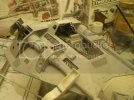
so to start off i didn't like the lack of detail in the cockpit area,the seats were to small and there was no side control consoles.so i used some plastic lolly sticks to make the seats longer,and cut down the head rest joinin the seats using some half mm styrene.and started makin up some pedals for the pilot.
GEDC1853.jpg
GEDC1856.jpg
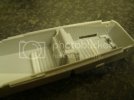
here you can see the pillot foot pedals and the start of some of the consoles
http://[http://i1173.photobucket.com/albums/r596/peza5/GEDC1858.jpg/img]
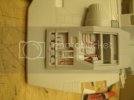
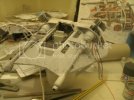
on this console i used some half mm fibre optic cable and 2 small pieces of soldering wire to make up the detail on the console face and gave it a good coat of silver as a base coat.
[ATTACH=full]75488[/ATTACH]
here you can see the bottom 4 control consoles all painted up and ready
[ATTACH=full]75489[/ATTACH]
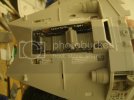
the next image you can see the bottom 4 in position and that i've started to put my half mm fibre optics in,i used a windproof lighter to melt and round up the heads of the lights this is just some of the lightin in so far
[ATTACH=full]75490[/ATTACH]
well thats it for this post i've gotta go work i'll post some more later..cheers for lookin....peza :)
 
eh up all,
here is the next update from where i left off.
the last image on my earlier post showed the fibre optics from the top but my first image on this post is the same image but from the bottom just so you can see how many have got into the bottom controls.
GEDC1884.jpg
you may of noticed that there are some fibre optics inbetween the seats which come out on the recessed parts on the sides of the seats.
next i started on the back gunners fire control panel which i had painted the same way then drilled out where the lights were going,but on the gunners scope i hollowed out and put as many fibre optics in it as i could cram in.with some clear styrene over the top glued in with some p.v.a for the clear look once dry
http://i1173.photobucket.com/albums/r596/peza5/GEDC1886.jpg
next you can see the finished off upper side controls,sorry i can't find any images of the construction side but it was the same procedure for the bottom ones,i also painted the inside of the cockpit and made myself some seat belts from some thin copper i got from work that i painted on p.v.a and then used a single piece of toilet roll to make it look like fabric but the cockpit looked good enough to leave alone now.
GEDC1932.jpg
oh one thing i forgot to mention was that i hadn't finished the front screen for the pilot.
here the pilots screen is finished using some clear styrene and some wood varnish on the inside of the screen to give it that switched off monitor colour.
GEDC1934.jpg
here is an image of all the fibre optics in the cockpit from the underneath all tidied up and pulled tight,i've not cut the f.o's down to size yet,
GEDC1933.jpg
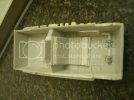
whilest i was waiting for things to dry with the cockpit i started on the body,i wanted to cut out panels as if it's in the maintenance bay.
so i started to cut out and make some backin pieces.
GEDC1857.jpg
here is the top view of my idea.
GEDC1855.jpg
and once i started on them 2 i thought i'd take out a few more and by adding some styrene tube,thin wire and some panther tank spare parts i came up with this.
GEDC1966.jpg
GEDC1968.jpg
and on the other side i made a cut out maintenance panel also
GEDC1897.jpg
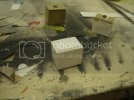
and here you can see i've painted that one up but also made another one for the front first side.
GEDC1979.jpg
well thats it for this post hope ya like folks...cheers peza
 
eh up all,time for the next update i do find it easy to post quick when you've already build it so this should be done in 2 wks.
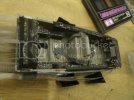
right then,to start here is a dry fit from the top and also the bottom,the bottom image shows how many fibre optics went into the cockpit area(by christ there was alot but it doesn't look to cluttered.
GEDC1900.jpg
and the bottome view
#GEDC1901.jpg
next i went over all the fibre optics with a mixture of tamiya clear colours,must of given them about 3 coats using a cocktail stick to put small drops on just the right bulb of the fibre optic.
http://[http://i1173.photobucket.com/albums/r596/peza5/GEDC1987.jpg/img]
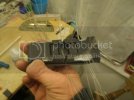
here i'm holding the model upto the light to show of the ilumination.
[ATTACH=full]75541[/ATTACH]
[ATTACH=full]75542[/ATTACH]
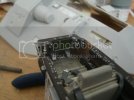
next up i made myself a little light box for all the fibre optics to go in.
[ATTACH=full]75543[/ATTACH]
after cutting all the fibre optics down to size and placing the light box at the back where the engine bay is.
and here is acouple of images of it all lite up.
[ATTACH=full]75544[/ATTACH]
[ATTACH=full]75545[/ATTACH]
well i was thinkin about hinding the cables and how to do it with the snowspeeder having a repulser lift and no landin gear,so where do you hind i,i came up with the idea of refuelling as a nifty way of makin the ship float and hind the cables at the same time,so lookin for the right wire for the job i found it in the same as always,just by chance at a fireworks night with the kids,the sparkler's had bendable wire but still strong.
so the next image shows the wires and the start of the wire mounting .
[ATTACH=full]75546[/ATTACH]
well that's it for this update....hope ya like cheers peza :)
 
Quaralane said:
Nicely done
And a good idea for the cabling

cheers Q i really got into building this one as a distraction from the falcon.
love the shield bus ;)
 
eh up all,here is the next post for y'all,
first off here are some other images where i left off,i started to put the guns together but i left the canopy off for easy access to flipping the model over to work on the bottom.
snow013.jpg
one thing i didn't mention was that i drilled out the gun barrels,which was a pain cos all it wanted to do was split the 2 halves apart.
snow014.jpg
next up was to put the bottom half of the modell on but as i had a look with a dry fit i noticed with all the fibre optics running underneath the seats it didn't fit no more.
before
GEDC2095.jpg
after a little milliput fine and some sanding.
GEDC2129.jpg
at the back it was worse i couldn't filler it or the air brakes wouldn't work.
GEDC2096.jpg
and with 2 little cut pieces of half mm styrene i covered over the gaps.
GEDC2142.jpg
and finally it gave me a horrible gap where the engine sat so that needed a little touch up also.
http://[http://i1173.photobucket.com/albums/r596/peza5/GEDC2130.jpg/img]
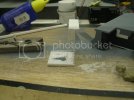
well that was it for the model for abit so i could concentrate on the base.i made myself i base using 1.5mm thick styrene and scribed some panel lines into it.
[ATTACH=full]75569[/ATTACH]
sorry for the wobble must of had afew by then :P
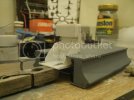
here you can see the bottom,note the kids bendy for the cables to run through.
[ATTACH=full]75570[/ATTACH]
next up i preshaded the top with some tamiya iron grey(love this colour for the cockpit also).
[ATTACH=full]75571[/ATTACH]
then a coat of paint on top of that. i also black glossed the sides
[ATTACH=full]75572[/ATTACH]
well thats it for this on again hope you like cheers for lookin....peza ;D
 
eh up all here is the next installment.
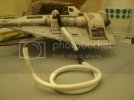
first off i got the ship mounted on the base using some 2 part epoxy,i pulled the cables out of an old cable flex to use the outer sheath.
GEDC2203.jpg
as you can see i got the effect of it floating done.
GEDC2204.jpg
GEDC2205.jpg
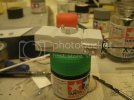
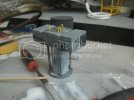
next i made the refuellin pod out of styrene some old tanks bits and some 2mm/halfmm fibre optics.
GEDC2332.jpg
GEDC2329.jpg
GEDC2331.jpg
on this image you can see the fibre opfics in and blackened up to stop light leakage.
GEDC2328.jpg
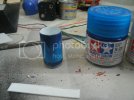
the next part of the pod was to find a clear tube in the house somewhere,i found this and it was sacrificed for the greater good.
GEDC2218.jpg
GEDC2221.jpg
next i gave it 2 coats of tamiya clear blue and once that was dry ran some tamiya white in and around the inside.
GEDC2239.jpg
next job was to fit it all together and put the LED through the bottom of the base and join and paint the refuellin pipe.
GEDC2341.jpg
GEDC2366.jpg
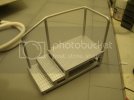
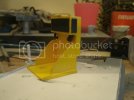
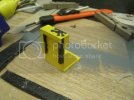
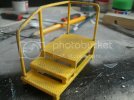
you also see that i made myself a maintenace stepped work station out of styrene tube,box section and some railway tread plate.first i painted it all silver.
GEDC2219.jpg
then gave it a coat of bright yellow once that had dried i used one of my mrs's old nail files to knock back the yellow on where i think wear and tear would be.
GEDC2342.jpg
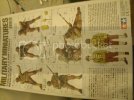
and that was that,next up was the ground crew i got myself these dudes because i spotted 2 fellows that i liked there pose.
GEDC2390.jpg
whiest i was having a fag and a brew i thought it would be ace for one fella to be on the maintenance station with a workin torch in his hand lookin in the the maintenance bay on the side of the ship,so that was the plan didn't know if it was do-able but i gave it a go.
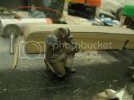
first off i choose the crouching figure mocked up his arms to the right position which i had to do some cutting to his shoulders,elbows and wrists.
GEDC2367.jpg
i also had to make up trouser legs as these boys had gaiter's on using some milliput white.
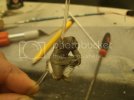
next i drilled a hole through my mans foot to the inside of his torso and up through his armpit.
GEDC2372.jpg
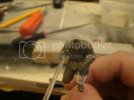
next i had to bend the fibre optic so it pointed in the right direction and start modifying his whole arm bit by bit.
GEDC2380.jpg
GEDC2389.jpg
GEDC2388.jpg
his hand needed i little tweeckin to get the torch properly sat in his grip but i eventually got it.
next step was to start paintin him up.
GEDC2395.jpg
this is last image for this post you can see the refuelling pod,ship and my man all lite up .


da,da,da,daaaaa!
GEDC2528.jpg
you may of seen the transport loader in the background but i'll go through that one next time.....
hope you like..cheers for lookin peza ;D
 
The refuelling hover stand was an idea I considered but did not know how to go about it for my project. Now I got it thanks to you. Darn fine build. I am also in awe on how you were able to light the instrument panel. Where did u get the very flexible fibers?
 
tiking said:
The refuelling hover stand was an idea I considered but did not know how to go about it for my project. Now I got it thanks to you. Darn fine build. I am also in awe on how you were able to light the instrument panel. Where did u get the very flexible fibers?

cheers buddy,the fibre optics were a £2 Christmas ornament which i bought just for the fibre optics and binned the rest.once again thankyou....peza
 
eh up all,
here is the next bit,i hold ya they would be coming at ya thick and fast.
well i said i'd get into the transport loader,and that is what this one's all about.
first off i did some research by workin empire over and over and drawing up a few pictures of bit's i needed to get started but some angles i couldn't find at the start but i had enough to get goin.
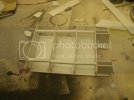
here i started on the flatbed and the curved sides.
GEDC2402.jpg
here is the bottom view
GEDC2403.jpg
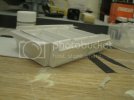
next you can see the curved side in place which i used half mm styrene just cos it bend's alot easier.
on the next image you can see both sides are done and i've started on some of the detail on the front.
GEDC2451.jpg
the same procedure for the sides i had with the back.
GEDC2452.jpg
next i started on the pilot's/driver's standing area.
GEDC2458.jpg
GEDC2464.jpg
next you see the basic shape coming together.
GEDC2466.jpg
i gave it a coat of paint the same way as i did on the maintenance station.
GEDC2476.jpg
GEDC2473.jpg
and i started knockin up the detail for the back of the pilot's standing station.
GEDC2477.jpg
it's nearly done now i got the footpedal and the stearing control finished off.
GEDC2511.jpg
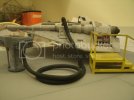
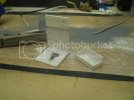
while i was buildin this i desided on it being an maintenance and re armament dio,so the next step was to make up some accessories and another crewman.first off i made a winch cable holder for new cable and a carriage for the harpoon gun,but you wont see the carriage for the gun for awhile and to honest it's not that special.
GEDC2494.jpg
next up i started makin up some of the boxes like san loads up when he's on gonna pay gabba off.
GEDC2496.jpg
GEDC2504.jpg
the last image is of 2 of the 3 boxes finished off,hope you like cheers for lookin...peza ;D
 

Latest posts

Back
Top