TDA
New Member
- Joined
- May 15, 2012
- Messages
- 60
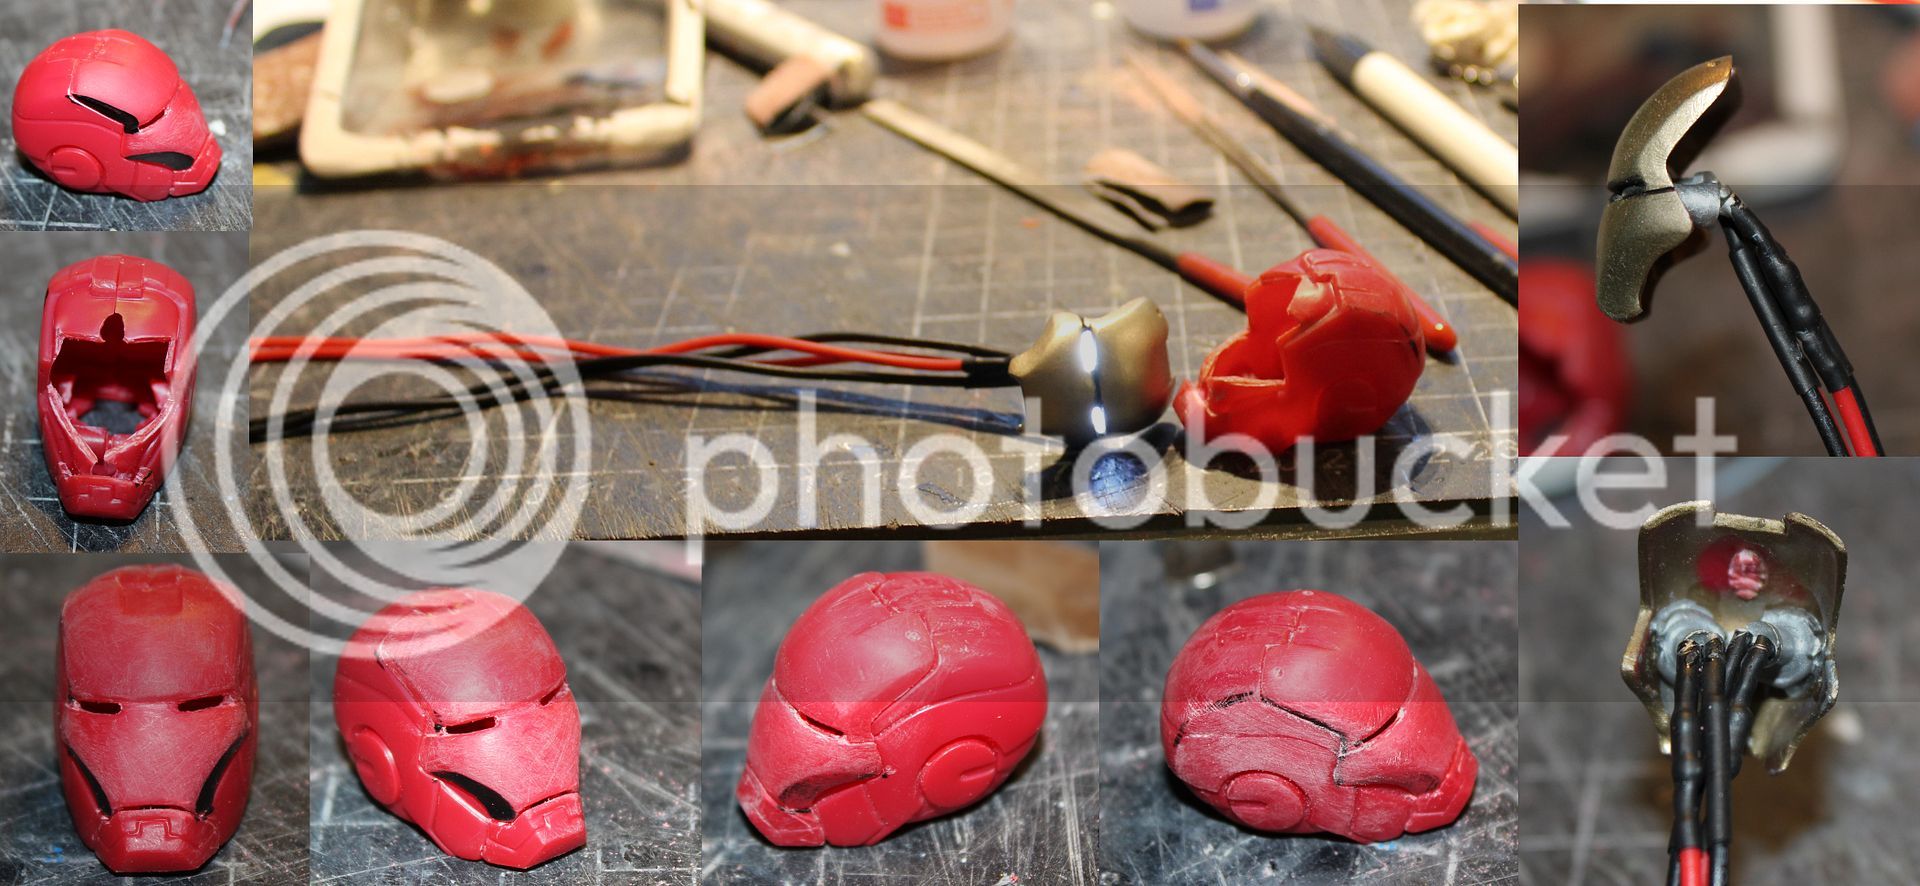
For this guy I used a filler from italeri that cures pretty fast. It worked way better than the acrylic stuff I usually use ")
Limpar33 said:Hi there, got one of these kits myself, did you thin your Vallejo paints for the airbrush? & what with. I'm a noob and can take all the help I can get. Ps did you polish your model or spray it with a coat?
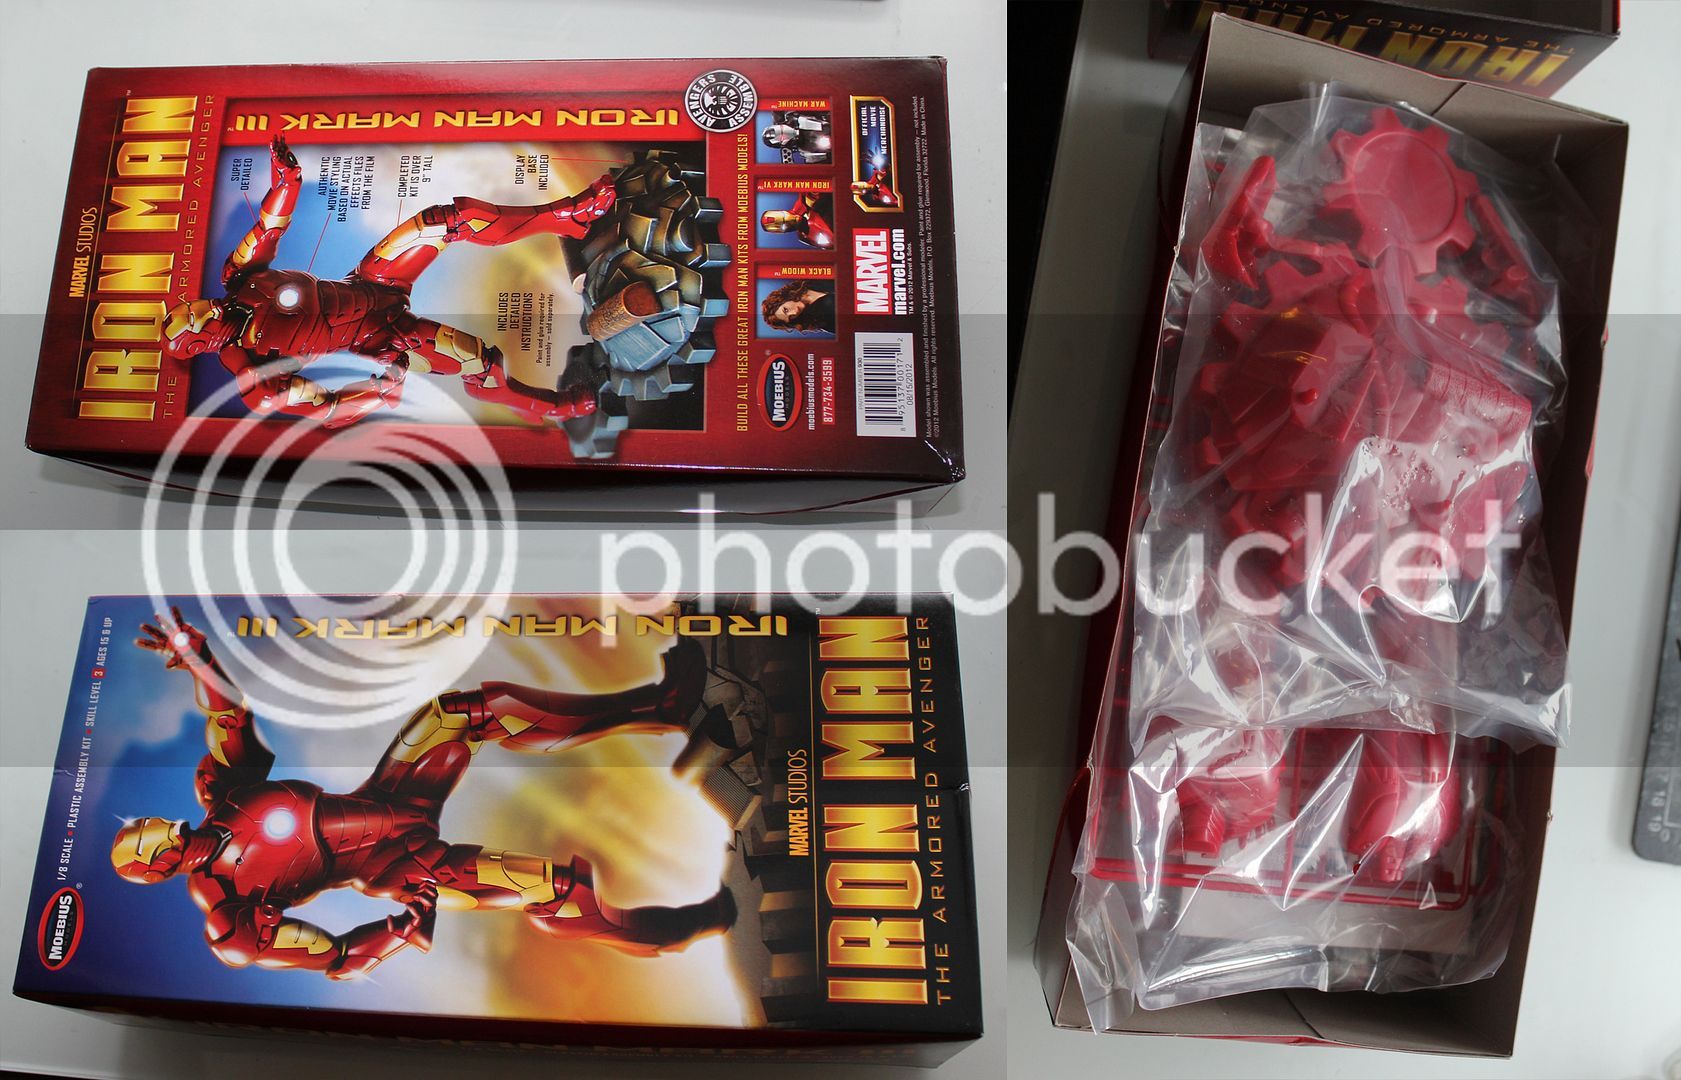
Yeah unless the paint is already formulated for airbrush use (Like the vallejo model air series etc.) it will need thinning. There's several acrylic thinners on the market, but I usually just use windscreen cleaner (like windex etc.) as it's way cheaper and works pretty much as well as any thinners I've tried And the model was given a coat of varnish as a last finish, I've never buffed or polished a miniature or kit as a final finish before Yeah unless the paint is already formulated for airbrush use (Like the vallejo model air series etc.) it will need thinning. There's several acrylic thinners on the market, but I usually just use windscreen cleaner (like windex etc.) as it's way cheaper and works pretty much as well as any thinners I've tried And the model was given a coat of varnish as a last finish, I've never buffed or polished a miniature or kit as a final finish before TDA said:Okay, apparently it seems that the dragon kit is with pre-painted parts... That really sucks (for me at least, as a modeler) so my first priority will probably still be War Machine...
Cool, so the kit comes unpainted as well, I might just have to get it thenLimpar33 said:Thanks for the advice, I also have the Dragon kit Mk VII, and I was going to just use spray cans, but realised I would compromise the finish. So now thinking of using Tamiya Fine Primer > Vallejo Model Air (Via Airbrush) > Tamiya Clear Red. Hope applying 2 different brands like this doesnt prove problematic.
Ps lovely work its very impressive.
I just found a cool T-rex recast vinyl kit on ebay that'll be my next project, but after that I might want to do another Iron Man I am looking to get the first version, as I don't like their revised "battle version" which doesn't look as cool.
Yeah the hearbreaker suit is on my wish list as well, I'll probably go and buy the iron patriot as well at some point as I'd love to paint himQuaralane said:I wouldn't mind getting that mk42 kit, if only to paint it in a scheme that's a little less 'over the top'
Would really like the Heartbreaker, myself
Hehe it's dangerous work traveling the interwebs, it's paved with temptationsEngineer Jeff said:Dang it. Now I wanna pick up one of these kits. Nice work!!


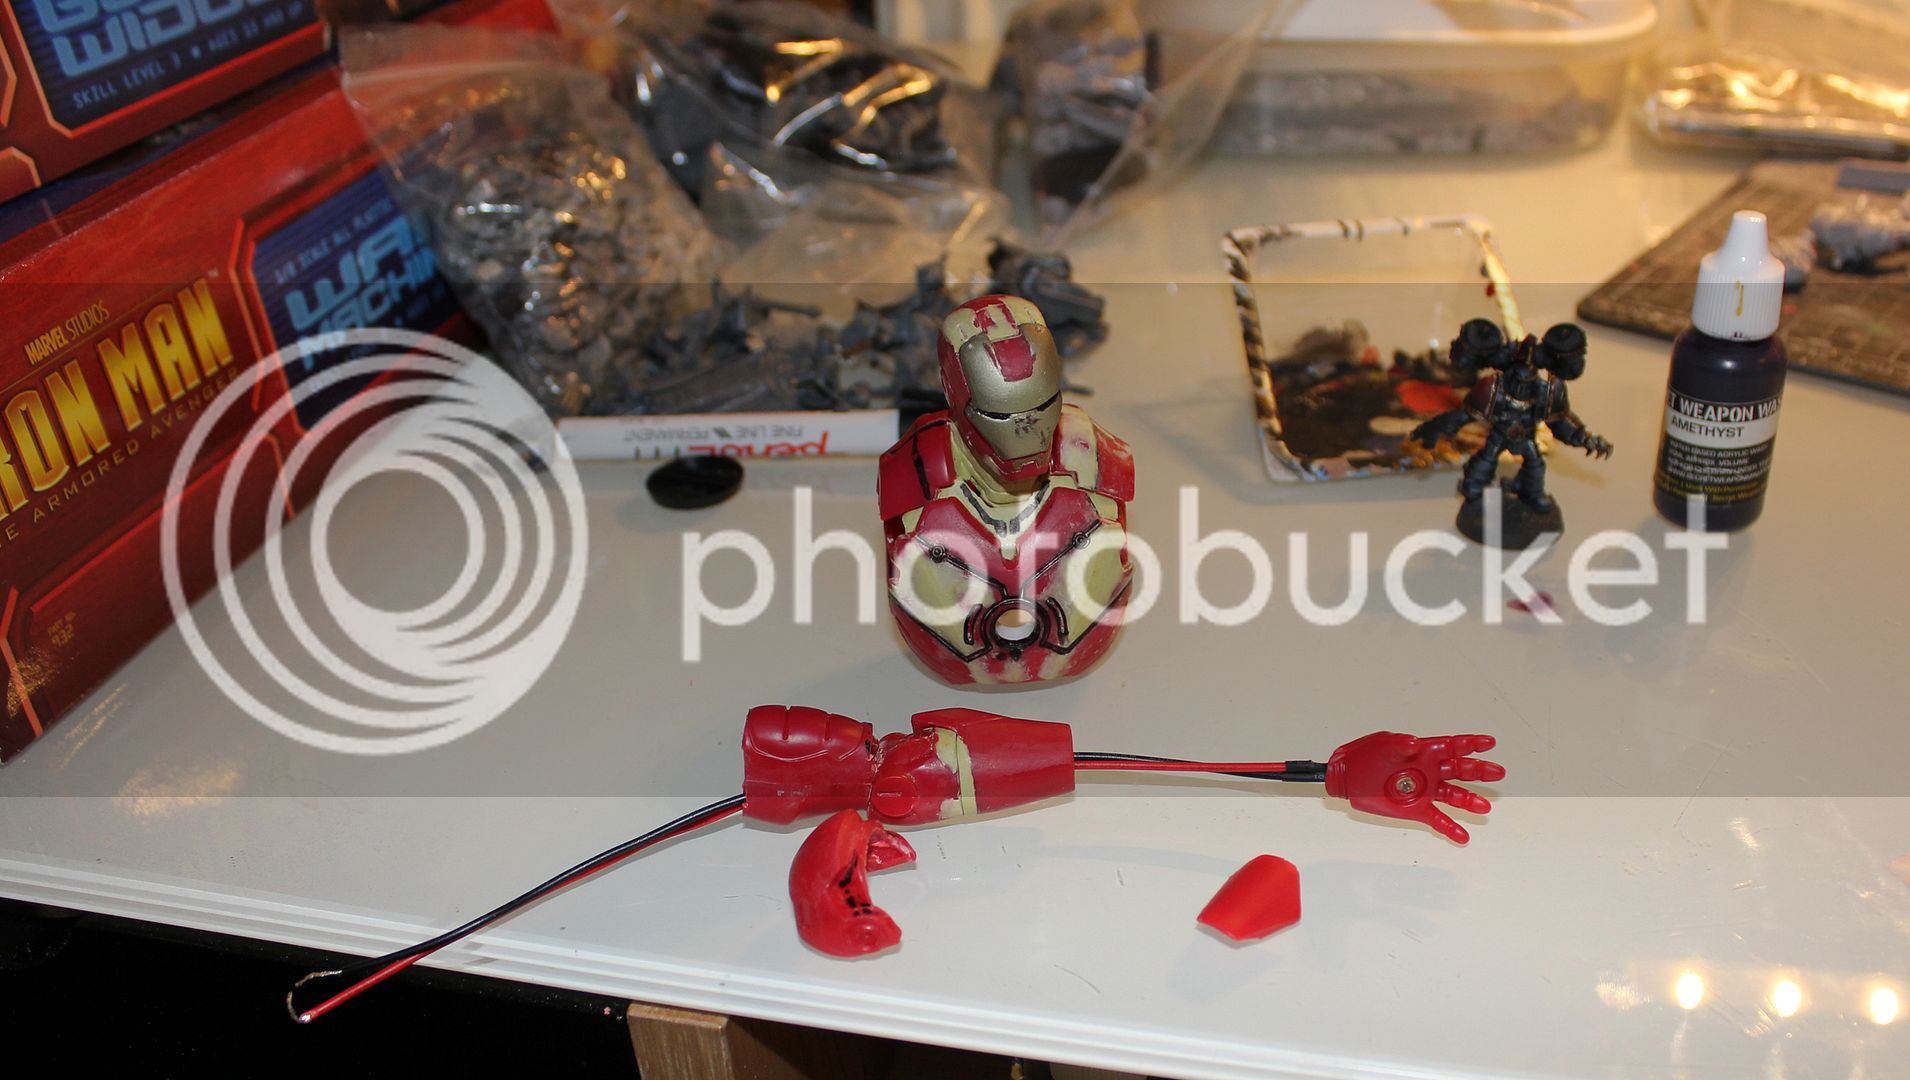
 Now begins the fun part