Jakko
Well-Known Member
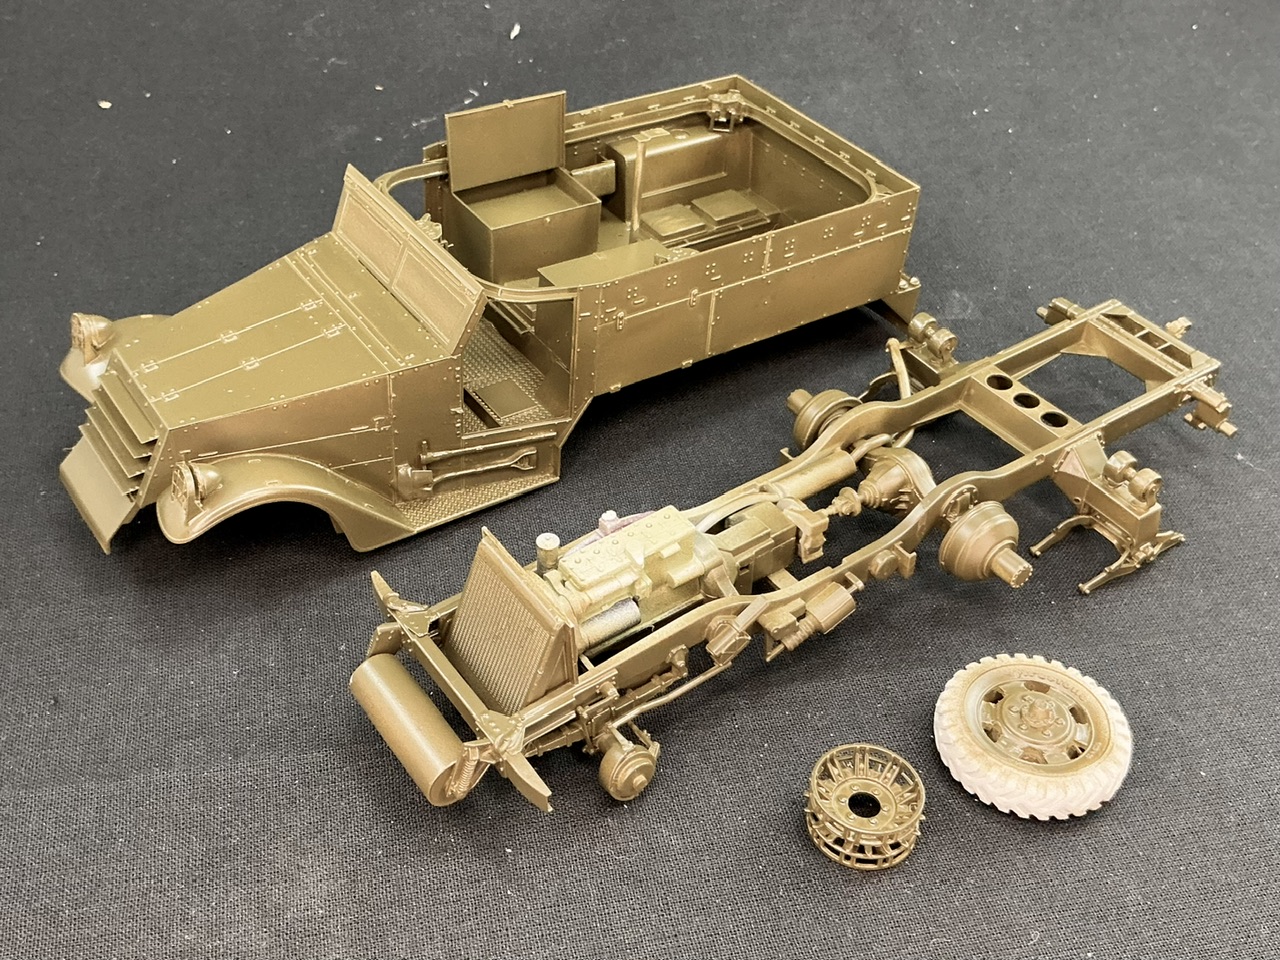
A few years ago, I bought a Dragon M2 halftrack kit second-hand, which the original owner had already started building. He hadn't got too far, though:
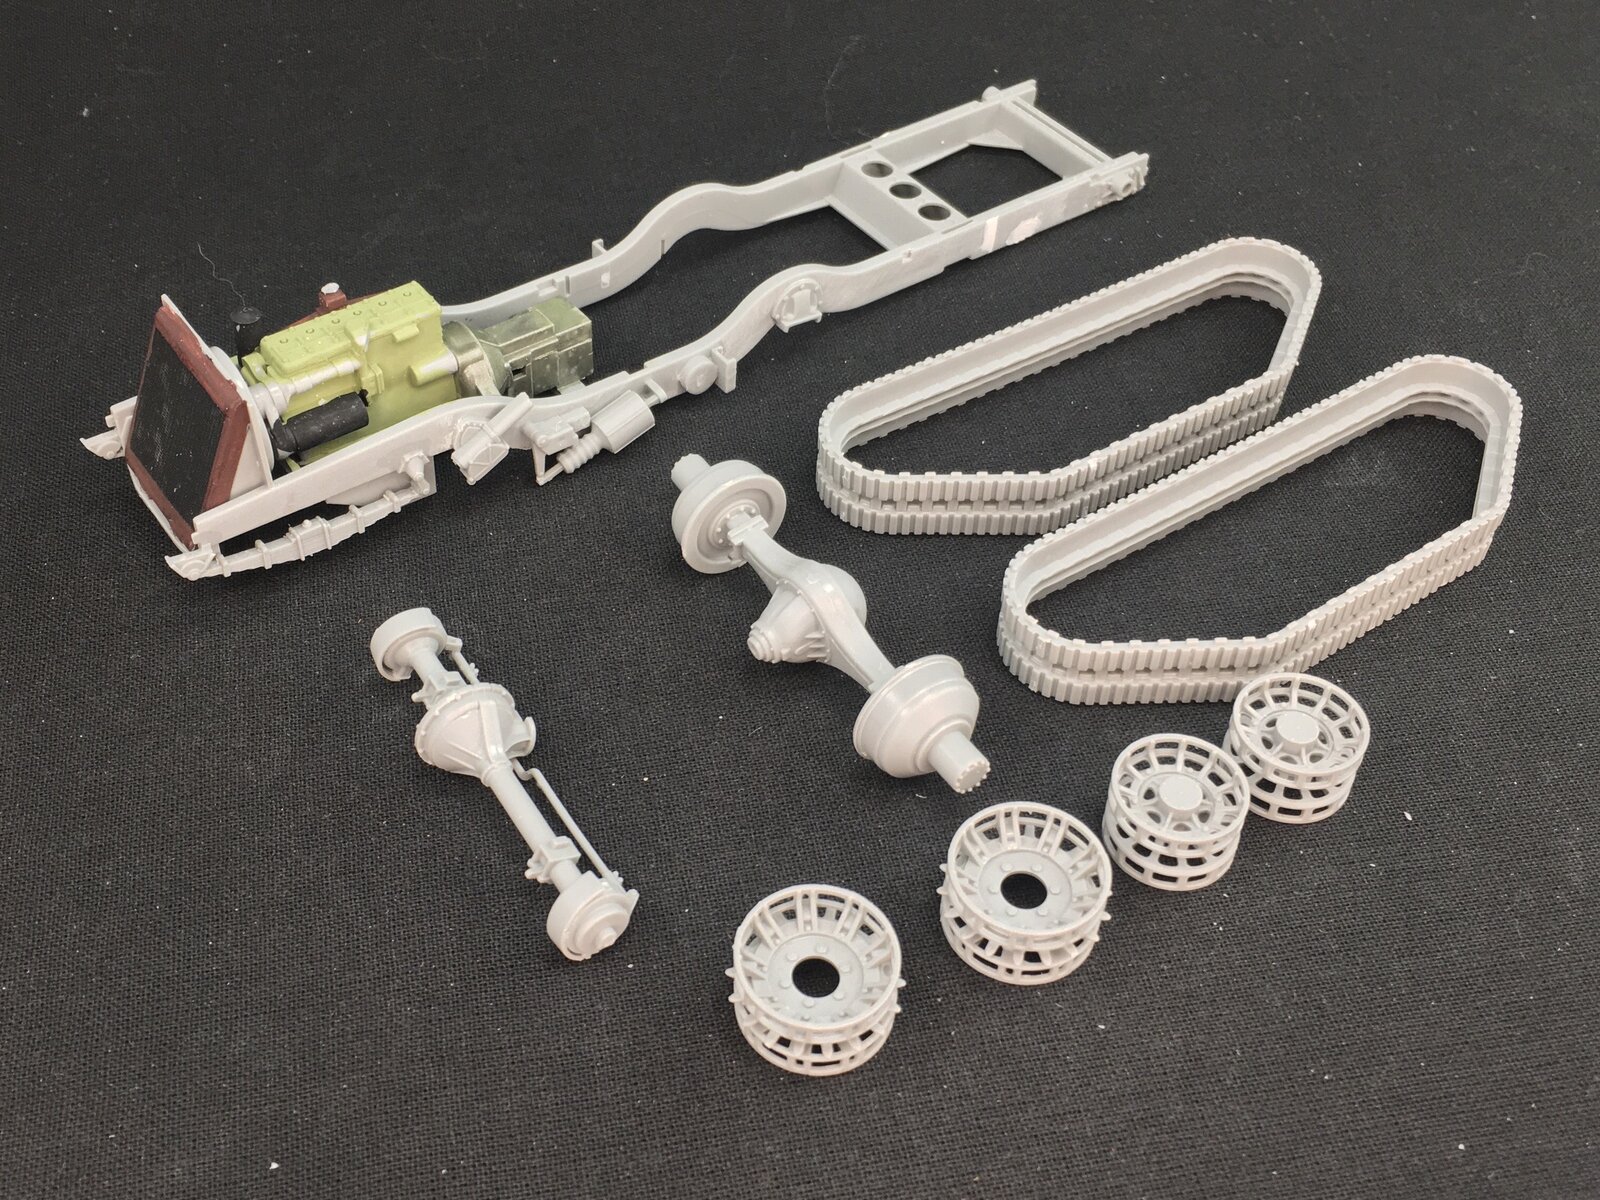
He had put together the chassis with the engine and removed a few other parts from the sprue, painted the engine and radiator, and that was it. It took me a year and a half, I think, before I decided to pull this kit out and build it, which I started doing in late 2023 … Since it's now February of 2025, you can probably tell already that it also stalled for me for a while Anyway, I took the photo above after I put together the axles, sprockets, idlers and tracks.
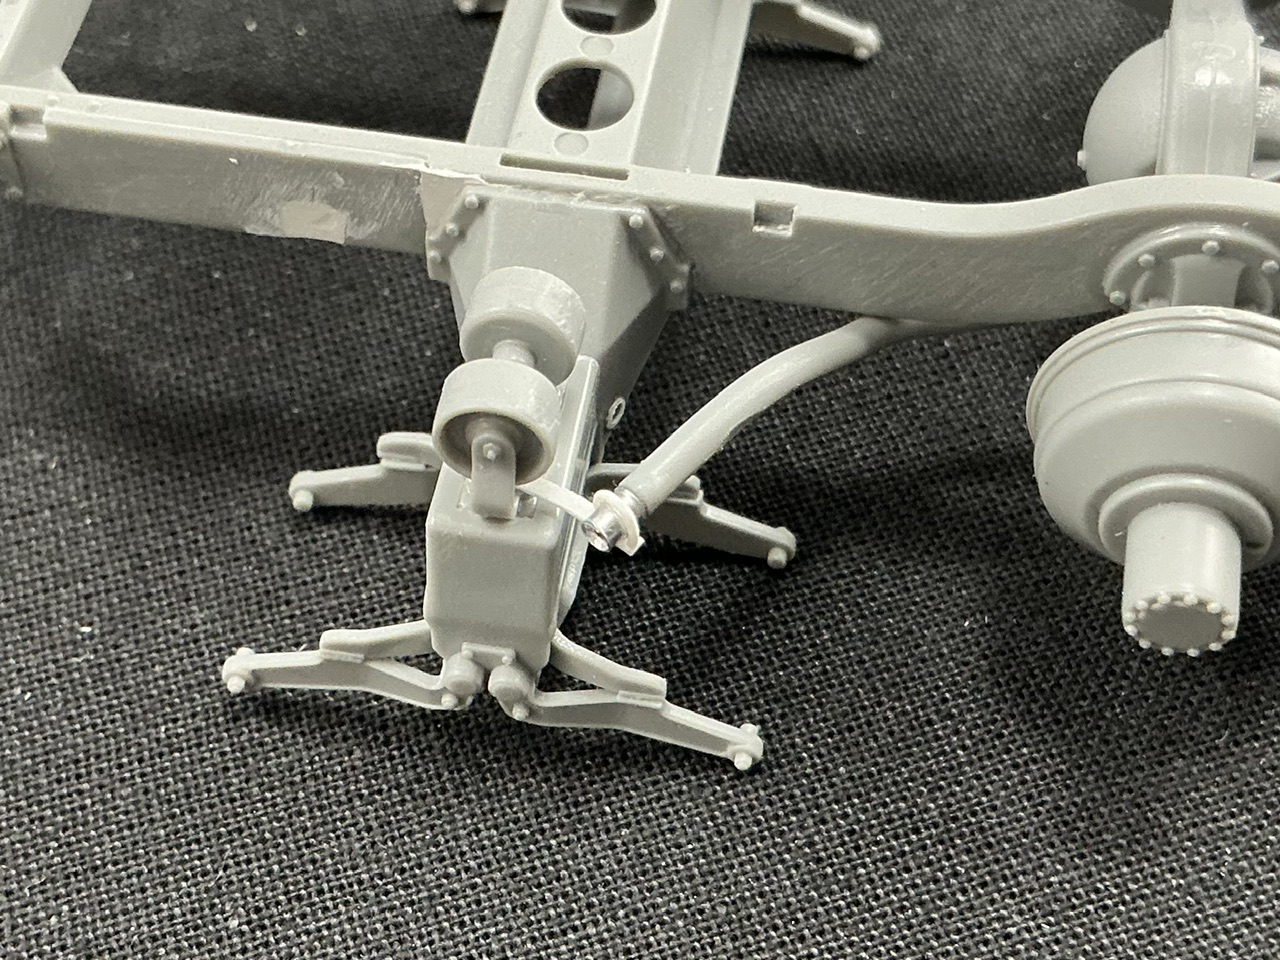
After some thought, I assembled the suspension in a way that would allow me to remove the main components from the model so I could paint them separately:
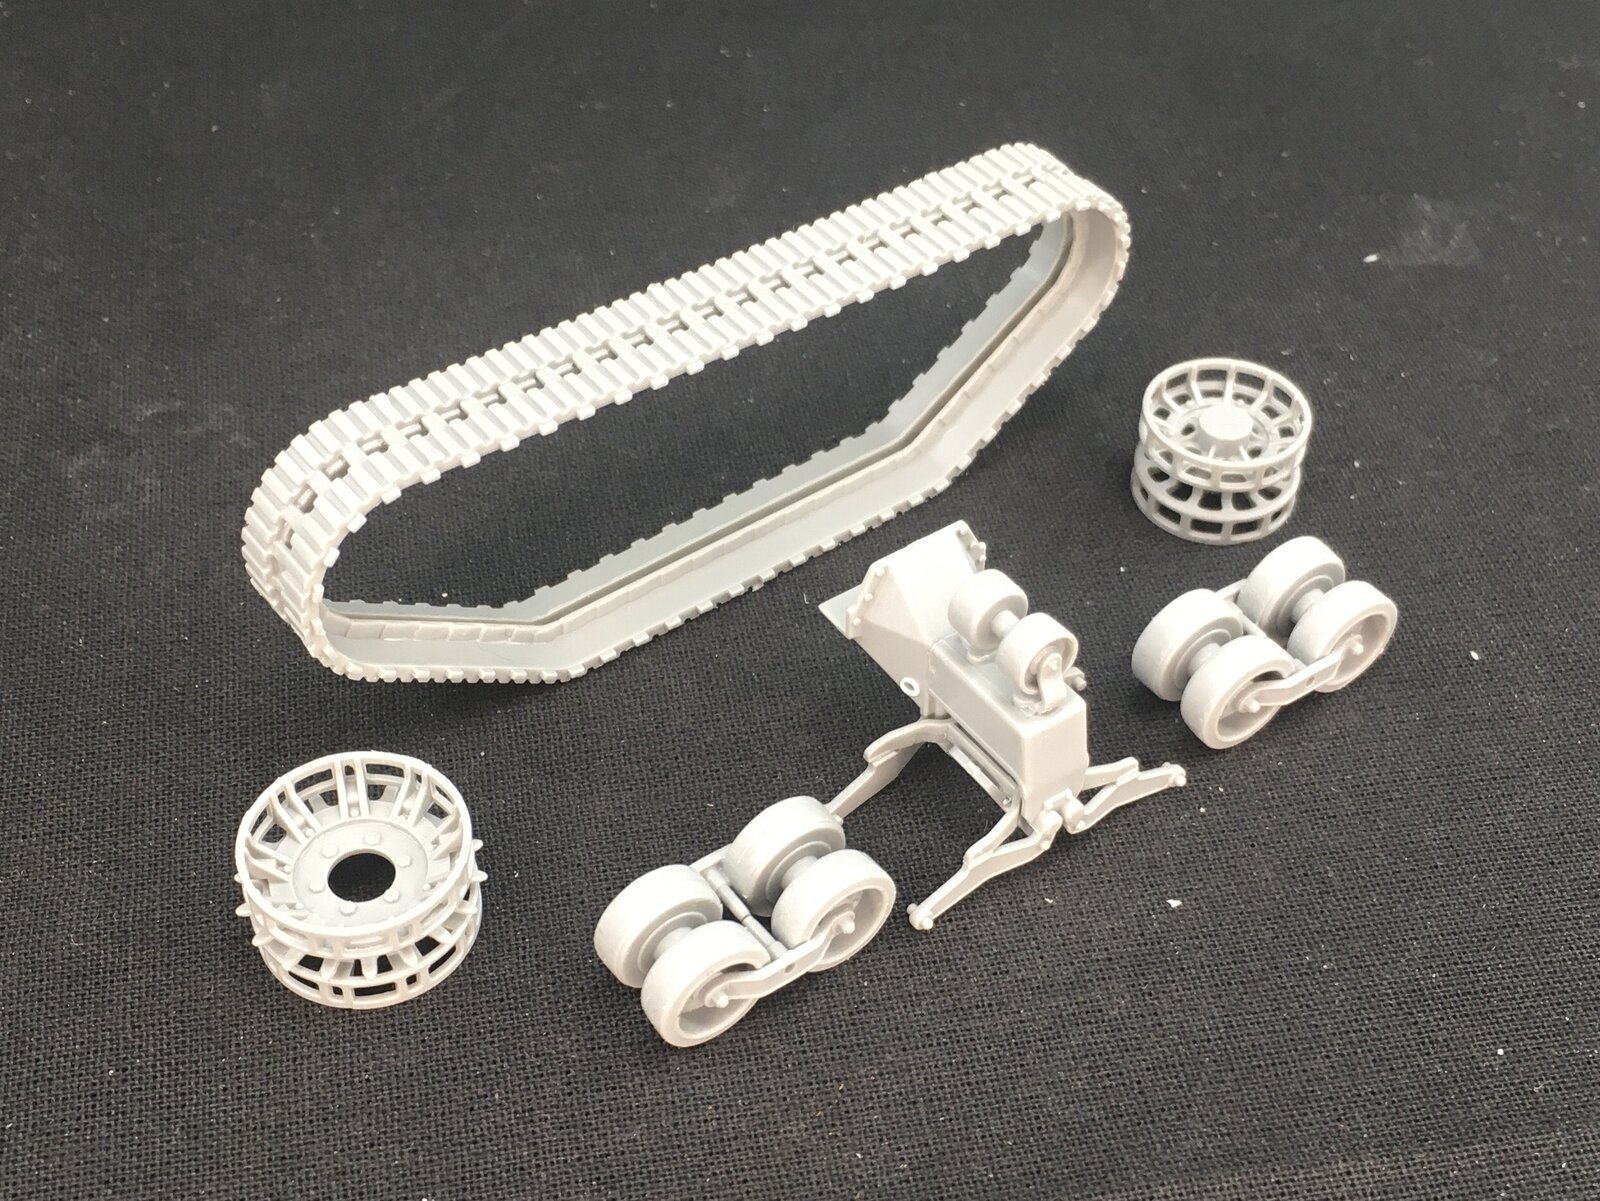
The bogie has the return roller on it, but not the roadwheels, which can click into place between the suspension arms. I also left the sprockets, idlers and tracks loose from the model, though I did later glue the bogies to the chassis. You can see in the photo that I added a little round ring on the side of the bogies (there's another one on the opposite side of this bogie), which I made by glueing a little disc there, that I had made with a punch-and-die set, and then drilling through it. The reason is that the real bogies usually had a hole there on both sides, which Dragon missed.
As I mentioned elsewhere on this forum, the Dragon kit really only provides for a later vehicle (ca. 1943 onward), because there are compensating springs for the idler that weren't on initial vehicles. Removing them is easy enough by cutting off and filling their locating points, and also adding a bit of plastic rod to the idler mounts D31 so that the adjustment screws A15 and A16 reach them:
Small aside here: don't waste your money on Kagero "Topdrawings" books. I had purchased their Armored Personnel Carrier M2/M3/M4 Half-Track book (No. 7084), thinking it would be useful for this model. At first sight, the drawings are quite good. Until you do something like this:
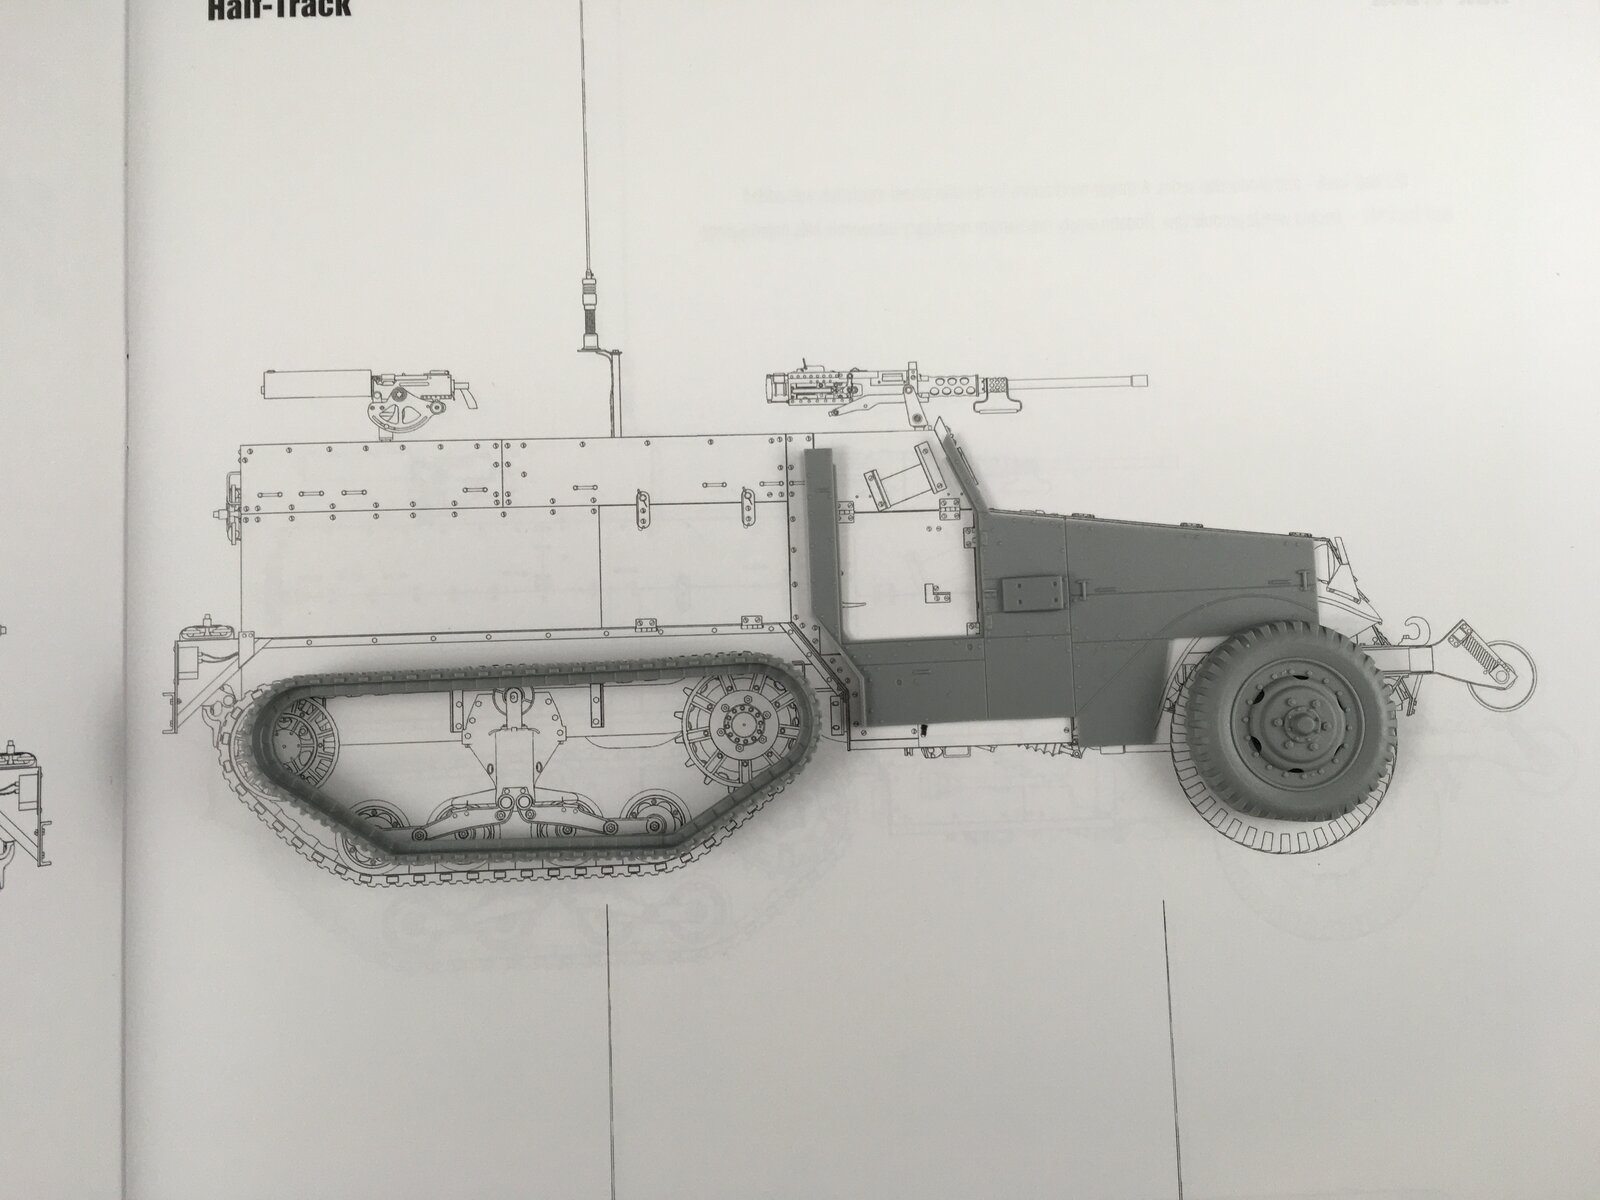
 The height of the engine cover is correct, but all kinds of other dimensions are not. When you then start looking more closely, you'll spot numerous other mistakes that result from sloppy work by the author and/or publisher. For example, all of the M2 and M3 halftracks in the book have a banjo front axle — when the real ones had a split axle there, and only had a banjo axle for the drive sprockets (M5-series halftracks did have a banjo front axle, though). You can also see that they drew them with jerrycan mounts first, and then deleted those for the variants that don't have them — without then drawing the screws that are covered by the jerrycans! There's plenty more detail errors like these that you would not expect in a book that pretends to deliver "top drawings". Oh, and there is no M4 halftrack in the book at all despite it being mentioned on the front cover …
Anyway, I had to remove the jerrycans mounts from the cab (which is why I noticed the missing screws in the drawings) because early halftracks didn't have those:
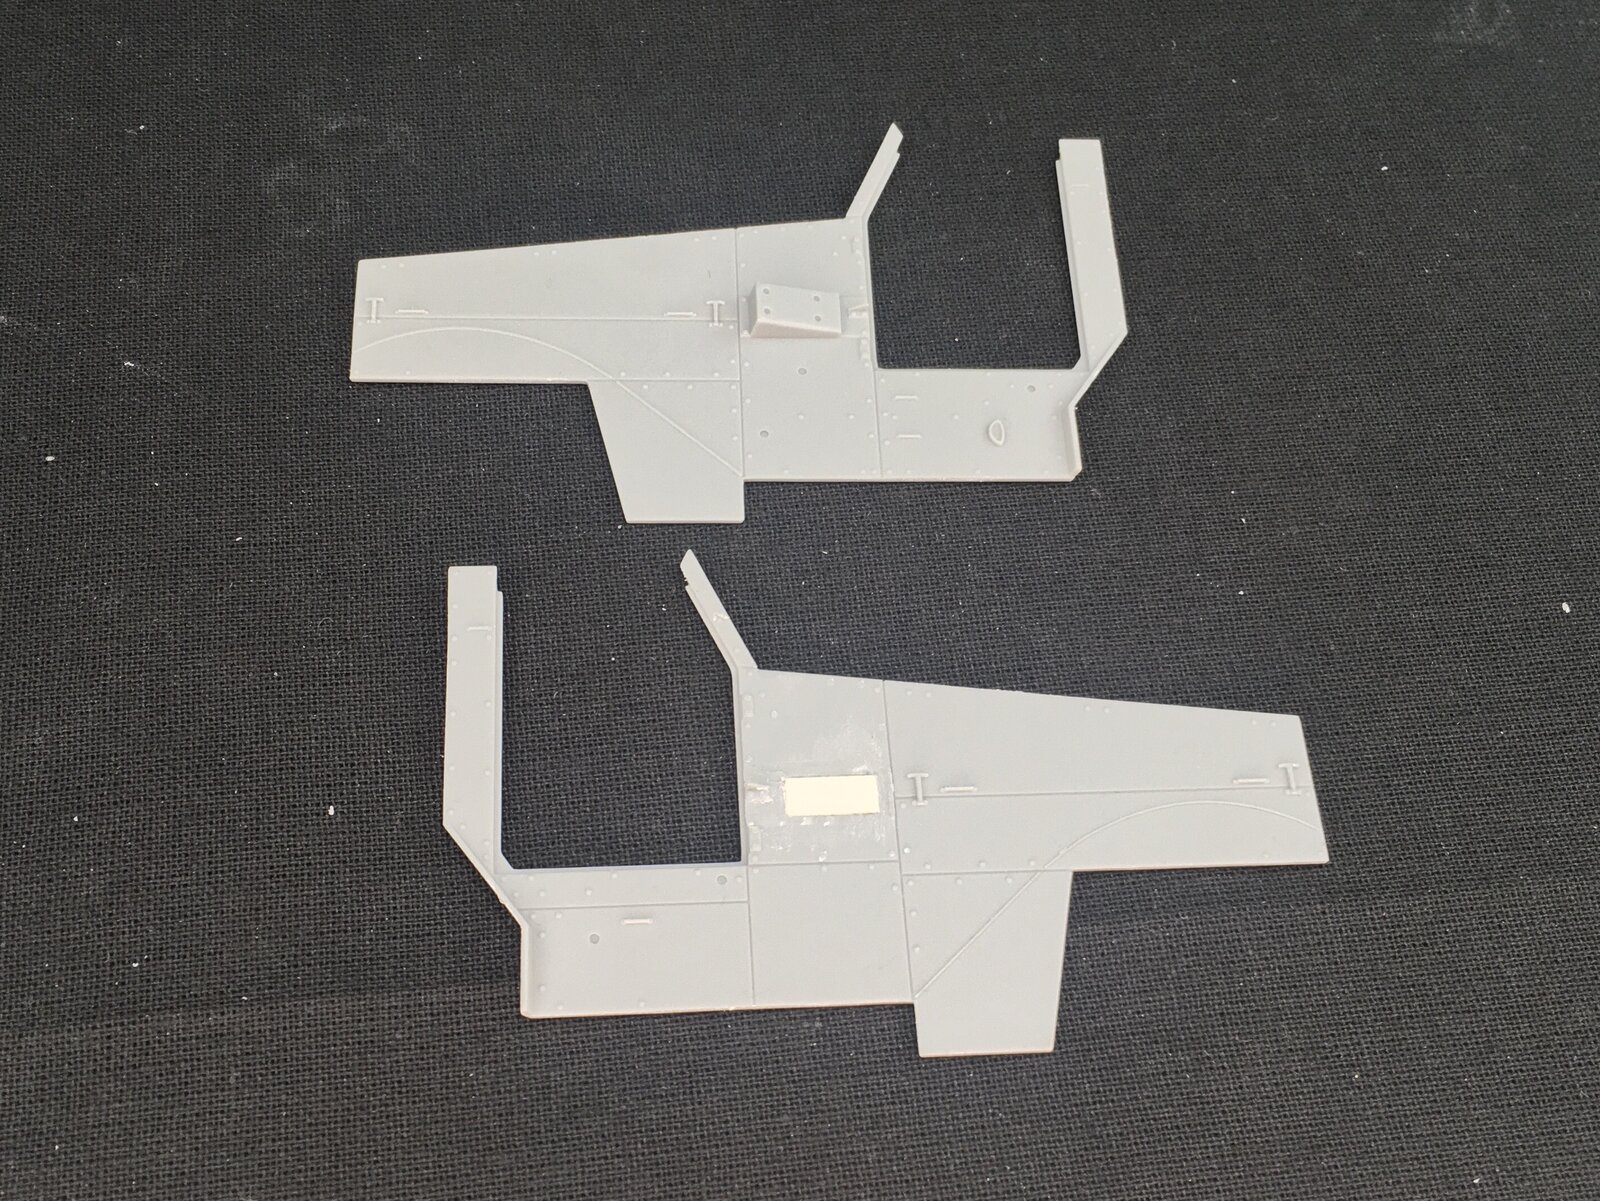
Top as moulded, bottom with the mount removed and the hole filled. This is fairly delicate work if you don't want to obliterate the detail, and I couldn't do with without taking off some of the screws, so I had to reinstate those later with 0.5 mm discs made with my punch-and-die set. By the way, even if you want to build a halftrack with jerrycans, you would do well to remove the mounts because on the real thing, these were made from a single plate of steel that was simply bent at (nearly) right angles to fit against the side of the cab. The top and bottom were completely open, which the kit totally fails to capture, but which is very obvious on a model viewed from above.
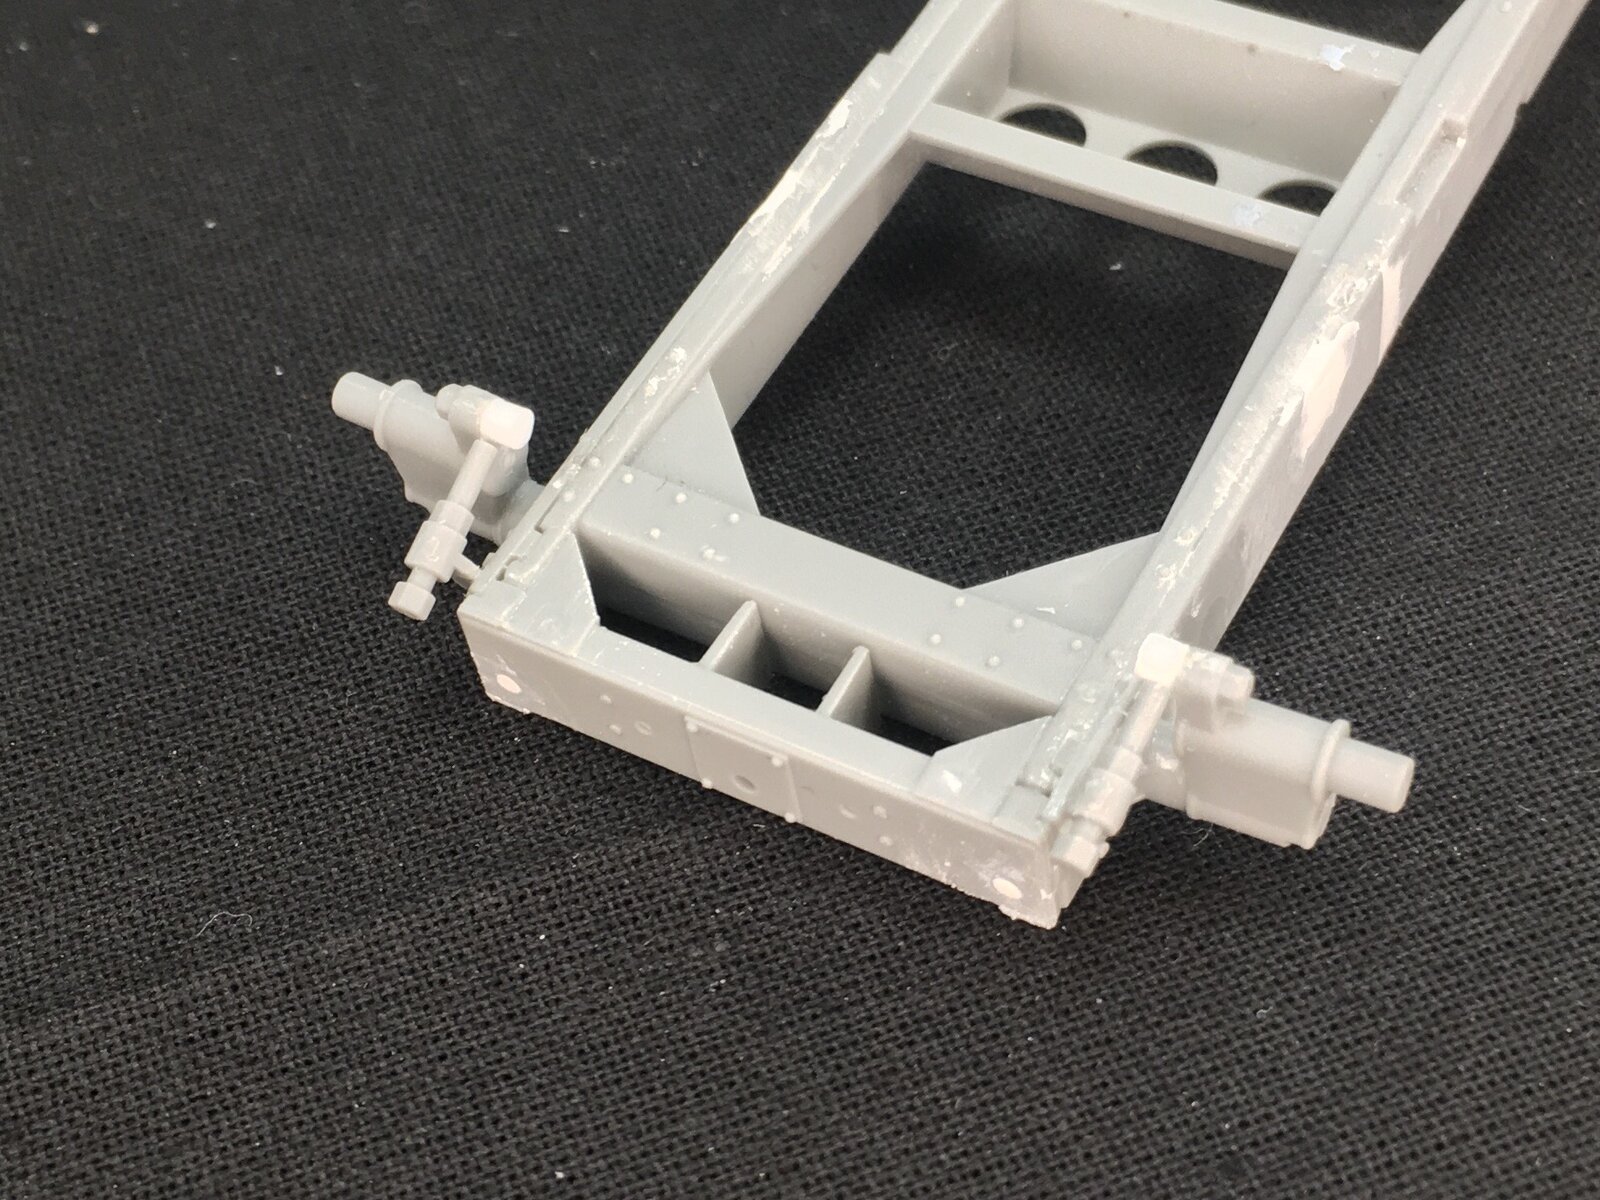
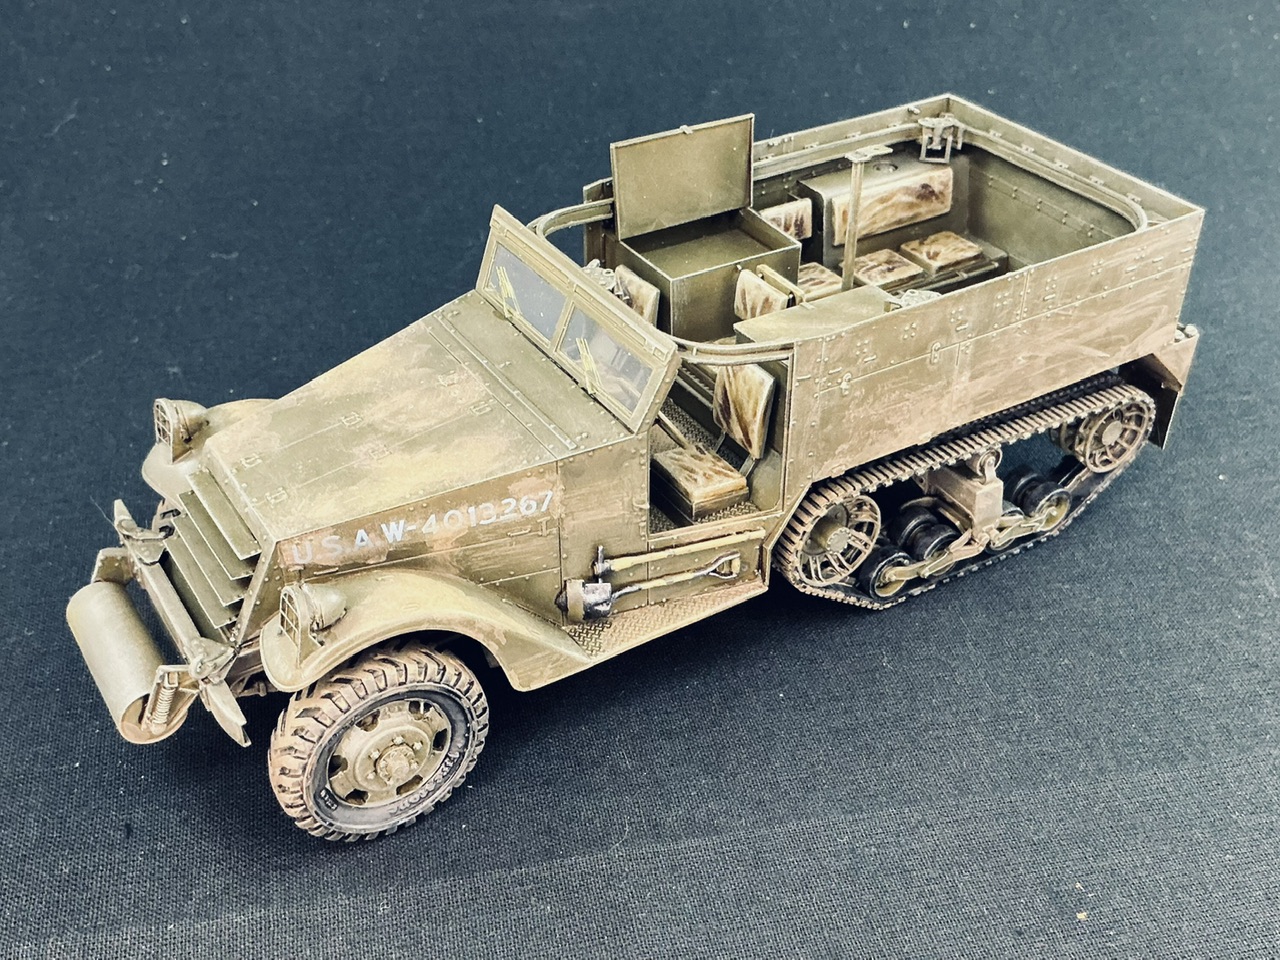
On the front, I added the roller rather than the winch, again because the winch was only used on later halftracks:
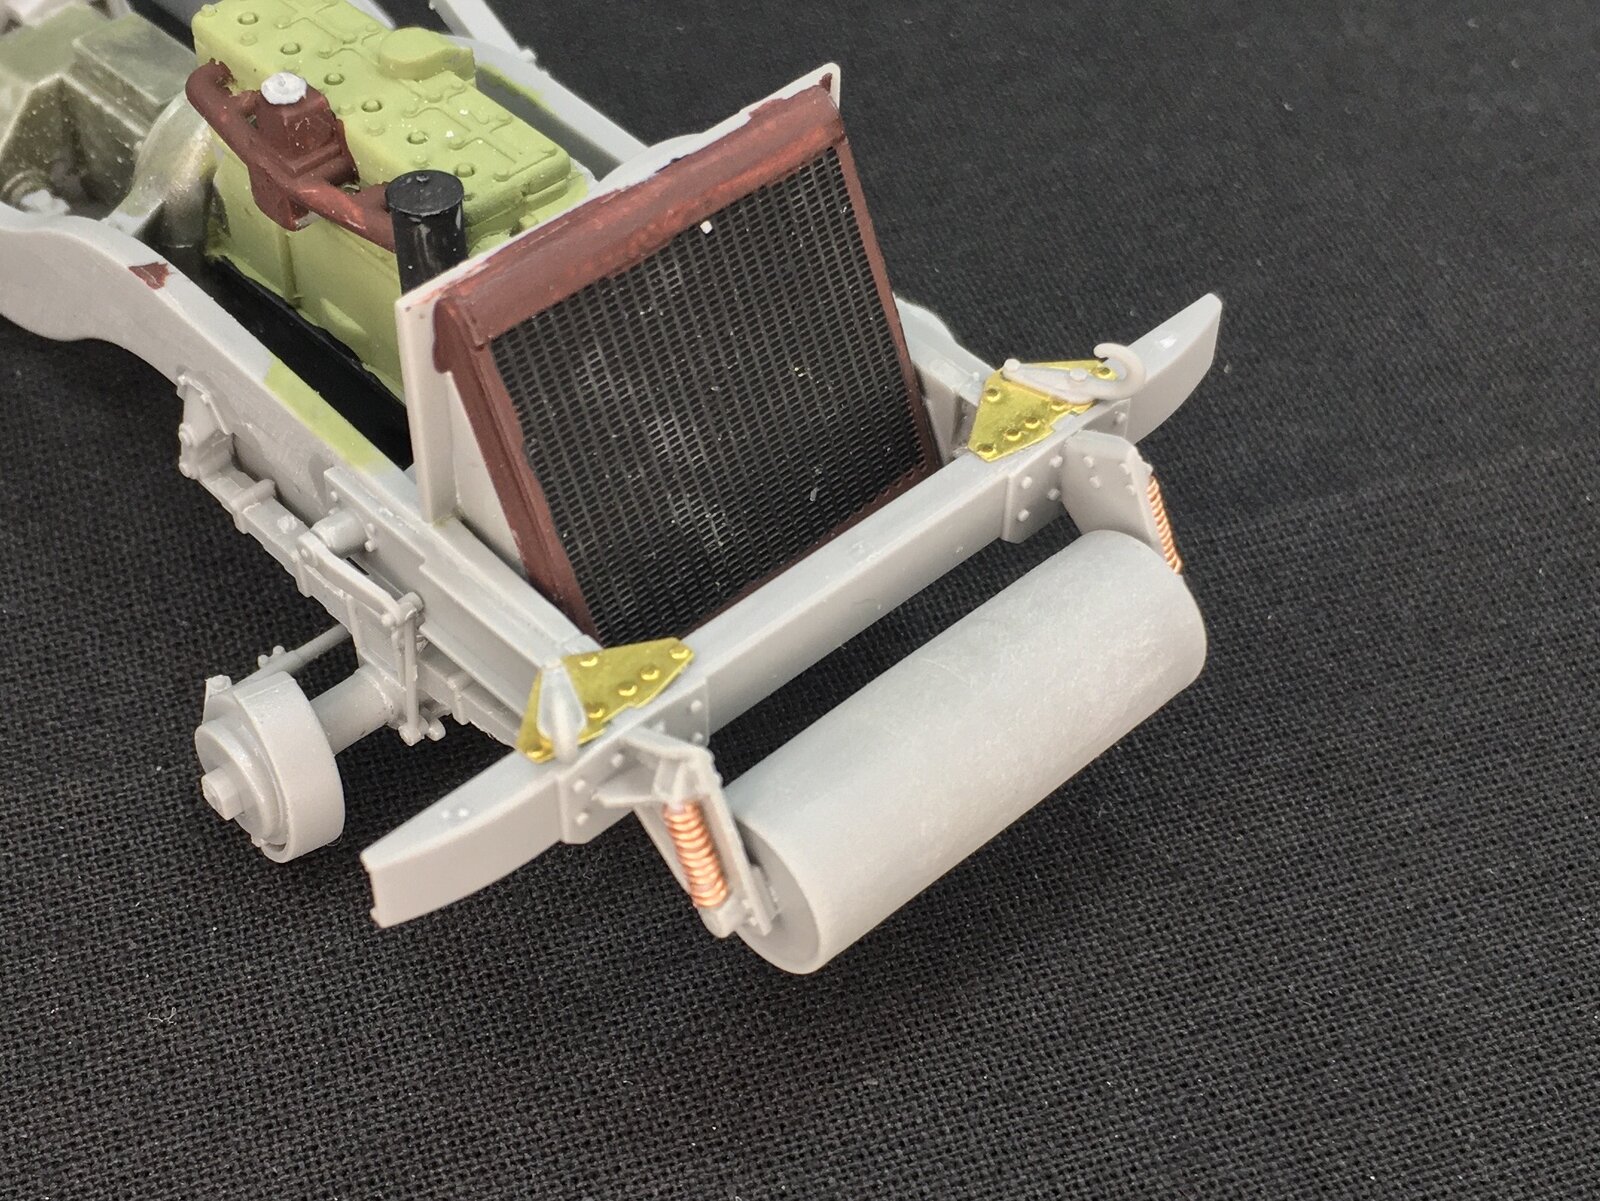
I also cut away the moulded-on springs and replaced them with some copper wire around a bit of plastic rod.
The cab was built mostly per the instructions, though I replaced the moulded-on pedals with some plastic strip and the gearshift lever by a new one bend from brass rod:
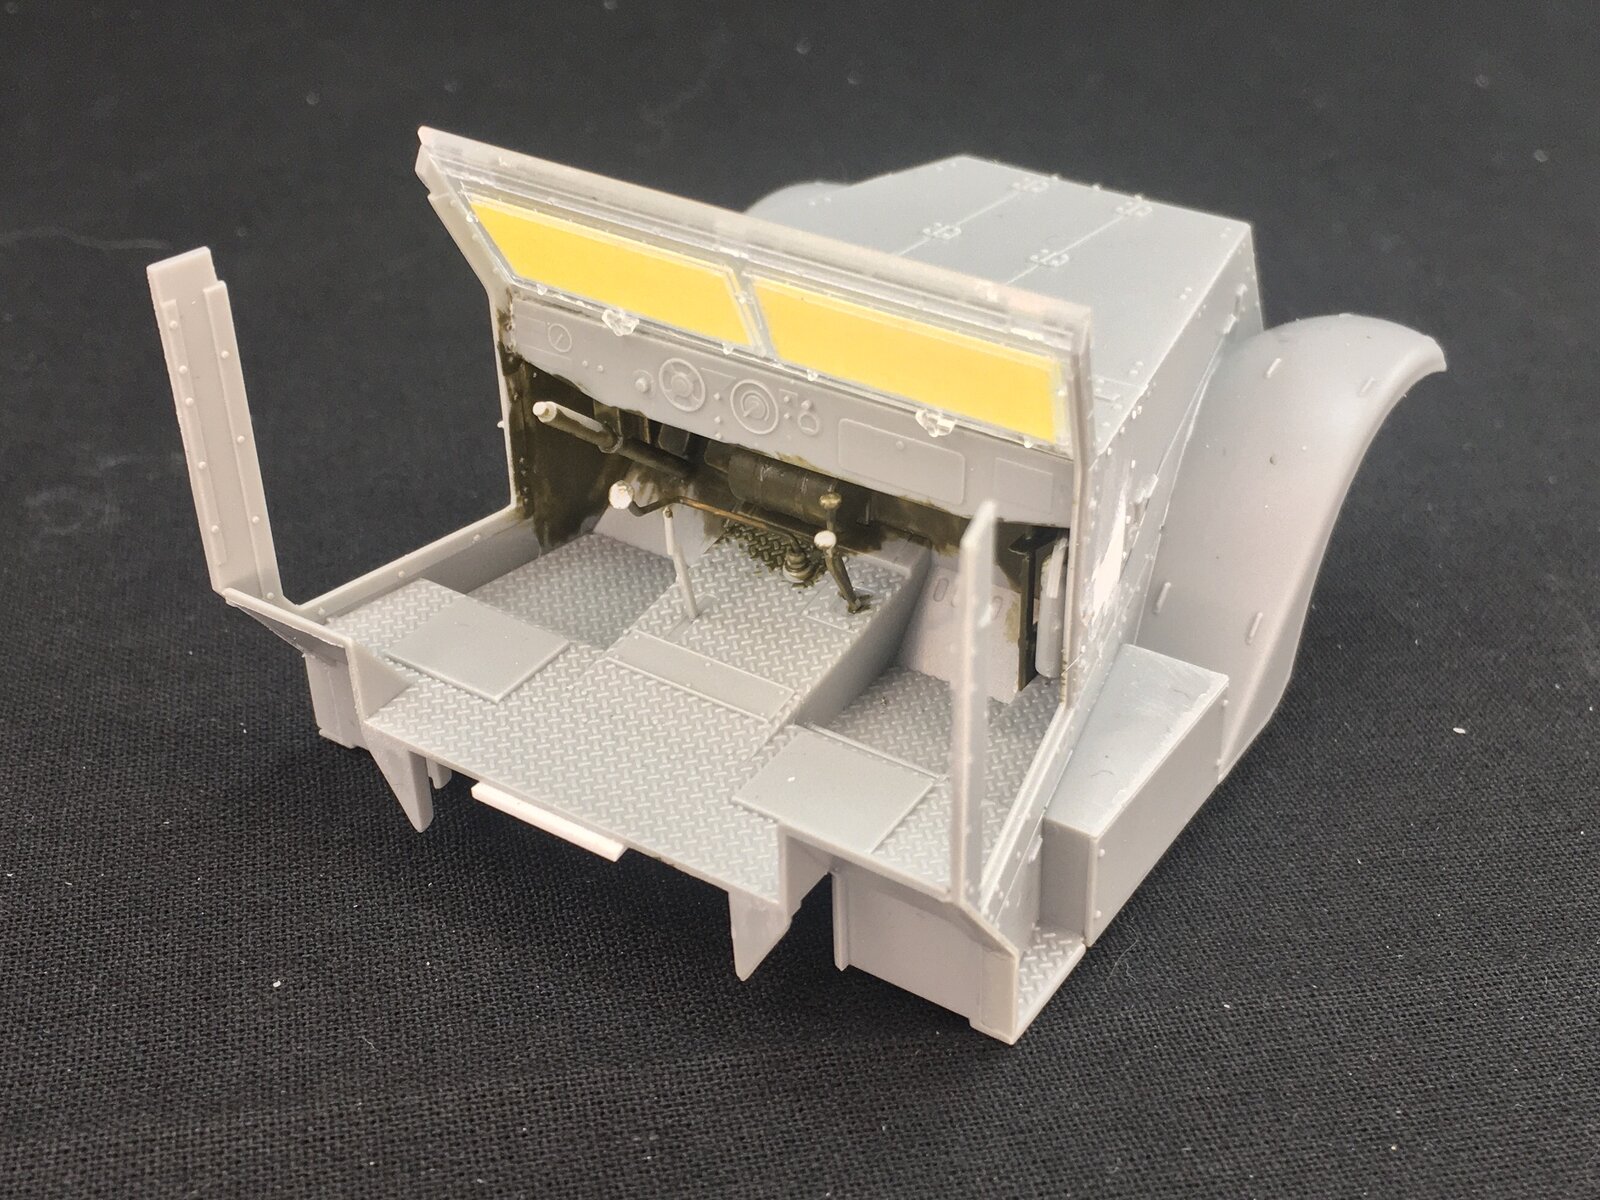
In hindsight, there's no real need to bother with the pedals because you can hardly see them. The gearshift lever, though, is clearly wrong in the kit: it only has two bends, when the real one has three.
And the rear area:
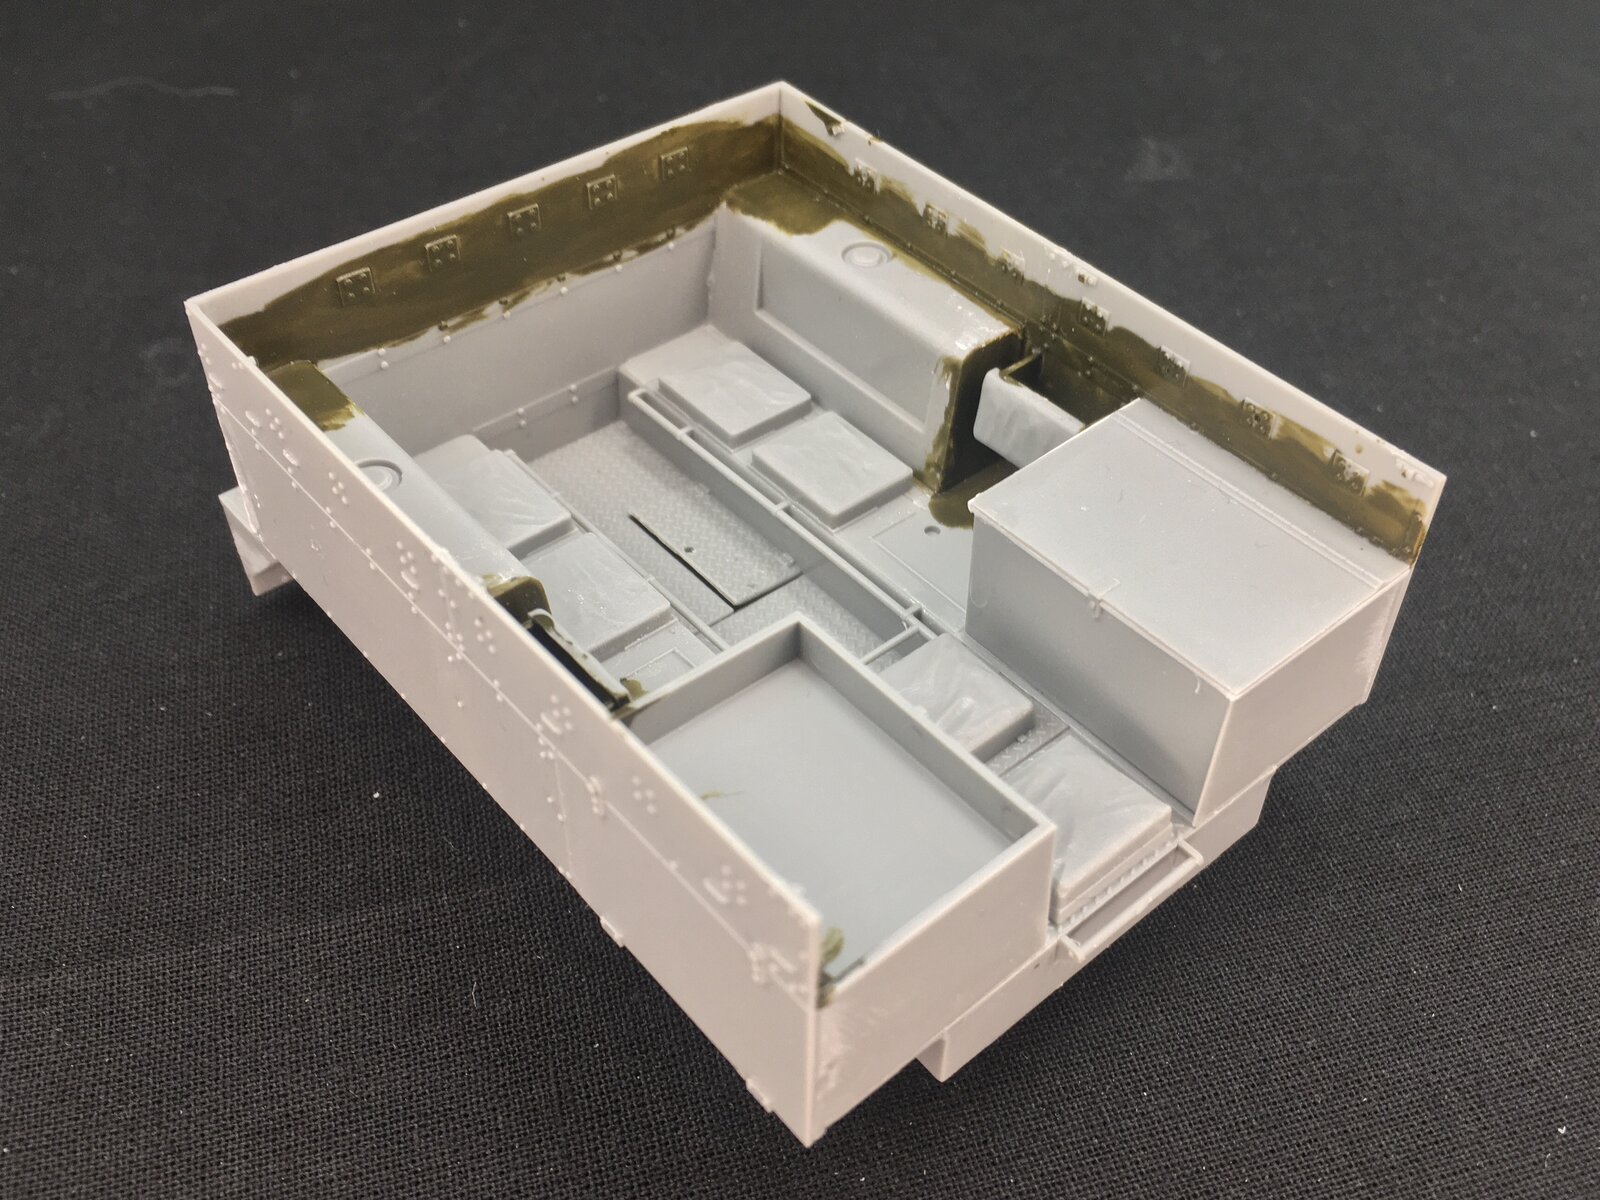
The olive drab paint is because that part will be covered by the machine-gun skate rail, so I've painted it already to ensure there won't be any grey plastic visible after spraying. I've also left off all the seats that I can, to make painting them easier later. On the right-hand stowage bin, I've left off the lid so I can pose it open; for that, I've built a new lid of thin plastic card and strip, but it's not fitted here yet. The one on the left has had plastic strip added around its lid, because Dragon's parts are simply flat and lie on top of the bins, when the real thing had a slight lip around the edge of the lid.
This said, those bins are a great failure on Dragon's part: they mould shelves inside, but there's no way to display any of the bins open! On the M2 and M4 halftrack, the top of the bins opens and there's a hatch in the side of the vehicle to access them from outside. The lids are single parts that incorporate both the fixed and the movable sections, while the hatches are moulded as part of the side armour Luckily, this kit has individual side panels for the M2 and the M2A1 variants, so if you want the outer hatch open, you can cut an opening into one and the hatch out of the other — but that should not have been necessary, had Dragon done slightly better design work.
And here is the machine-gun skate rail:
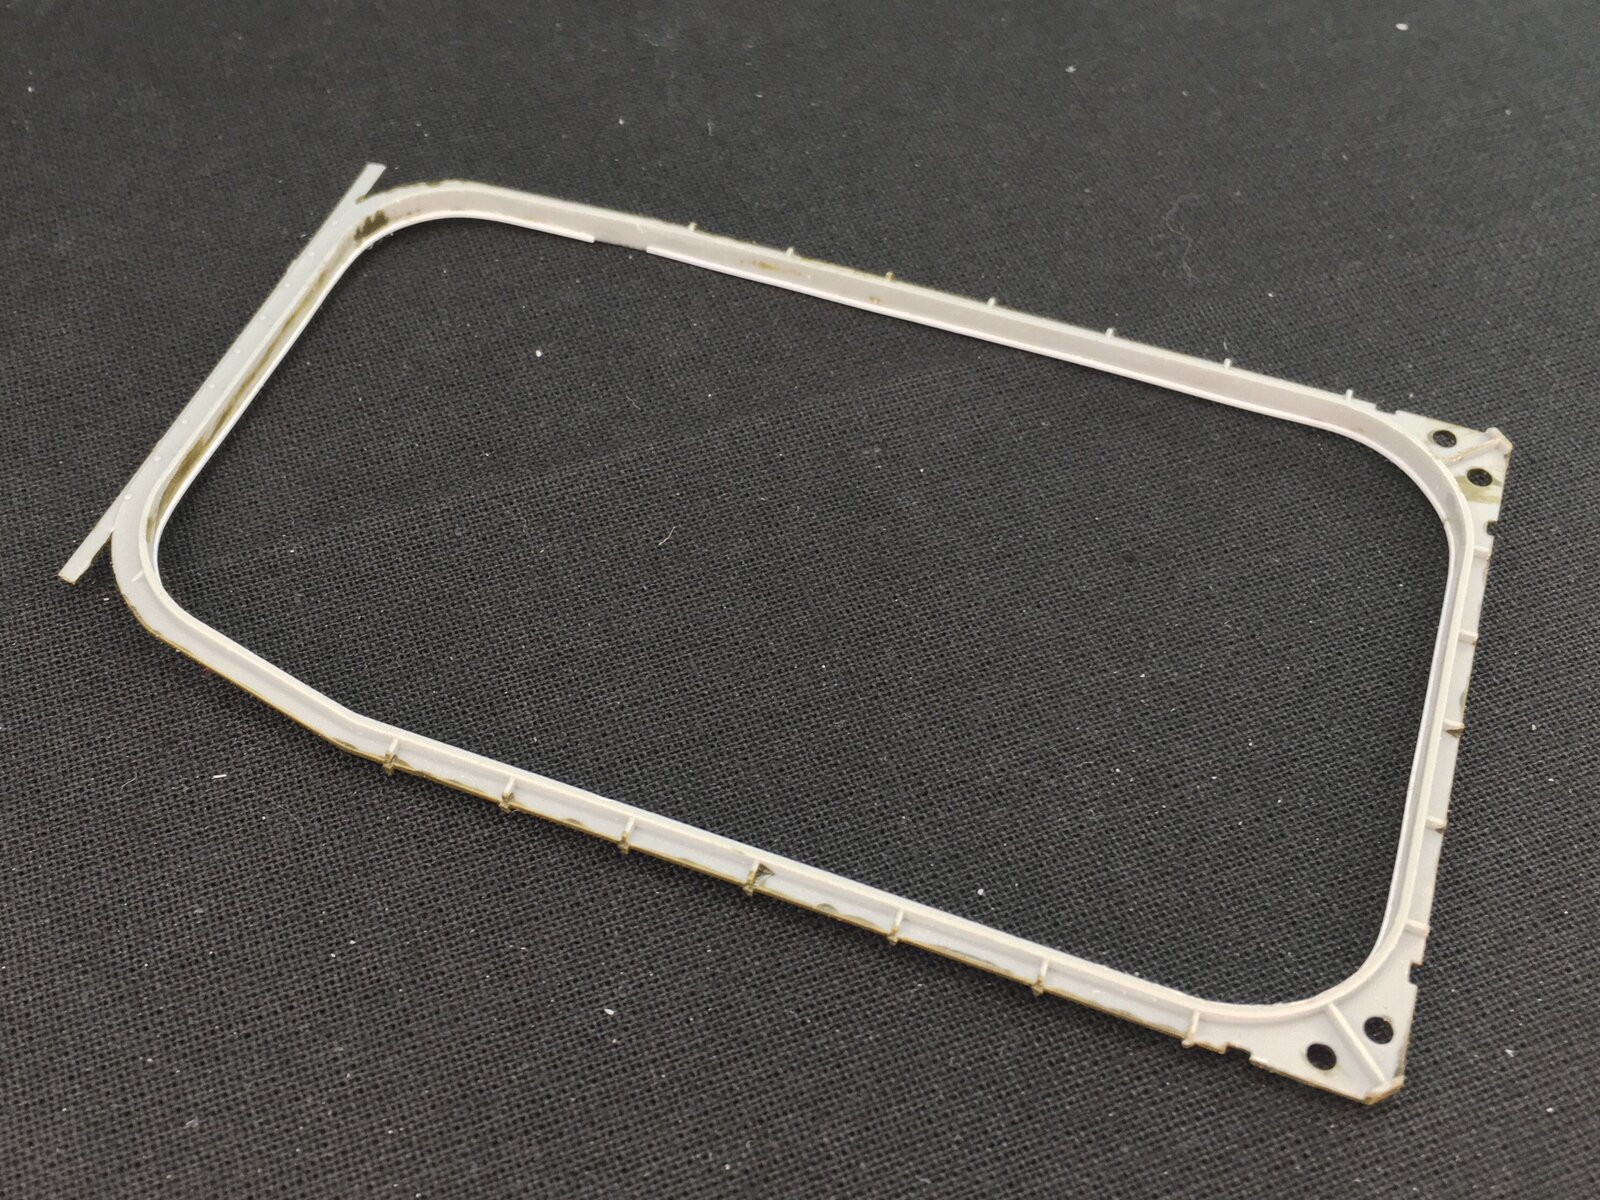
I added some thing plastic strip around the bottom edge (minus a little section that still needed to be done, because the strip was just too short), and after taking the photo, added a second one along the top edge. This because on the real vehicle, those raised lips are very visible, but again, Dragon didn't bother trying to add them.
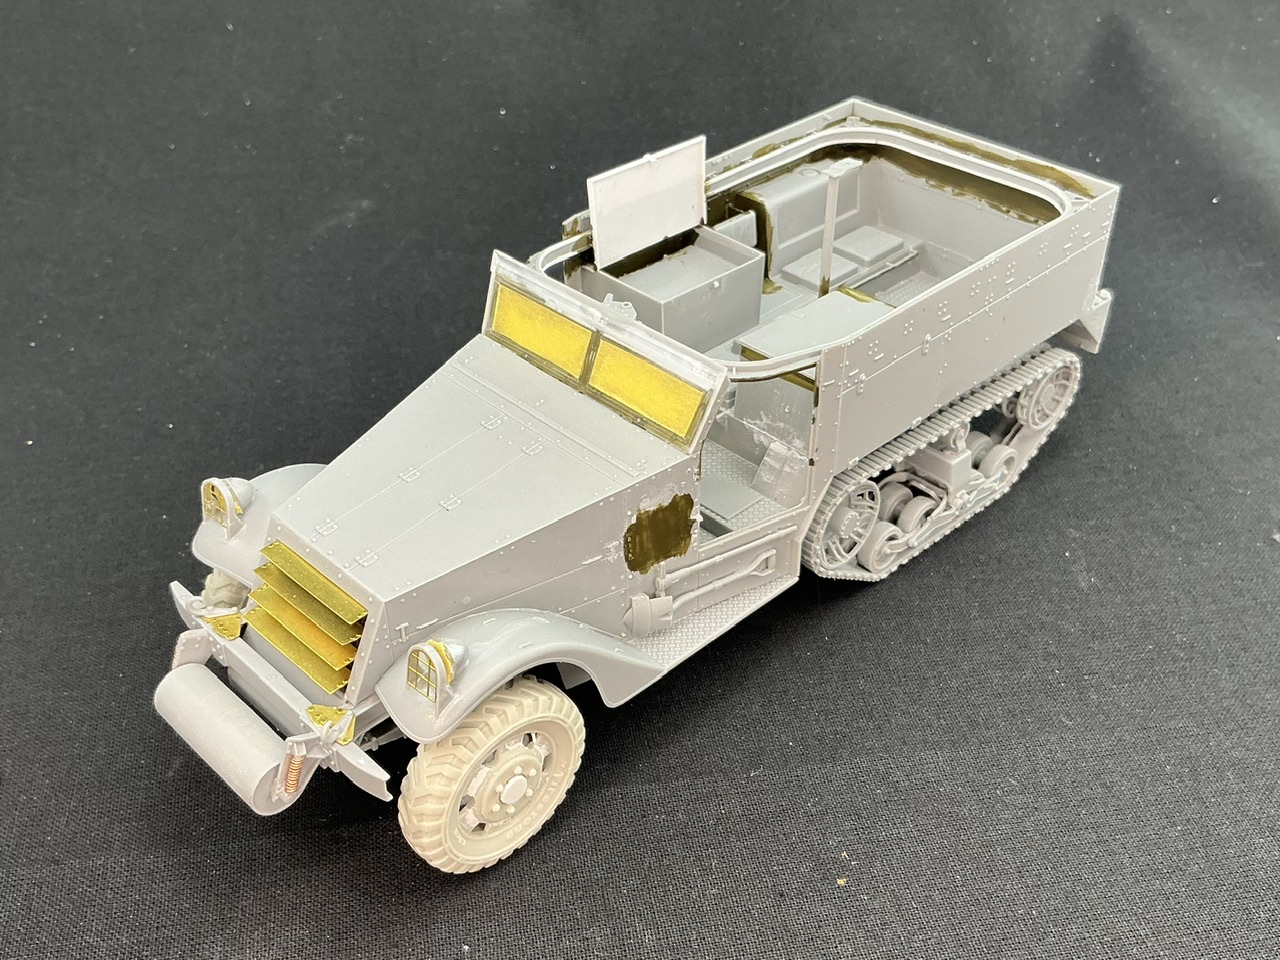
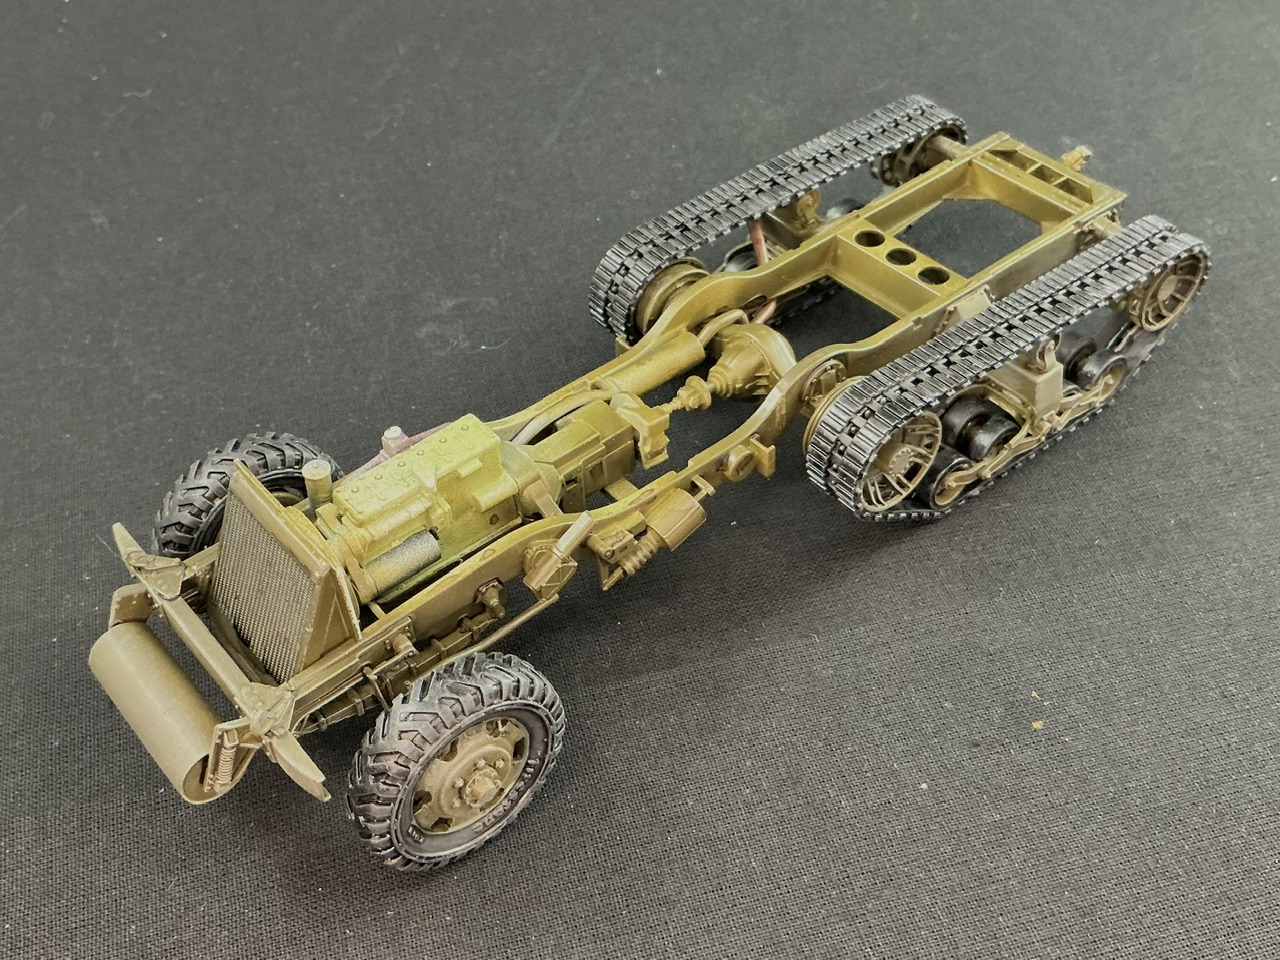
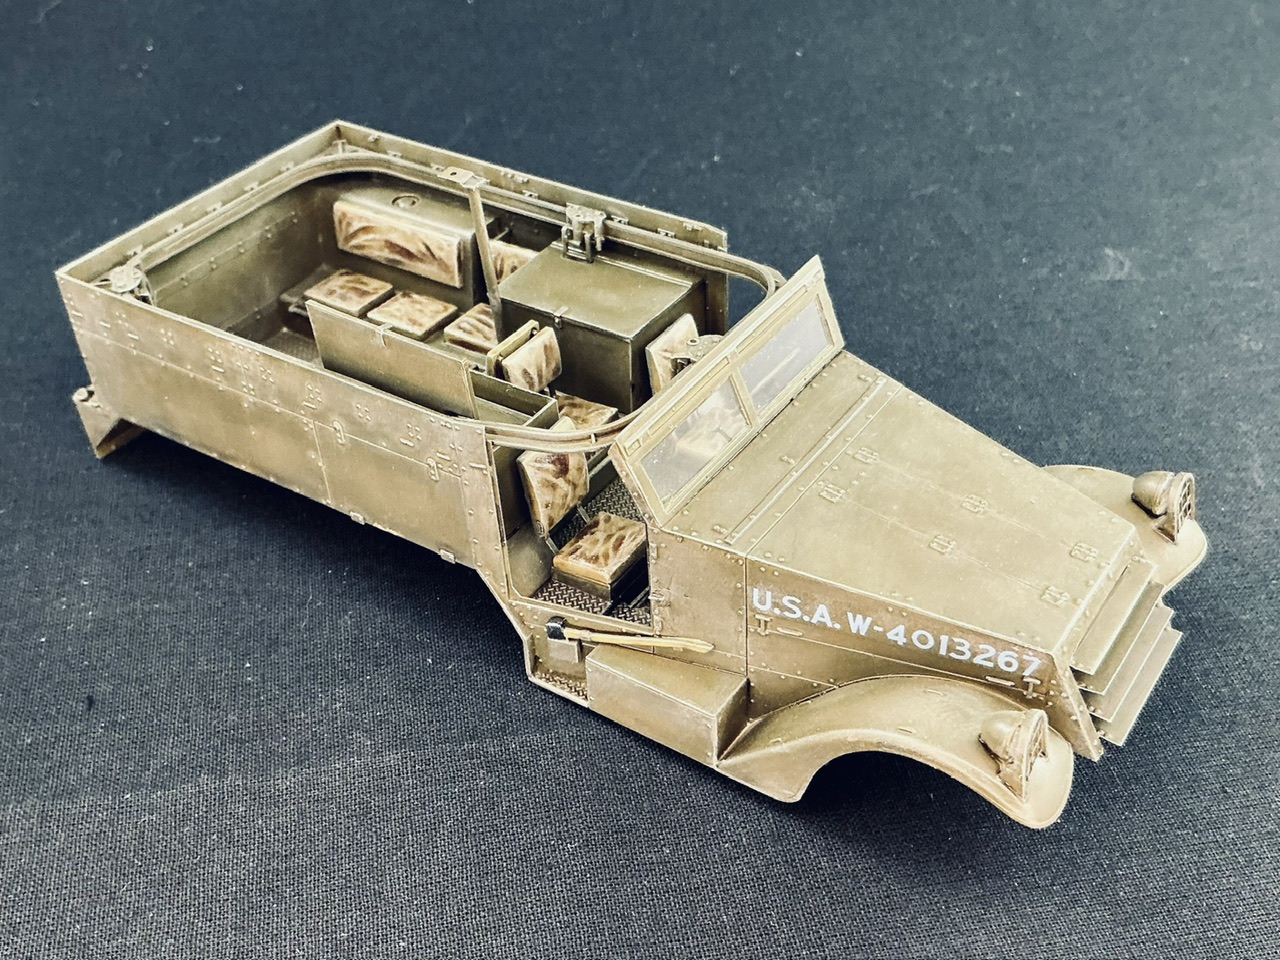
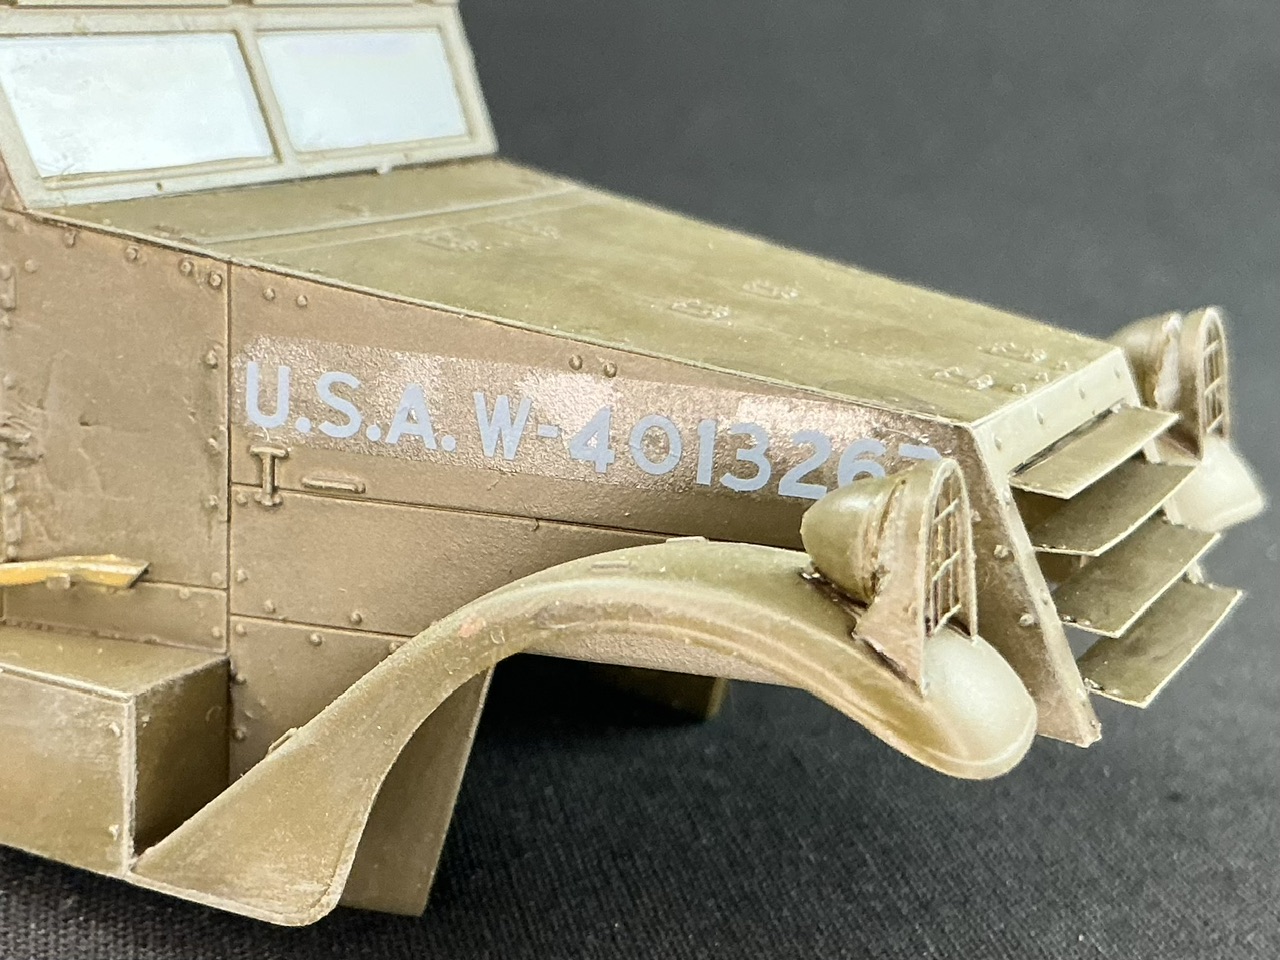
All of the main parts assembled:
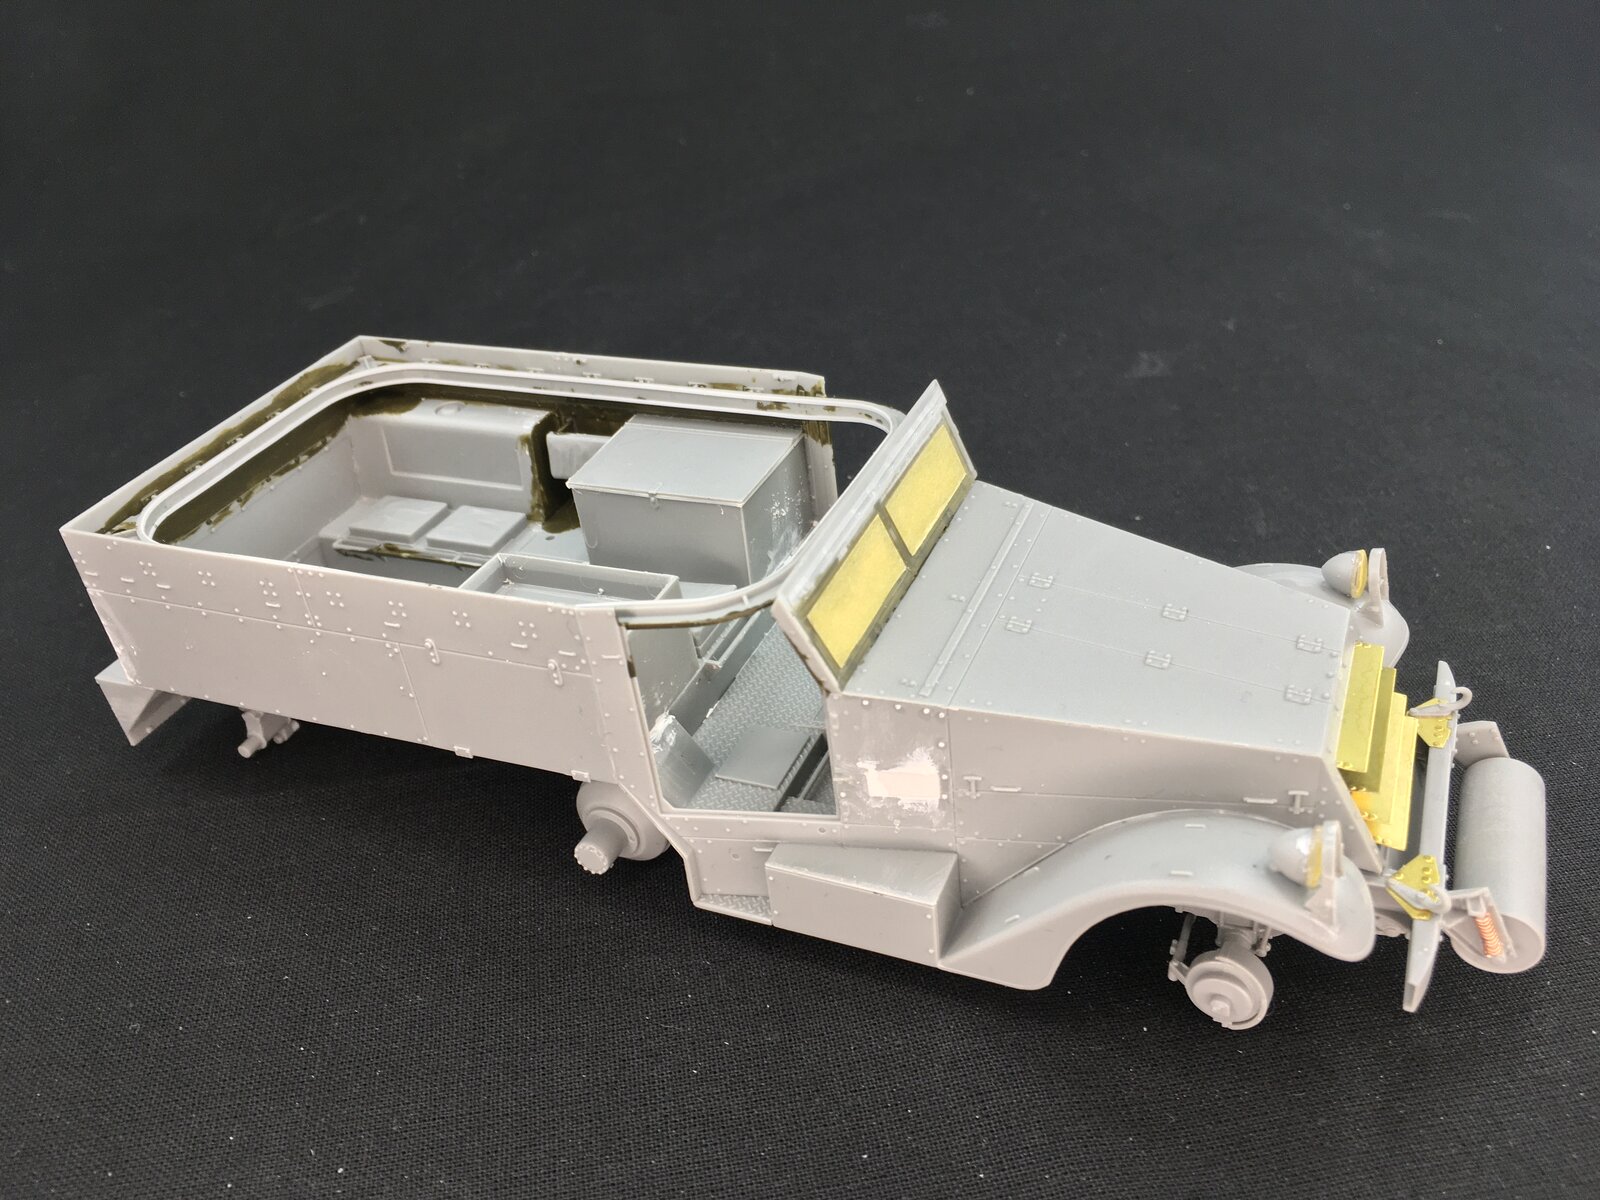
If I'm not mistaken, I've glued the cab, load bed and skate rail together here, and placed them loose on the chassis. (I know that last bit for a fact, but I'm not sure anymore which of the other parts are already glued here )
He had put together the chassis with the engine and removed a few other parts from the sprue, painted the engine and radiator, and that was it. It took me a year and a half, I think, before I decided to pull this kit out and build it, which I started doing in late 2023 … Since it's now February of 2025, you can probably tell already that it also stalled for me for a while
Anyway, I took the photo above after I put together the axles, sprockets, idlers and tracks.After some thought, I assembled the suspension in a way that would allow me to remove the main components from the model so I could paint them separately:
The bogie has the return roller on it, but not the roadwheels, which can click into place between the suspension arms. I also left the sprockets, idlers and tracks loose from the model, though I did later glue the bogies to the chassis. You can see in the photo that I added a little round ring on the side of the bogies (there's another one on the opposite side of this bogie), which I made by glueing a little disc there, that I had made with a punch-and-die set, and then drilling through it. The reason is that the real bogies usually had a hole there on both sides, which Dragon missed.
As I mentioned elsewhere on this forum, the Dragon kit really only provides for a later vehicle (ca. 1943 onward), because there are compensating springs for the idler that weren't on initial vehicles. Removing them is easy enough by cutting off and filling their locating points, and also adding a bit of plastic rod to the idler mounts D31 so that the adjustment screws A15 and A16 reach them:
Small aside here: don't waste your money on Kagero "Topdrawings" books. I had purchased their Armored Personnel Carrier M2/M3/M4 Half-Track book (No. 7084), thinking it would be useful for this model. At first sight, the drawings are quite good. Until you do something like this:
The height of the engine cover is correct, but all kinds of other dimensions are not. When you then start looking more closely, you'll spot numerous other mistakes that result from sloppy work by the author and/or publisher. For example, all of the M2 and M3 halftracks in the book have a banjo front axle — when the real ones had a split axle there, and only had a banjo axle for the drive sprockets (M5-series halftracks did have a banjo front axle, though). You can also see that they drew them with jerrycan mounts first, and then deleted those for the variants that don't have them — without then drawing the screws that are covered by the jerrycans! There's plenty more detail errors like these that you would not expect in a book that pretends to deliver "top drawings". Oh, and there is no M4 halftrack in the book at all despite it being mentioned on the front cover …Anyway, I had to remove the jerrycans mounts from the cab (which is why I noticed the missing screws in the drawings) because early halftracks didn't have those:
Top as moulded, bottom with the mount removed and the hole filled. This is fairly delicate work if you don't want to obliterate the detail, and I couldn't do with without taking off some of the screws, so I had to reinstate those later with 0.5 mm discs made with my punch-and-die set. By the way, even if you want to build a halftrack with jerrycans, you would do well to remove the mounts because on the real thing, these were made from a single plate of steel that was simply bent at (nearly) right angles to fit against the side of the cab. The top and bottom were completely open, which the kit totally fails to capture, but which is very obvious on a model viewed from above.
On the front, I added the roller rather than the winch, again because the winch was only used on later halftracks:
I also cut away the moulded-on springs and replaced them with some copper wire around a bit of plastic rod.
The cab was built mostly per the instructions, though I replaced the moulded-on pedals with some plastic strip and the gearshift lever by a new one bend from brass rod:
In hindsight, there's no real need to bother with the pedals because you can hardly see them. The gearshift lever, though, is clearly wrong in the kit: it only has two bends, when the real one has three.
And the rear area:
The olive drab paint is because that part will be covered by the machine-gun skate rail, so I've painted it already to ensure there won't be any grey plastic visible after spraying. I've also left off all the seats that I can, to make painting them easier later. On the right-hand stowage bin, I've left off the lid so I can pose it open; for that, I've built a new lid of thin plastic card and strip, but it's not fitted here yet. The one on the left has had plastic strip added around its lid, because Dragon's parts are simply flat and lie on top of the bins, when the real thing had a slight lip around the edge of the lid.
This said, those bins are a great failure on Dragon's part: they mould shelves inside, but there's no way to display any of the bins open! On the M2 and M4 halftrack, the top of the bins opens and there's a hatch in the side of the vehicle to access them from outside. The lids are single parts that incorporate both the fixed and the movable sections, while the hatches are moulded as part of the side armour
Luckily, this kit has individual side panels for the M2 and the M2A1 variants, so if you want the outer hatch open, you can cut an opening into one and the hatch out of the other — but that should not have been necessary, had Dragon done slightly better design work.And here is the machine-gun skate rail:
I added some thing plastic strip around the bottom edge (minus a little section that still needed to be done, because the strip was just too short), and after taking the photo, added a second one along the top edge. This because on the real vehicle, those raised lips are very visible, but again, Dragon didn't bother trying to add them.
All of the main parts assembled:
If I'm not mistaken, I've glued the cab, load bed and skate rail together here, and placed them loose on the chassis. (I know that last bit for a fact, but I'm not sure anymore which of the other parts are already glued here
)




![Pampers Sensitive Baby Wipes, Clinically Proven, Fragrance Free, Unscented, Water Based, Hypoallergenic, Multi-Use, Hand Wipes 336 Wipes Total (6X Flip-Top Packs) [Packaging May Vary]](https://m.media-amazon.com/images/I/41KLBHu9CAL._SL500_.jpg)







 It's an easy enhancement — the hardest bit was cutting away the moulded-on springs without causing damage.