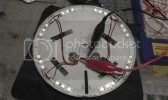
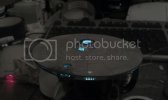
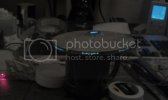
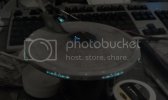
Lighted 1/1000 Refit Enterprise - pic heavy!!

JediPuju

New Member
Joined
Jun 9, 2009
Messages
47
'Sup. ;D

I decided to take a break on the mig 29 and get back into some sci-fi . Here I go with the 1/1000 PL Enterprise!
I got the Paragrafix set with this, which has been great.
Ive done a fair amount already, so Ill post my progress so far. Comments / Suggestions are welcome!

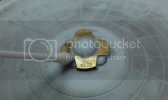
Installed the photo-etched main sensor array. The PE is very easy to bend, it has an etched line on the reverse you can follow. I used 2 10A blades on a metal coaster to bend them. They were then attached with some CA after much hacking away at the original part. Mr.Surfacer 500 was then used to putty in the gaps. I smoothed and cleaned the putty with a cotton bud soaked in cellulose thinners and rotated it into the recesses, which did a nice job:
IMAG0011.jpg

The PE set also includes very handy window templates for drilling the windows out. I didnt use the rec deck template, as I dont have a file small enough! I opted for filing out the whole area and scratching the windows out of styrene strip. First I added a bar across:
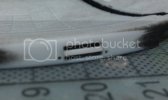
IMAG0012.jpg

Then I jabbed in 6 knife shapes and glued them in:
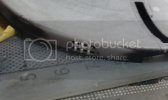
IMAG0016.jpg

Then sanded flush:

IMAG0018.jpg

Officer's lounge removed, and PE part put in:
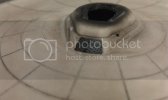
IMAG0007.jpg

IMAG0014.jpg
 
Hey, nice start! I'm liking those PE parts and you've implemented them superbly!
 
Hey thanks Igard!

Sorry This is going to be a long one so Im going to split the posts. Some of these pics are a bit rubbish im afraid :mad:

I put some FO in the neck:

IMAG0003-1.jpg

Probably a bad Idea but im stuck with it now!

I then cut out the impulse engines, ready to receive some PE action later on. There was a huge sink mark on this part, it will be filled. Im probably going to back these parts with some white styrene which should look the part. We'll get to that later.

IMAG0009.jpg

Ok now for some fun!

Ive used SMD led strip for window lighting, in 4 pairs, all in parallel. I made 2 rails with a couple of globs of green stuff and soldered everything to them. The strip is very bright so I think in going to tone down the voltage a bit, but this stuff is great. ;D

IMAG0032.jpg

Meanwhile, Ive been prototyping the strobe circuit:

Enterprise Strobes

LOL @ my jumbled mess of wires he hee!
 
Nice work so far, the photo etch does the trick!!

What are you using for timing chips? A 555?
 
Grendels said:
Nice work so far, the photo etch does the trick!!

What are you using for timing chips? A 555?

thanks Grendels ! - Yes its two 555's I followed the circuit here:

http://www.colosseumbuilders.com/enterprise/circuits.htm

Im currently working on using a PIC12F675 to do the same thing on one chip, which will be ideal for a model so small. Ill be sure to post up if I have any success, I'm learning PIC assembler and Ive got an arduino nano on hold to learn also. However, this works pretty well so Im probably going to put the electronics in the base.

I'm kind of using this as a precursor to the 1/350 as I want to design and build my own lighting rig and software.
Plus once I've got the hang of programming these little micro controllers, It will open the door to all sorts of stuff I can put in models :D
 
JediPuju said:
Grendels said:
Nice work so far, the photo etch does the trick!!

What are you using for timing chips? A 555?

thanks Grendels ! - Yes its two 555's I followed the circuit here:

http://www.colosseumbuilders.com/enterprise/circuits.htm

Im currently working on using a PIC12F675 to do the same thing on one chip, which will be ideal for a model so small. Ill be sure to post up if I have any success, I'm learning PIC assembler and Ive got an arduino nano on hold to learn also. However, this works pretty well so Im probably going to put the electronics in the base.

I'm kind of using this as a precursor to the 1/350 as I want to design and build my own lighting rig and software.
Plus once I've got the hang of programming these little micro controllers, It will open the door to all sorts of stuff I can put in models :D

I thought I recognized those chips. Be careful with using more than one 555 in the circuit. They will leak the signal out of the circuit causing weird behaviors. Especially if you use some other type of timing chip. I found this out the hard way.

Try hooking a few steady LED's into the circuit and see if they flicker any.

I did find a fix for this, it is posted on my NX-01 build that I still haven't finished after getting half way....

I am going to take the PIC plunge this winter.
 
Pretty awesome build!I've always thought that the small 1/1000 Ent kit had great potential to turn into a pearl, especially the the PE set You are using. Great to see it coming true :)
 
Thanks guys - hopefully I can deliver!!

Grendels said:
I thought I recognized those chips. Be careful with using more than one 555 in the circuit. They will leak the signal out of the circuit causing weird behaviors. Especially if you use some other type of timing chip. I found this out the hard way.

Try hooking a few steady LED's into the circuit and see if they flicker any.

Thanks Grendels - Strangely I was getting this behaviour on the navigation light. It would dim slightly when the strobe flashed. Ive since removed the diode they used in the circuit to prevent wiring the chips the wrong way, and it went away. ::)

I also connected a couple of LED into the circuit and they seemed steady. Will know more once I have put more lights in the model and we can have a looksee !
 
Your welcome. When I was experimenting with these chips, I just built separate circuits for the strobe and navi. I didn't try to interlace them like the diagram you are using.

I don't really know enough about it to say why they did that.

Keep us posted!
 
merseajohn said:
This is awsome work! :D

cheers merseajohn!

Quaralane said:
Excellent work on this, Jedi.
Keep rocking it

Thanks Quaralane ! - and I do like to rock :D

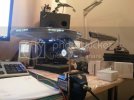
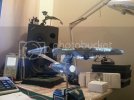
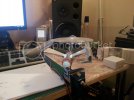
Minor update guys: I put in some FO's and another led which will power the bridge and sensor dome, still might use 2 here, Ill know when I put the bridge on. Again - please excuse the pics im using my phone, I need a proper camera!! I have an 'ISO' setting on my phone which I put way down, so the light doesn't blind the camera sensor, and gives a blue tinge these lights are actually white. Still though - i'm likin' it!!

IMAG0039.jpg

IMAG0040.jpg

IMAG0041.jpg

now - id better go tidy that desk - what a mess!!
 
Thats looking really good!
Those photo-etched parts make such a huge difference.
And the lighting looks great, thus far.
;D
 
Apologies but this has been sat on my 'Shelf of doom' for a long time and Im trying to get through all my uncompleted builds at present - Im not opening any more kits until all my shelved ones are finished!!!!
.... Im still buying them though. :p

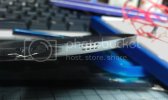
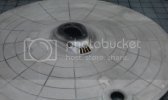
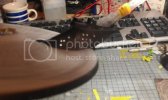
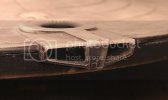
Anyway Im getting this one finished so after some more work on it here is the latest:

20121001_231648.jpg

20121001_231756.jpg

20121001_231721.jpg

Still a while to go but lots of progress made - I promise to keep this post updated this time !!

Take it easy all. PS some year old replies:

Grendels said:
Did I see some fiber? Good update!

Yep - I decided early on in the build to use fibre for the windows, but am going off that idea, still the ones that are in there will be kept.
Im using fibre to run lights to the navigation strobes, and the other lights in the nacelles. Space is at a premium in this kit, so Ive run FO from the nacelles into the saucer where the strobe leds have been mounted. Ill post some detail when I get back.

Ziz said:
[shameless plug]

If you're interested, I make Refit nacelle decals in three colors - http://www.modular-models.com/Refitnacellesandpylons.html - each set comes with two different color deflector dishes and four different color impulse engines.

[/shameless plug]

Lol thanks but not lit in this pic is the Lightsheet inside the nacelles. Ill try to get a shot of that later too , but they are masked up at the moment.

I tried so many combos of LED strip , 'flo-tube' type thingies and drinking straws and opaque materials I just couldnt get rid of 'hot spots' in the nacelles, I had to go for lightsheet for a nice even illumination.
 
When using fibers in a well lit place, make sure you paint the fibers black, light will leak into those fibers if you don't....
 

Latest posts

Back
Top