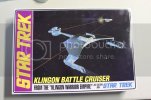
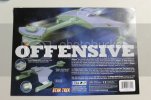
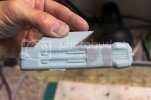
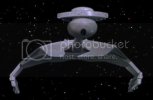
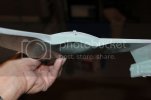
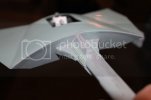
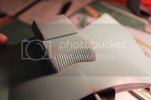
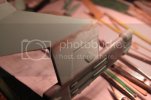
Klingon D7 Battle Cruiser Reissue by AMT

trekriffic

Well-Known Member
Joined
Jan 6, 2012
Messages
960
So the other day I got the bug and cleaned up my work bench...
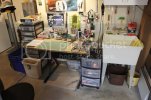
IMG_3642_zpsb8da0224.jpg

And my airbrush and spray can station...
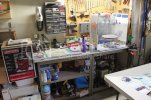
IMG_3644_zps587ebf22.jpg

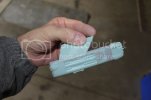
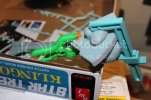
And broke out this bad boy...

IMG_3641_zps4e6dbad6.jpg
IMG_3639_zps0abdfd25.jpg

Yes! Those dastardly Klingons!
I always loved the predatory shape of the Battle Cruiser; still the most badass Trek villain ship in my opinion, maybe not the most powerful, but no ship conveyed a feeling of bad intentions quite so well as the D7.
I must have built a half dozen Enterprises as a lad but only built one of these as a kid and that one included grain-of-wheat bulbs which this reissue does not. The box says it comes with improved parts. Couldn't tell by me. I think the main thing is they got rid of the chrome piece that fit behind the impulse deck grill on top of the engineering section. And there are no clear green bits for lighting the command "bulb" anymore. Other than that it's pretty much the same kit as I grew up with.

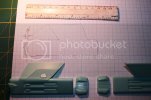
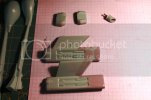
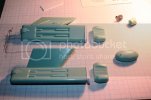
First thing was to lay out the parts. Yep. Everything is here...
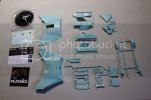
IMG_3635_zps35cac974.jpg

The decal sheet now includes windows which is nice...
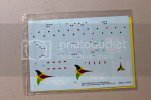
IMG_3645_zpsa2be804b.jpg

I don't like the look of chrome plating so much so I soaked the parts overnight in Super Clean to remove it...
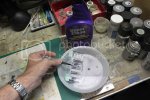
IMG_3636_zpsfac16b76.jpg

The chrome parts after soaking overnight... all clean!
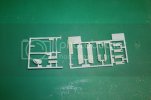
IMG_3652_zpsb46eb7e9.jpg

Next I removed the parts from the trees and tackled some helacious pour stubs on the engineering hull pieces.
A few passes with my scribing tool did the trick...
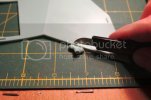
IMG_3650_zps5189304e.jpg

Not bad. Just need a little touch up with a sanding stick...
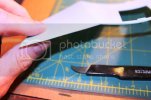
IMG_3648_zps01f51cd1.jpg

This screen printing on the inside of the lower hull should sand off pretty easily...
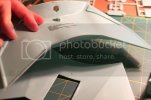
IMG_3649_zps3ffefaa4.jpg

All the parts cleaned up and ready for more...
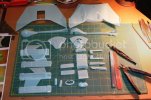
IMG_3651_zpsa18f5c3d.jpg

The first thing I wanted to do concerned the inside of the deflector tunnel; you now, the "mouth" at the bow of the ship.
Now I know some out there may say, "Deflector tunnel? No way! That was a torepedo launcher!"
Well that's fine if you want it that way but I never saw the Klingons ever fire a torepdo from it when the original series aired back in the day so, for me and this build, it's a defllctor tunnel dammit!

Anyway, the kit part has a tapered spike in the center which is OK but not particularly accurate to what I see in this photo:
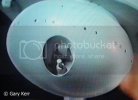
gkerr1_zpscb606925.jpg

So I cut off a piece of 3/32" round brass rod and turned it in my dremel using needle files to shape it...
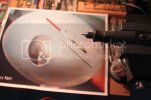
IMG_3653_zps3ae0201f.jpg

The result was pretty close. Good enough for government work anyway...
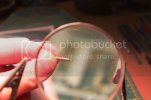
IMG_3660_zpsced7d505.jpg

Here's the new antenna next to the deflector housing. You can just see the conical spike in the center...alas poor spike, I knew you well... well, not THAT well...
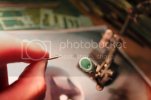
IMG_3659_zps4d50319f.jpg

More to come. Thanks for reading!
 
YAY....
I too have always loved the design of the D-7 . It exudes "Predator".
I just built one of the 1989 re-releases a couple Summers ago....
I still haven't gotten one the Round 2 re-re-releases.
;D ;D ;D
 
Thanks for all the nice comments guys!

Today's progress...

So I was looking at this screen grab of the original D7...

http://images2.wikia.nocookie.net/__cb20050424170811/memoryalpha/en/images/5/52/D7_battlecruiser,_profile.jpg

And I kept thinking, "The nacelles sure do look longer in the pic than the ones in the kit." So I pulled out a triangle square and taking some measurements off Agatha Chamberlain's blueprints drew a line from the top point of the wing in the diagram at right angles to the slope of the wing and determined that the kit part was about 1/8" too short.

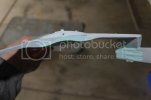
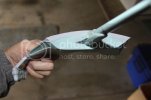
So I cut off the back angular part of the nacelle from the long straight section and added two pieces of .060 Evergreen sheet stryrene stacked together and glued to the ends of the nacelles. I didn't have 1/8" thick styrene so had to stack 'em...

IMG_3661_zps018faadb.jpg
IMG_3662_zps40f57ad1.jpg
IMG_3663_zpsdd0926fc.jpg

After it's good and dry I'll shape the plugs with file and sanding sticks followed by surface putty and more sanding until you can't tell I added them.

Here are the parts I worked on today:

IMG_3664_zpsa4ee4f17.jpg

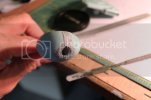
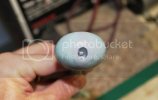
The "jelly bean" bridge module was glued together after I first drilled out the holes where the little "knobs" went and filled them with red acrylic rod turned down in my dremel to fit the holes.
For the deflector antenna assembly I cut a piece of round .060 Evergreen to the diameter of the back of the deflector tunnel and drilled a 3/32" hole in the center. The brass antenna was glued in place with CA and brushed with Mr Surfacer. I also drilled out and removed the old kit spike from inside the tunnel itself.

Later this evening I'll take a stab at shaping the nacelle plugs. It's about 72 degrees in the garage so it should be dry by 5.
It's actually warmer out there than in the house with the big windows in the garage door letting in lots of sun today.

8)
 
Looks like a lot of working will be going into that one.
Should be excellent when it's finished, though.

And it looks like we share similar tastes in calendars. ;)
 
Today's report...

Nothing too sexy as I'm at the glue, putty, and sand stage.

The nacellee extensions were filed and sanded to shape then covered with Tamiya Basic polyester putty...

IMG_3666_zps8bc6a459.jpg

The antenna was installed in the back of the deflector tunnel. I also added the little rectangular bit above the antenna in the tunnel that you can see in the studio model photo...

IMG_3673_zps154fe6d8.jpg

The tunnel was glued into the starboard half of the command bulb...

IMG_3679_zps9ef9bea0.jpg

The nacelles were sanded then given a good brushing of Mr Surfacer 1000 before more sanding...

IMG_3667_zps4bedbf22.jpg

The command boom halves were glued together with Testors cement (the black squeeze bottle). I used my seam scraper to clean up the glue that squeezed out between the seams before applying Tamiya putty...

IMG_3680_zps41a7a8b8.jpg

The bulb after sanding, adding a little AVES Apoxy Sculpt around the rim of the tunnel to toughen it, letting dry overnight, sanding, applying Mr Surfacer, and sanding some more...

IMG_3681_zps43166e13.jpg

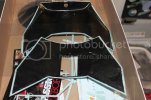
Even though I'm not lighting this model I still sprayed black lacquer to the inside of the "manta ray" engineeering hull halves to block any external light from shining thru from the opposite side; this is especially important for photography if you are backlighting a subject. Not photographed but I did the same to the inside of the command boom...

IMG_3687_zpsc736f0c3.jpg

The command deck was light blocked and glued together. I used Tamiya putty on the front, sides, and back edges then sanded smooth before applying Mr Surfacer. Then I sanded some more...

IMG_3684_zps30382bba.jpg

IMG_3685_zps5560e257.jpg

The stair steps along the front sides of the command deck had a noticeable gap along the top edge so I filled with AVES and smoothed with a sculpting tool. Little, if any, sanding should be needed...

IMG_3686_zps4dbdbc09.jpg

The kit included some parts left over from the previous release of the kit that are no longer required for this more screen accurate version.
Most notable are piece 100 which was the chromed insert that fit behind the impulse deck grill vents and part number 105 (4 pieces),the power pod inserts...

IMG_3688_zpsa0612789.jpg

The port nacelle after the rear angular bit was glued back on and end cap was glued on the back...

IMG_3682_zps2bfc9a3d.jpg

Next thing is to glue the engineering hull halves together but first I want to attach the command boom to the front of it and reinforce the glue joint from the inside with some brass rod; some type of locking retainer clip thingy; and some epoxy putty maybe for good measure.

Thanks for reading!
 
Looks to be coming along nicely.
At this pace, you should be ready for paint fairly quickly
 
Moving along nicely. Looking forward to your solution to attaching the command boom.
 
Grendels said:
Moving along nicely. Looking forward to your solution to attaching the command boom.

I got the subassemblies for the bulb all glued and puttied with AVES yesterday and attached the neck to the secondary hull. It's as rock solid as you'll ever get. I also cut the port nacelle off it's winglet with an xacto saw.
I'll post more details and some pics later.
 
Here are the latest updates fellow Klingon addicts...

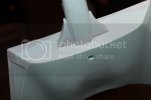
I glued the command pod parts together:

IMG_3690_zps4d3238b9.jpg

The boom was puttied and sanded then glued to the front of the engineering hull with Testors:

IMG_3691_zps51c842c0.jpg

The boom neck was reinforced with brass tubing and a locking key assembly:

IMG_3693_zps752842ce.jpg

The neck to hull joint is extremely strong now.

The hangar deck/impulse engine housing was glued together and puttied with Tamiya and AVES putties:

IMG_3695_zps94e829fb.jpg
IMG_3696_zpsfed9250d.jpg

After gluing the upper and lower main hull halves together I added a tube in the stern:

IMG_3699_zps2a361f3d.jpg

The brass rod inserted in the tube will allow me a second support option for photographic purposes:

IMG_3700_zps6769a7fd.jpg

I mentioned before I had cut the port nacelle from its pylon. I had planned on repositioning the nacelle to slant more inward but after comparing the untouched starboard nacelle with this picture:

500px-Klingon_D7_Class_Cruiser_zpsa84650d9.jpg

I discovered that the angle of the kit part was correct!

Doh! :-[

So I spent part of this evening gluing the nacelle and pylon back together. It now sits on my bench after being puttied with AVES. By tomorrow I can go back and sand, fill any remaining imperfections with Tamiya putty and sand some more.
 
Excellent work and research...

Your Wip will sure proove to be useful. My kit is waiting for me to be built. :D
 
Thanks Q! Thanks Y!

Last night and today's progress...

The port engine after reattachment to the winglet, puttying, and sanding:

IMG_3701_zpsbe4187bf.jpg

Tamiya putty was applied to the stern with a spatula tool:

IMG_3703_zpsf3727c9b.jpg

Same thing for the neck and front of the engineering hull:

IMG_3704_zps27a7ab6e.jpg

After sanding, some gap filling was done using AVES. The "surfboard" ridges were extended to the hull. AVES is an amazing product for sculpting.:

IMG_3705_zps0205c0a3.jpg

The stern after sanding:

IMG_3708_zpsffddc82b.jpg

Top of the neck after sanding:

IMG_3709_zps1f7f67c6.jpg

The hangar/impulse deck housing was glued on and gaps filled with AVES:

IMG_3712_zpsd9bf041d.jpg

The port nacelle and winglet were glued to the main hull and gaps filled with AVES:

IMG_3714_zps7bbc73d7.jpg

The starboard winglet to hull gap after filling and sanding:

IMG_3710_zps387a494a.jpg

The neck after a coat of Mr Surfacer. Pretty darn smooth IIDSSM:

IMG_3715_zpsc789cce8.jpg

The current state of the model. Mostly assembled; I still have to attach the slanted side panels to the housing on top but that can wait until I paint the housing.

IMG_3716_zpsd381ccb5.jpg

That's it for the moment. I have to go rouse the Klingon crew and fire up the barbeque.
They shot a Targ yesterday so that's on the menu for this evening.
Yummmm!
 

Latest posts

Back
Top