Imai/Bandai 1:72 Macross Super Valkyrie VF-1J with LEDs

stevethefish

My name's actually not Steve
Joined
Jun 12, 2015
Messages
295
tumblr_ovapg2kFON1uovh9bo1_1280.jpg
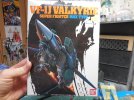
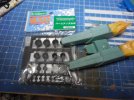
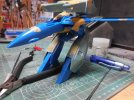
I had a thread on this build on the old SMA forum before it was haxxored. This is the old Imai 1:72 Super Valkyrie VF-1J kit, repopped by Bandai. It does not transform, but the legs can be extended forward for that pseudo-Gerwalk, VTOL mode. This is my favorite pose for the Valkyrie, with the legs extended while the arms are still folded underneath. I started this back in 2017, with plans to light it.
tumblr_ovapg2kFON1uovh9bo3_1280.jpg
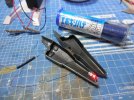
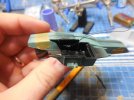
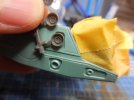
Here is a dry fit. This kit has clear pieces for the navigation lights on the wingtips as well as wing lights, but the wing halves do not create a hollow space inside. I'm leaving the wings unlit and instead will have it in combat mode, with a rapid flashing LEDs in the gunpod.
tumblr_p04sgjDPGL1uovh9bo1_1280.jpg
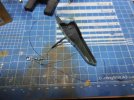
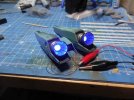
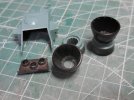
Here I've drilled out the engines. Conveniently, these are perfectly sized for 3mm and 5mm LEDs.
tumblr_inline_p04qdulgex1tof5ad_1280.jpg
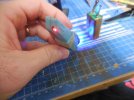
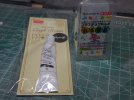
I've used UV curing clear craft resin to create some clear parts for this kit. I used Oyumaru plastic clay to create molds. Just stick them into boiling water and press the parts into it while it's still hot and soft.


tumblr_inline_p04qljVzgd1tof5ad_1280.jpg
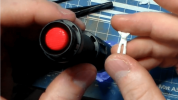
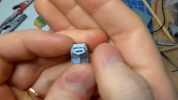
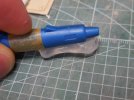
To light up the red laser sensor on the gunpod, I did a dry fit and pressed it into the Oyumaru.
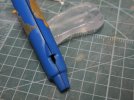
tumblr_inline_p04qpkh8uX1tof5ad_1280.jpg
I used a Tamiya saw bit to cut out the plastic-molded to cut out the sensor. Above you will see the replacement clear resin part I made.
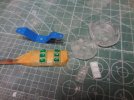
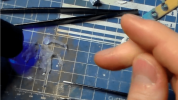
tumblr_inline_p04ruftNXe1tof5ad_1280.jpg
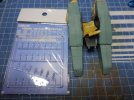
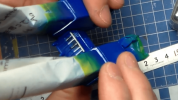
The feet thrusters are completely inaccurate on this kit. the blue part you see in the upper left of this picture is supposed to go into the foot thrusters. You can see where I carefully drilled out the holes before I realized that this whole part is crap. It is not at all accurate, so I have decided to ditch this. Again I used Oyumaru and UV-curing clear resin to recast the foot thruster piece from the 1:72 Valkyrie Battroid model from Hasegawa (bottom right white plastic piece). You can see one cast piece that didn’t turn out right. The two that turned out well are the ones you see stuck onto the stick. I have applied Mr. Masking Solution into the thruster modules I wish to remain clear. The rest will be painted steel or something.
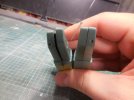
tumblr_inline_p04qze8AW11tof5ad_1280.jpg
I also realized that there is a laser sensor in each fastpack booster. This detail is shown on the box art, but not molded into the part. I just used my best judgment to determine where to place these and fortunately they are pretty symmetrical. I drilled a hole into each nacelle with a .8mm drill bit with my pinvise, and then used a larger-sized drill bit on top of that to drill onto that hole to make a shallow indentation around these holes.
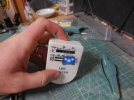
tumblr_inline_p04rfevKvu1tof5ad_1280.jpg
tumblr_inline_p04rkn14tE1tof5ad_1280.jpg
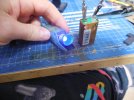
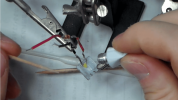
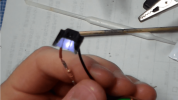
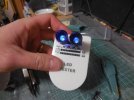
I tested the flickering blue LEDs with my LED tester.
 
55c5bba34fcfe54a2fb8b2700533146f43772267.jpg
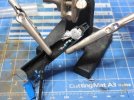
In the picture above, you can see that I used some Cemedine Epoxy Putty for Plastic to secure a red 0402 SMD into the tip of the Valkyrie’s fastpack nacelle. In the previous update, I mentioned that my plan was to use .75mm fiber optics for these red lights, and that by mushrooming the tips not only would it act as a lens substitute but also it would amplify the light. Upon further thought, I decided to just use SMDs. I made sure that the SMD was shining straight out of each of the holes.

165c468c33857a882a51dbf3a7f428bd191aea44.jpg
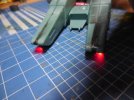
The wires for the SMDs are super thin, so I shaved off some places to strip the coating off the wires and attach them to the 5mm flickering blue LEDs for the thrusters. Again, this kit’s engine holes are perfect for both 3mm and 5mm LEDs to be used for its engines.

cc5e984e24a75661480e9efe0c69cf1a3cb6d260.jpg
The front red SMD shines nicely.

58d4882ff727c61c25e0a629e275ef009c562617.jpg
The 5mm LED looks great too.

d74354945ec0eae3898baef716cafd8d1adb8399.jpg
9aadae4c09c12f159a8273c6a4ccc9c3c3ed3174.jpg
Next I threaded the wires through the holes I had drilled out and attached the nacelles to the Valkyrie’s back section and glued them into place.

2750e0e359cc23f49bbdfd7006b7c4d6fbdb482b.jpg
58e76a89c13a0f6fd42f6e5382c9883bab5e772a.jpg
Looks good.

f529f76fe9c75d4e09eb79aaffa66afb9d68cd14.jpg
For the lenses on the fastpack laser sensors, I decided to use Wave’s H-Eyes 3 Mini set. These are targeted for mecha kits with mono eyes like Doms and Zakus from Gundam or Scopedogs from Votoms, and these will work nicely for what I need to accomplish here.

c19df56947dbfd8c9a38393224bacf21d87c3a7f.jpg
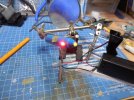
As for the gunpod, I used the same putty to secure the SMD for the targeting laser as well as the rapid flashing 3mm yellow LED and then soldered them into place. I messed up twice and ended up ruining two red SMDs. Rats.

09179600887eb8c356e2f9c07439adfdbc2f2067.jpg
Looks nice! But something bothers me about the weak detail on the vernier thrusters for this kit.

7ea7aacc578a7156e3d2515c4afd1ac72bea7630.jpg
Here’s where Kotobukiya’s M.S.G. Vernier Nozzles III comes in. I used these on my Crusher Joe Fighter 1 and 2 by Takara build to add engine detail, which I posted on this forum earlier.

d7370e37cadc19a5eccf50e41b80da1c0f10737f.jpg
These will be an improvement. I had to buy three sets of these for the two Crusher Joe fighters, so I should have enough for this project. Larger and smaller verniers will fit on the fastpack as well as the leg augmentations.
 
17cfcacd99dbdd92983b68ac582bce2c7b0ecdac.png
fccb0c0a0a4490bf9ab10e096ed5f718acbec976.png

Above I have taken the pilot figure from the Hasegawa VF-1 Weapons Set. Yes, the pilot suit is from the DYRL movie and not the TV show (like this model is), but oh well. This Imai kit isn’t incredibly accurate anyway, so I’m taking artistic liberties. I used Oyumaru to make molds of the parts and injected them with UV-curing clear resin for two reasons: 1. the UV resin is easier than using epoxy putty because it is sturdier, and 2. I intend to light the pilot suit up as you see int he movie. The shoulder guards glow and there is also a monitor on the chest. I’m still working on this, so I will show this in a later update.

adc55170e2e40cf55e9777f805f759748f6f247c.png
a62fbb004dba433aa0a8ff4ef7a4627d3dceab96.png
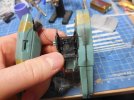
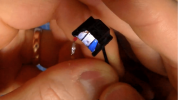
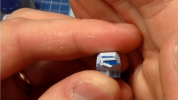
I also used Oyumaru and UV resin to copy the cockpit’s console. Again, this part is inaccurate, but I’ll have fun with it, nevertheless. I trapped an SMD into the bottom and encased it in UV resin. I then painted the surface underneath with white paint to help refract the light inside, and then I light-blocked it with black paint.
70fc9a0496e78dbcdf0c92b2ab1e448350c3e6b2.png
I used stills from the movie (and TV show) to make my own clear waterslide decals. On the left is Misa, in the middle is a battle scene, and on the right is just a blue grid pattern.

6209e9b940d78c340d1c9b87a4e5aef97ed11f7e.png
c21503174dc830bfc486de566244e744e2376513.png
The VF-1J head lacked proper face detail, so I re-created it with sheet styrene. It looks much better now!

7220106666cd993d65b36bc6347643bcaeaf69aa.png
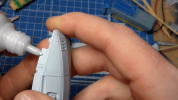
I needed to putty in the holes where the landing gears go. I secured sheet styrene on the inside and used Vallejo Plastic Putty to fill in the holes.

15d9382d01db1210b06884b41c2e4b7ff17cfe2f.png
There was some missing detail on what are the shoulders in Battroid mode, so I scribed this. People may scoff at these older kits for their lack of detail, but part of the challenge is improving such kits and challenging oneself.

ac3fcaf23f0bc67541d337487e186f36fbe5685c.png
After painting, I noticed a real lack of detail on the middle part of the fastpack. Using strips of styrene, I created a grill intake pattern. The featureless surface just bothered me. The worst part of this kit has got to be the shape of the nose, but I can deal with that. I have heard that there is an old Macross guide book that demonstrates how to alter the nose on this old Imai tooling, but it goes for a bit of money and at this point, I am ready to just fall forward.
 
Liking where you're going with this.
Also liking the idea of using the UV resin for some of the new parts
 
Thanks. UV resin can be found easily at 100 yen shops here in Japan, in the crafts section. They also carry the plastic clay that softens in hot water, which can be used for creating molds. Oyumaru is one brand name, but there is at least one other company that makes it.
 
This looks pretty sweet. Make's my Valk build look simplistic. Can't wait to see more.:p
Thanks. I am currently working on a 1:6 scale Minmay sofubi kit by Arii which is taking priority. I'm using V-Color paints, which are made for vinyl kits such as this. I'm working on latticework for a mini concert stage, and I'll have LEDs in the latticework. There'll be UV lights to make her dress shine, as well as colored blinking lights. I have one of those sound generators used in greeting cards which comes with buttons, so I will have segments of some of her songs play at the push of buttons. IIRC it uses mp3 files which can be transferred to the sound card via a USB connection, but I forget what program I need to use. I think the seller should still be active on eBay, I hope.

As for this Valkyrie, I need to figure out how to do the foot thrusters and will need to do some scratch building for those.
 
I almost have this project completed. So last night i finished construction on my Macross Valkyrie. Right as it came together, pretty much everything wrong happened to it, except fortunately the wiring remained intact. I had to re-glue so many parts back together again because Imai didn't really create good joint connections. First the fastpack came off, then the nose cone and cockpit piece. When trying to fix these, one of the legs came off I was going crazy! Why didn't the glue hold? Maybe if I had tried pinning the pieces? It's done now, and I just now need to attach it to its base. I'll be back with pictures.
 
I finished the Valkyrie over the weekend, but have yet to take any photos and such yet. I did make a quick video though. Check this out.


Latest posts

Back
Top