Group Build: F/A-18A-G Super Hornet/Growler

Scale Model Addict - Model Tips, Guides, Tools & Tech, Tutorials, and Community

Help Support Scale Model Addict:

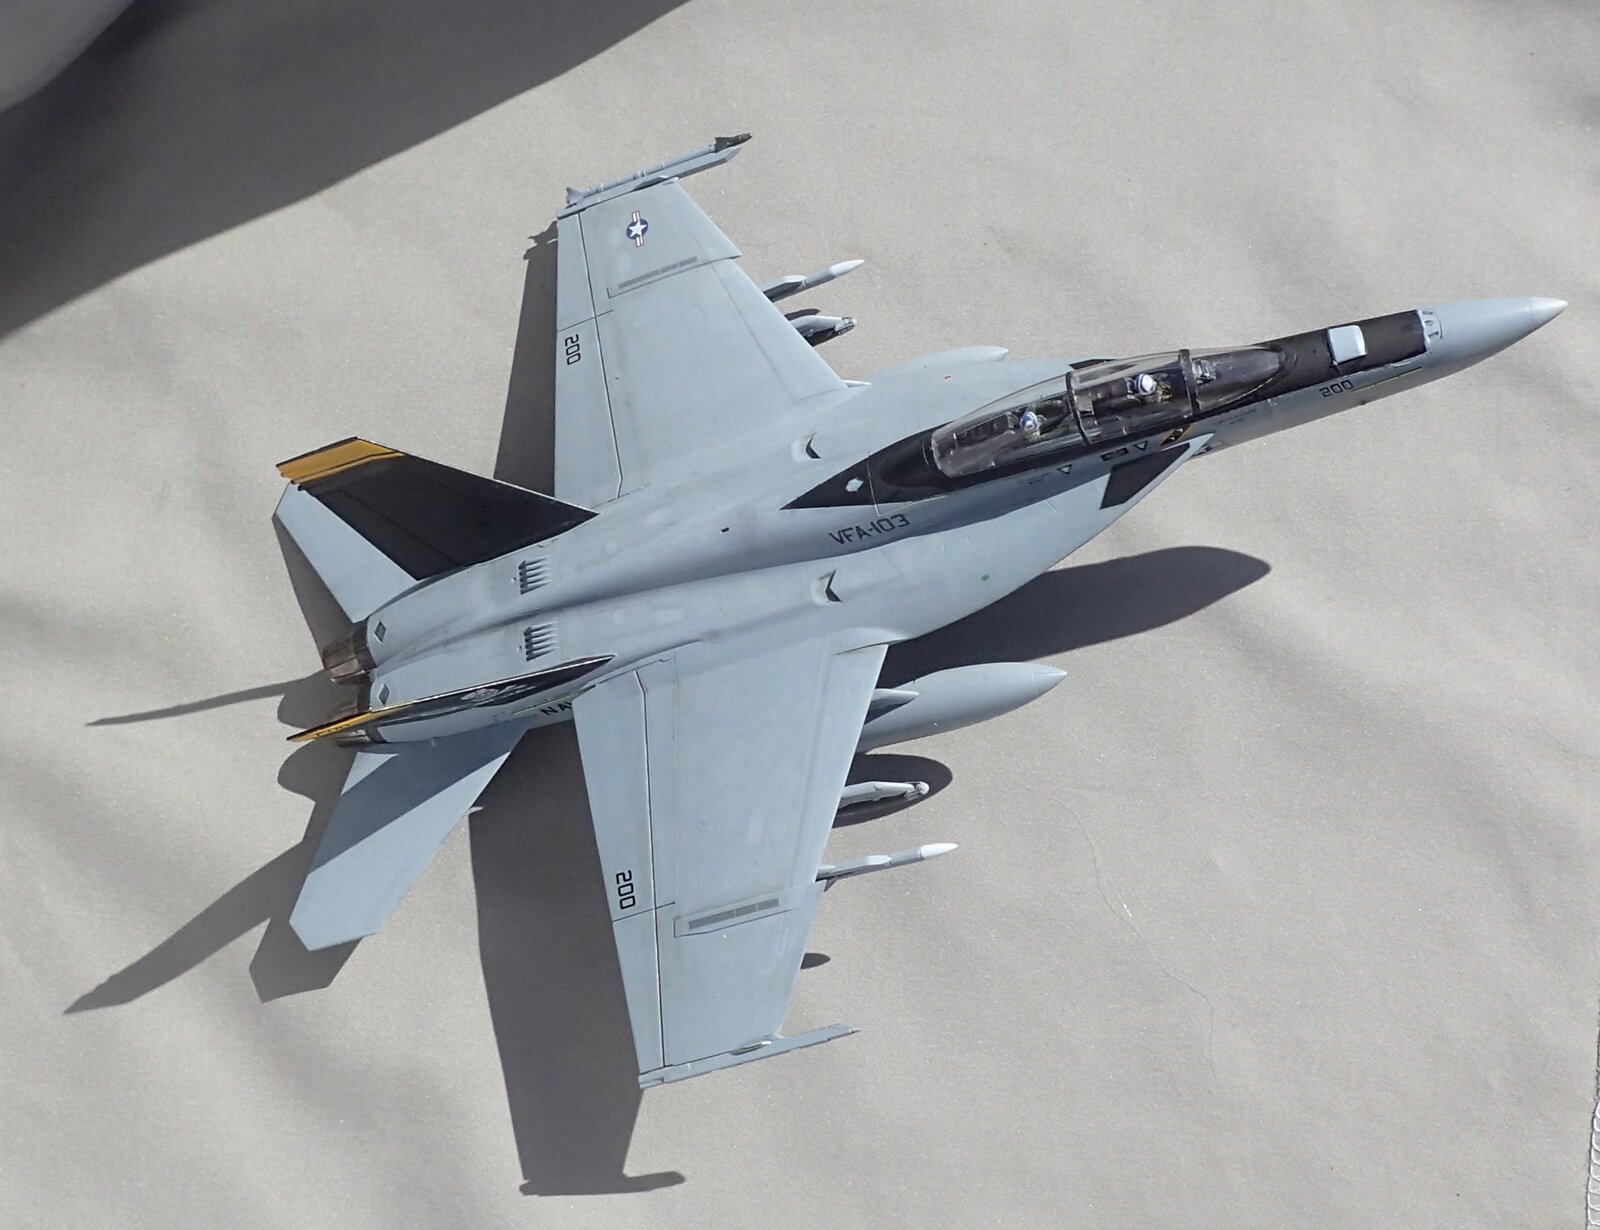
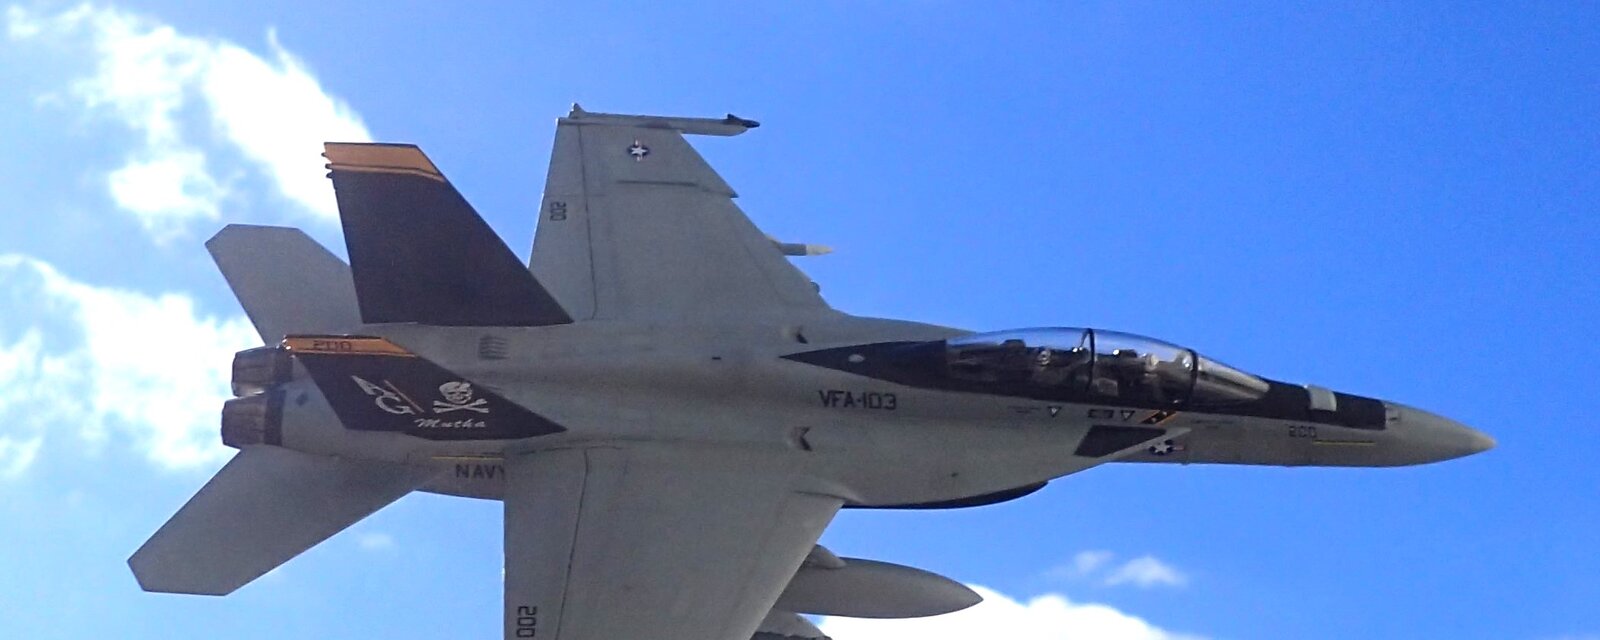
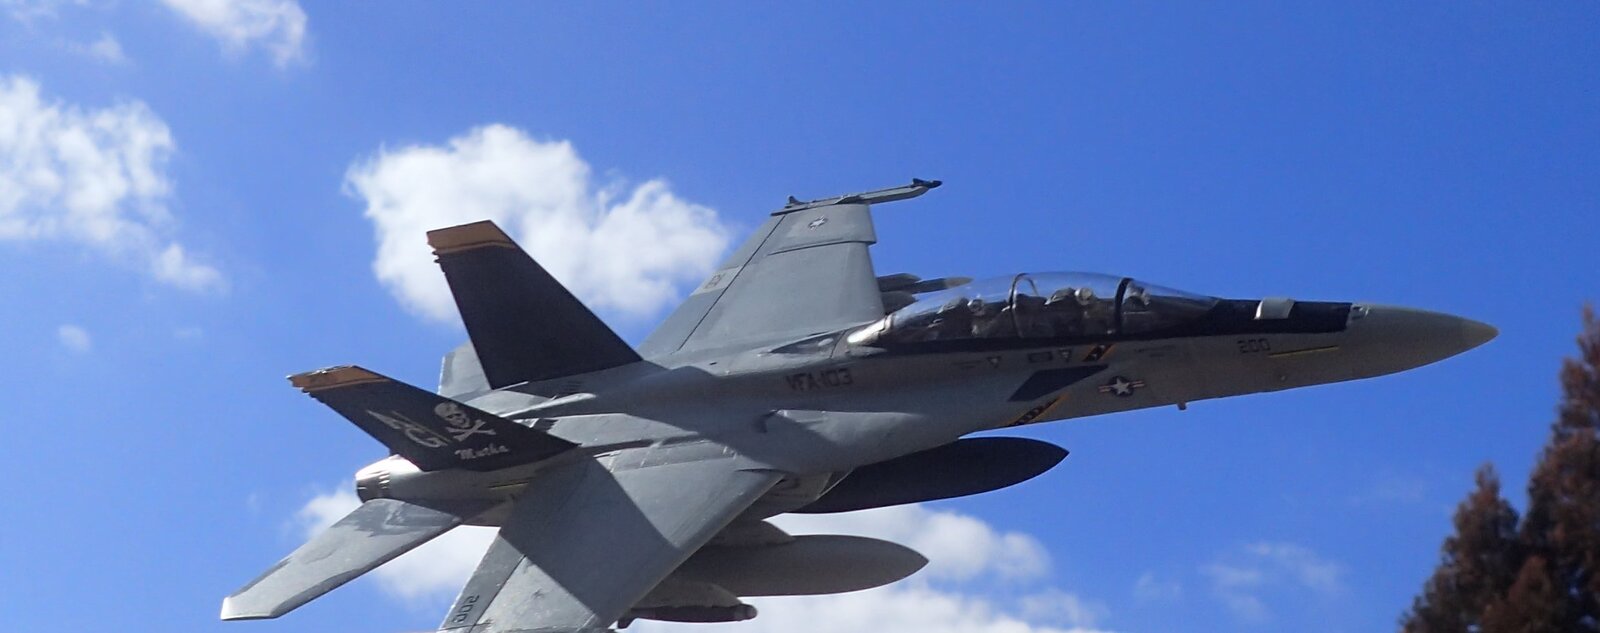
I have to mix up a custom batch since the Vallejo Dark Ghost grey feels out of scale.

I think I will follow what I did with my Academy 1/72 F-18F and instead of using the Dark Ghost grey and Light Ghost Grey straight from the bottle, I will mix in some Light Ghost Grey with a little white as the base coat over a Tamiya light grey primer.
Then use a mix of Dark Ghost Grey starting with around 25% Light Ghost grey, and gradually up that to 50% Light Ghost Grey as I get more panel highlights

I find if I use a darker primer like black or Army painter dark grey the whole thing seems to turn out even more blue/darker

This may not match color chips anymore, but I think looks more correct for the smaller scale models based on what I see in various pictures
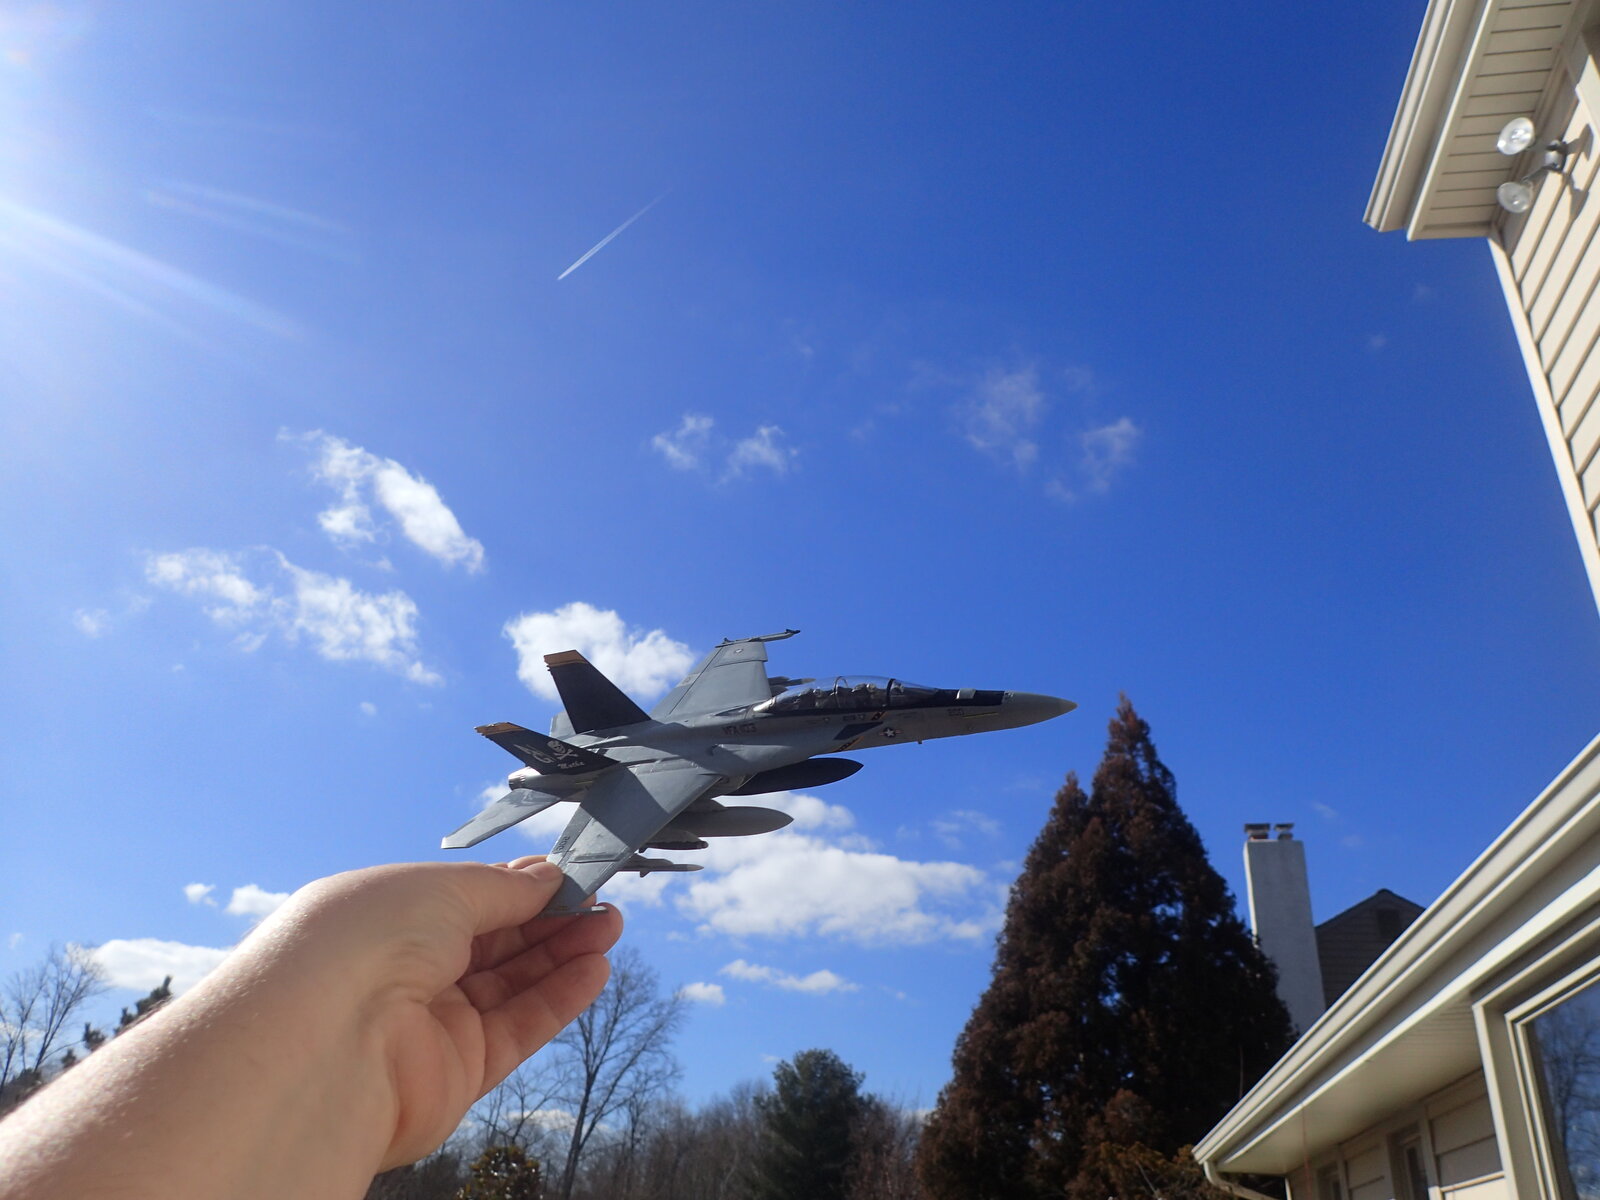
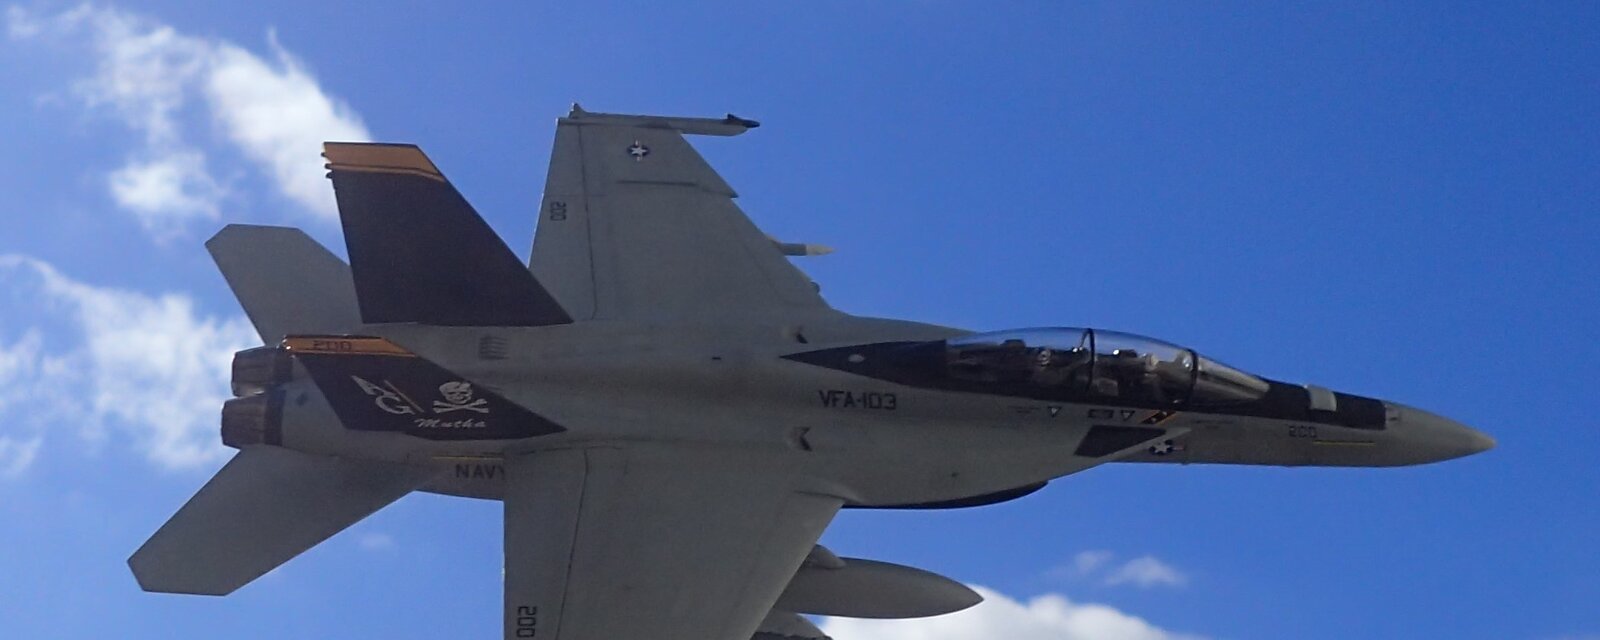
below is some playing around to see how it might look in real lighting ( I may or may not have made jet engine swooshing sounds while holding it up in the air )
P2211913b.JPG

P2211914a.JPG

P2211913.JPG

P2211914.JPG

P2211915.JPG
 

Attachments

  • P2211913a.JPG
    P2211913a.JPG
    76 KB
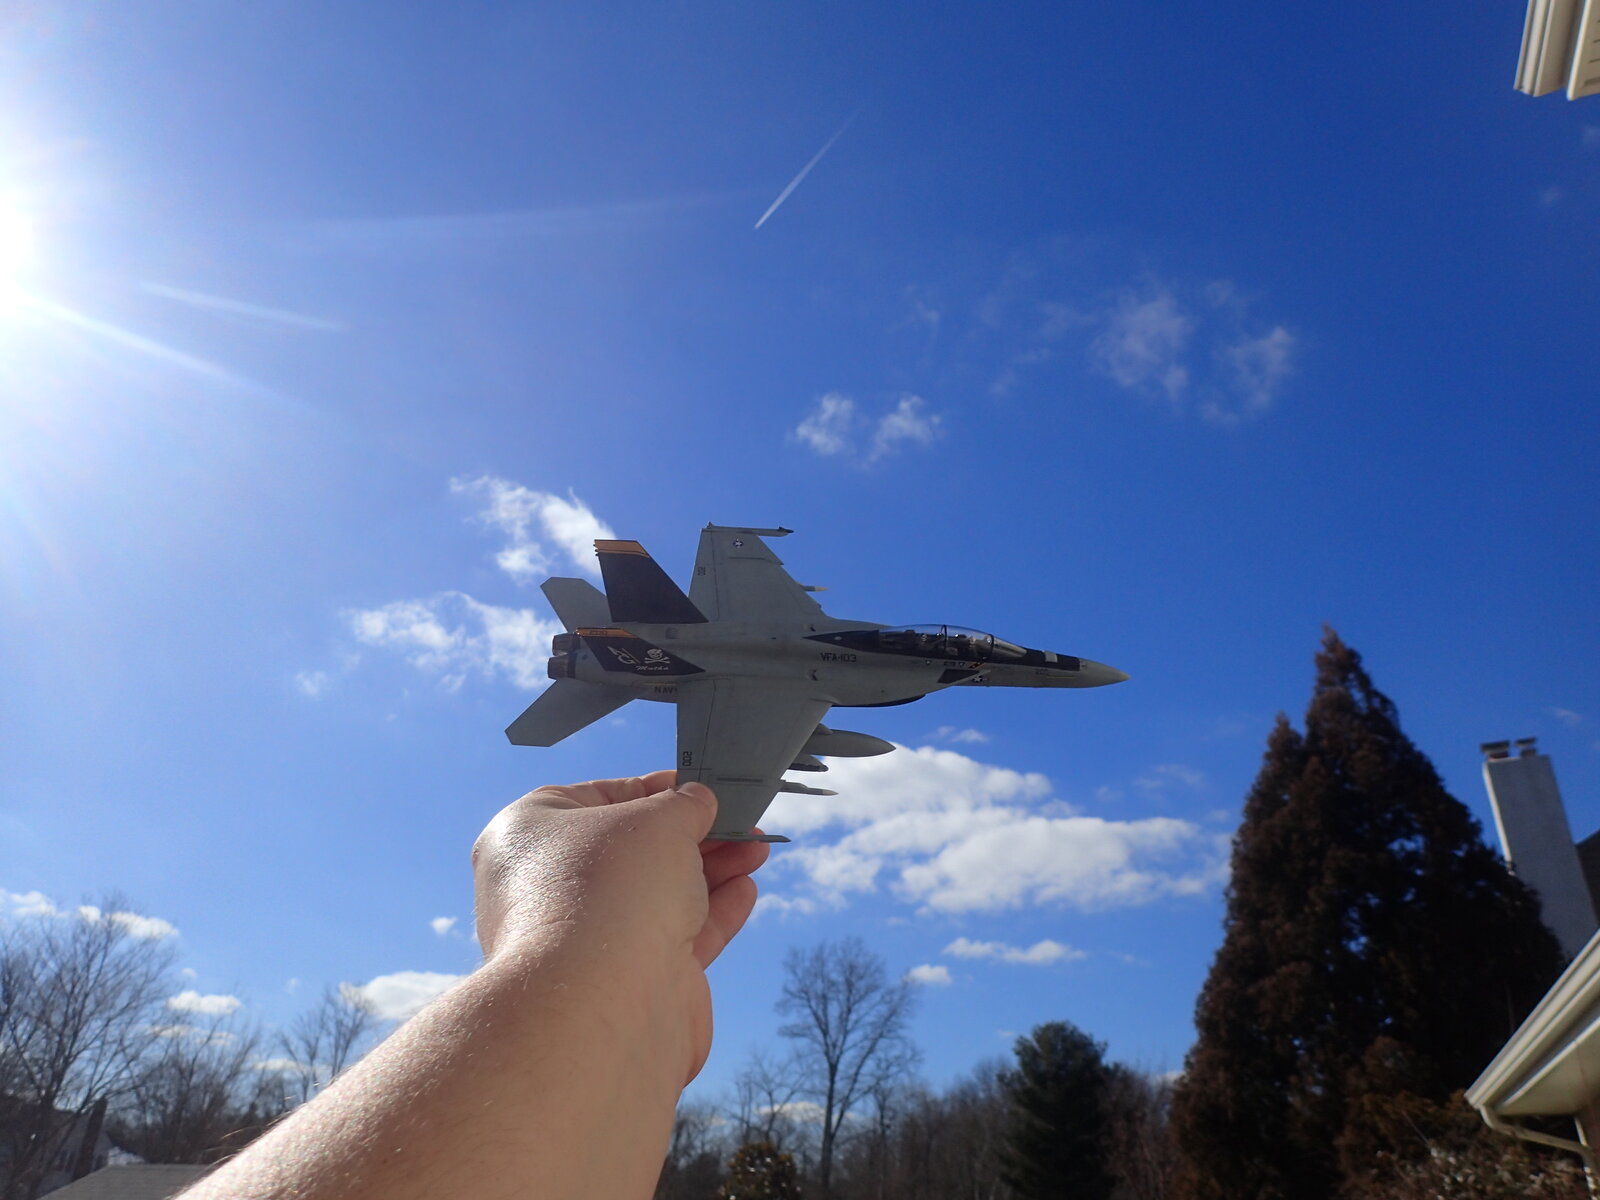
I have to mix up a custom batch since the Vallejo Dark Ghost grey feels out of scale.

I think I will follow what I did with my Academy 1/72 F-18F and instead of using the Dark Ghost grey and Light Ghost Grey straight from the bottle, I will mix in some Light Ghost Grey with a little white as the base coat over a Tamiya light grey primer.
Then use a mix of Dark Ghost Grey starting with around 25% Light Ghost grey, and gradually up that to 50% Light Ghost Grey as I get more panel highlights

I find if I use a darker primer like black or Army painter dark grey the whole thing seems to turn out even more blue/darker

This may not match color chips anymore, but I think looks more correct for the smaller scale models based on what I see in various pictures
below is some playing around to see how it might look in real lighting ( I may or may not have made jet engine swooshing sounds while holding it up in the air )
That is an issue when going smaller scale, you do tend to lighten colors with scale effect. Sounds like you have a solid plan devised. By the way, you would have been in violation of modeling research protocol if you DID NOT produce some sort of jet engine swooshing sound!
 
I came to the same conclusion and just painted what I thought looked convincing.. I found some pics where details matched like those larger pipe looking things that I painted a dark color. Also was hard to find the right ones for the right variant since it is not always clear if your looking at pics of a f18c, e,f etc...
View attachment 179548
View attachment 179545View attachment 179546
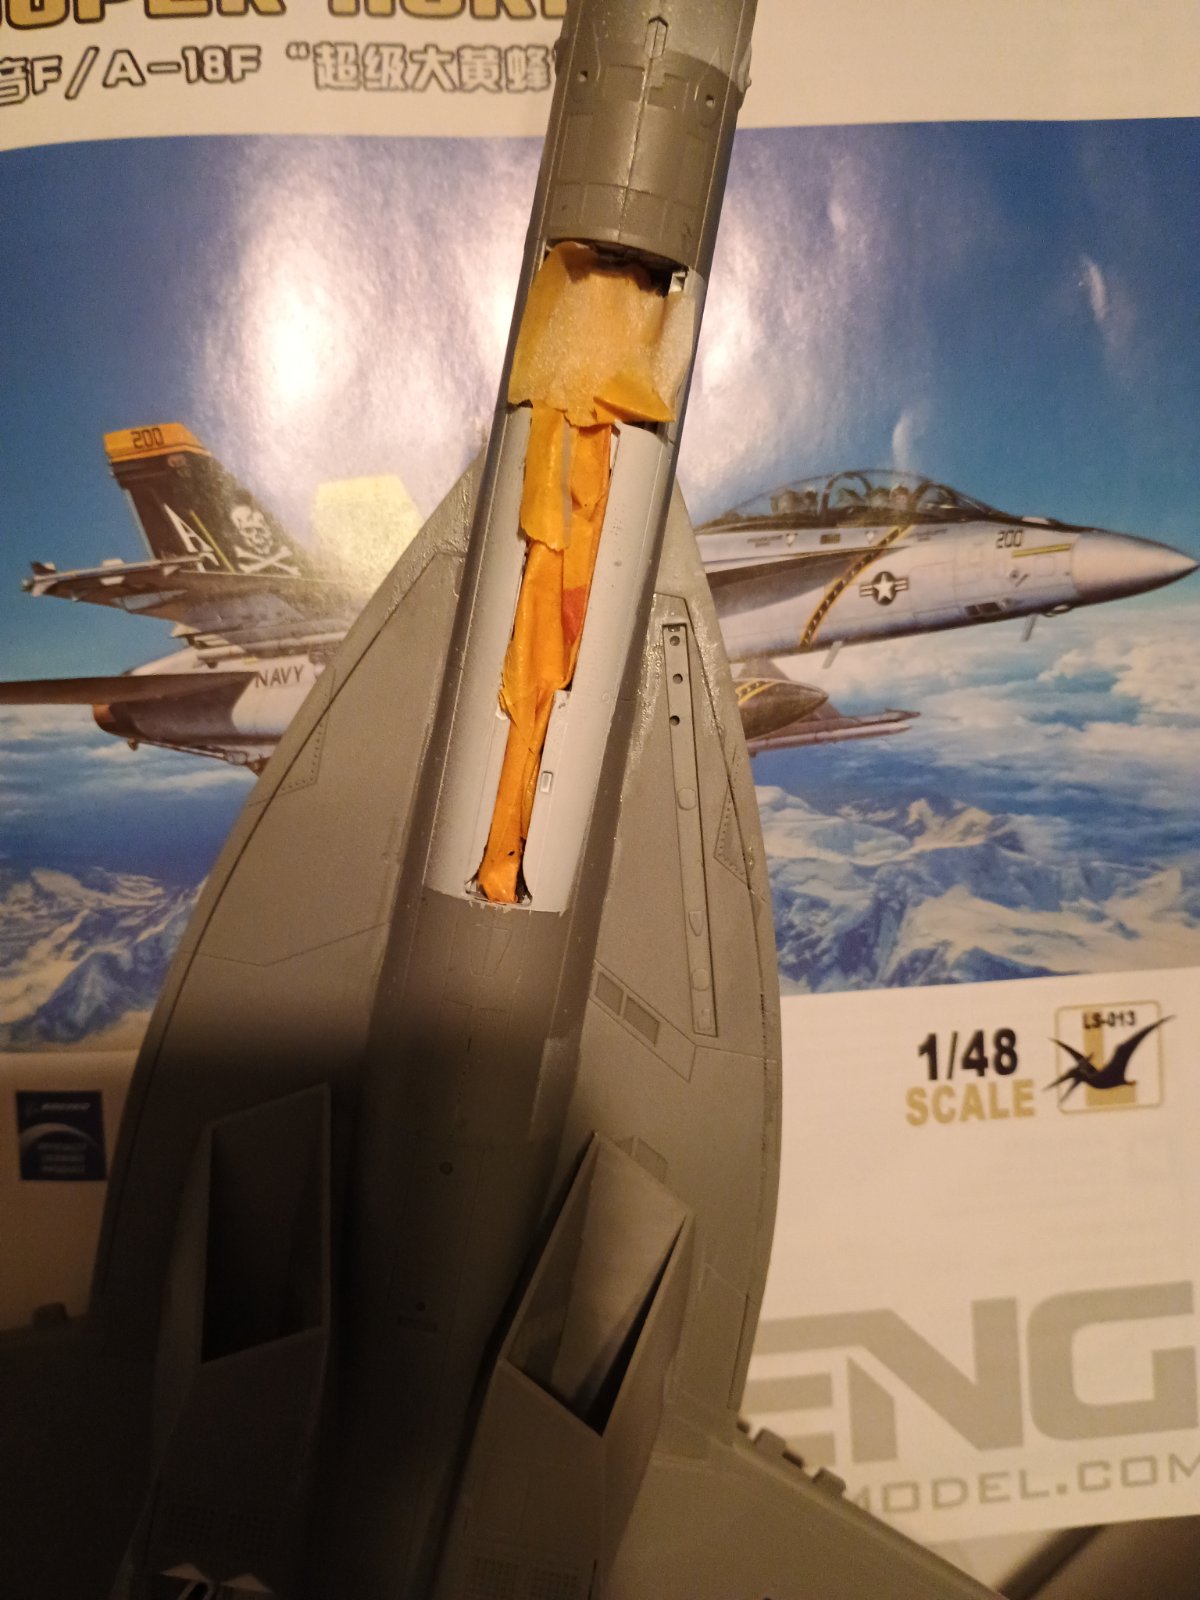
The work that you've done in the gear wells is amazing to me, but how do you mask that off to do the underside painting?
 
The work that you've done in the gear wells is amazing to me, but how do you mask that off to do the underside painting?
I just kind of stuff some masking tape in there like this and then make sure I do not spray directly into it but instead spray from the side. If there are really tricky spots that don't get covered I can add some masking fluid around the edges
 

Attachments

  • 17708348783192622205313138929855.jpg
    17708348783192622205313138929855.jpg
    214.5 KB
I just kind of stuff some masking tape in there like this and then make sure I do not spray directly into it but instead spray from the side. If there are really tricky spots that don't get covered I can add some masking fluid around the edges
I like to use cotton balls and some water. This mix can be shaped exactly as you need it . Like in the odd shapes of landing gear.
IMG_4411.jpeg
 
As an Amazon Associate we earn from qualifying purchases. Product prices and availability are accurate as of the date/time indicated and are subject to change.
Hello Everyone, Just wanted to get the ball rolling for an upcoming GB! For anyone interested, the focus of this build is the F/A-18 Hornet/Super Hornet/Growler in any of it's variations, and in any scale. Since there are members who wish to participate, but have other projects in the works (who here doesn't), we have a projected start date some time in the early to mid part of March. For anyone that would like to join in, you have plenty of time to secure a model, accessories, paints, and any other goodies you'd like to throw at this one. The rules are very simple... build any F/A-18 of your choice, go at your own pace, share and enjoy! That's it! So if you happen to have one already in progress and haven't shared it yet on the Forums, don't hesitate to throw it on in here. Thanks everyone, look forward to the builds!
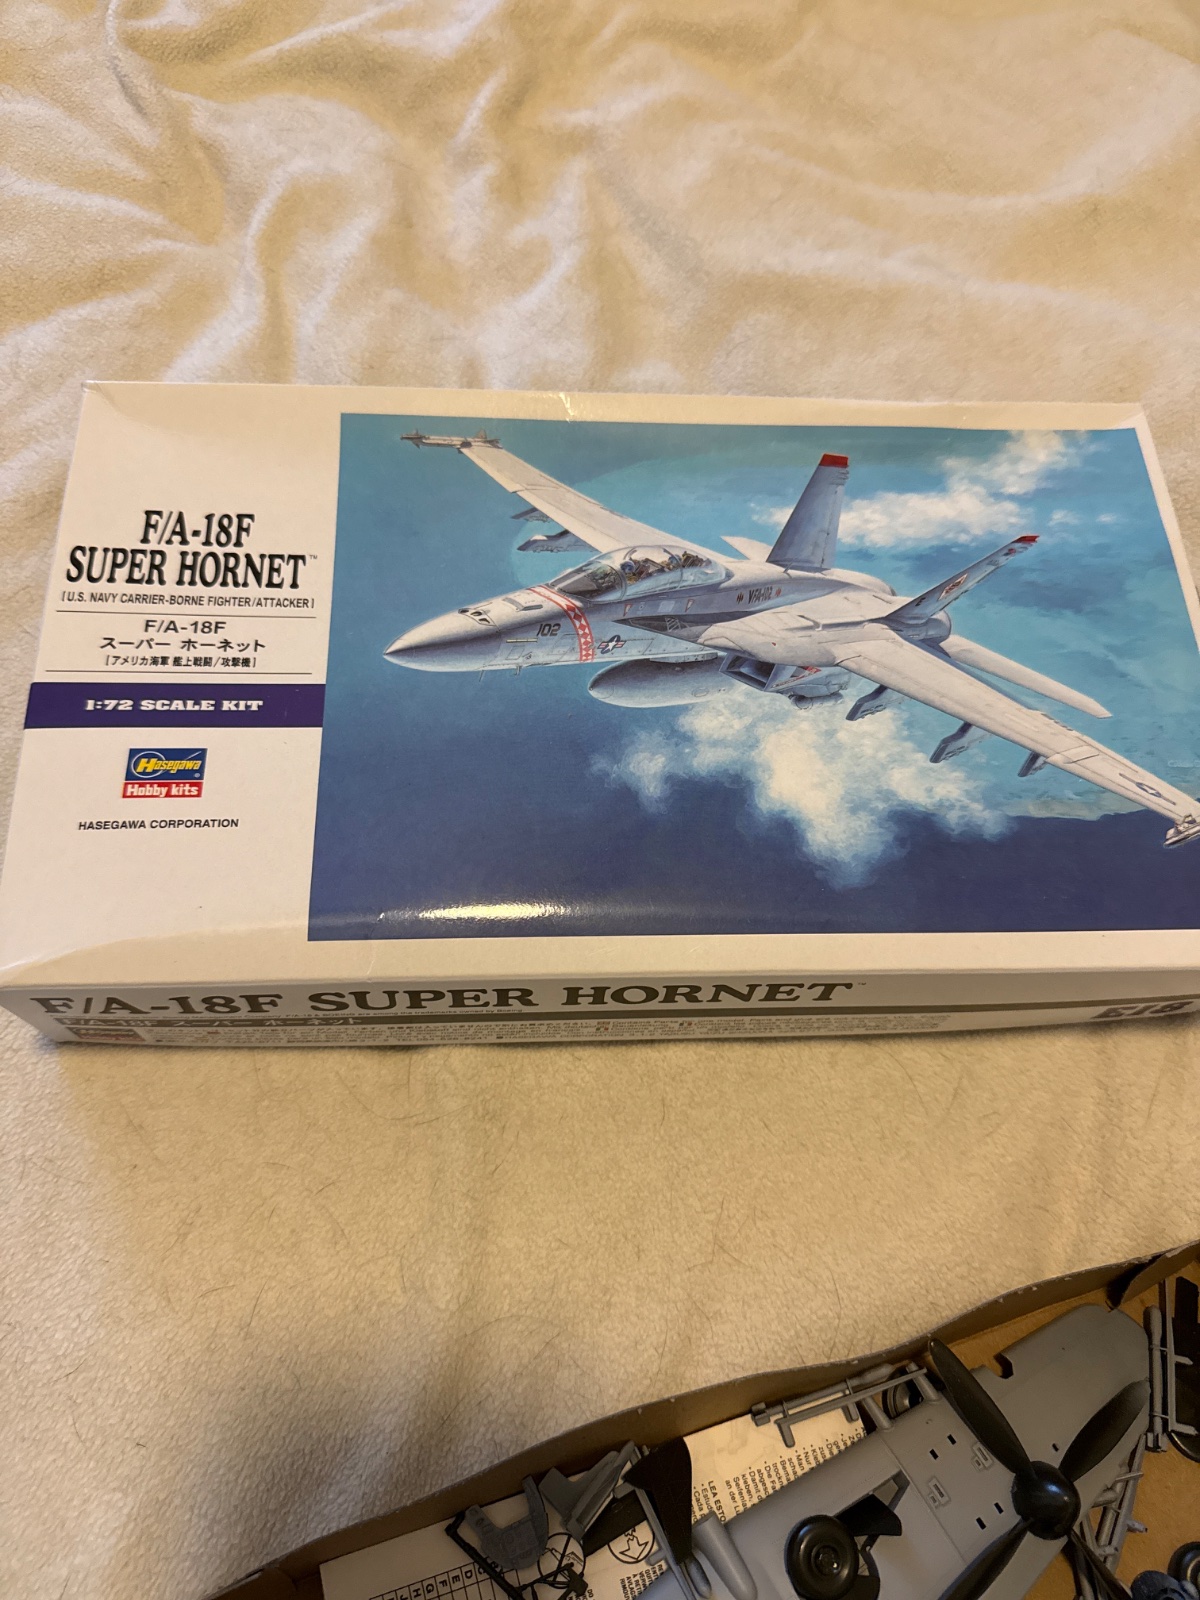
This will be my build. Hasegawa F/A -18F super hornet 1/72. Oob.
 

Attachments

  • image.jpg
    image.jpg
    548.2 KB
Hello Everyone, Just wanted to get the ball rolling for an upcoming GB! For anyone interested, the focus of this build is the F/A-18 Hornet/Super Hornet/Growler in any of it's variations, and in any scale. Since there are members who wish to participate, but have other projects in the works (who here doesn't), we have a projected start date some time in the early to mid part of March. For anyone that would like to join in, you have plenty of time to secure a model, accessories, paints, and any other goodies you'd like to throw at this one. The rules are very simple... build any F/A-18 of your choice, go at your own pace, share and enjoy! That's it! So if you happen to have one already in progress and haven't shared it yet on the Forums, don't hesitate to throw it on in here. Thanks everyone, look forward to the builds!
This will be my build. Hasegawa F/A -18F super hornet 1/72. Oob.

Oh no Ron, you said OOB, now you are about to find a "Rabbit Hole"! 😉
 
cotton balls and some water
No issues with fuzz and fibers left behind? I did that once in a cockpit and regretted it, maybe some artificial fiber balls?

I use foam that I cut to shape as needed. It holds itself in, and conforms as needed in odd shapes, and nothing to get hung up on or taping that may pull paints (especially acrylics). HTH
 
I have concerns with the Tamiya LP line of LGG/DGG, they look really blue to me.
It seems like almost every lgg/dgg paint feels very blue. Part of that is pictures are a hard way to judge color, but also I think matching to an FS color chip is not actually the best way. Paints look way different in various lighting and I feel most colors, even like gull greys, wind up looking darker or more saturated then they do on the real things. It's a nice place to start from using an FS color, but in the end I think tweaking the stuff a bit looks better. I prefer to have something look like what I see over matching exactly to an fs chip
 
Have to be careful what kind of foam is used along with what kind of paints you are spraying. Water based acrylics for example shouldn't be a problem, but solvent based paint can actually dissolve thing like Styrofoam etc ...

Especially if using most common rattle can primers
 
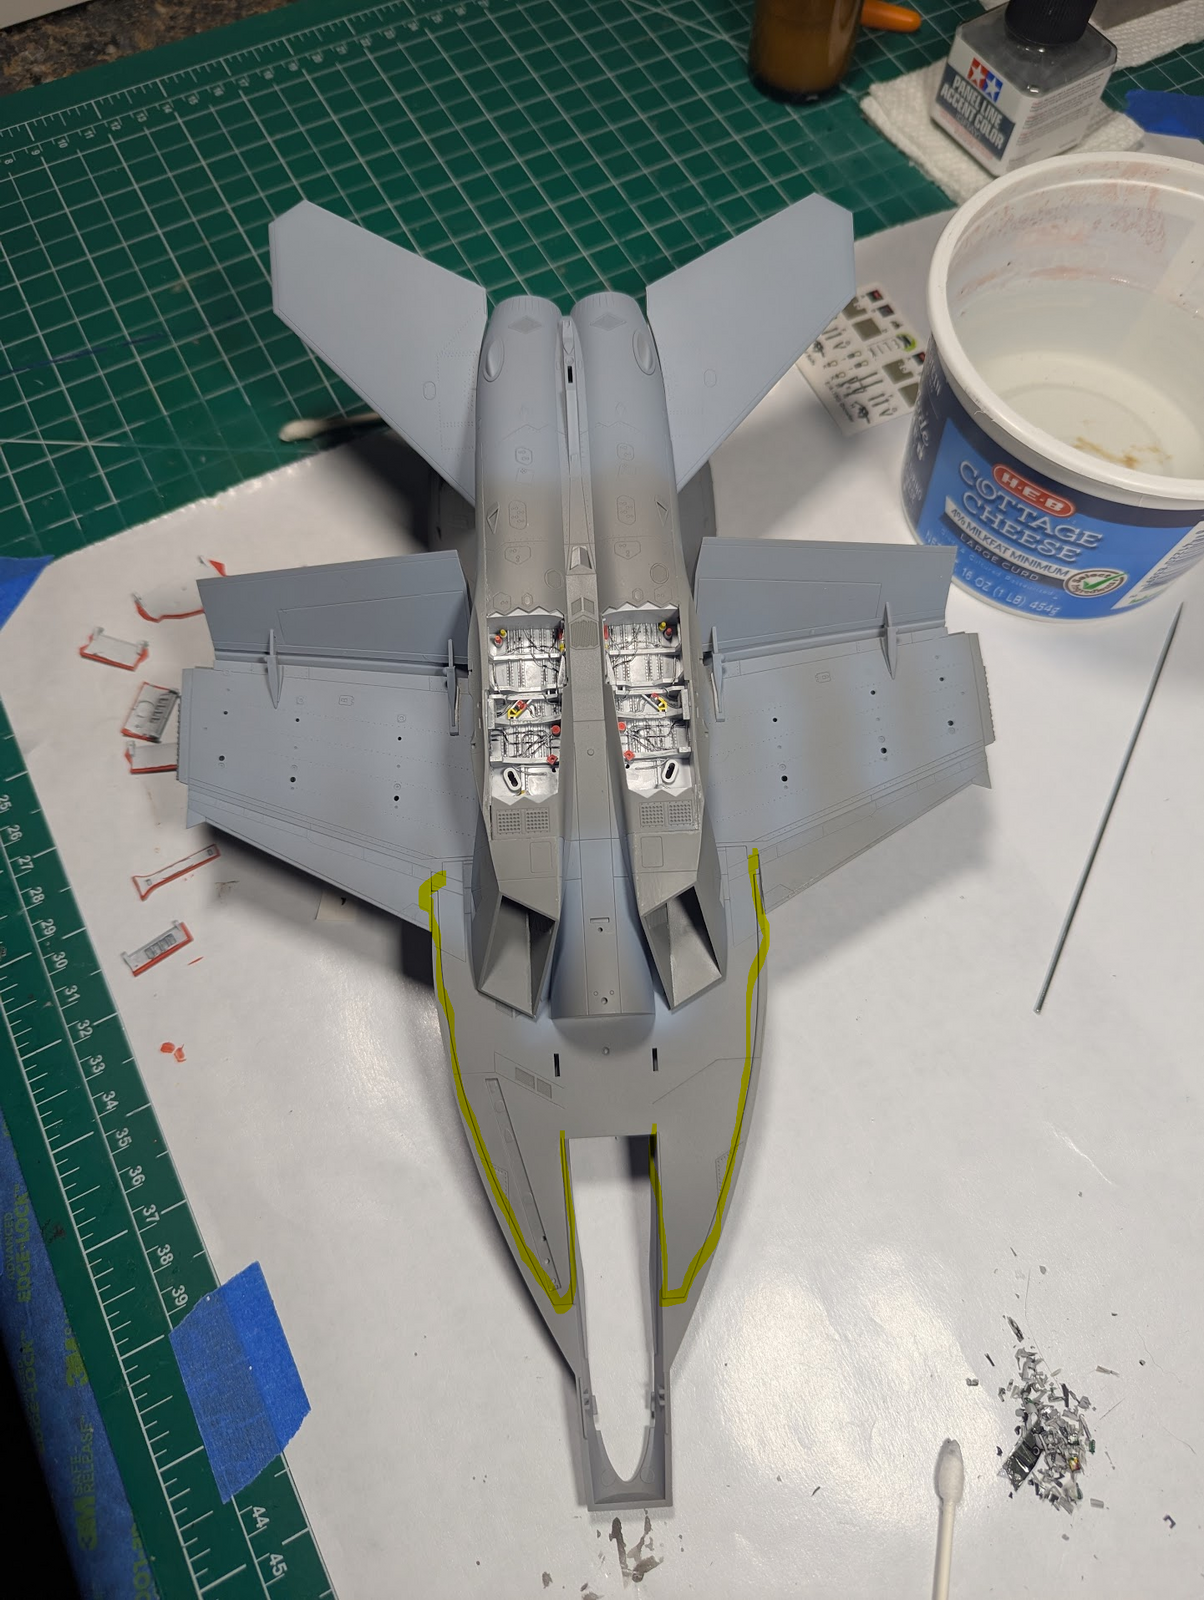
Current state....

1771016203985.png


The cockpit is on-hold for now, which is preventing next steps if following the instructions. But I always see them as suggestions only, so I'm skipping ahead on other stuff. This is my first Hornet, since I started taking builds seriously that is, and I was not aware how many moving surfaces it has. There's an entire page of the destructions for the wingtips, folded/flat is one option, leading and trailing edges up/down is the other. Pay close attention here when you get to it. There'll be lots of bits for the spare-parts box when finished.

You can probably see I am doing tips up flaps down, since that is what I see with most parked aircraft not in storage.

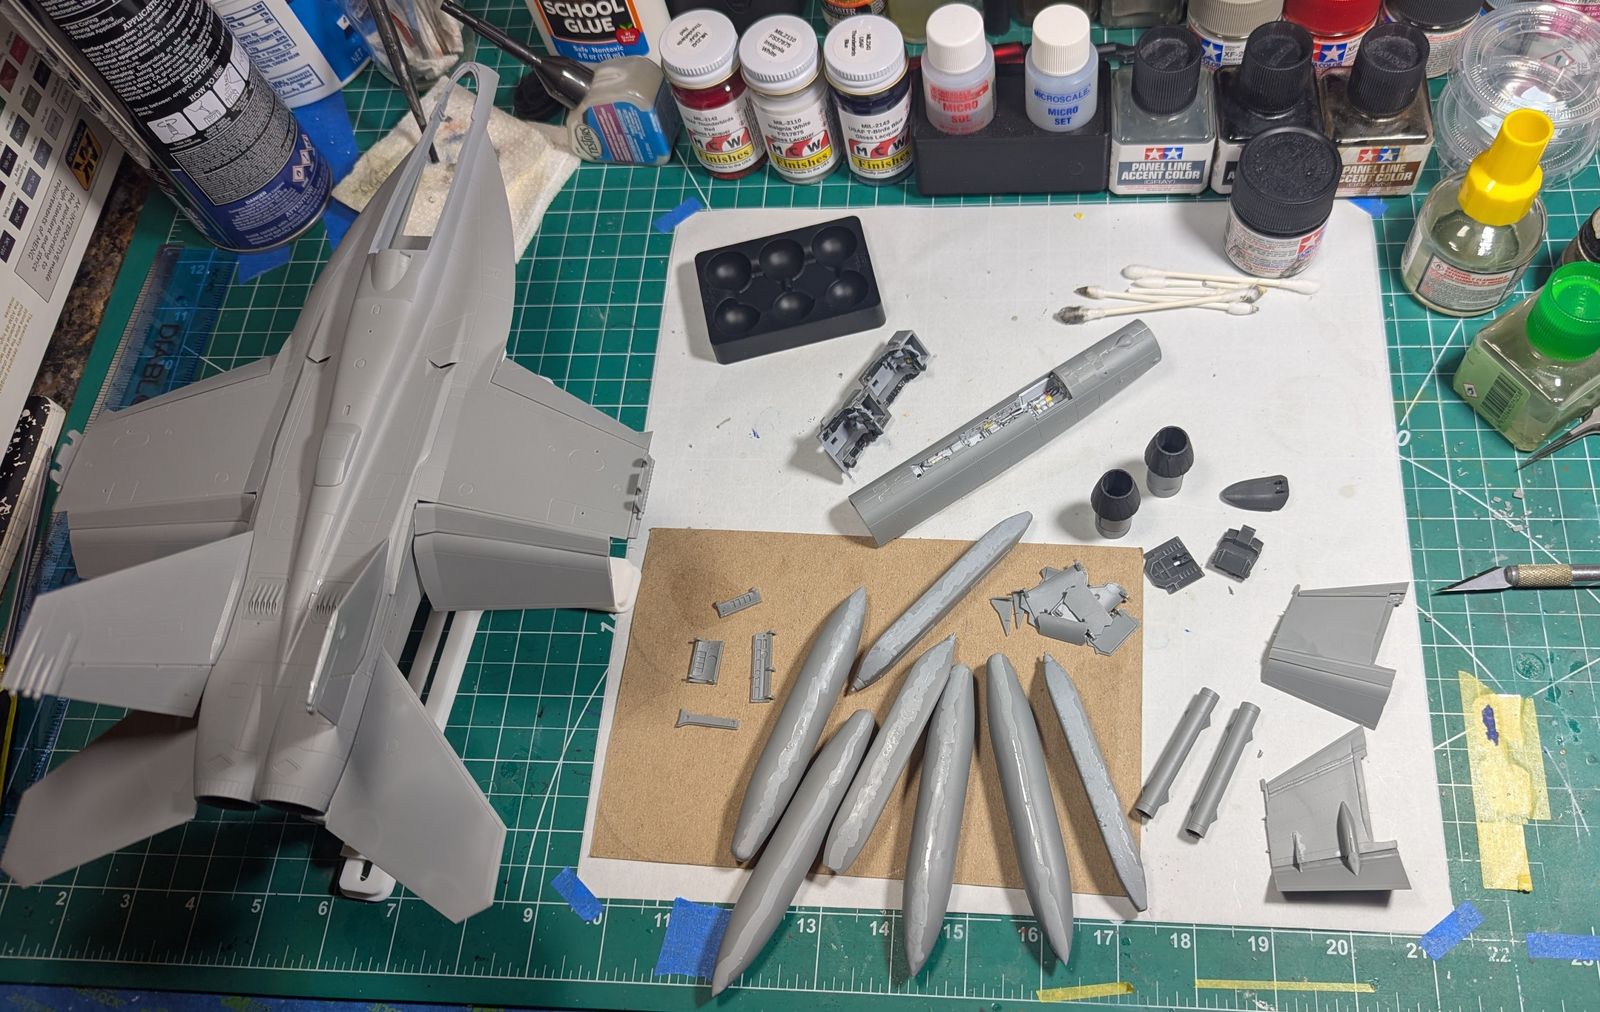
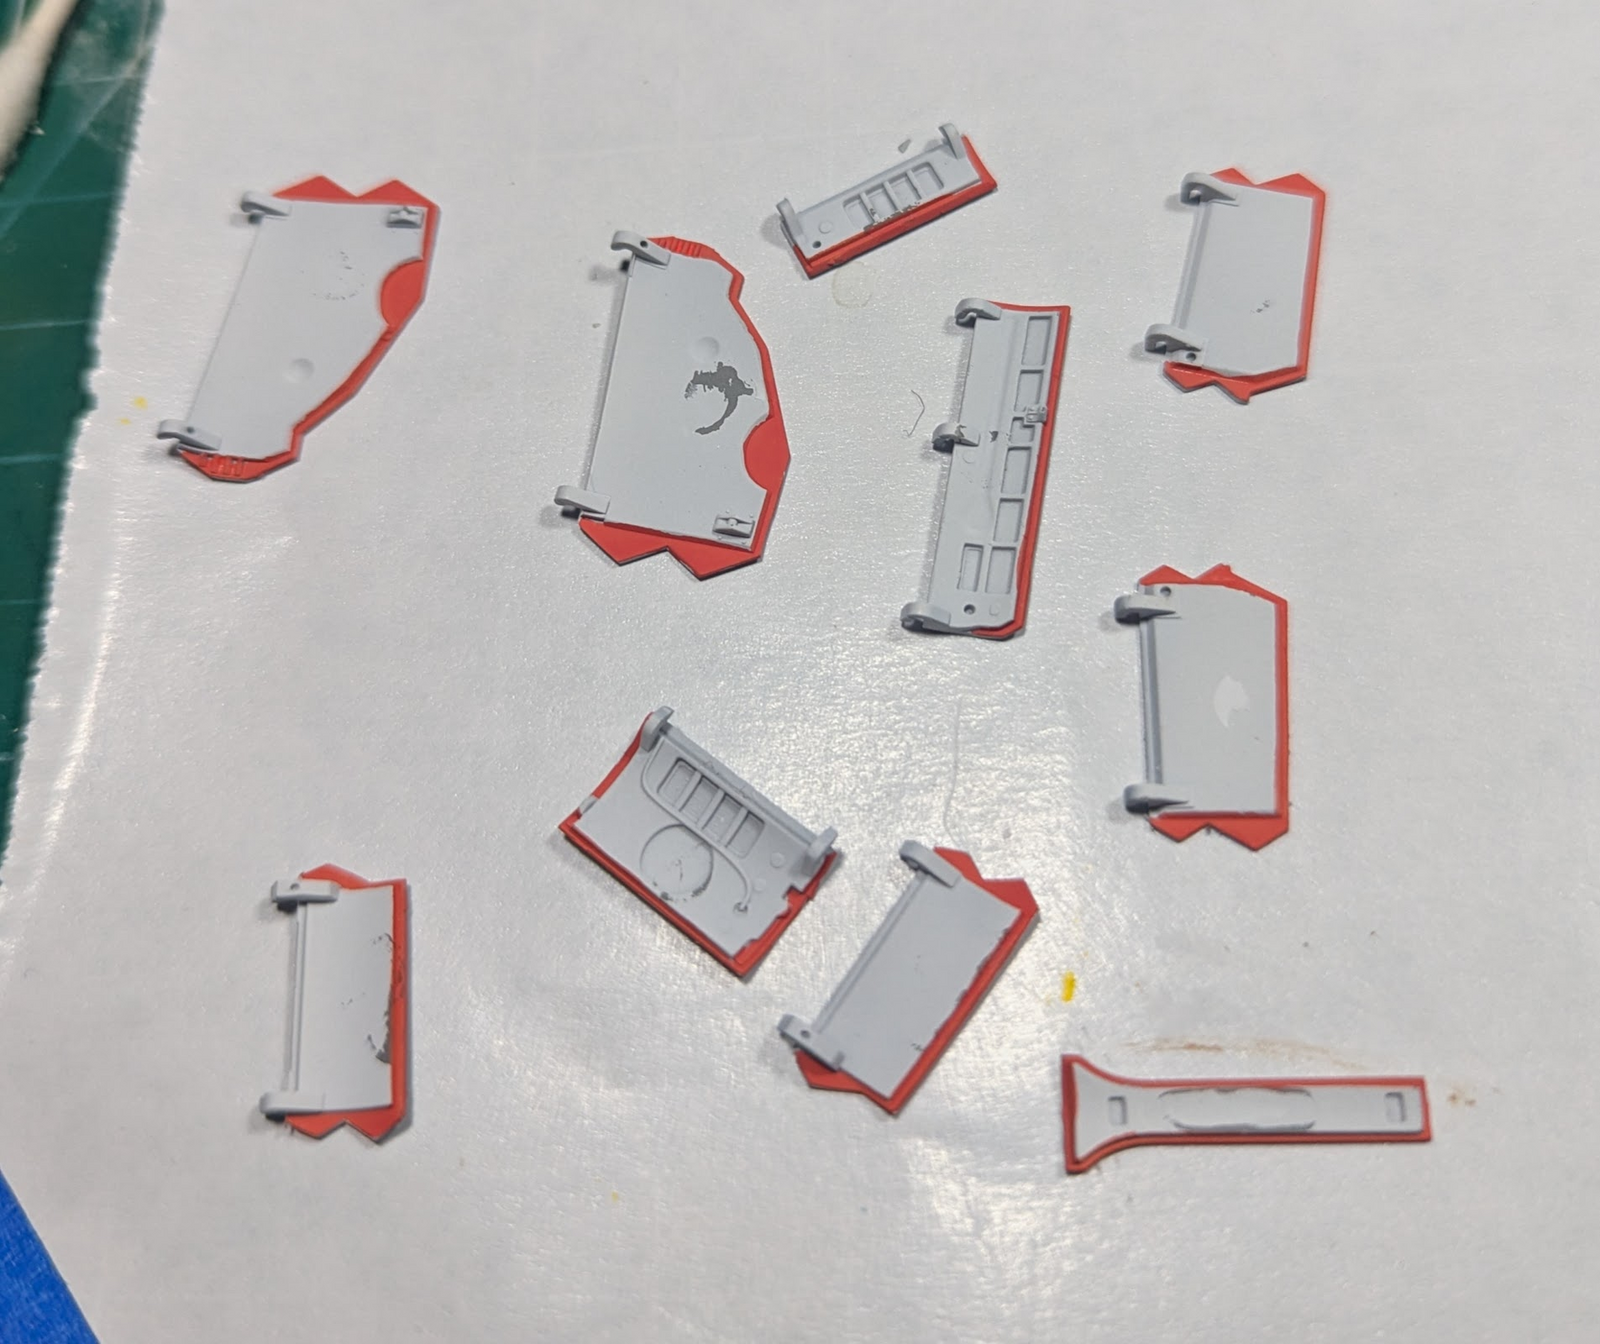
The four drop tanks and ECM pods are together and sanded, then a thick painted layer of gap-filling primer for final sanding stages applied. Started cleaning up the gear doors too, the Elmer's glue is what I use to attach them to the cardboard for painting in case you're wondering. That stuff comes right off when done. The nose gear is adhered (left) the main gear (upper-right) need a cleanup before I glue them down and paint the white. I intend to do the exterior gray afterwards, before messing with the red.

The cockpit is still on hold despite getting my detail kit from Eduard earlier this week. As was pointed out previously, I bought a set for the Trumpeter Growler, not the Meng. It will probably be a 90-95% fit, but I chickened out. If anyone is building the Trumper version let me know, I'll make you a deal on the ad-on :-)

Edit: the elevators and verts are pressed in but not glued. Polycaps on the elevators, just a tight plastic fit on the stabs. Think I'll paint it all up and only glue them in after stickers are done.
 
Current state....

View attachment 180009

The cockpit is on-hold for now, which is preventing next steps if following the instructions. But I always see them as suggestions only, so I'm skipping ahead on other stuff. This is my first Hornet, since I started taking builds seriously that is, and I was not aware how many moving surfaces it has. There's an entire page of the destructions for the wingtips, folded/flat is one option, leading and trailing edges up/down is the other. Pay close attention here when you get to it. There'll be lots of bits for the spare-parts box when finished.

You can probably see I am doing tips up flaps down, since that is what I see with most parked aircraft not in storage.

The four drop tanks and ECM pods are together and sanded, then a thick painted layer of gap-filling primer for final sanding stages applied. Started cleaning up the gear doors too, the Elmer's glue is what I use to attach them to the cardboard for painting in case you're wondering. That stuff comes right off when done. The nose gear is adhered (left) the main gear (upper-right) need a cleanup before I glue them down and paint the white. I intend to do the exterior gray afterwards, before messing with the red.

The cockpit is still on hold despite getting my detail kit from Eduard earlier this week. As was pointed out previously, I bought a set for the Trumpeter Growler, not the Meng. It will probably be a 90-95% fit, but I chickened out. If anyone is building the Trumper version let me know, I'll make you a deal on the ad-on :-)

Edit: the elevators and verts are pressed in but not glued. Polycaps on the elevators, just a tight plastic fit on the stabs. Think I'll paint it all up and only glue them in after stickers are done.
Regarding all the control surfaces on the F-18... One of my brothers was a fighter pilot and F-18 instructor for 25 years. I was seeking his advice on my F-18 build and the topic of control surfaces came up. He said he often found it a bit disconcerting to look back in flight and see the control surfaces flapping and flittering all over the place when he wasn't moving the stick or rudder pedals.
He also said the F-18 was fun and easy to fly. He said the scariest plane He ever flew was a Tiger Moth. He said that, compared to the F-18, the room for error in the Tiger Moth was very small. The difference between stalling and cruising speed wasn't that much. He said getting out of trouble with the F-18 was easy; just point the nose up and ignite the afterburners.
 
Updates!

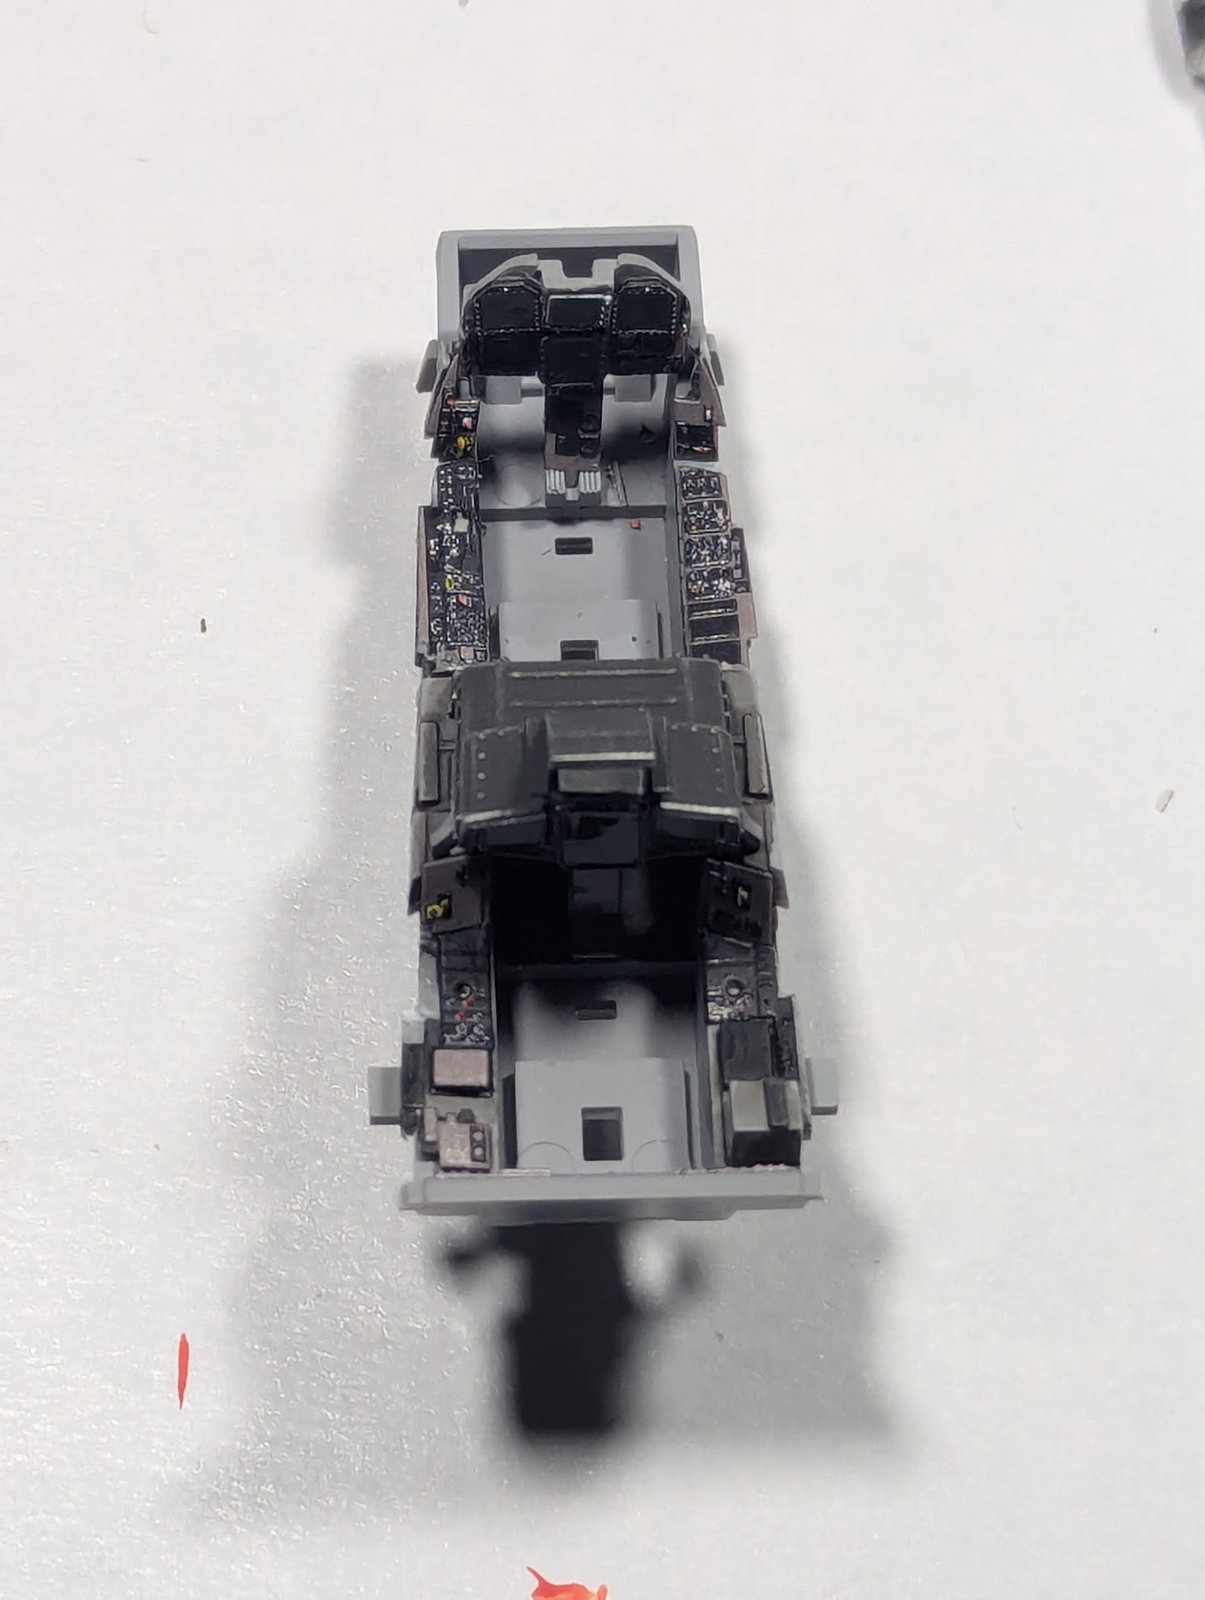
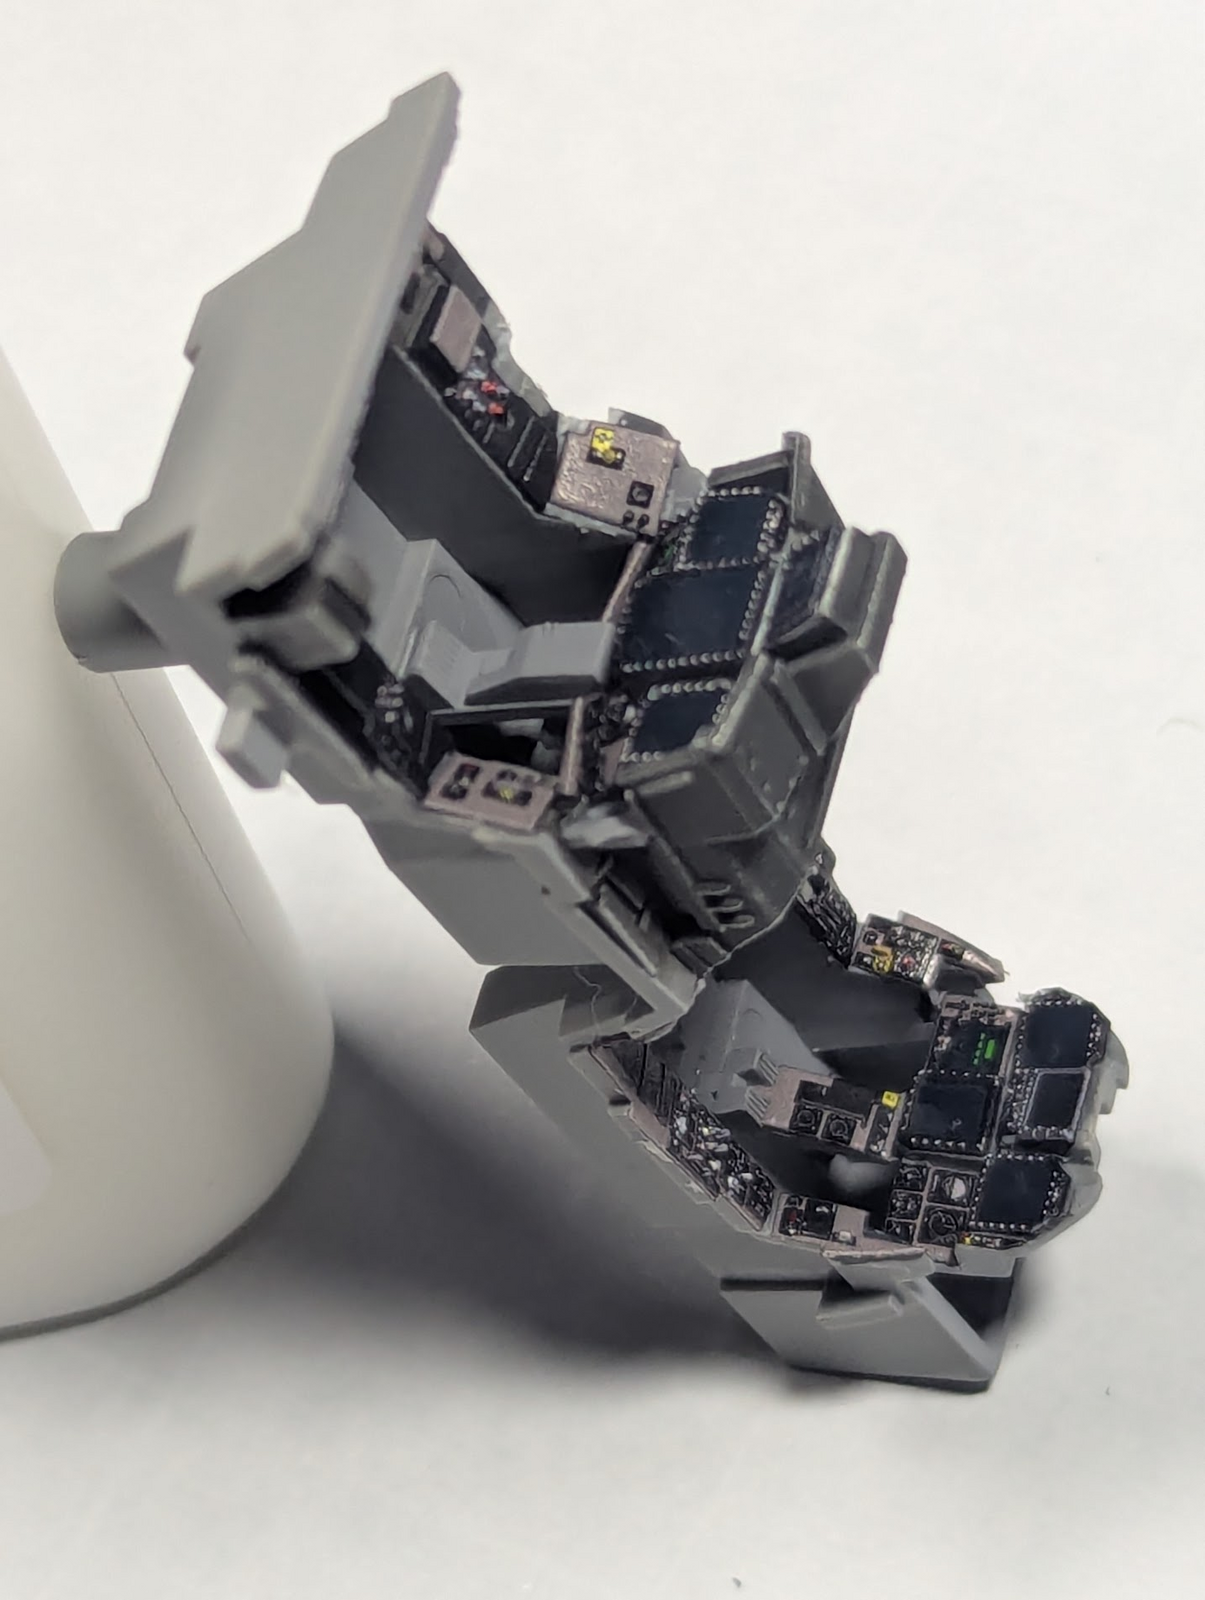
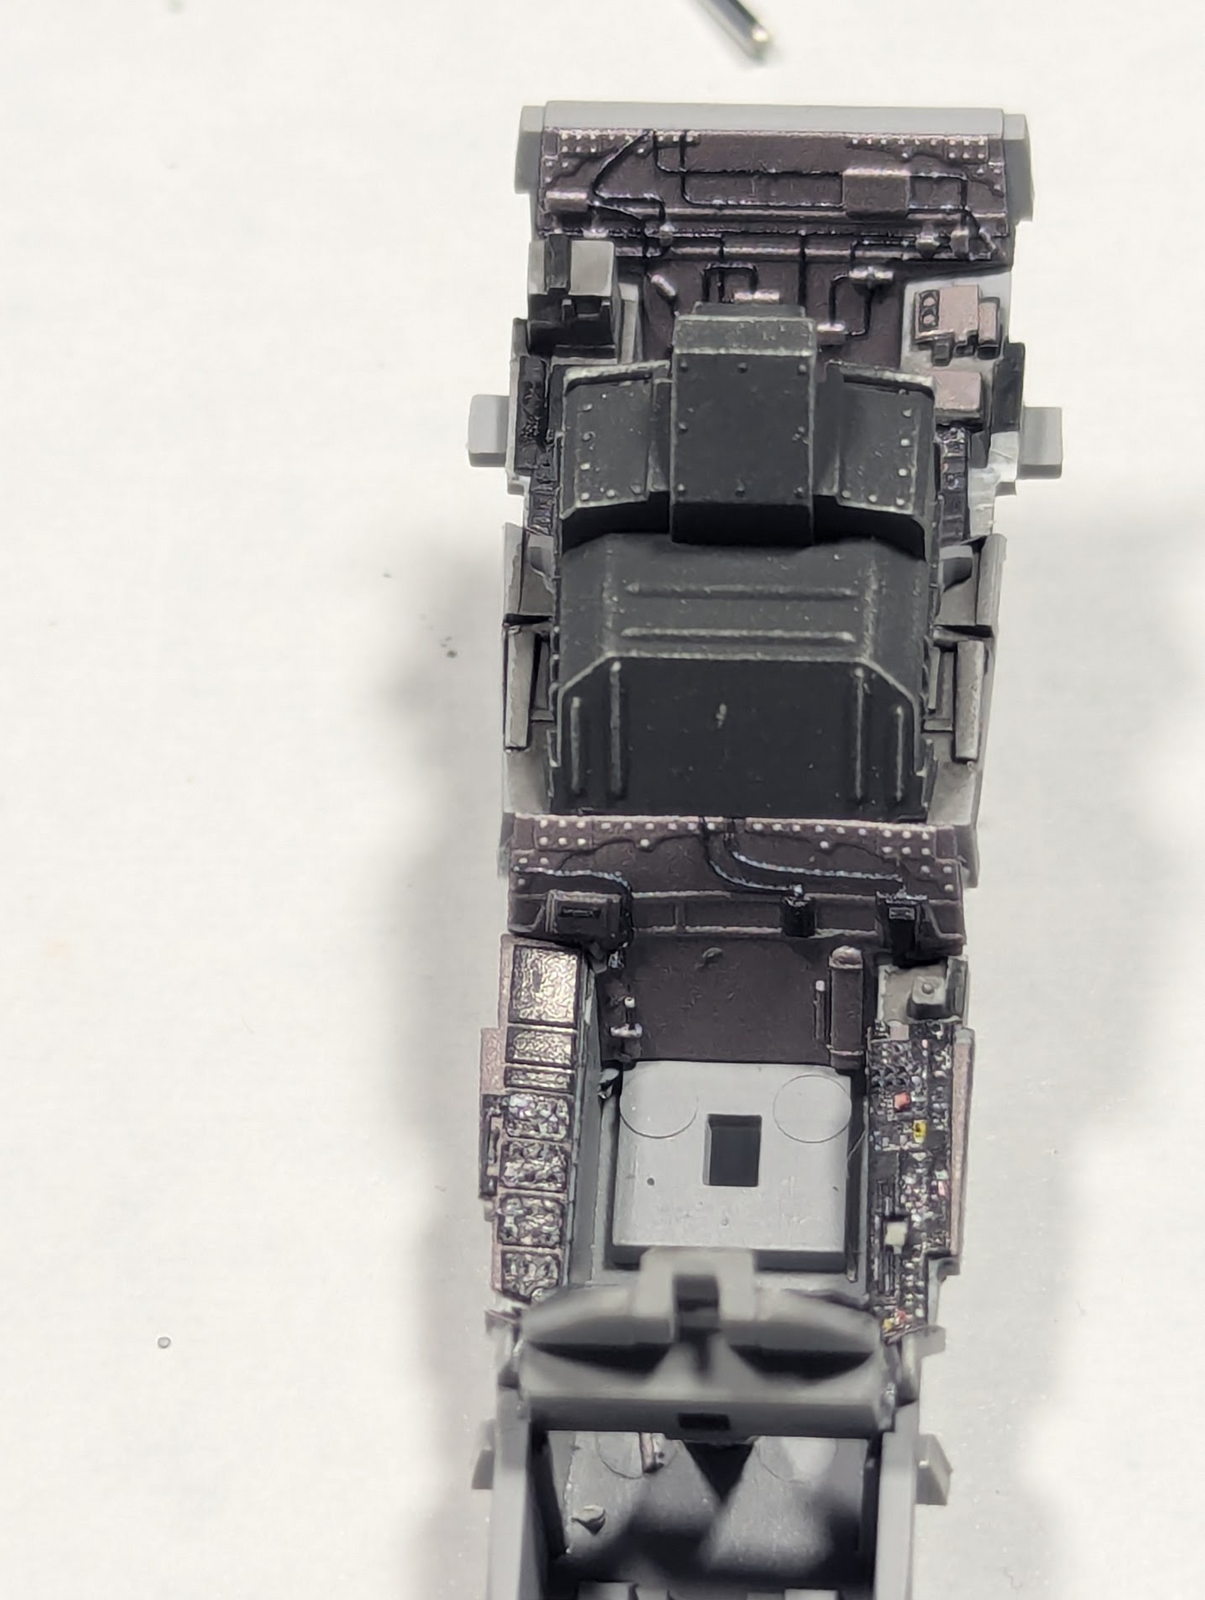
So the cockpit as deliverd from meng has exquisite detail, very three dimensional. They also provide stickers that do not work in the 3D environment. I do not want to knock Meng, I've become a major fan, not quite Tamiya with fit an engineering, but they are there with detail and close on the rest.

Here's an example, the best zoom I could get with a cell phone...
1771462429053.png


I know it is hard to see, but the stickers fit on the raised bits as well as down in the MFDs, which frankly does not work, no matter how much sol solution you apply. Also, lit up MFDs are not appropriate for a parked aircraft not running off an APU, which would only be fired up with a crew onboard or boarding.

So I ordered an aftermarket cockpit detail kit from Eduard. Actually (look back at early pages) I ordered one for a Trumpeter kit not Meng, it included a lot of PE for wheel-wells and other details, but I decided to get a 2nd kit meant for the Meng that has powered-off MFDs. This one is from a company I've not used before "Kelik". I try to avoid politics here on SMA, so do not want to get involved in the Ukraine war topic, but will support any company from anywhere that makes good stuff, and this is it. Go Ukraine!

These are "3D decals", which means they come off the backing paper the way normal stickers do. But in this case there's nowhere near enough adhesive to apply them to styrene. So I used a lot of white glue (Elmer's "School glue" in the USA example) and it seems to be working fine. Below are a few shots as examples.

1771463015783.png

1771463022557.png

1771463029348.png


While I am adding updated photos, here's the landing gear wheel covers...

1771463086621.png


I have found that AK paint markers make this detail into child's play. But I think it is too pink if I am honest. In the old days (2024) I used a red sharpie, but discovered that ink caused bleeding that the AK markers do not. I want something in between, but it does not yet exist.
 
Last edited:
I hate gap-filling and seam-repair more than almost anything in the hobby, even more than tracks for armor since I cannot cover them with mud :-)

One thing I like about Meng is the excellent fit, but the complex shapes and lines of the Hornet make such things inevitable.

Here's what is going to hold this project back by quite a bit...
1771463873239.png


That (primitively) highlighted bit in yellow needs to go away...ooof!
 
@Edbert I have been eagerly waiting to see which way you were going to go with the cockpit! So glad to hear you went with the 3D printed decals vs the PE set. I too chose to go that route and I was very close to going with the same Kelik set, but decided I didn't want to risk a long wait or customs issues, so I went with the Quinta Studios set that was a US seller. They look amazing on your Growler.

I hear you on the whole seams, putty, sanding blah, blah, blah. It's the worst part of modeling for me as well! I might just fill those fuselage gaps with styrene, I just hate putty that bad...lol. I also didn't like the thought of dealing with the intake seams, and went with 3D printed parts, but the trunks aren't fitting as nicely as I thought they would, so I'll have to play around with them and see what works best.
 
Last edited:
Alright fellas, I've getting some uneasiness with the colors of the exterior now. Official colors are FS#s (Federal Standard) and that is easy enough right? One would think. However it appears that all of the hobby paint companies have their own "interpretation" of what "Dark Ghost gray" and "Light Ghost Gray" really looks like.

To my eye, and all the photos I've seen in my references and elsewhere the two grays are very close to each other and might have a faint blueness to them. I think this website captures it pretty well.

Before doing much research I bought a 10ml LP pot of each LGG/DGG from Tamiya. I posted them early in this thread (page 3) and they look pretty blue. If you see the picture above I have a little bit of it on the model and it definitely looks blue.

I'm trying to find a paint that matches the two FS#s better, see what you think about these two links:
https://www.modelshade.com/paint-conversion-chart/fs/36320
https://www.modelshade.com/paint-conversion-chart/fs/36375

Should I stop worrying and use the Tamiya LP version or get a different color? I find it interesting that modelshade says XF-19 is both...LOL. But maybe I can use that (XF-19) and lighten it a bit for the 2nd color.
 
Too bad it's not armour... with my Italian vehicles, good colour references are scarce, and precise paint hues hard to come by... so I lean on filters to slowly pull the colour in the direction I want it to go. And that was with a brush — I imagine AB application will be even more subtle.
Of course, an additive process is scary, so I usually test on a mule beforehand.
 
Alright fellas, I've getting some uneasiness with the colors of the exterior now. Official colors are FS#s (Federal Standard) and that is easy enough right? One would think. However it appears that all of the hobby paint companies have their own "interpretation" of what "Dark Ghost gray" and "Light Ghost Gray" really looks like.

To my eye, and all the photos I've seen in my references and elsewhere the two grays are very close to each other and might have a faint blueness to them. I think this website captures it pretty well.

Before doing much research I bought a 10ml LP pot of each LGG/DGG from Tamiya. I posted them early in this thread (page 3) and they look pretty blue. If you see the picture above I have a little bit of it on the model and it definitely looks blue.

I'm trying to find a paint that matches the two FS#s better, see what you think about these two links:
https://www.modelshade.com/paint-conversion-chart/fs/36320
https://www.modelshade.com/paint-conversion-chart/fs/36375

Should I stop worrying and use the Tamiya LP version or get a different color? I find it interesting that modelshade says XF-19 is both...LOL. But maybe I can use that (XF-19) and lighten it a bit for the 2nd color.
I have the Vallejo Air Dark Ghost Grey and the Light Ghost Grey, which is a primer, for my F18, and both match the FS color number. They are very close, and both have a touch of blue.

https://www.scalehobbyist.com/catag...071120/product.php?kw=Vallejo,dark,ghost,grey

https://www.scalehobbyist.com/catag...70615/product.php?kw=Vallejo,light,ghost,grey
 
Last edited:
@Edbert I think one of the main issues when trying to match visuals colors as seen of the actual aircraft, there are so many variables, lighting, aircraft motion angles, and the simple fact that Naval aircraft are exposed to so many elements which fade and alter the color. Interestingly, if you put a USAF & USN 18's side by side, you'll see the contrast of stowed (hangar kept) aircraft vs the exposed and how much difference there is. Also, image capturing devices, cell phone, camera or video devices also add variables.

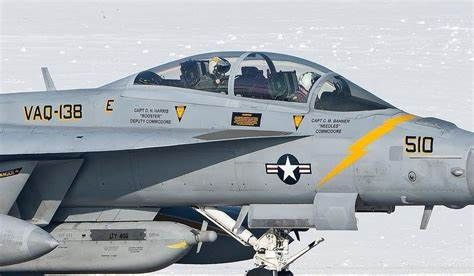
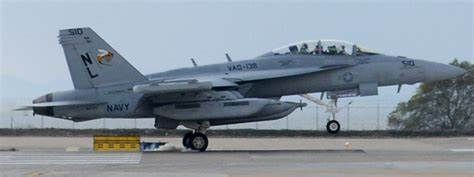
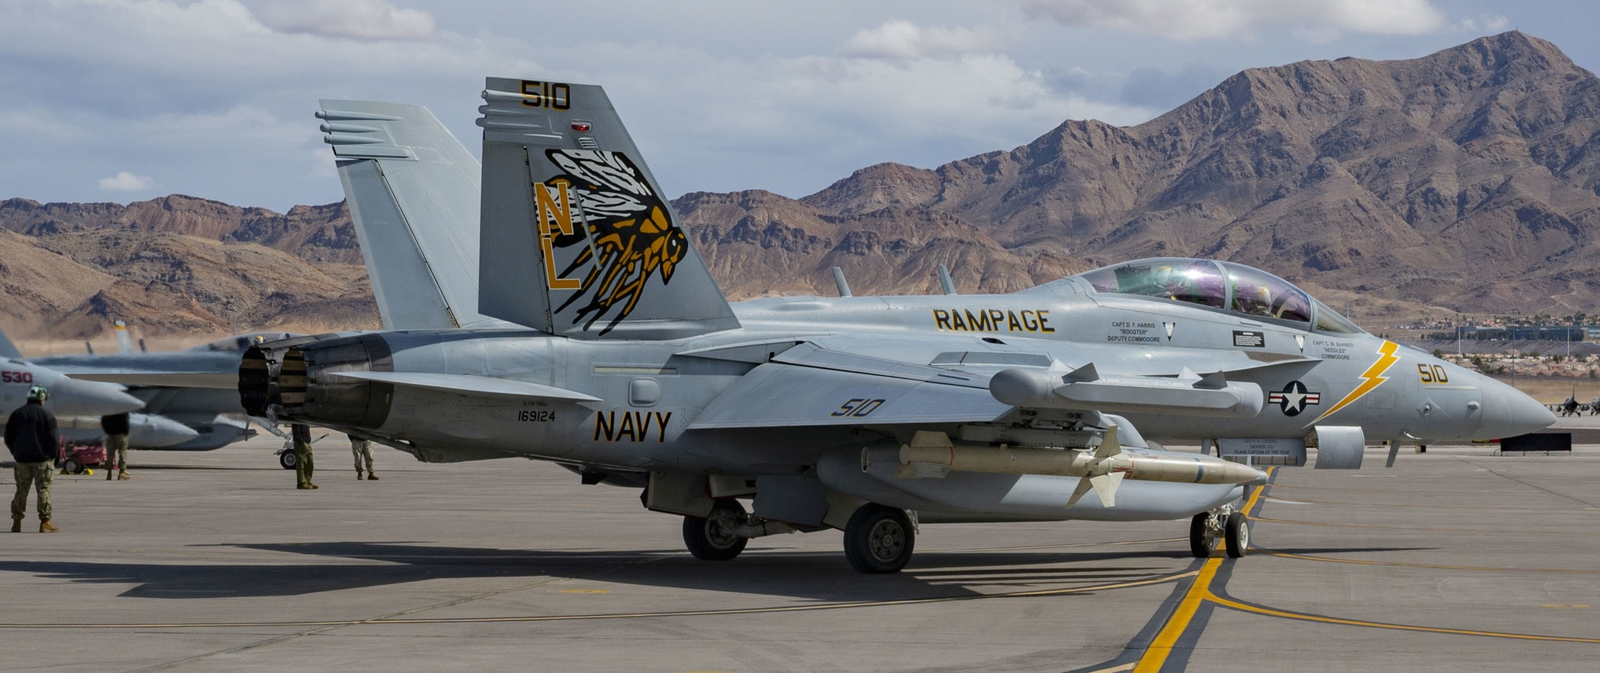
I tend to lighten the base colors for scale effect. If I add 2 drops of white to DGG, I do the same for LGG to keep it relative. If your painting it as a very weathered aircraft, using only one color overall with slight lightening can be a great way to go. What I usually do, is a lot of layering. Starting with black basing/priming overall, followed by white marbling and highlighting, then followed by the base color/colors. You can go back over areas to lighten and highlight even more to your desired color shade you find most suitable. Seal it up and apply decals, then any weathering you'd like. Here are a couple close ups of EA-18Gs from VAQ-138 that you can see the color variation. HTH

1000024573.jpg1000024572.jpg
 
Alright fellas, I've getting some uneasiness with the colors of the exterior now. Official colors are FS#s (Federal Standard) and that is easy enough right? One would think. However it appears that all of the hobby paint companies have their own "interpretation" of what "Dark Ghost gray" and "Light Ghost Gray" really looks like.
Should I stop worrying and use the Tamiya LP version or get a different color? I find it interesting that modelshade says XF-19 is both...LOL. But maybe I can use that (XF-19) and lighten it a bit for the 2nd color.
I'm no expert, but here's my opinion on the whole paint color thing. I'm not building my model for a government contract, I'm building it because it's my hobby and I enjoy doing it. I'm going to be looking at said model for the rest of my life in my display case. So I try to get close to the color called for in the FS references, but what it comes down to is painting it so that I think it looks great. (gets down off of soap box);)
 
I'm no expert, but here's my opinion on the whole paint color thing. I'm not building my model for a government contract, I'm building it because it's my hobby and I enjoy doing it. I'm going to be looking at said model for the rest of my life in my display case. So I try to get close to the color called for in the FS references, but what it comes down to is painting it so that I think it looks great. (gets down off of soap box);)
Total agreement bro. But did you see how blue my Hornet was looking?

That said, here's a fully operational version, I confess I can see the "blueness" (not a word thank you) in that pic. I think I am worrying about nothing, just seeking consolation :)

1771544322575.png
 
I agree, the Meng cockpit is pretty detailed.

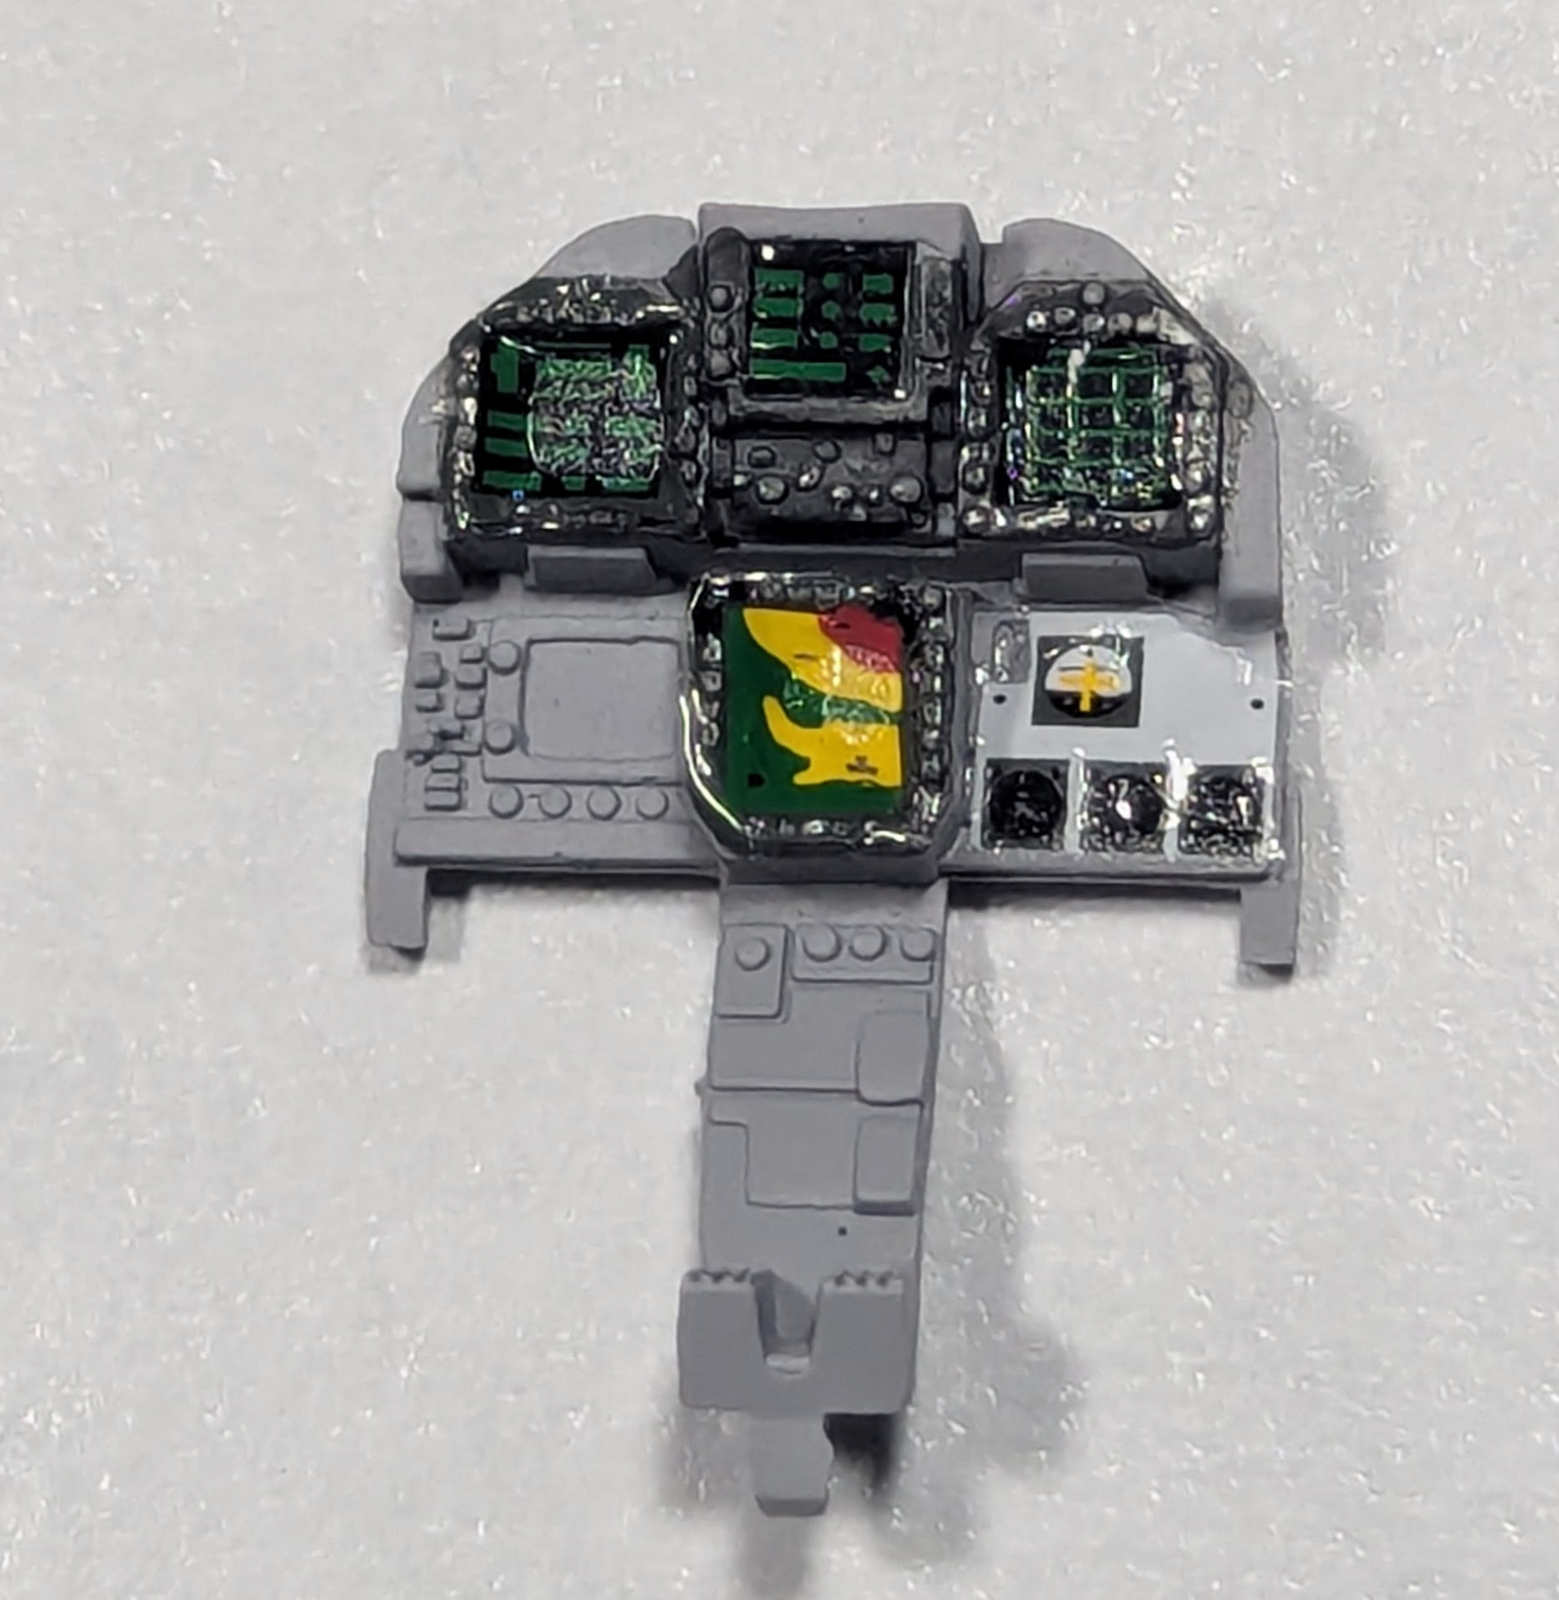
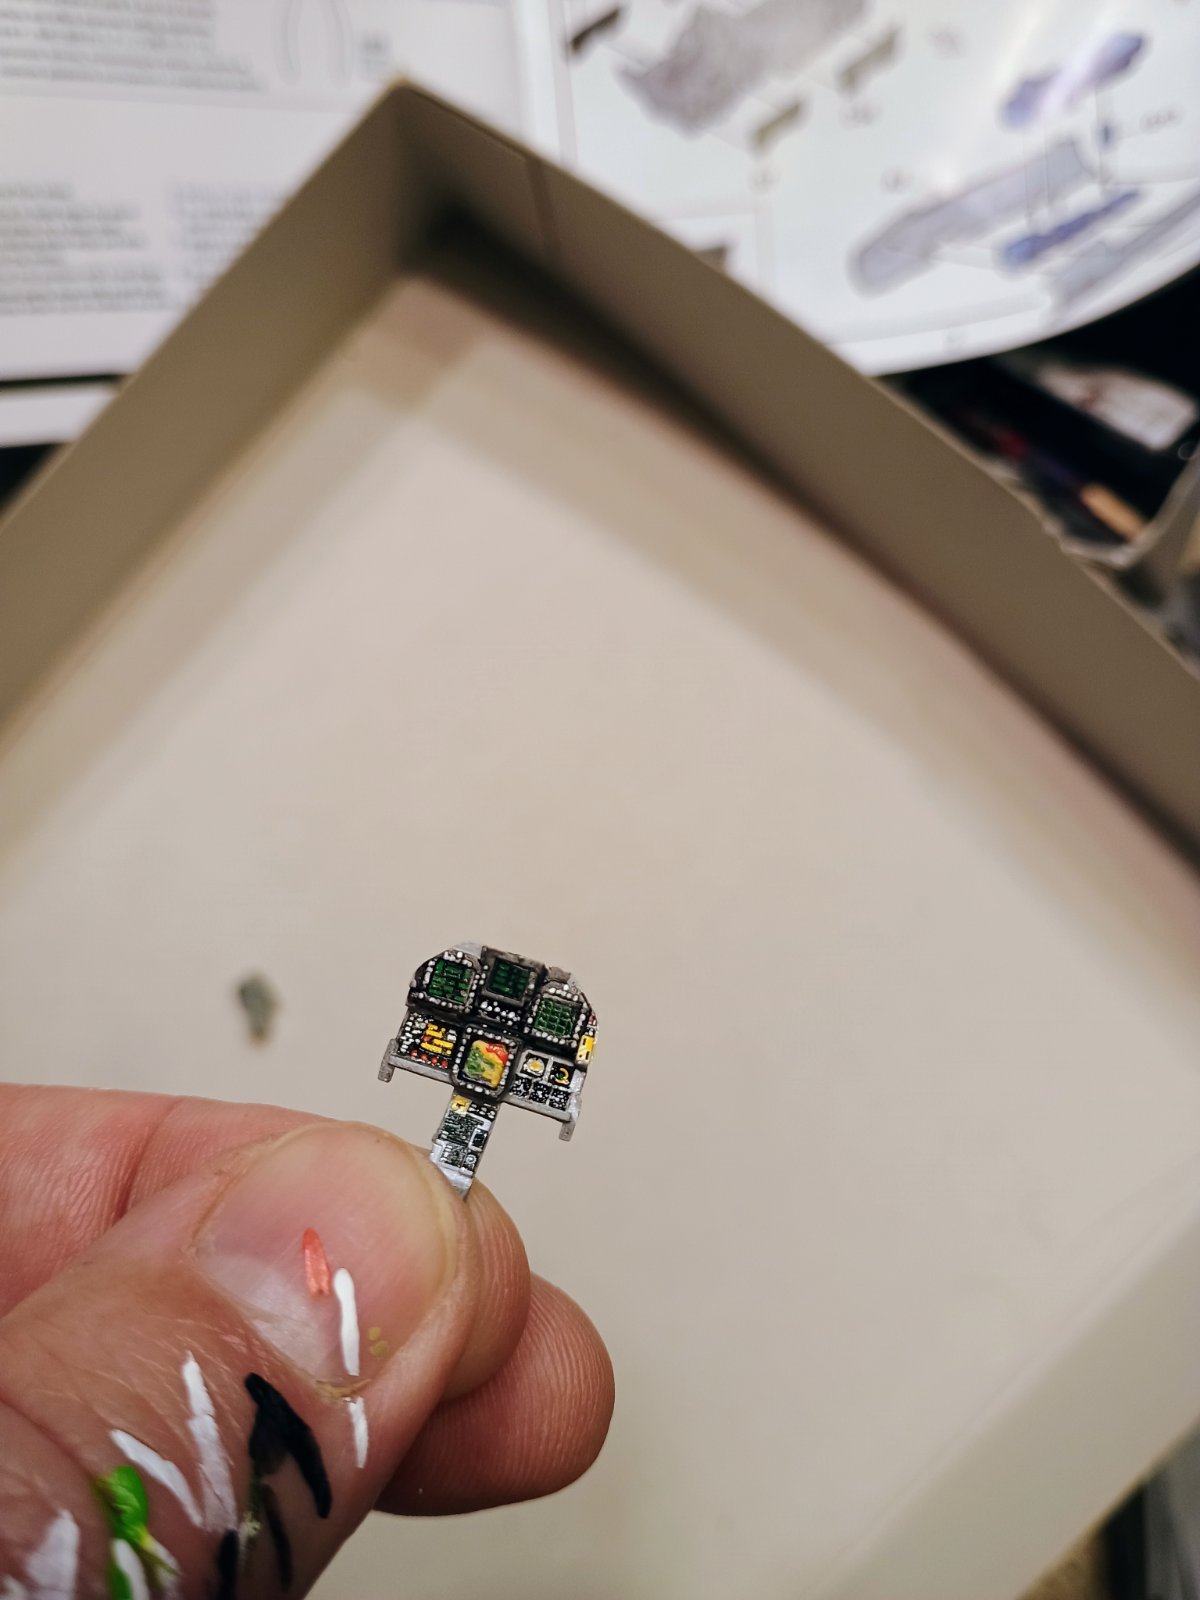
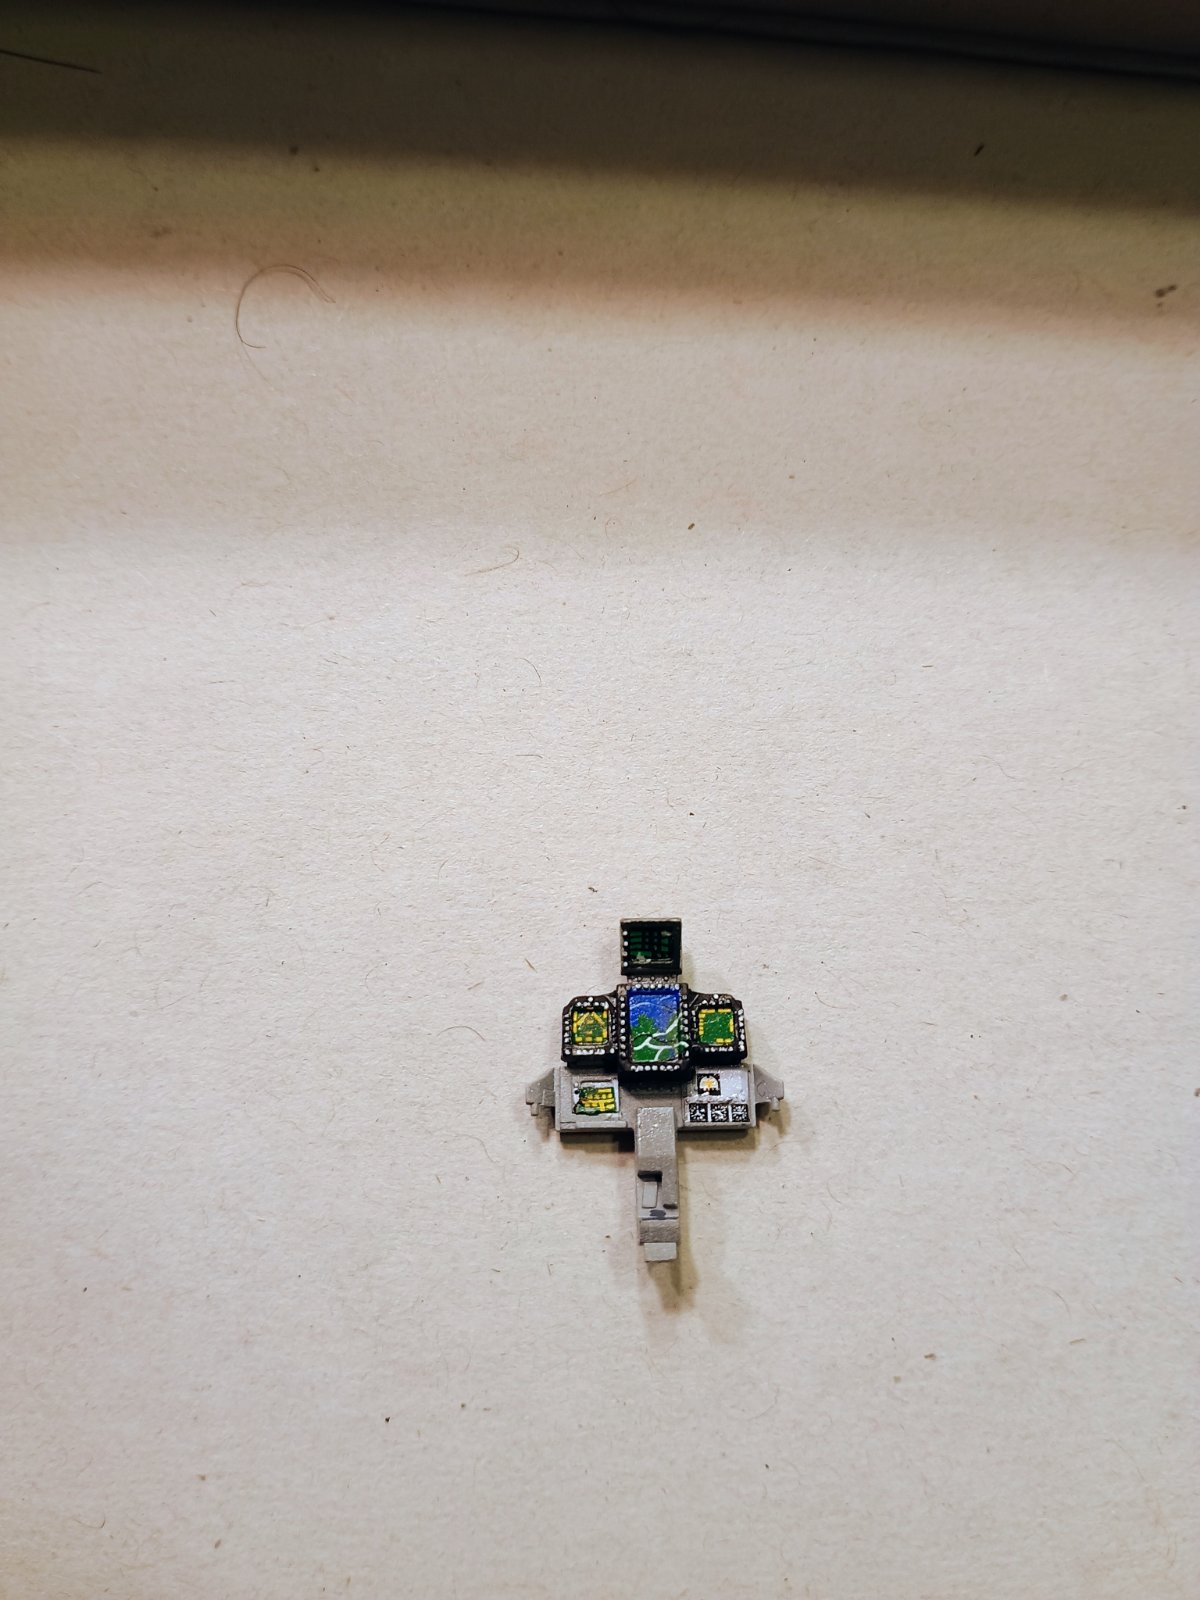
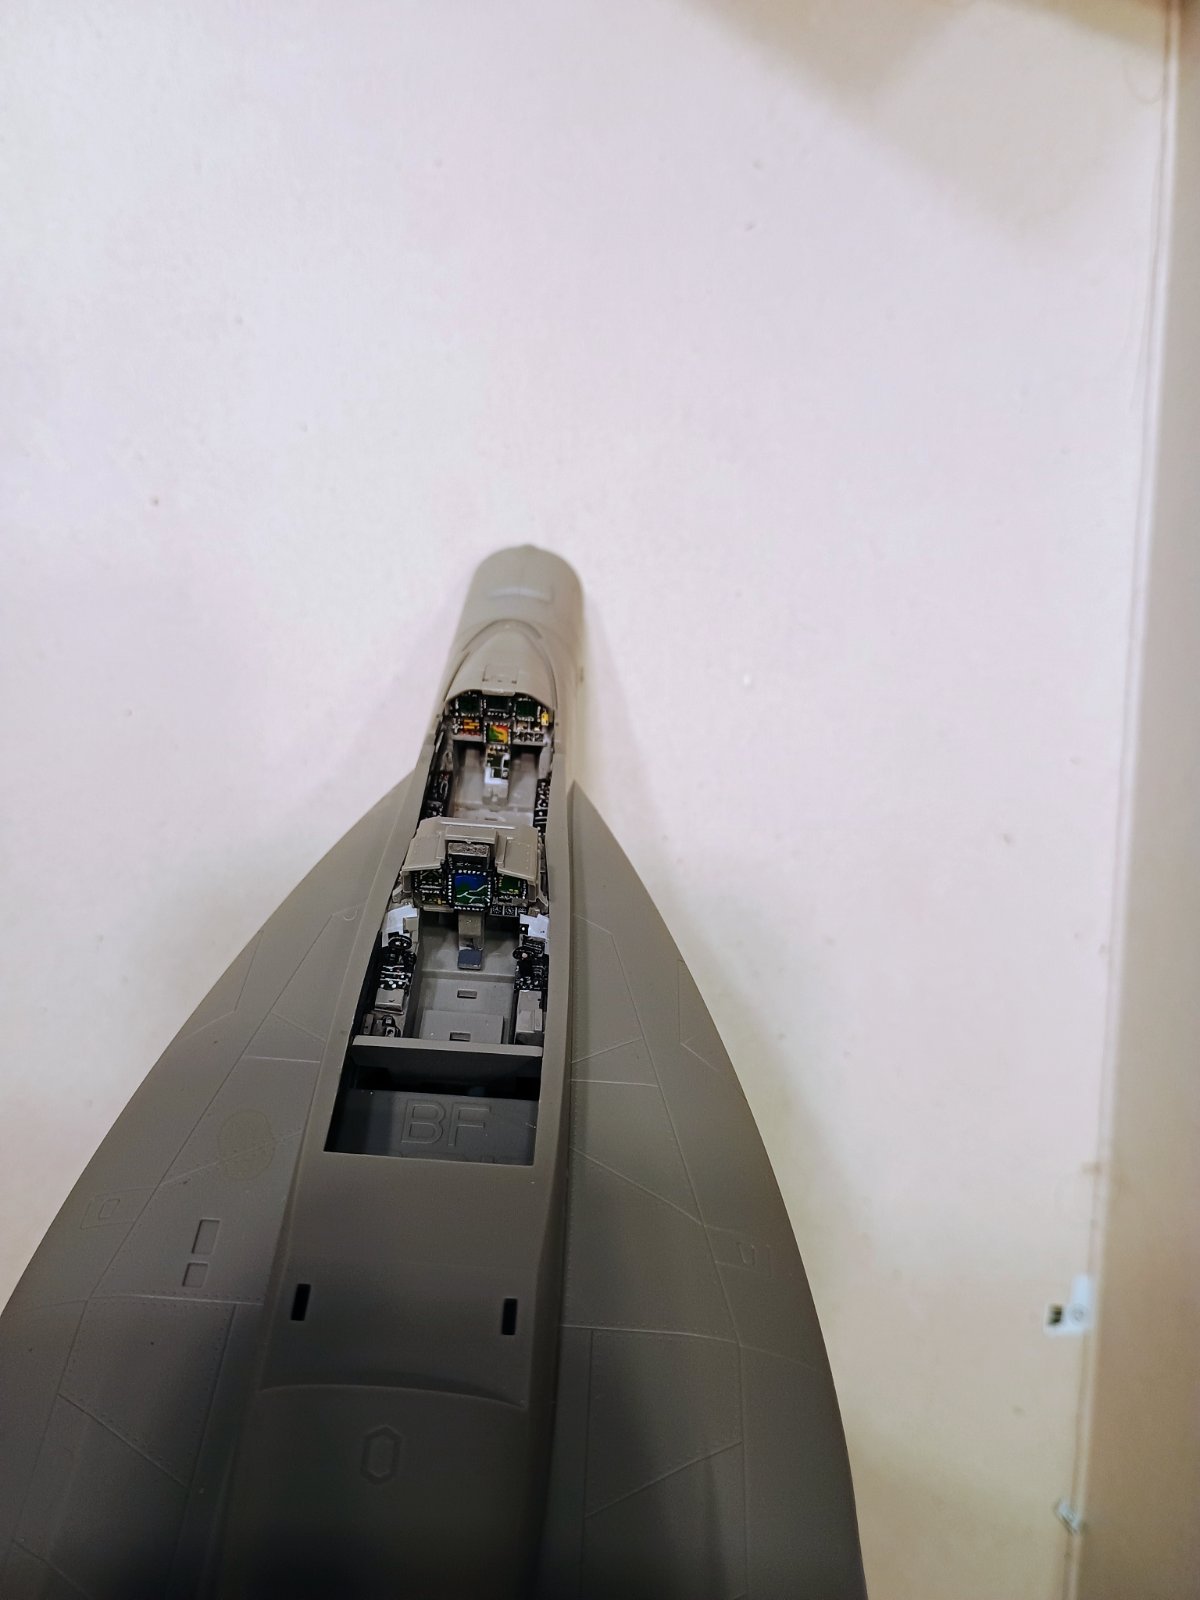
However, using decals over some of the detail is a challenge. I found it better to cut out the display screens and drybrush the rivets if using the kit parts and decals.

Although I dropped the one screen decal showing the color coded map and it was lost by the carpet monster. I gave up looking for it, so I painted my own. Not perfect as far as painting the rivets/buttons around the screens but at normal viewing vs zoomed in photos it is fine, especially once the canopy is on and pilots are in there

IMG_20260218_234719024_AE.jpg

IMG_20260218_225842148_AE.jpg

IMG_20260219_000157354_AE.jpg
 

Latest posts

Back
Top