German 8 Wheeled 233 Build

Scale Model Addict - Model Tips, Guides, Tools & Tech, Tutorials, and Community

Help Support Scale Model Addict:

What you smell is the nefarious smell if fire-cracker powder as they are being carefully placed inside a Sd.Kfz. 233 8 Rad model's interior. LOL

Just joshin' ya.

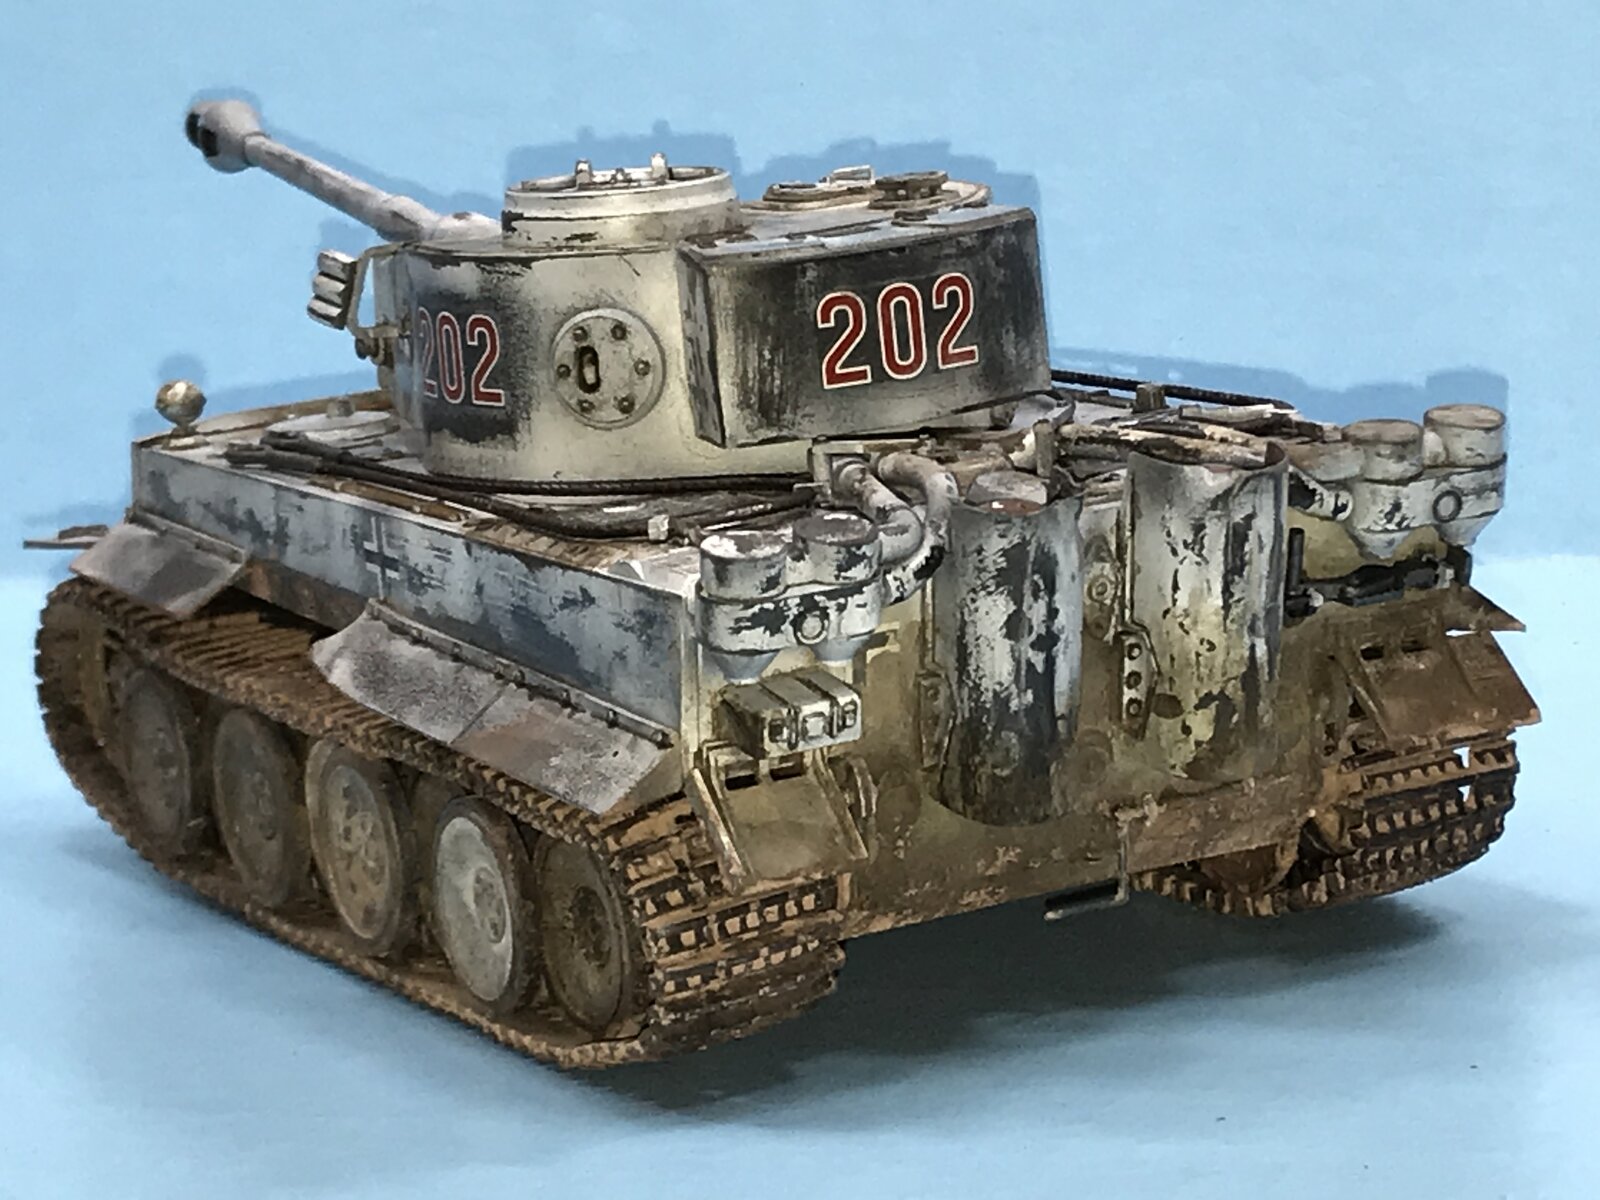
I don't know if DAK will be my Tiger 1's attire. I am thinking maybe going out of the box this time for an Eastern Front look. Maybe panzer grey with a whitewash in-field camo as the snow came down. It's minus 4 degrees F today at home... So, I am thinking while cold. F is for Fahrenheit, not the other F word but it could apply.

I don't know yet, but most of my kits end up sandy.
 
What you smell is the nefarious smell if fire-cracker powder as they are being carefully placed inside a Sd.Kfz. 233 8 Rad model's interior. LOL

Just joshin' ya.

I don't know if DAK will be my Tiger 1's attire. I am thinking maybe going out of the box this time for an Eastern Front look. Maybe panzer grey with a whitewash in-field camo as the snow came down. It's minus 4 degrees F today at home... So, I am thinking while cold. F is for Fahrenheit, not the other F word but it could apply.

I don't know yet, but most of my kits end up sandy.
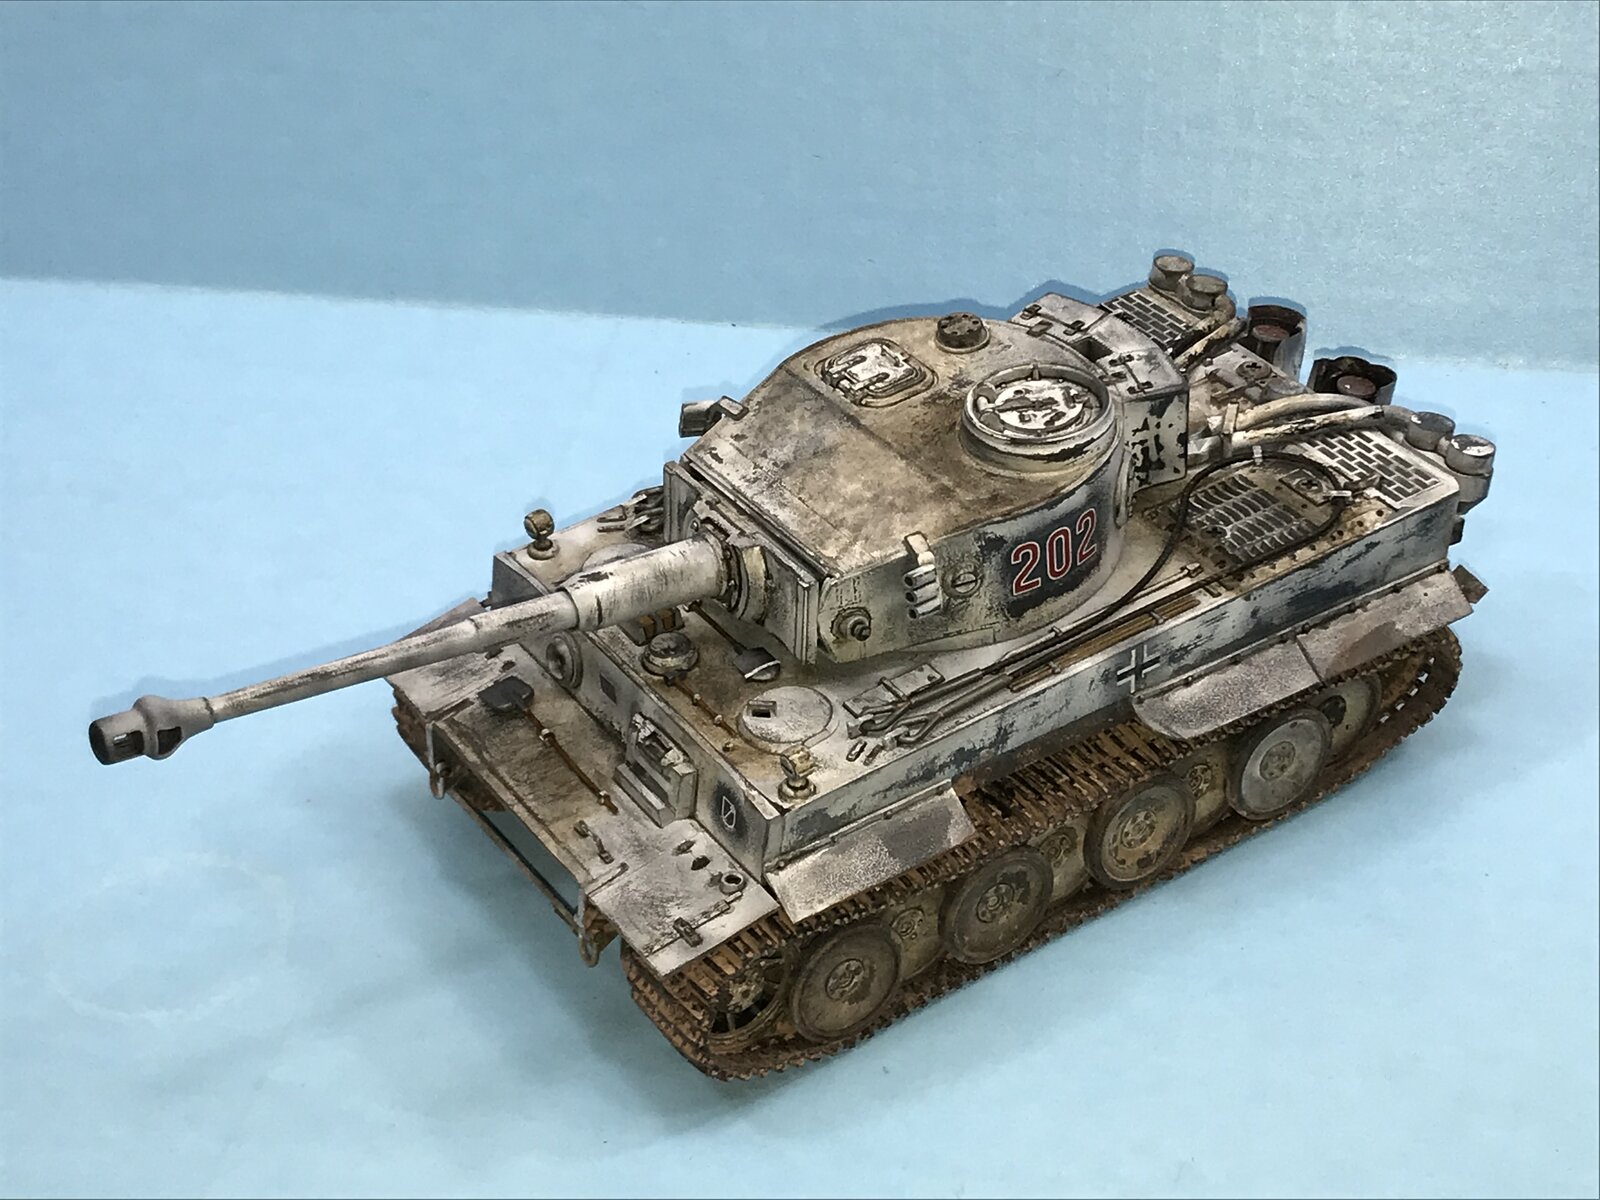
The whitewash is really cool looking. I built this old 1/35 Tamiya Tiger over 30 years ago and was about to toss it. I experimented with hairspray and white craft paint and was happy with the results.
IMG_5438.jpeg
IMG_5437.jpeg
 
As an Amazon Associate we earn from qualifying purchases. Product prices and availability are accurate as of the date/time indicated and are subject to change.
So, I went to box up the 1/35th 8 Rad, and I just felt like a quitter. I don't think my aged ability will get better if I don't put my nose to the grindstone and finish it. So, the 8 wheeler is still on the bench. PE 'joy' ensues.

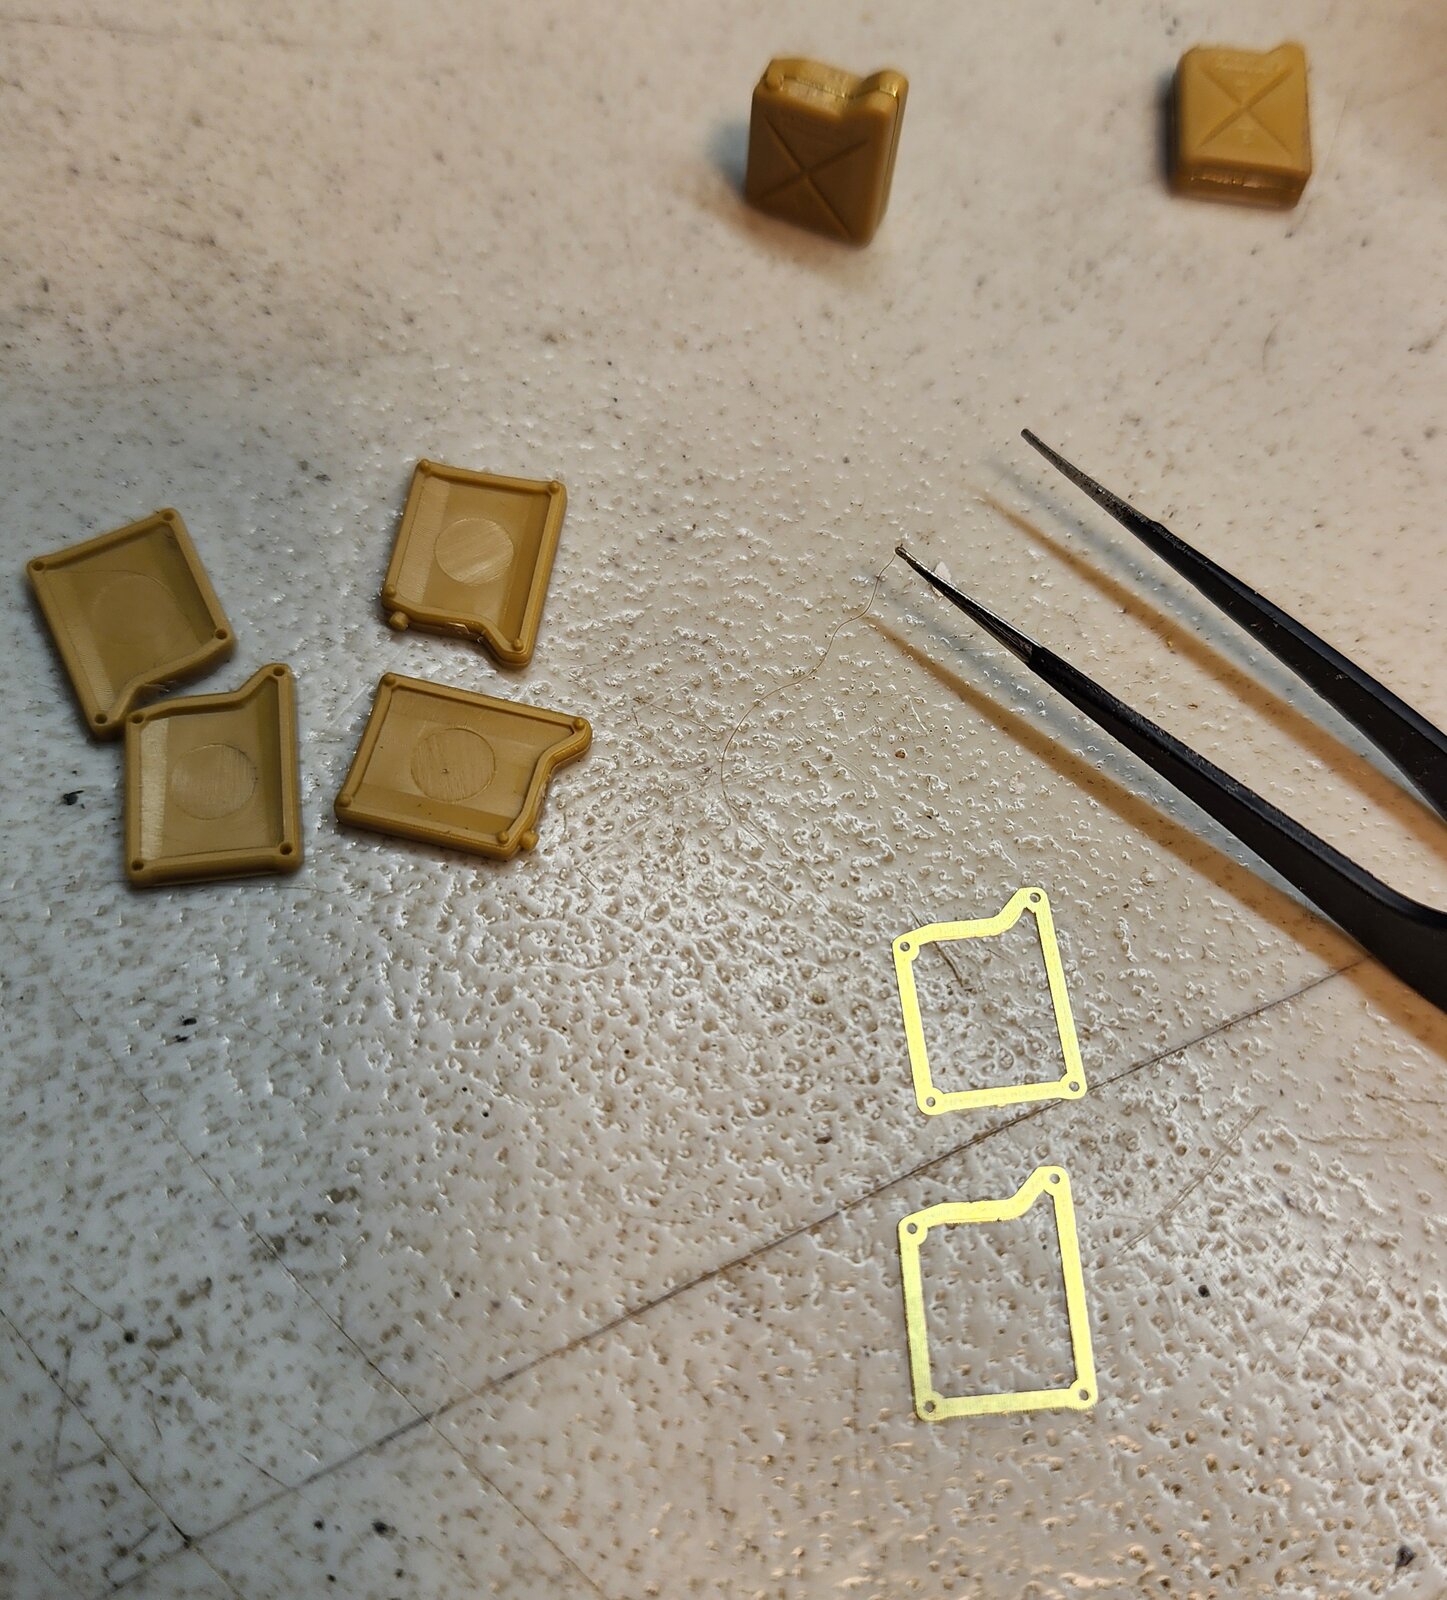
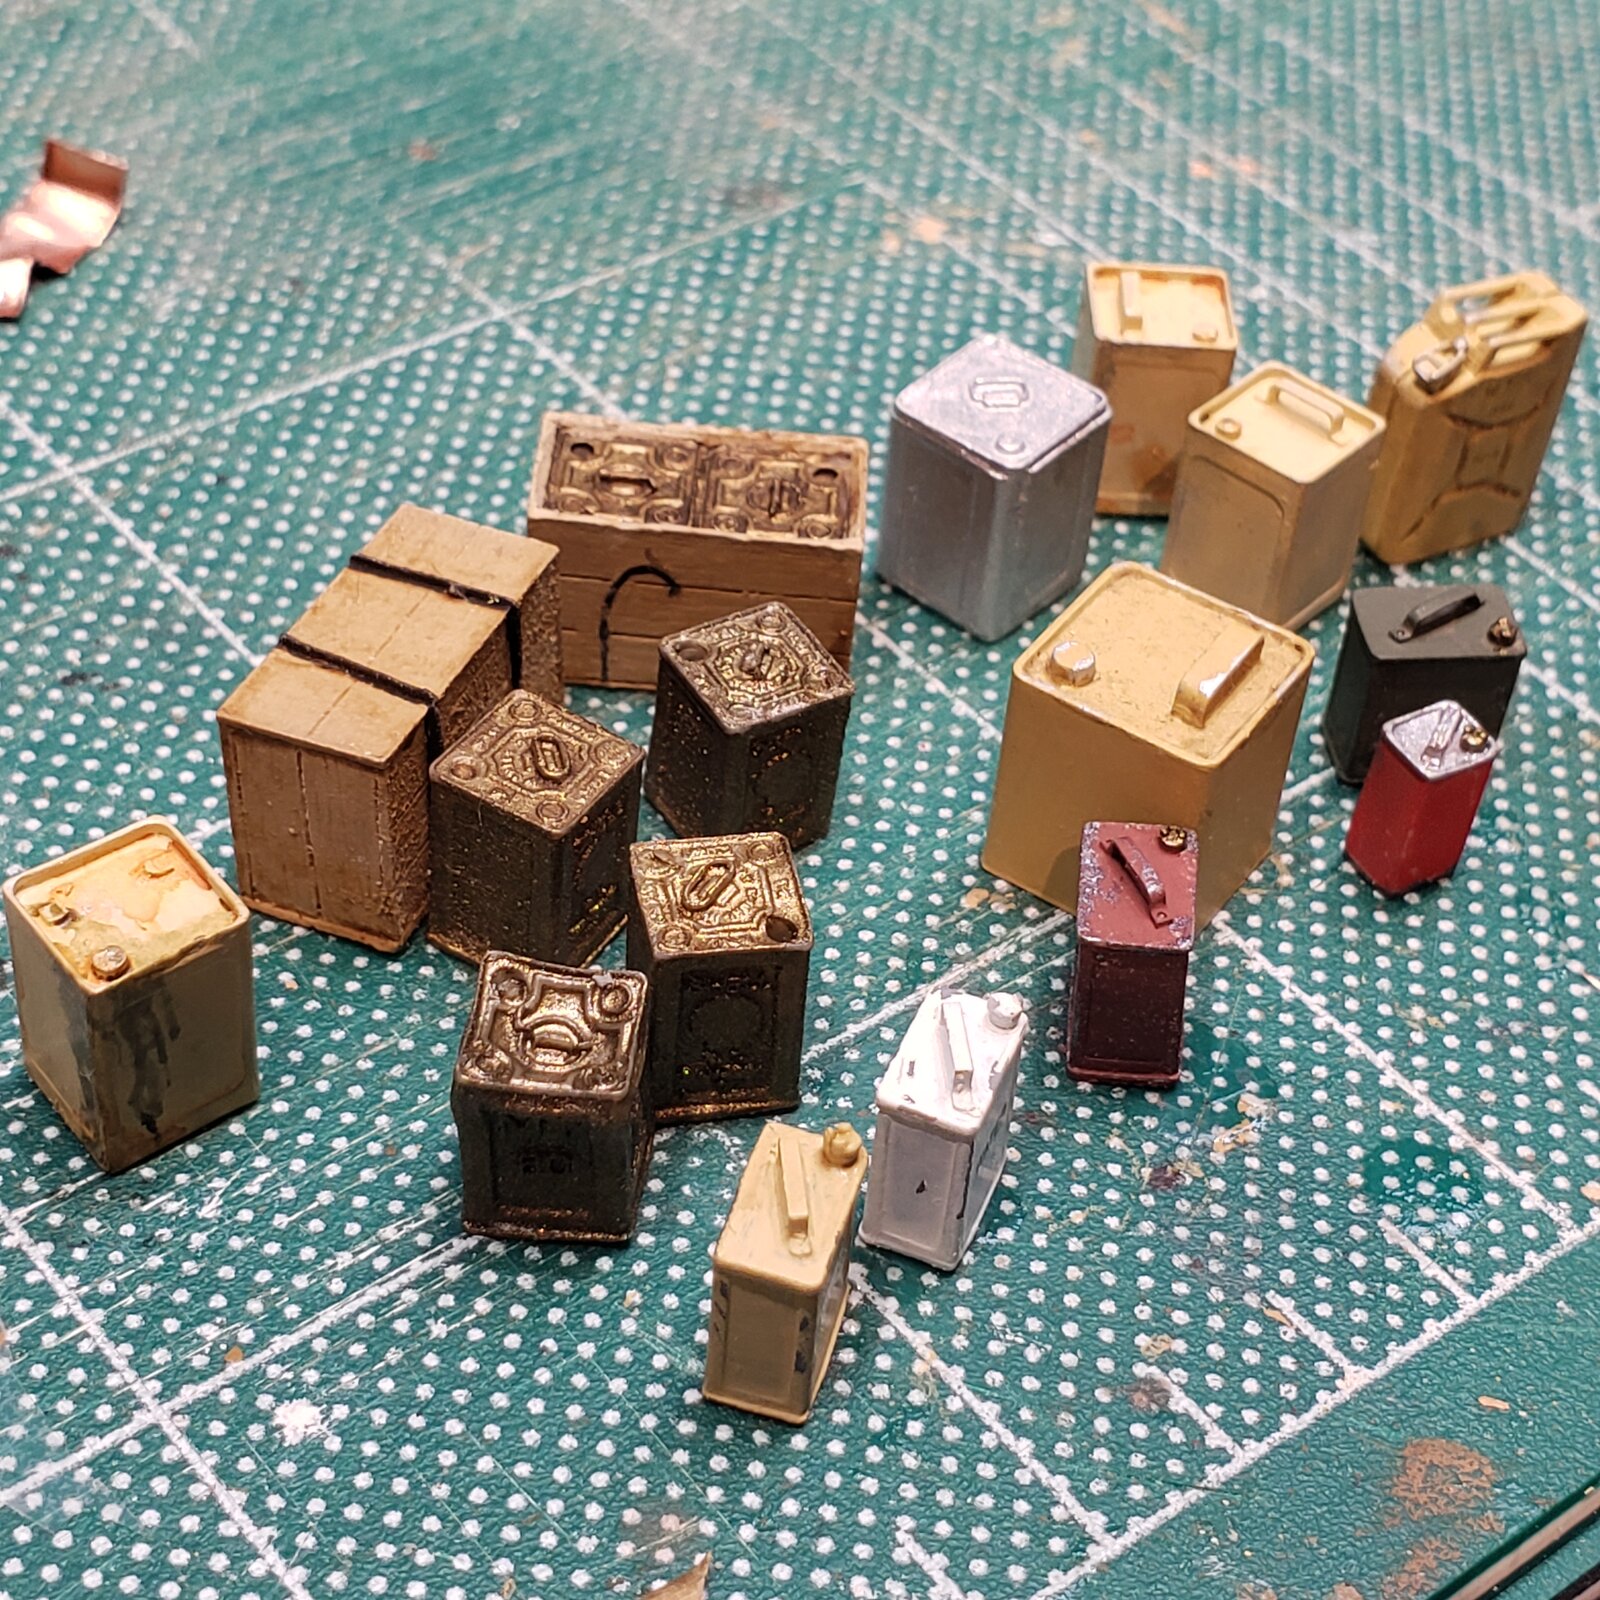
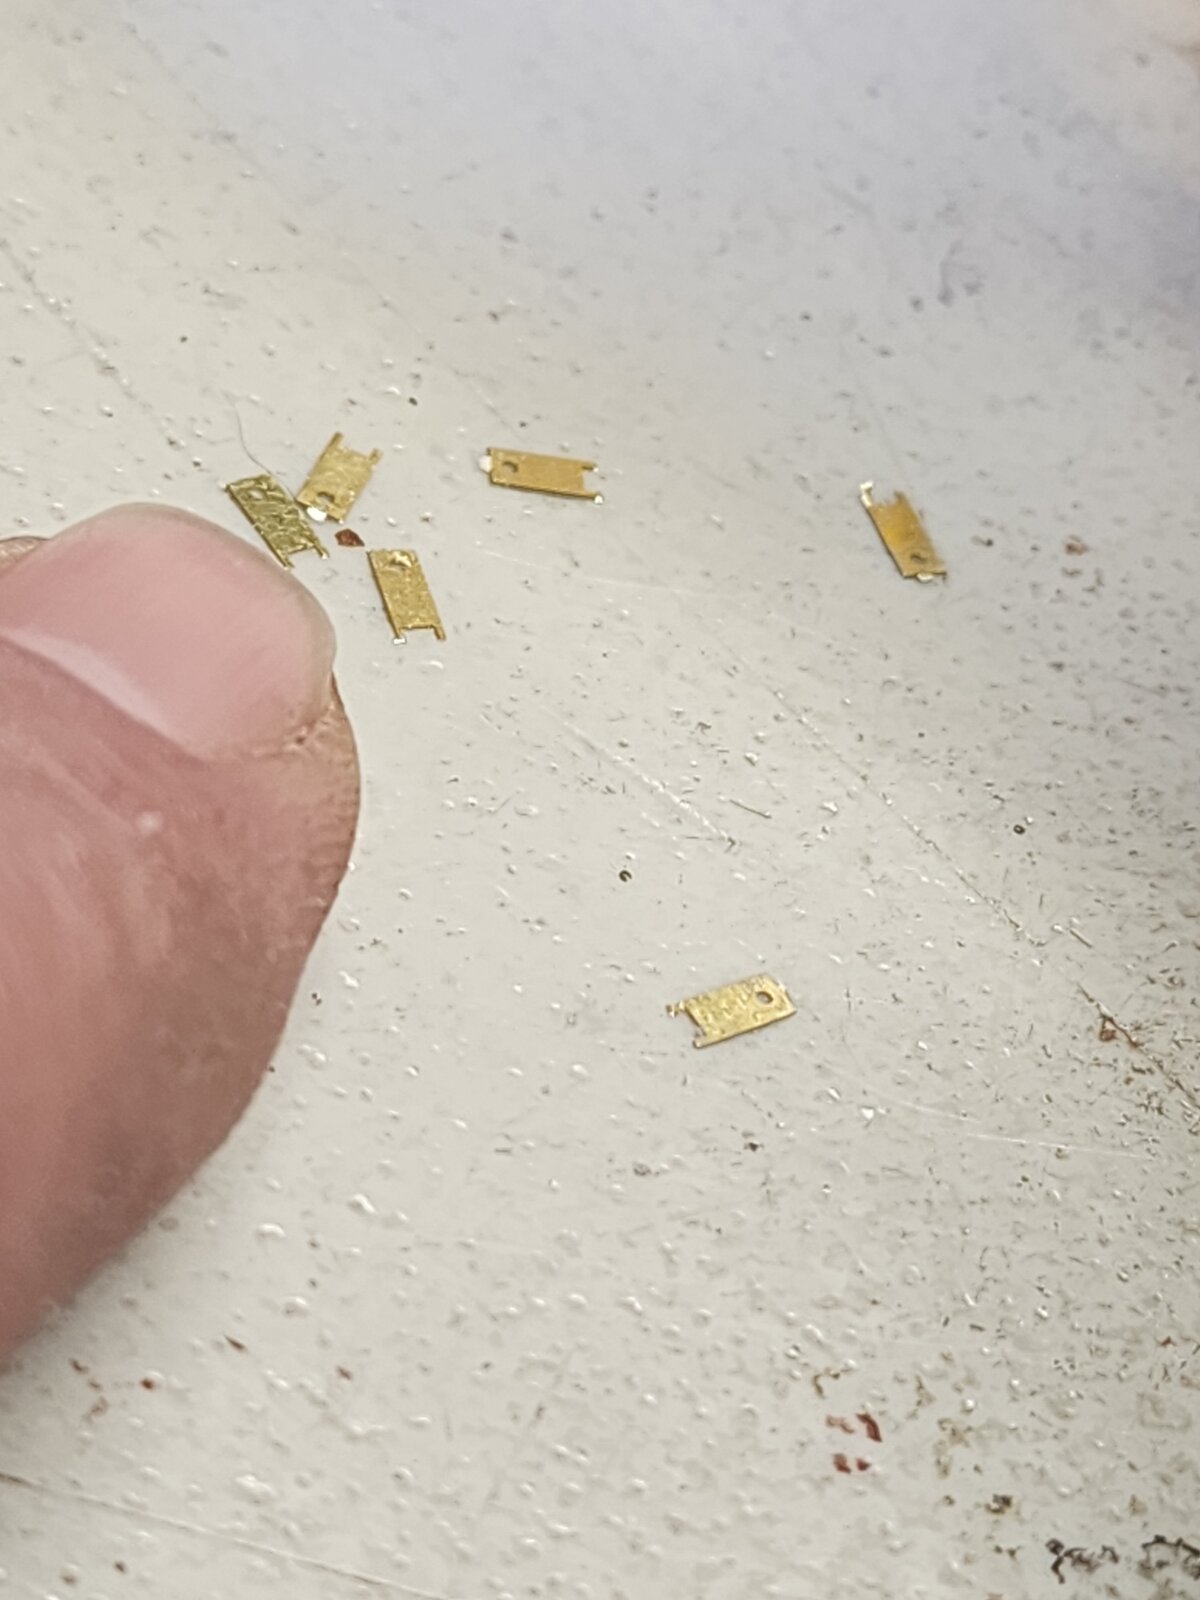
Even the 'jerry cans' have a midline PE insert, which puzzles me. Maybe you folks can tell my why.
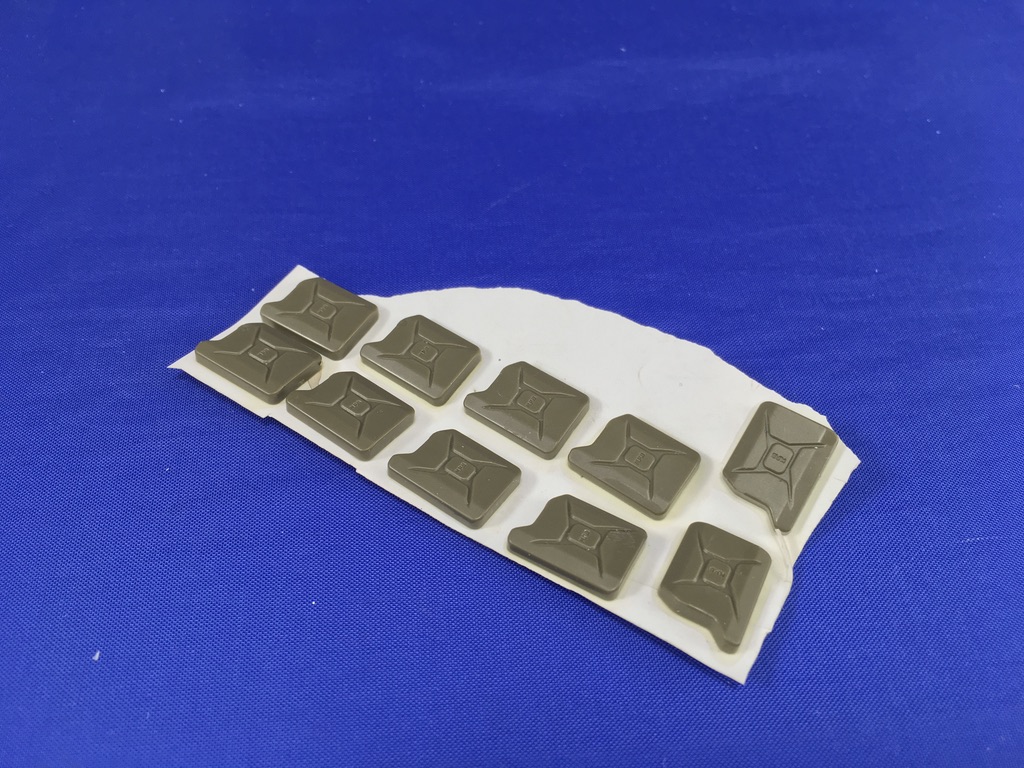
Assembling the jerry cans...
20250125_043730.jpg

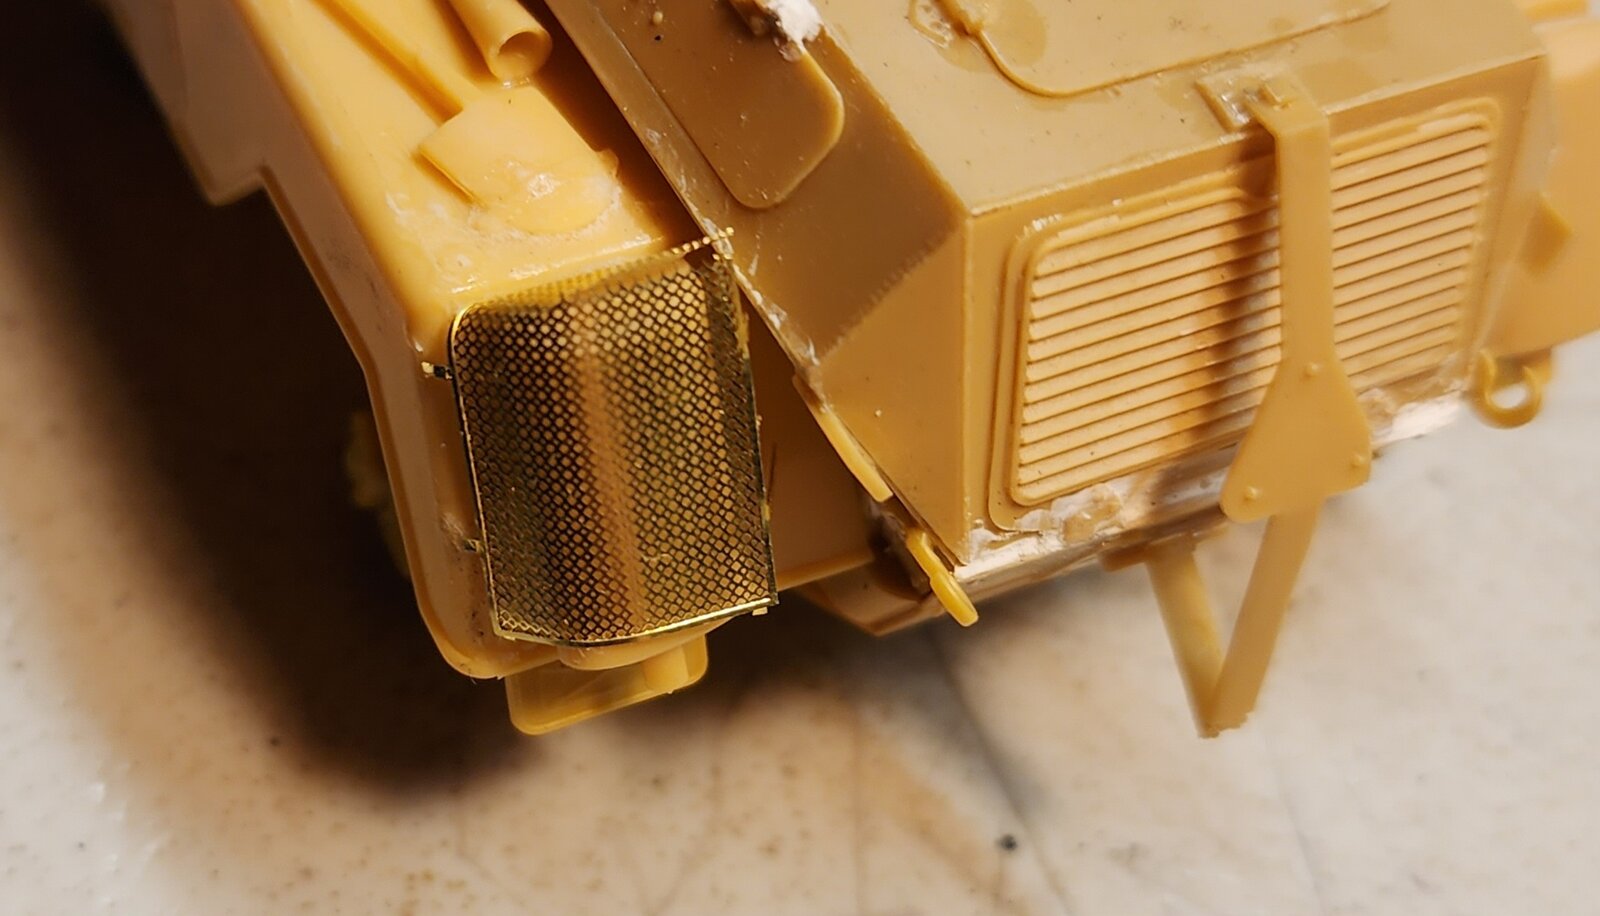
The PE muffler covers have got me. I wanted to paint the mufflers in a rust and have the PE grates in DAK yellow. But I skipped that CA-gluing-after-paint-deal and am installing the covers. I will hand paint the finer details in the pre-weather finishing steps. I have decided to install the tools and whatnot before painting because my patience only goes so far. I have personal display in my own home patience with this kit. Not model contest patience. I am still adjusting the left muffler cover in this picture. The upper PE fold isn't right, yet.
20250125_045508.jpg

Be well. Model on.

Eric
 
Last edited:
midline PE insert
Glad to see you at it again. Is that admiration or schadenfreude?
Anyhow, I'll say it again, somewhere out there, there is an evil kabal of PE designers sitting at 60inch monitors, conspiring to make our lives a living nightmare, with no intention of ever building a model with PE themselves!
 
By the way, included in the kit on the sprues are the parts for 12 jerry cans. But only 4 PE midline inserts. And, just to make it fun, there are 6 jerry cans to be installed on the kit per the instructions. Not 4. So I am short 2 PE parts.

Seriously, why a centerline PE part? PE is for high detail small parts, not for adding filler between parts. Is it PE parts count validity? Who knows? Someone in Taiwan does.

It's almost as though AFV Club wants to make super detailed kits, but then re-thinks it half-way through and only gives you so much.

I digress. Onward. It is the most detailed and yet, frustrating German 8 Rad that I have tried to build so far.

Be well. Model on.

Eric
 
Even the 'jerry cans' have a midline PE insert, which puzzles me. Maybe you folks can tell my why.
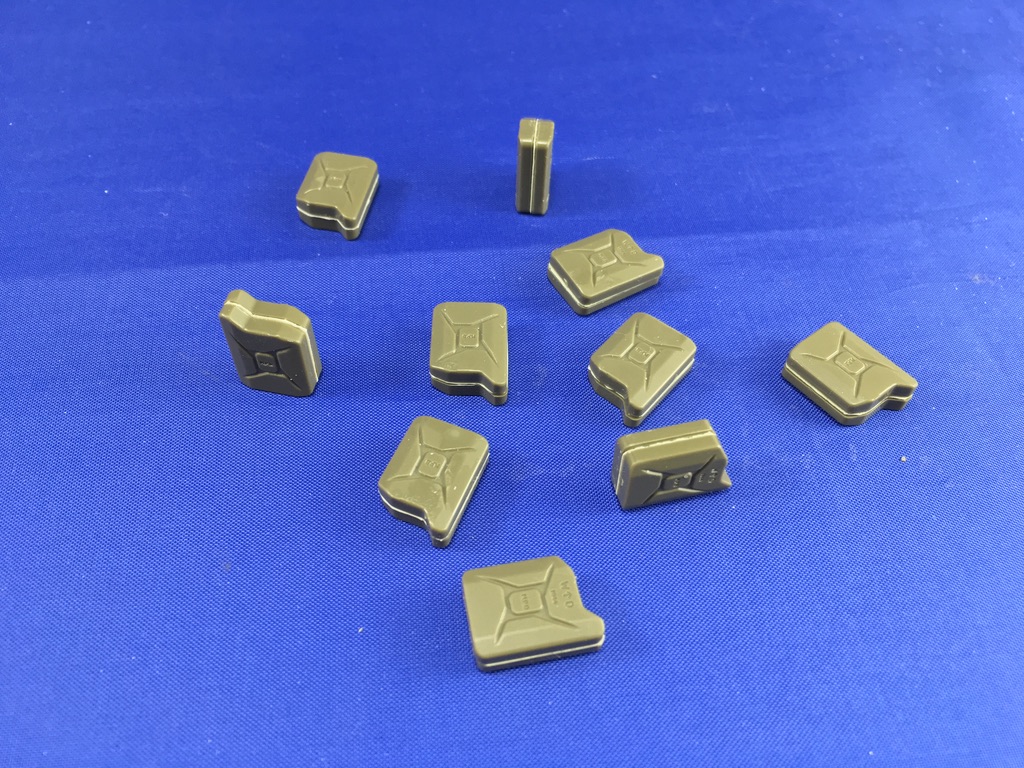
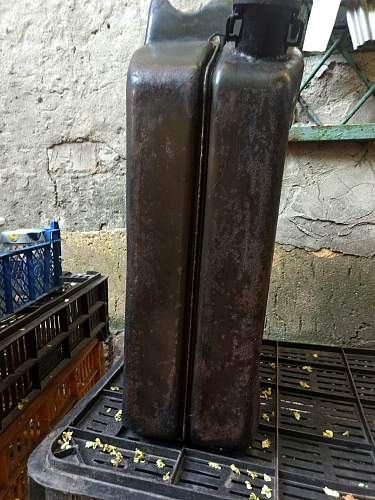
For the reason @BarleyBop showed above: real jerrycans of the German type have a seam down the middle, which can't be moulded in plastic. Very easy to DIY with some thin plastic card, though:

D9DA7AFD-52D9-4322-9CCA-A53A2EF60276_1_105_c.jpeg
1E12D2AD-E63D-4C9D-914A-189A7680BE0D_1_105_c.jpeg


Just glue one half of the jerrycan to the card, cut around the circumference and glue to the half without.
 
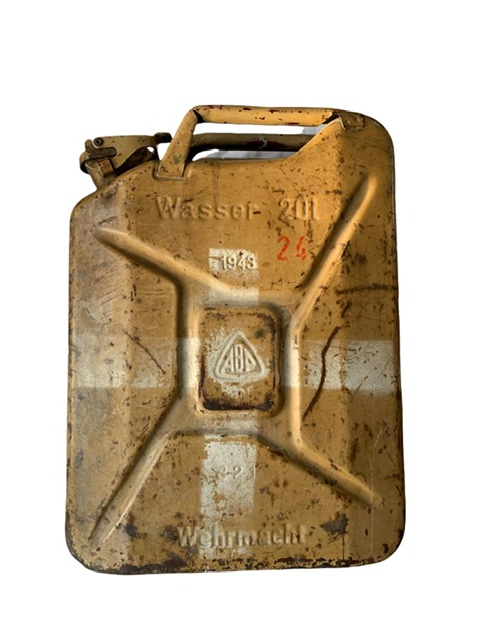
Did the Germans make a separate Jerry can for water, or were they the same ones used for fuel with that white cross painted in them?
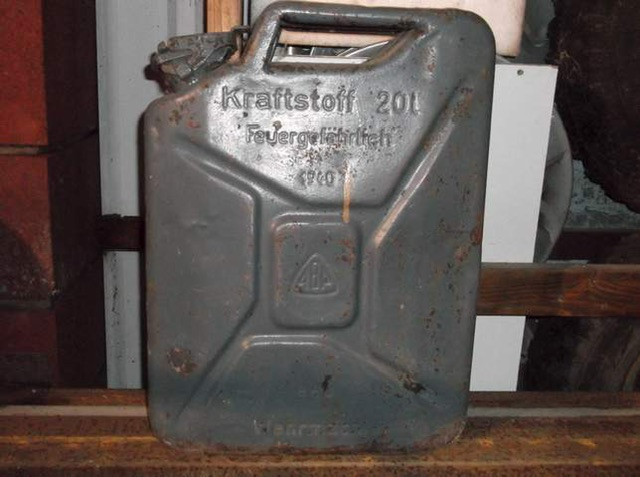
They were different, but not in a way that shows on a model if you don't want it to:

IMG_2202.jpeg
IMG_2203.jpeg


Ignore the white cross, look for the real difference :)

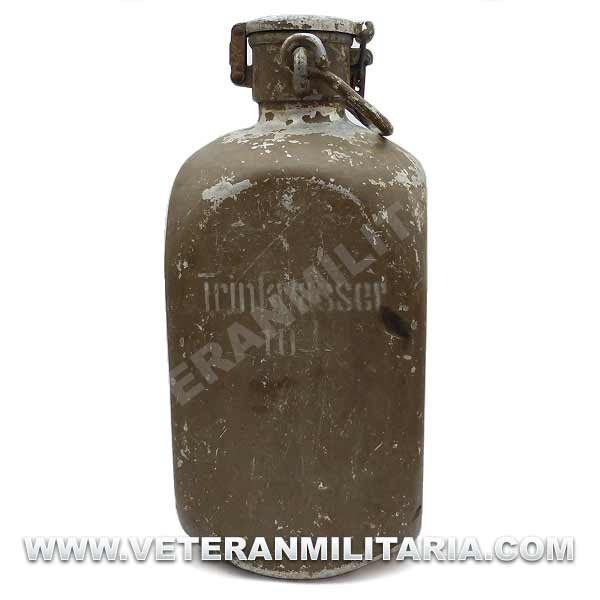
One has Kraftstoff ("Fuel") embossed in it, the other Wasser ("Water"). Not sure if there was a difference in construction, though.
 
Last edited:
I'm not German but I bet "wasser" means water . :)
Truth.

Pronounced "Vassah" in Deutsch. The German 'R' is nearly silent in most cases.

Edit: That is, to the english speaker. Unless R as a first letter, then it is a deep throat 'R'. Like Reich. My German professor used to laugh at the english 'R' pronunciation.

Native German speakers can correct me.
 
Last edited:
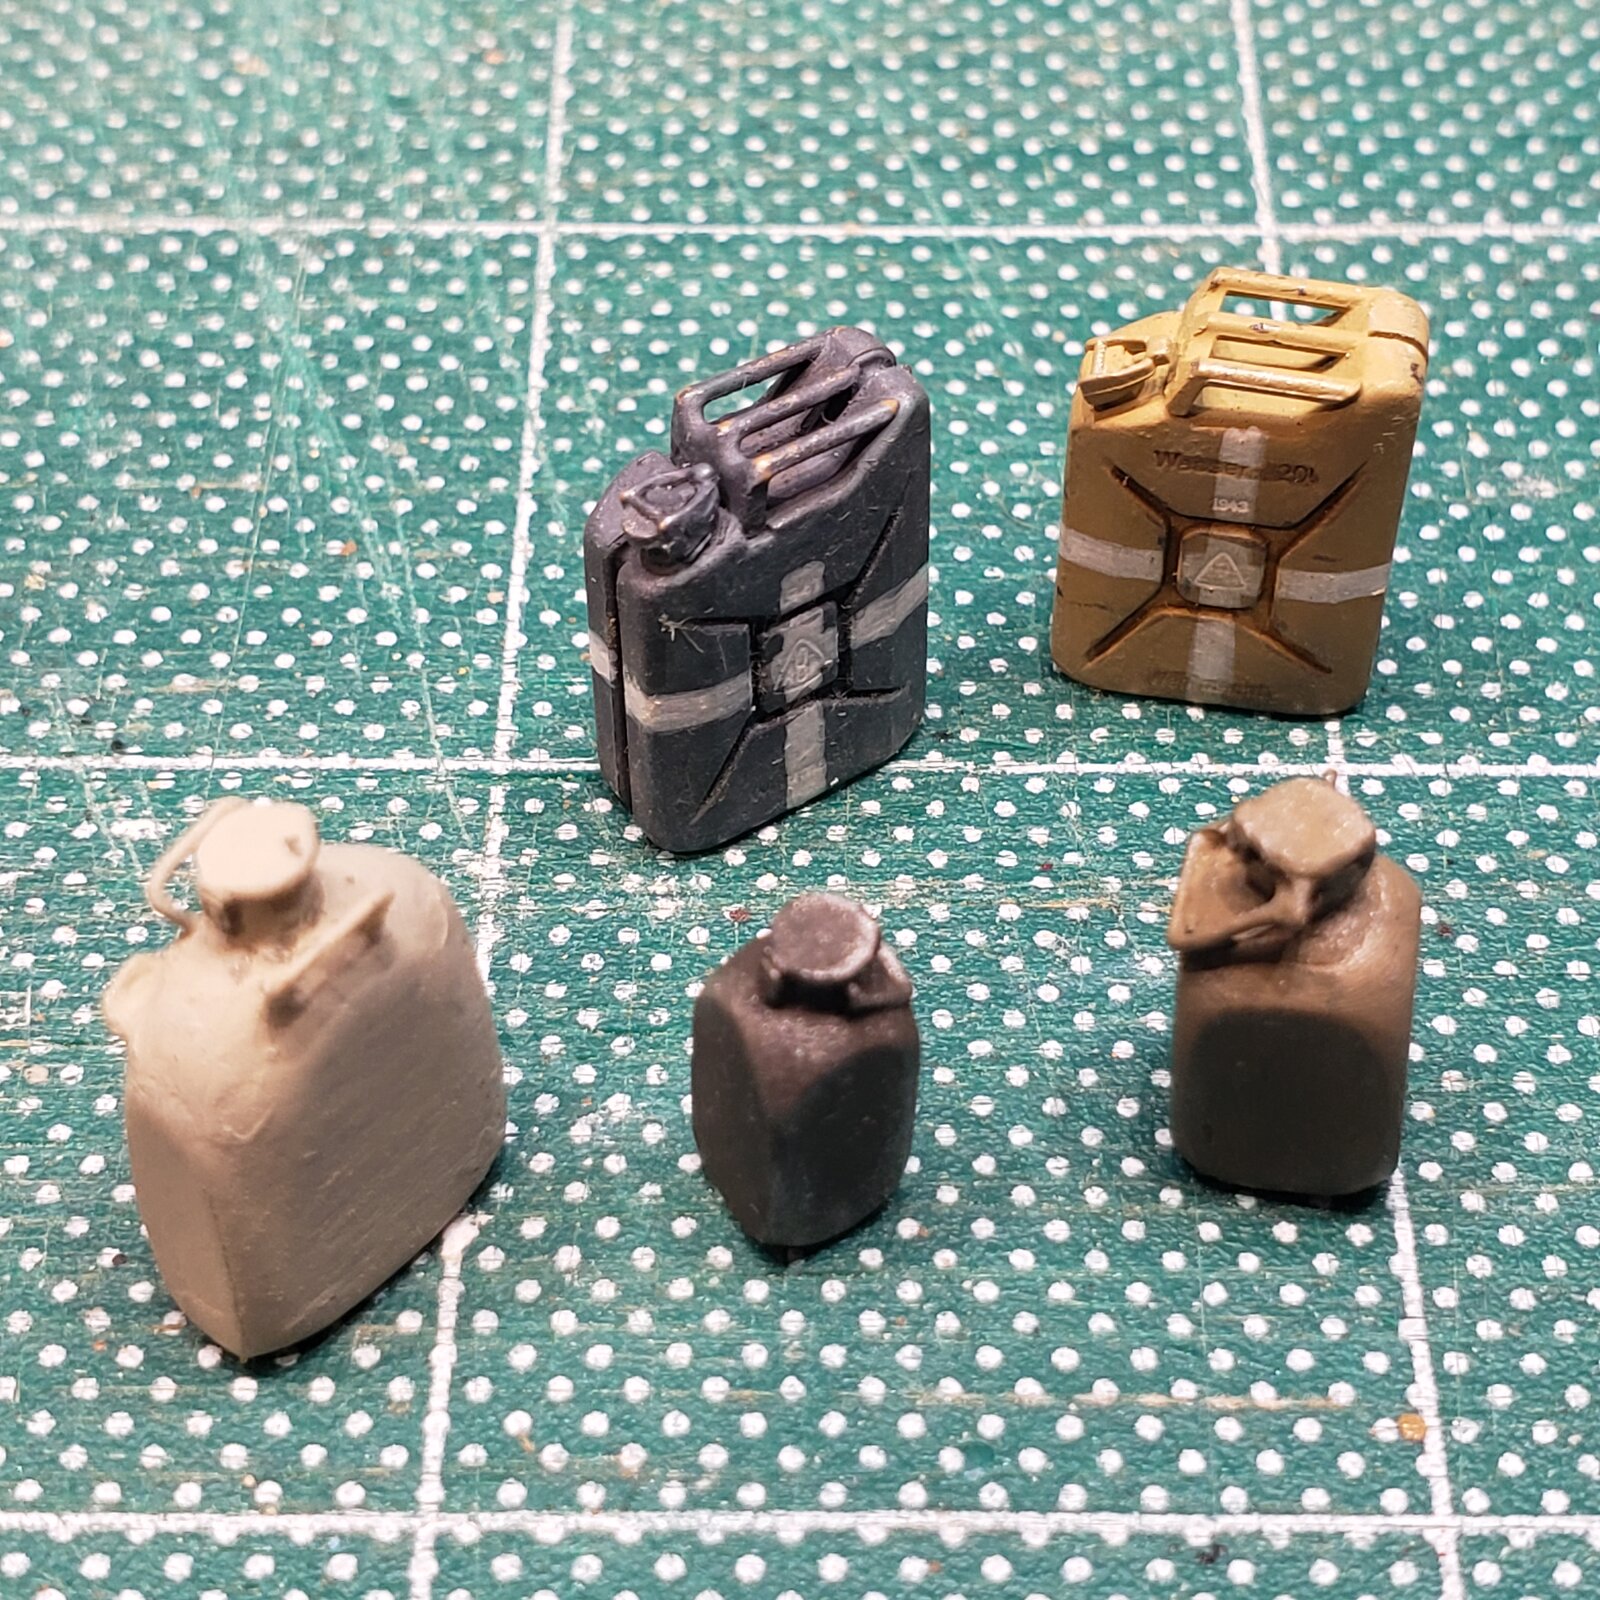
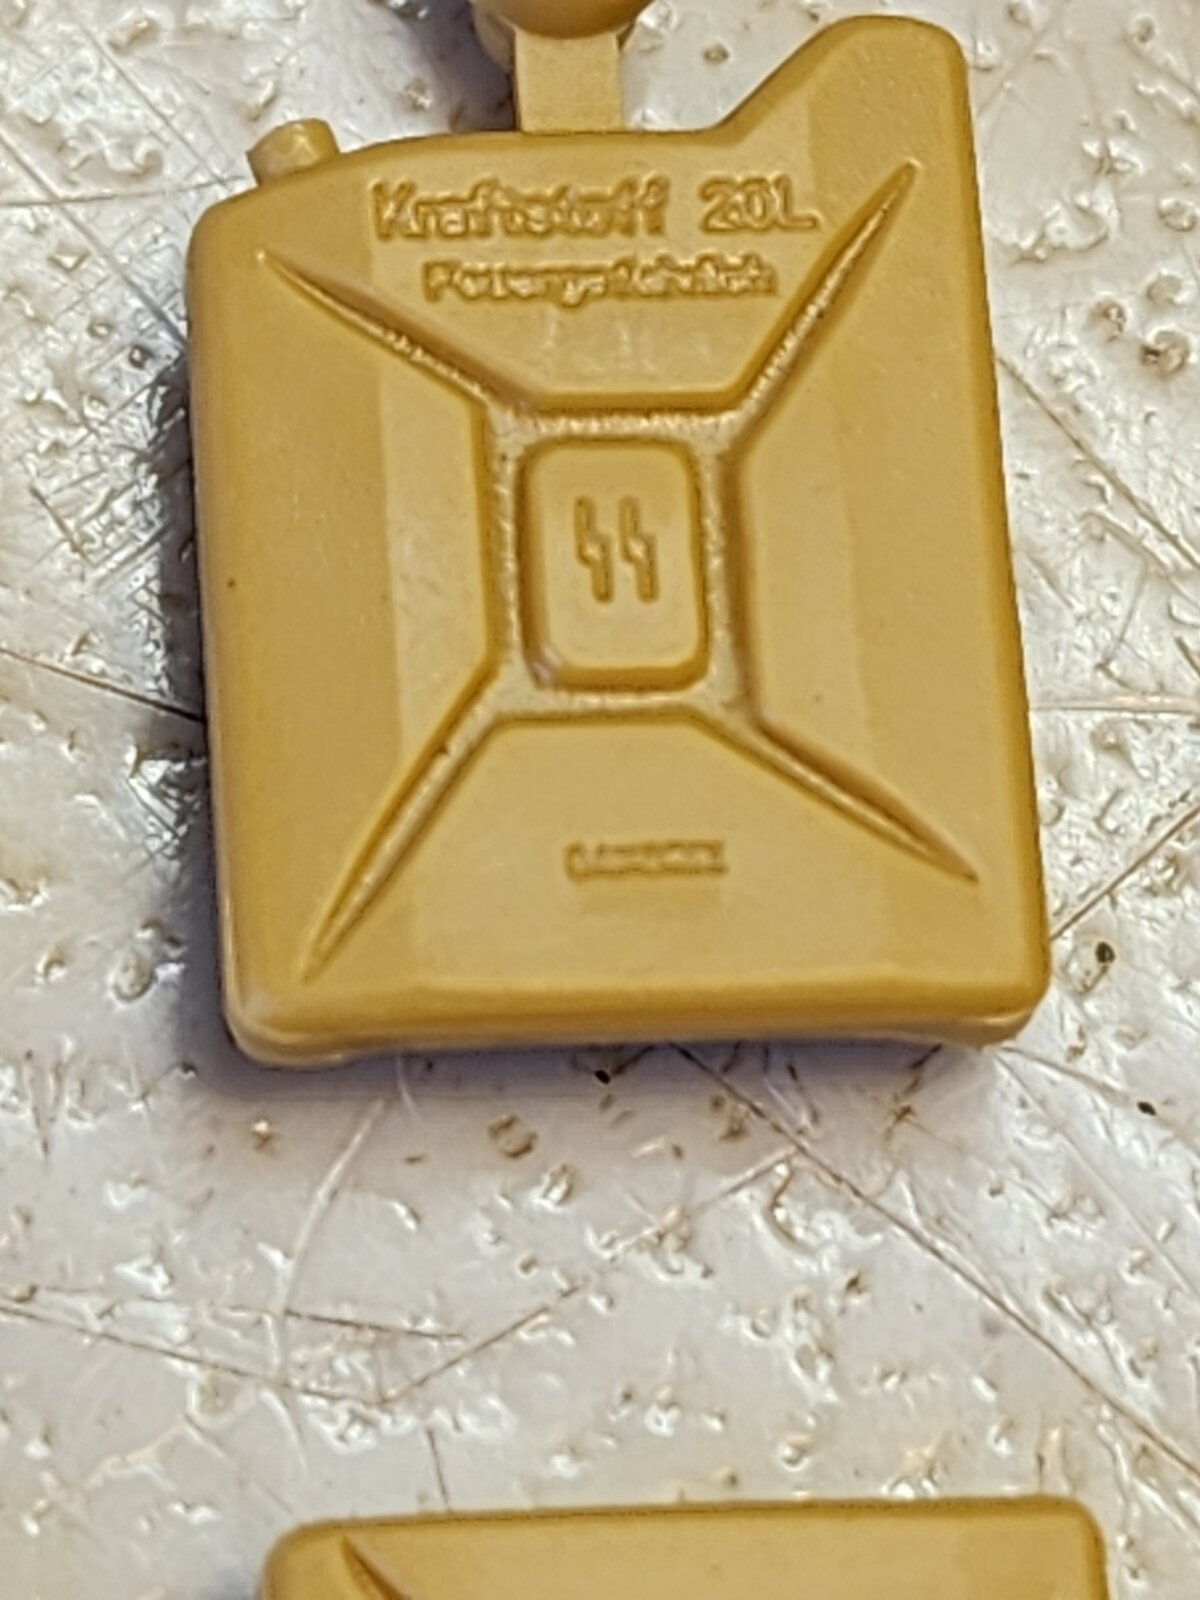
The jerry can detail in this kit:
20250125_135816.jpg

There are no water cans in this kit. Looks like SS marks. The real bad guys.

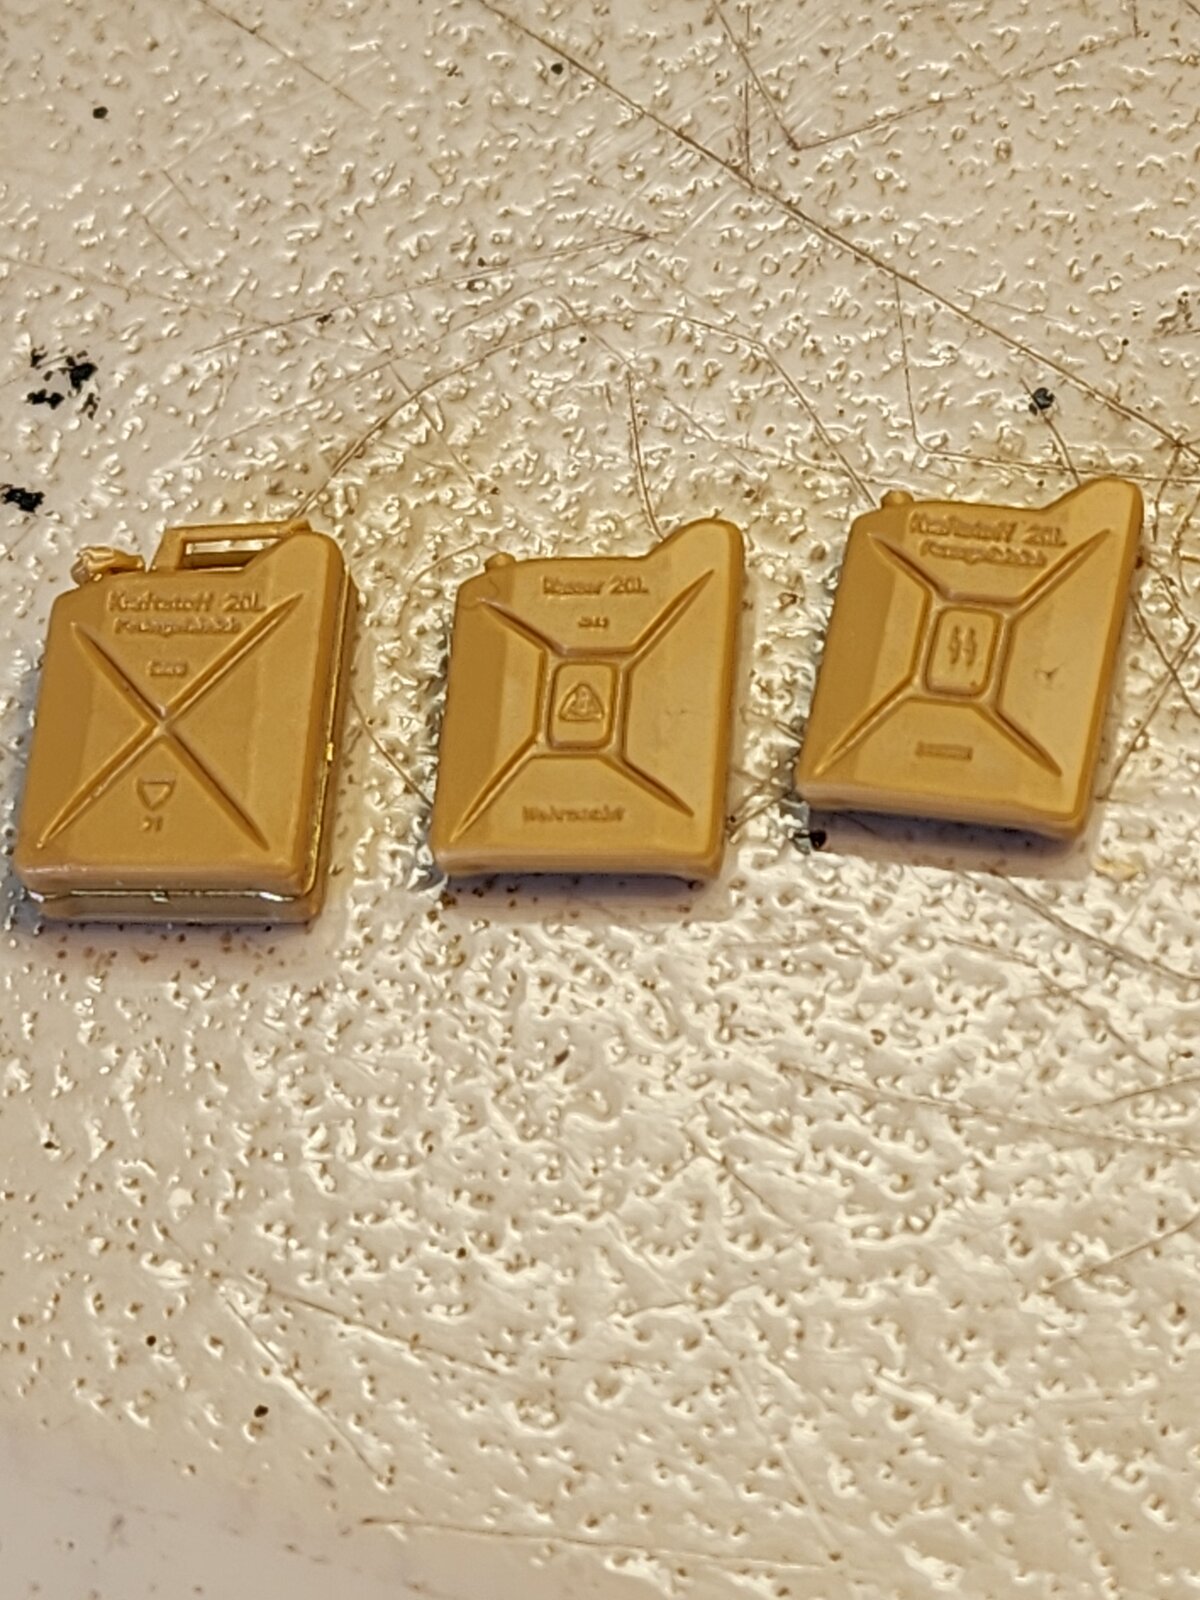
EDIT: My mistake... The jerry cans in this kits are different. There are 3 types:

20250125_150136.jpg
 
Last edited:
I'm not German but I bet "wasser" means water . :)
I'm not German either but I know for sure that it does :) Aside for the linguists: it's a good example of the High German consonant shift. The Dutch and English counterparts are both spelled water, though especially the <a> in that is pronounced differently due to the English vowel shift, but in German the /t/ has become /s/.

This German jerry can info could be a whole thread on it's own.
There is quite a lot to read about them online. Or also videos, like the one posted above.

The jerry cans in this kits are different. There are 3 types:
The one with the plain cross on it is an early type, the other two are the later, much more common one (but you can occasionally see the X type in photos of late in the war). That square in the middle, BTW, is to allow for expansion or contraction of the can's contents in hot or cold weather. It allows the sides to move more than the cross would, while still retaining the strength afforded by the ribs pressed into them.

another example of that "fine German engineering ".
They really are very well thought-out. It's especially interesting when compared to the American cans, which were inspired by the German ones but "improved" because the Americans thought they were over-engineered. So the Americans made a can that really retained only one of the German can's good features, namely the three handles. The German cans were welded to prevent leaks, the American ones had rolled seams that could leak. The German cans had a spout off to one side to allow everything to come out, and with a retained lid that can be opened and closed easily, the American cans have a screw lid that can be very difficult to remove (so they also developed a tool for it) and that's in the middle so you could end up with some fuel left in the can that won't come out. And that's not even all of it :)
 
So, the photo etched joy continues...
20250126_125430.jpg
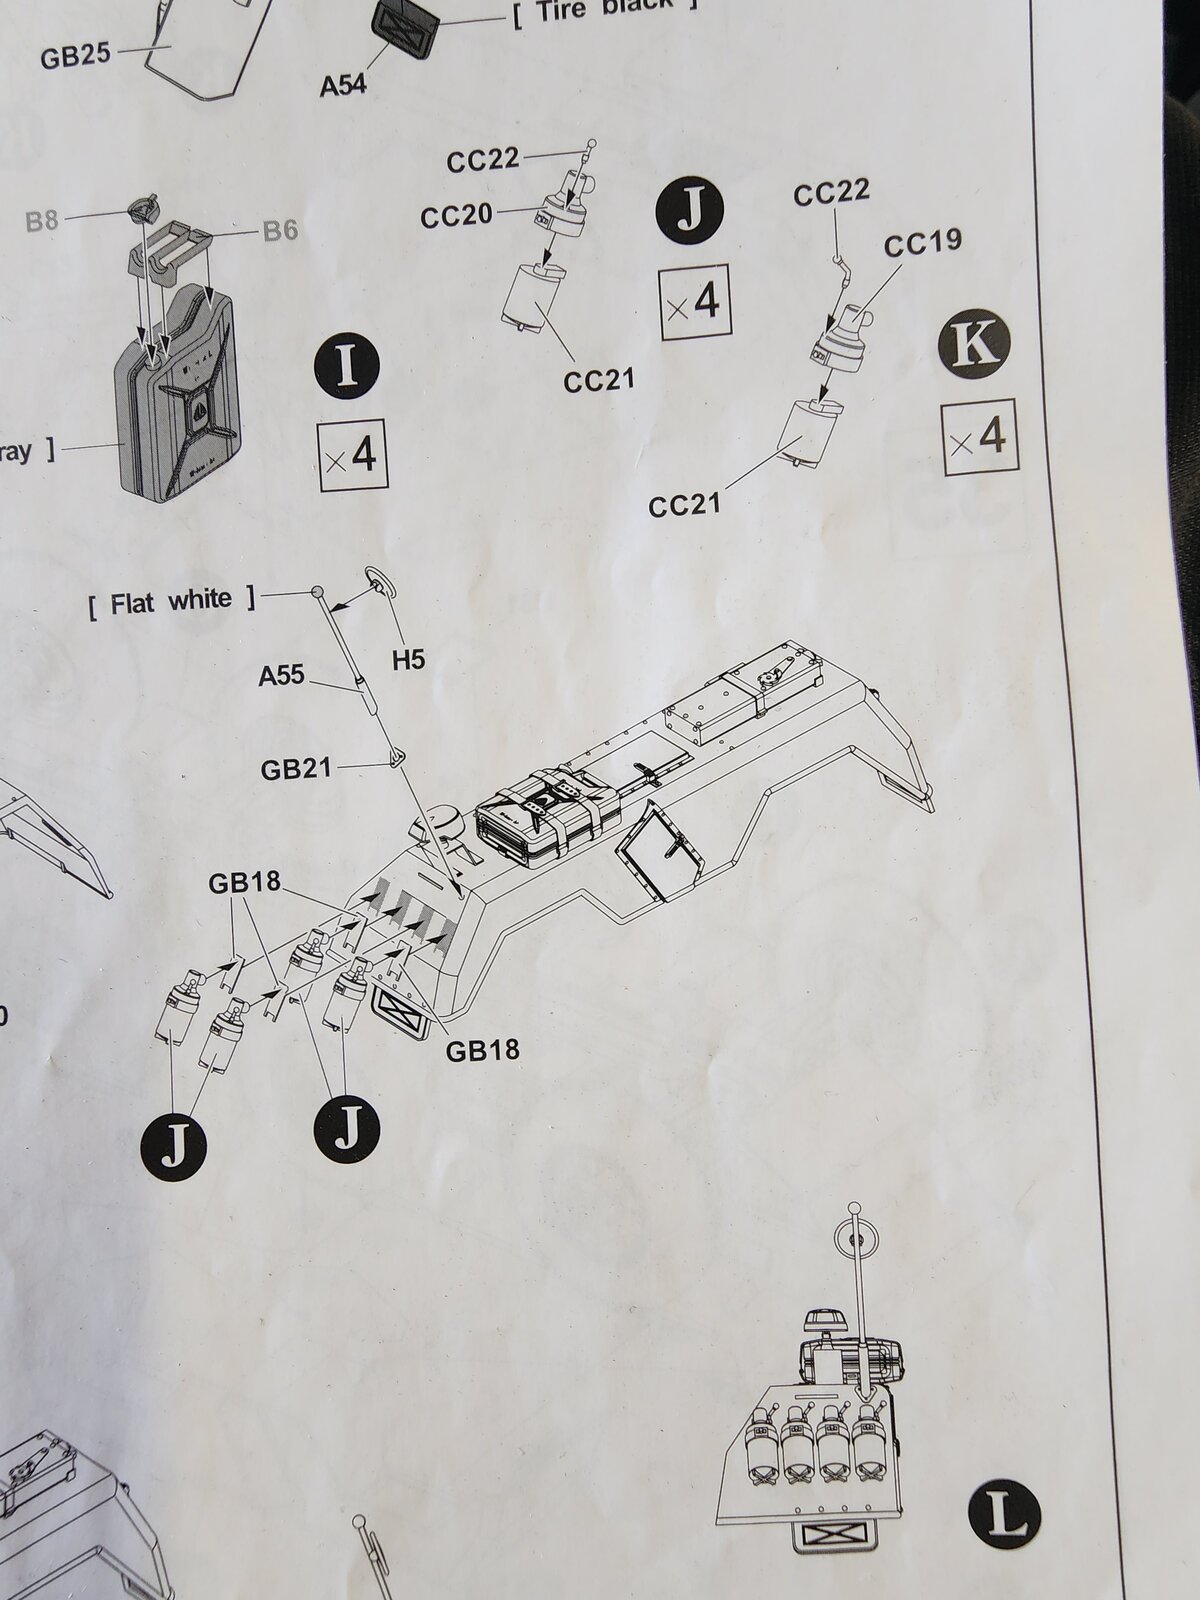
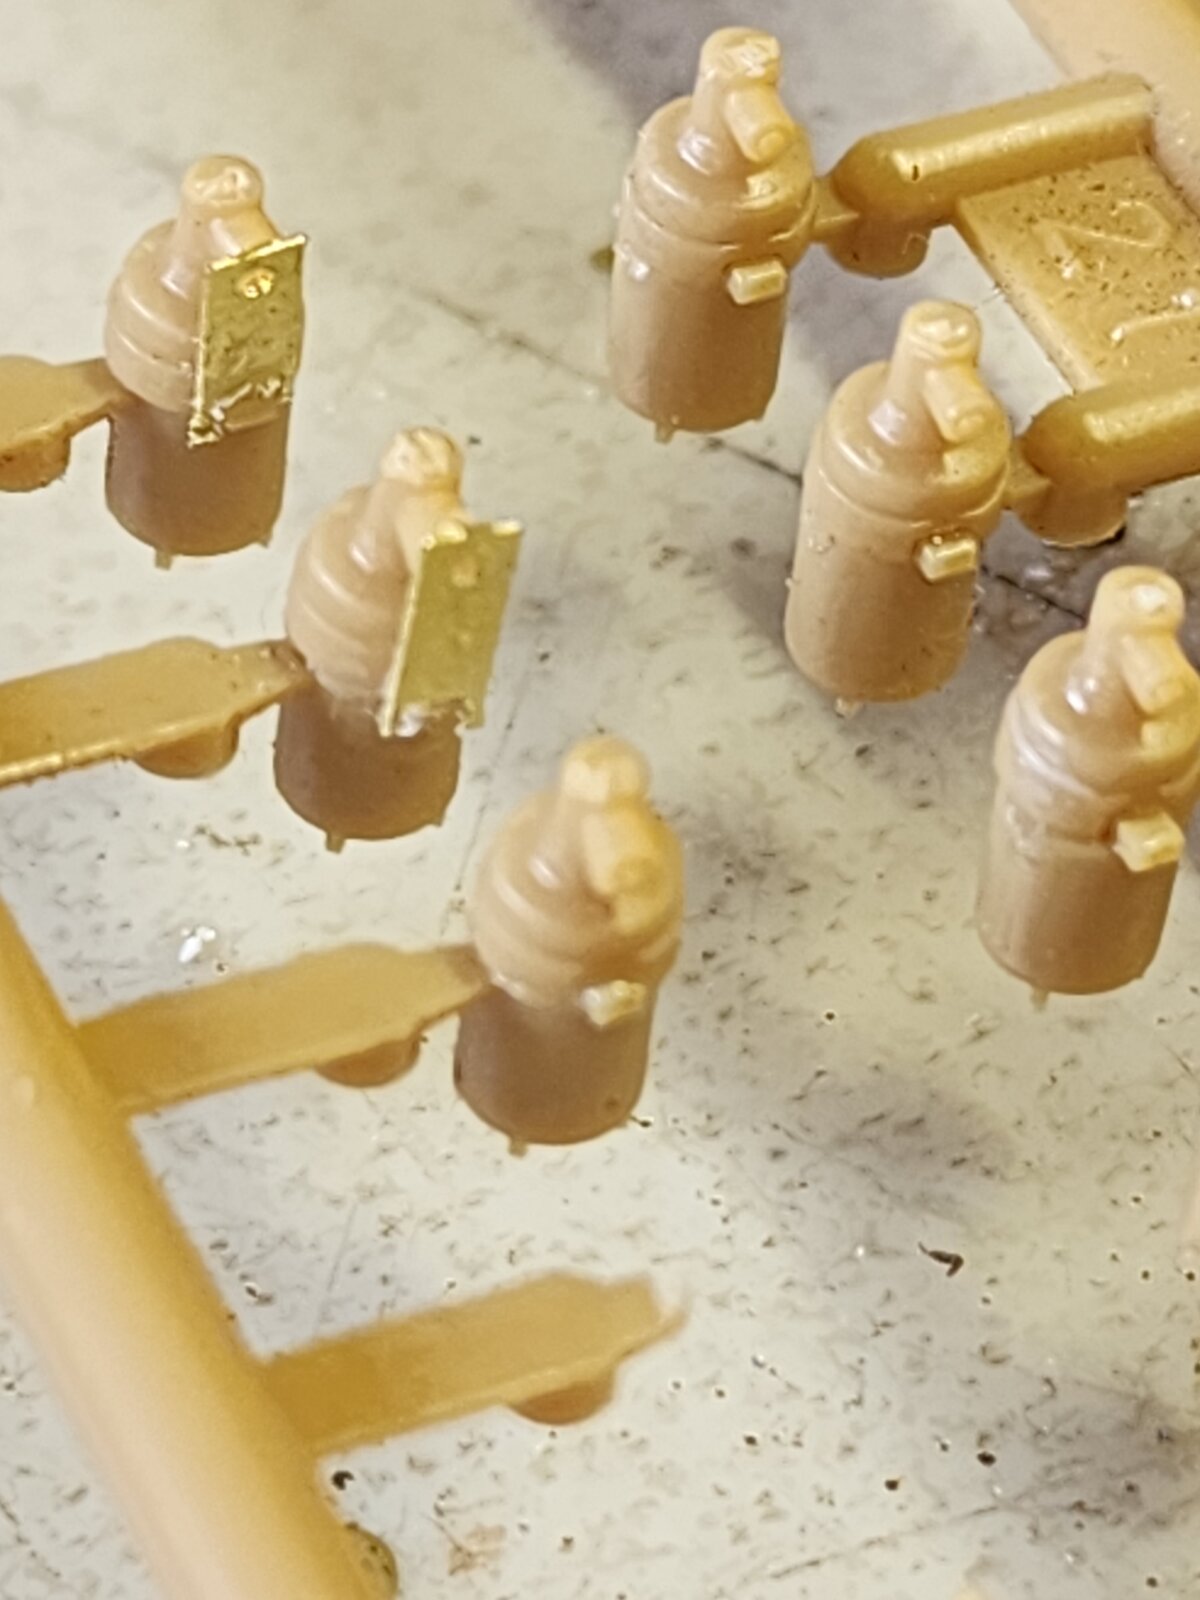
These bits are the mounts for what I am guessing are smoke dischargers on the front fenders.
20250126_124948.jpg


I glued the top halves, CC19 and CC20, to the bottom half CC21 while CC21 is still on the sprue. Then also gluing the PE parts GB18 to the smoke dischargers while CC21 is still on the sprue. two are on in the next pic. The eyebrow sized parts CC22 will get installed after the smoke canisters are on the fenders. That's my plan anyway.
20250126_124920.jpg


Be well. Model on.

Eric
 
compared to the American cans
Haha! I'm surprised you didn't mention those cookie tins the brits were using early on, small wonder they were called flimsies!
Easy to cut in half though, fill with sand and petrol, instant stove!

LRDG would budget for a large % leakage for their long haul treks in the desert.

17379269748928933216480090782467.jpg


Sorry to highjack your build thread @OldManModeler , but since we were on the topic of fuel cans...
 
Pin locators are, for the most part, non-existent on this kit. Usually, the pin side is there but the female hole is not. And, there are no details in the instructions about drilling out these female holes. I have been cutting off male pins because there are no female holes to fit into.

I am changing my honest review of this kit, but with a disclaimer; If you know the history and have deep knowledge of the vehicle and AFV Club's kit in question; In my opinion this kit is a 9.9. A skilled historian can rock a super detailed kit from AFV Club.

If you just want to build a WWII 8 Rad kit and want it moderate, this kit is a 3.0. Don't do it.

It's not for you. It's not for me at 1/35th scale. Go with Tamiya or Dragon or... Italeri.

But I continue because I started it and wanted a challenge. But my challenge was in the 'can I build this highly detailed kit' category. Not in the can I build a kit that has poor instructions and almost zero locator pins.

My hat's off the AFV Club for this highly detailed cluster. I highly recommend it to Pro's only. That's not me. I am not a professional model builder or a history detective. But I am going forward with the build.

Be well. Model on.

Eric
 
Last edited:
Haha! I'm surprised you didn't mention those cookie tins the brits were using early on, small wonder they were called flimsies!
Easy to cut in half though, fill with sand and petrol, instant stove!

LRDG would budget for a large % leakage for their long haul treks in the desert.

View attachment 135817

Sorry to highjack your build thread @OldManModeler , but since we were on the topic of fuel cans...
Isn't an issue, Sir. I appreciate you and the information. Love it all.
 
Haha! I'm surprised you didn't mention those cookie tins the brits were using early on, small wonder they were called flimsies!
Easy to cut in half though, fill with sand and petrol, instant stove!

LRDG would budget for a large % leakage for their long haul treks in the desert.

View attachment 135817

Sorry to highjack your build thread @OldManModeler , but since we were on the topic of fuel cans...
I have found several US flimsy's in the California desert over the past few decades. Located mostly in Patton's previous WWII training grounds. And some at target areas that they used for P-39's (Airacobra) and P-40's (Warhawk). I leave them in place for others to wonder about, and because it is illegal to remove them. They are mostly just rusted parts in the shape of a squarish can.
 

Latest posts

Back
Top