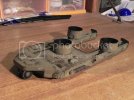
Falke + dioram

This does look good. The interior is awesome! I never really knew what Ma.K was. Do they still make the books or whatever they are called?
 
Hi and thank you:
noname - here you go
http://www.hlj.com/scripts/hljlist?Word=maschinen&Dis=2&DisplayMode=images&Sort=std&qid=MBDAMCONJL2UC&set=1&q=1&GenreCode2=boo

As a word of cousin for any one who will want to make this kit. Take lots of time with the decals. I did use Set and Sol fluids on them but after applying varnish some parts of some decals did detach from the service. I'm now struggling to get this sorted and if everything is ok I will be able to start weathering today in the evening or tomorrow.
Cheers
Lukasz
 
I see, it's a model based picture book but the models are actually life size? Alot of work must go into this.
 
There are also some sketchbooks.
I'm not too familiar with this topic yet :) I'm still getting to now it. Maybe Lin.K or Java could help you.
Cheers
Lukasz
 
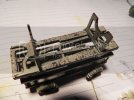
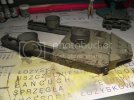
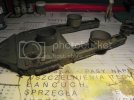
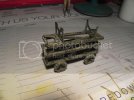
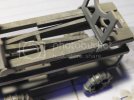
Most of the chipping on trailer and trolley are done. I consider them as tools and in my opinion no one will take to much care about how they look and they will only receive required maintenance. So the chipping is rather intense on them. For this I used Green-Grey paint from Vallejo (886) which is almost the same as Moon Green Gray from Finisher’s but I highlighted it with Yellow Ochre from Vallejo (70913). I used 0 brush to paint chips and scratches in are where they would likely occur because of the usage, maintenance of the equipment on them or maintenance of them self.
Falke040.jpg
Next I use 00 brush and Vallejo paint SS.Cam. Black Brown(822) and painted all the chipping again but in such way that I wont fully cover previous step.
Falke041.jpg
This method is time consuming but I think it’s worth it.
Falke043.jpg
Falke044.jpg
Falke042.jpgx
What do you think?
Cheers
Lukasz
 
Looking pretty good Biskup!!! That should blend together nicely when you hit the weathering part! ;)
 
I like how your chipping came out. You highlight something I've been thinking about recently, in weathering a couple of WWII vehicles. Where the paint has chipped, the metal would discolor, and eventually rust/oxidize. I've been looking at metal objects, like tools, and metal scaffolding, wheel barrows, chipped finishes on cars, etc, to observe what the metal looks like. Often guys will use a silver or aluminum color for chipping, and sometimes it's a match (like on an aircraft with aluminum skin), but unless the area is continuously worn, rubbing off oxidized metal, it goes dull and most metals will have a grayish color. Your cart is a proof of concept for me.
 
Trailer's looking good.
You're right about them likely not worrying about how it looks
 
BISKUP ,

This thing is Awesome !! I love th "camo" .... The weathering to th Cart & Pad are Off-th-Chain !!

Really , Beautiful Job !!
 
the Baron said:
I like how your chipping came out. You highlight something I've been thinking about recently, in weathering a couple of WWII vehicles. Where the paint has chipped, the metal would discolor, and eventually rust/oxidize. I've been looking at metal objects, like tools, and metal scaffolding, wheel barrows, chipped finishes on cars, etc, to observe what the metal looks like. Often guys will use a silver or aluminum color for chipping, and sometimes it's a match (like on an aircraft with aluminum skin), but unless the area is continuously worn, rubbing off oxidized metal, it goes dull and most metals will have a grayish color. Your cart is a proof of concept for me.

Great points, and truly one of the essential elements of painting convincing weathering on models. My first attempts I just used bright silver paint, which adds good detail but doesn't quite look right. You need a mixture, maybe with fresher scratches and dings having a bit more shine and older spots or areas that get heavy use having duller or oxidized metal.

I recently switched to AK interactive weathering products, and they make a world of difference over using my citadel bolter gun metal paint!

I'd love to know the technique of how the paint chips were done on this Falke. Sure is one sweet looking model, there's just so much visual interest going on with it. That support cradle for it is gonna look sweet when you put the whole dio together. MaK stuff are some of the best models available today, I think.
 
Thank you all for your comments.
Cave_Dweller – the scratches on Falke’s cockpit were done the same way as on the trailer and trolley. I will use the same technique on Falke exterior.
Regards
Lukasz
 
This is definitely looking great!
Very smart chiping, well connected with the probable usage of the area. Like it!
 
Thank you Solander.
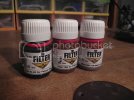
After quite a long time I managed to almost finish the trailer for Falke. Only minor add-on’s left, such as tools lying on it, etc.. First, I used these here filters.
Falke045.jpg
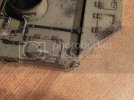
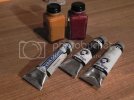
When it thoroughly dried I’ve laid some few washes of oil paint Brawn Van Dyke, and then using the "spot" method I did discoloration of paint, also using oil paints.
Falke046.jpg
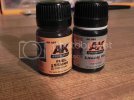
Then I used products from AK-Interactive company for fuel stains and spots of spilled oil.
Falke047.jpg
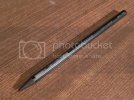
At the end of all edges where there was chipped paint I rubbed with graphite, in order to achieve a metallic effect, adding realism.
Falke048.jpg
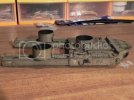
And this is how the trailer looks at for the moment.
Falke049.jpg
Falke050.jpg
Falke051.jpg
All comments are more than welcome
 
Beautiful weathering, lovely shifts in the tones and some very nice effects.

That overall olive drab like color don't hurt none either. ;D
 
Fantastic paint work, masterful weathering, so realistic.
Beautiful job.

Can't wait to see this is its dio context.

McNylon
 
WOW! The trailer looks great, looks like a piece you'd see on a loading dock, very realistic wear. Well done!
 

Latest posts

Back
Top