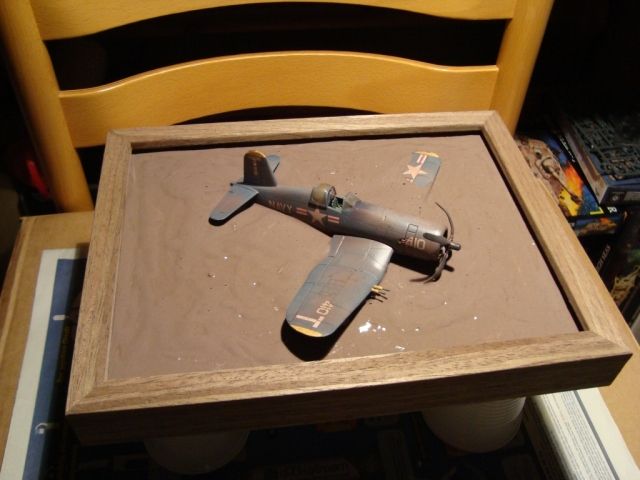
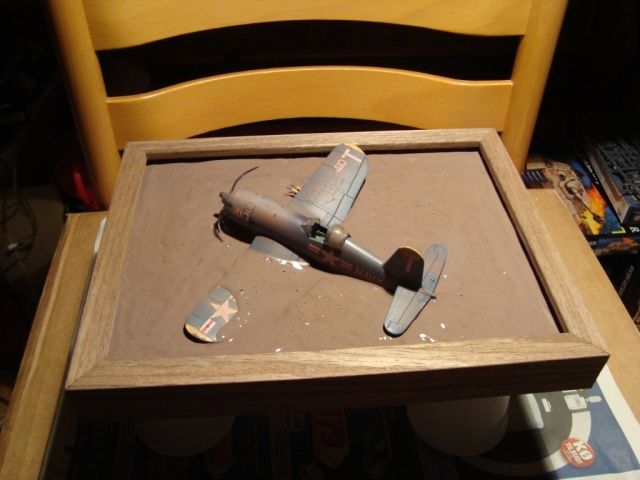
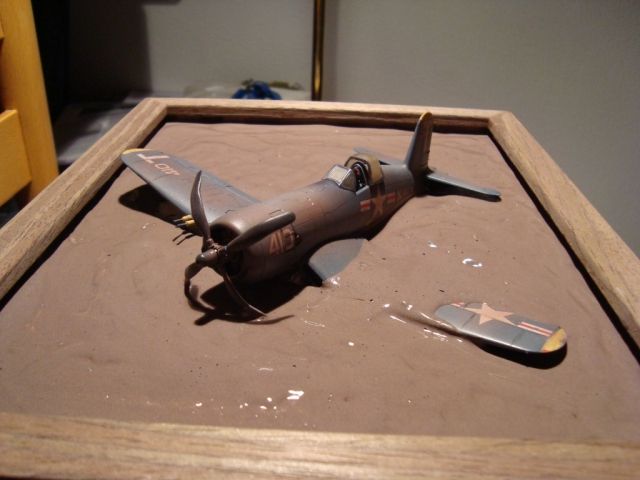
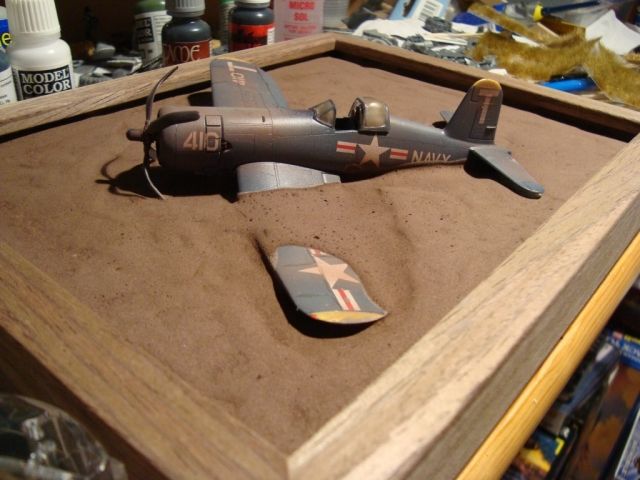
F4U-5 Corsair

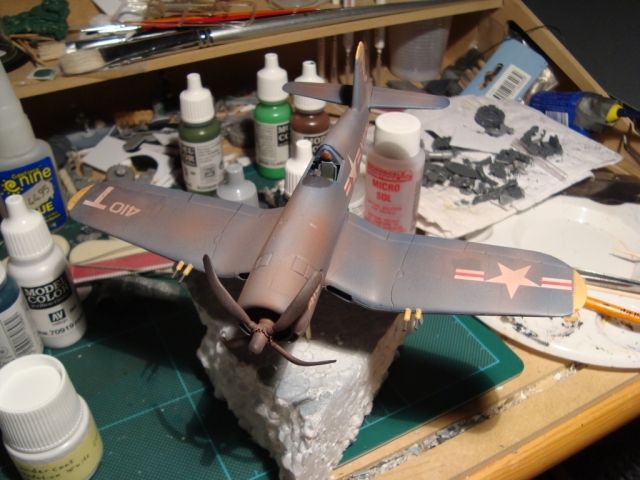
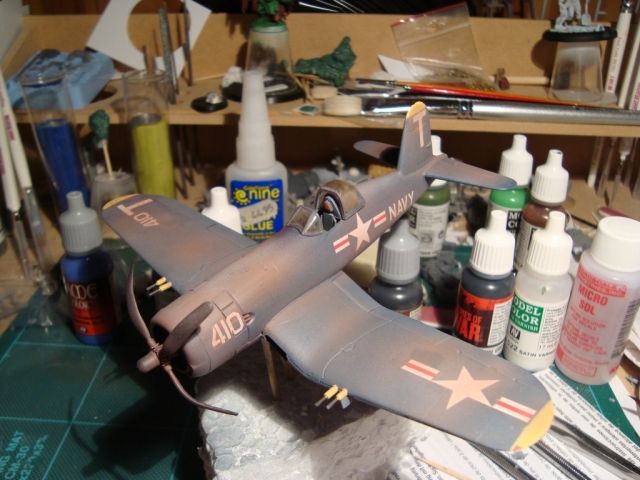
The wingtips and tail have now gotten a bit of yellow on them and the decals have been applied.


You wouldn't think that something as simple as applying decals could be a problem, right?

Well, you’d be wrong then...

As I mentioned in the beginning, rumours had it that the decals were a bit on the thick side. And they sure are! There’s a rather noticeable raised edge where the decal is placed and there’s a bit of silvering beneath some of them.

I think it’s down to me not getting enough satin varnish on the model before applying the decals. In fact, if you look closely at the inboard side of the star on the left wing you can see an area where the water from the decal has eaten right through the varnish and taken the weathering layer straight with it.
I’m not too concerned about it as I can simply do another round of weathering on top of it. But I really need to go back over all the decal and apply another round of setting solution to get them to settle properly into the panel lines. But I’m afraid that it might start to eat away at the undercoat if I apply too much of it.

I guess I’ll just have to take a bit of a chance here. If I don’t get them softened a bit I’ll never be able to do a pin wash along the panels covered by the decals.

Be back with another update after lunch...
 
A quick update...

There's something fishy going on here. Another round of setting solution allowed me, with some gentle persuation from a toothpick, to get the decals worked into the panel lines.

But I could see the tidemarks appearing in front of my very eyes as soon as I applied it. I absolutely need to apply a thicker layer of varnish the next time. This is nearly impossible to work with!

Anyway, as I said: the decals are in place. I just need to add the last few details then it's time to give bird another coat of satin varnish and some hairspray. Tomorrow, once the varnish and hairspray is completely dried, I'll go over it with some pinwashing and the final weathering. And then it's time to mount it on its base...
 
f2k - you're flying through this. Maybe the problem with the varnish and the decals might have been that it did not have a long enough time to cure. I know with my corsair it took multiple applications (3-4) of decal-sol to get the decals to soften up and "snuggle" down.

Looking forward to the next round of pictures.
 
JMac said:
f2k - you're flying through this. Maybe the problem with the varnish and the decals might have been that it did not have a long enough time to cure. I know with my corsair it took multiple applications (3-4) of decal-sol to get the decals to soften up and "snuggle" down.

Looking forward to the next round of pictures.

Sadly, I don’t dare give it any more solution. I’m just too afraid that I might take the paint right off...

The varnish has, due to me being delayed, cured for over 48 hours. So it should be completely dry by now. The solution was allowed to dry for a few hours before I hit it with the next layer. Don’t know if that’s enough but that should only cause me trouble with getting the decal in place – not with losing my paintjob.

Eastrock said:
Your almost there, F2k!!!

It going to fly!!! ;)

Actually, I was rather hoping that it would sink instead... :D


Anyway, I’ve changed plans yet again. I suddenly realised that there was no real reason to apply the pin washing before the final weathering since the weathering would most likely remove the washing.

So now I’ve applied the final weathering effect – a faint dusting of pure white along the top of the fuselage and patches of brown wherever I felt like it. Came out fairly nice in my opinion, but it’s hard to say until the varnish has been applied. The overall effect will probably be dulled a bit.


So that’s almost it. Only thing left on the plane now is the canopy. Now, I thought I was really clever here... I wanted it to look slightly matt and brownish-dirty so I lightly dragged a piece of fine sandpaper across the inside of the canopy to create groves in the glass and then gave it a brown wash, hoping that the paint would settle in the groves I had created. Well, it did... Sort of... But the glass is so think that it’s almost impossible to see the effect from outside. Seriously, the main canopy is so thick that it can function as a magnifying glass! From some angles the effect is somewhat visible, from others the refraction of light in the glass makes it impossible to see. Oh well... Don’t want to do anymore about it now... Just need to cut some custom masking for the outside of the class so I can hit it with the airbrush...
 
Last update for today - the canopy is done.


Man, making your own masks is no fun. Managed to get the tape to cover almost completely. There was a bit of paint that got in under the masking but no problem - I had already thought of a solution to that.
Before masking the canopy I had given it a short burst of hairspray so I could simply put a bit of water on one of my sculpting tools and scratch the paint right off.

Getting the canopy on wasn't much fun either, I must admit. The main canopy was almost a full millimetre smaller than the fuselage so I had to do a bit of twisting to get it to fit. Still doesn’t fit completely and there’s probably some damage to the paint underneath but who cares? This is an old wreck, you can’t expect everything to be in its place...
 
The weathering looks great f2k. Well done. :)
I had problems getting my canopy to fit also, I just forced it down and tried to glue it in place. By the time the glue had set, the canopy had moved up off the rails...

But yours looks good, can't tell that you had any problems with it (masking or location).

Jason
 
Thanks once gain guys. Glad that you like it...

Sadly, I’m being forced to accelerate the pace a bit. Can you say “overtime”?

Looks like I’ll be pulling some really long days (as in 12+ hours long days) at work on Monday and Wednesday, leaving only Tuesday evening to do work on the rest of the diorama. So I absolutely need to get the bird varnished, washed and mounted in the base today so I can add the water on Tuesday.
 
First worthwhile update for today...

Well, I could post pictures of my bird drying after getting it's second coat of varnish but that would be rather boring...

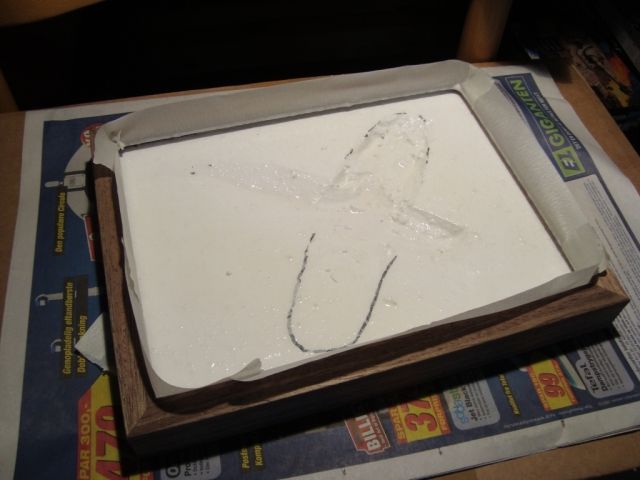
So, while I'm waiting for it to dry I’ll start working on the base. I'm not sure if it's really needed, but I figured that it probably wouldn't be a bad idea to seal the bottom of it.


I simply cut out a piece of newspaper, slightly smaller than the base, soaked the base in a mixture of white glue and water, placed the newspaper on it and applied another round of glue and water until the paper was soaked through. Once that's dry I'll turn the base over and push some undiluted glue into the sides to help seal the top of it before mounting the Corsair and pouring the bottom layer of my swamp.
 
Almost done...

Once the bottom was dry to the touch I turned it over and coated the top with white glue, making sure to push it into the corners.


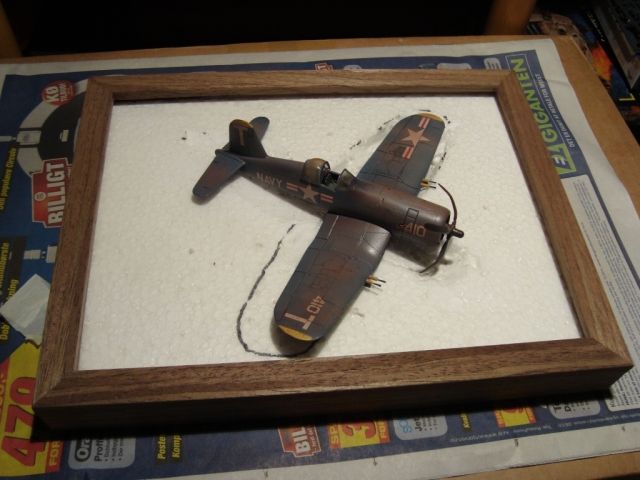
And once that was mostly dry (and I was out of patience) it was time to place the bird in its nest.


I then poured my patented Goo Glue (TM) mixture out over the whole thing, taking care to push it down under the plane and over the lower wing. This will, in conjunction with the water effect that’s up next, keep the plane in place.


I’ve currently placed the base on four paper cups in order to be able to see if any of the glue runs out. It shouldn’t, but better safe than sorry...

For now I’ll just let it be. It will take some time to dry completely and, in any case, as I said earlier, I won’t get back to it until Tuesday.
 
Thats looking excellent buddy ,great idea for the dio . Looking forward to the water going on :)

Chris.
 
And it’s done...!

Well, the water still needs some 18 to 24 hours to dry but that’s a minor detail...

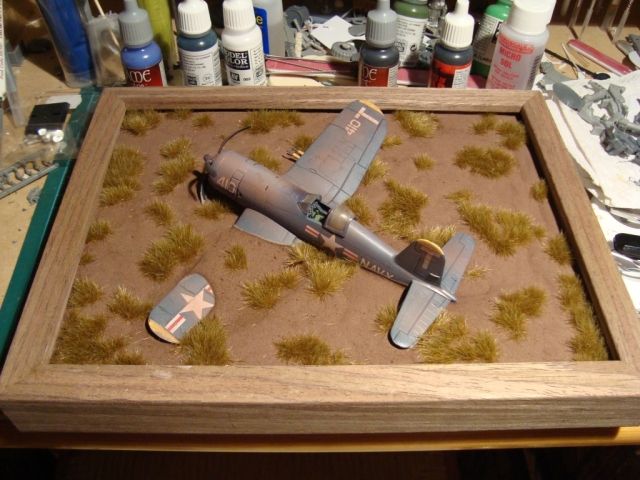
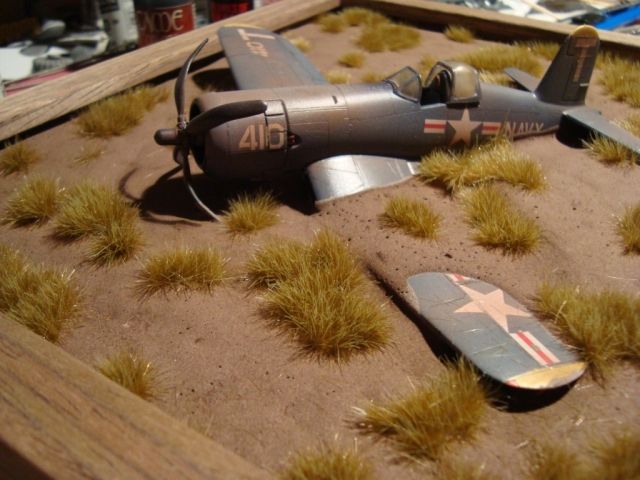
This is what the base looked like once the Goo Glue (TM) was dried. The bird is now well and truly grounded!


I then placed no less than three boxes of grass tufts on the base.


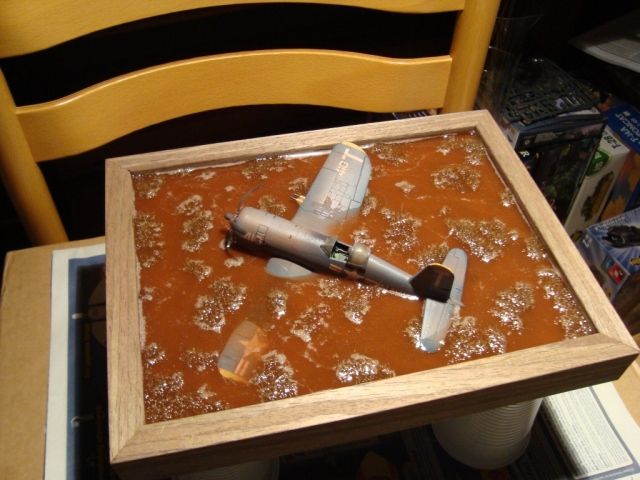
Then it was finally time to add the water effect. And that was where the problems began...

The instructions said that the resin would mix up to a consistency of water, thickening to syrup over the first hour.
Well, if the original viscosity was water then I don’t want to know what syrup should look like!

Oh well, some gentle coaxing with a stiff brush managed to get it to flow into all the cracks.

An even bigger problem was that it didn’t only flow like syrup, it also looked like it. It might eventually cure to be completely transparent, but since I wanted to tint it brown the fact that it was a rich yellowish colour proved to be quite a problem. I’m afraid I ended up adding way too much brown paint to the mix, trying to overcome the original colour.


Oh well, I’ll just have to wait and see what it looks like once I get home from work tomorrow. For now I’ve boxed it in, trying to keep the dust away from the surface until it’s cured. I’ll probably lift the lid a bit later tonight, just to make sure that none of the resin is flowing out of the base.


Isn’t it ironic that the grass tufts are more expensive than the plane itself? And that the water effect is more expensive than the grass and plane together?
 

Latest posts

Back
Top