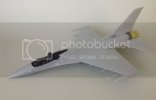
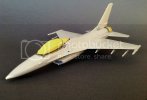
F16-A Israeli Air Force " Fighting Falcon"

rookie

This is not a toy
Joined
May 18, 2012
Messages
937
G'day folks,

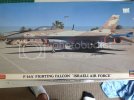
With the BSC all done and dusted I thought it was time to turn may attention to something new. This is Hasegawa's 1/48 kit, from what I've read one of their older ones. Shows it age with a little flash here and there and the fit isn't as crisp as I've seen on other kits from Hasegawa. It's got a nice camo scheme which I may attempt freehand.. :p

The box ( excuse the feet )

faac83fc499be9f7f568f1d6ac4ae82d_zps0c870721.jpg

The seat is pretty basic compared to some of the resin options I've seen available, but I've come to the conclusion I spend way to much time on interiors that don't get seen that much any way.
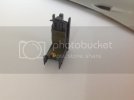
20b9d0833908e7730296f8d8588f1a2e_zps9ea9a466.jpg

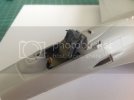
Forgot to take a pic of the instrument cluster before I stuck it place. No decal or PE option , so did the best I could with painting and dry brushing.
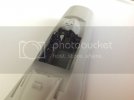
cfeec748e73498a57c52a27fc7ee54c8_zps89c3c651.jpg

0b0db175dde691f4e1b11a3629c725b5_zps5216482f.jpg

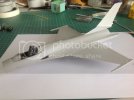
Construction is relatively straight forward on this kit and will build up to a decent size.
2c3b84039df22a84db86db3a2ebbef68_zps246a7b9a.jpg

Thanks for looking :)
 
Great start. That front office looks really good. Looking forward to your next update. :)
 
Nice work there Rookie :)

I like the cockpit ,to be honest I think sometimes painting looks better than decals or wrongly coloured etch parts .

Keep at it ;)

Chris.
 
Thanks for the kind words fellas.

Chris, yes I'm kinda pleased I had to paint it, six months ago it would have been a mess, but have learnt so much from hanging out here. Quite happy with the way it came out, the seat still looks pretty plain though.

Keen to paint this thing, I'm gonna try using all Vallejo model air, can't get any where close to the colours in the Tamiya range and love the quality of the Vallejo line. Off to the LHS this weekend to see if I can find the right colours in Vallejo or as close as possible and mix my own shades.

Cheers! ;D
 
Some progress over the last couple of days.

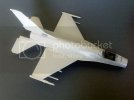
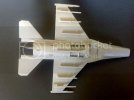
Most of the major work done on fuselage
3767c62b47fd75e42a434296c5064a23_zps1c28a1b8.jpg
5a248b1293ee4b8b5ae76a59260d11a1_zps03029b7a.jpg

The nose cone called for weight. Filled it with lead sinkers then poured in some PVA to stop them rattling around. Here's hoping I've used enough....

0590fbdf753941793246901dae3aace2_zps454163e5.jpg

A fair bit of work to be done yet toget rid of these seams

0bfe76ebafd2e0603e7662d8412c7599_zpsfe2eb83a.jpg

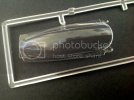
Both canopy pieces have a nasty seam running down the middle and some ejector pin marks. Will have to be sanded and buffed out, not something I've done before but I have a good array of fine grit wet and dry so should be ok.

58226de4b89e06e5c35e0c4cb2c7993d_zps09f6cc86.jpg

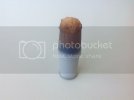
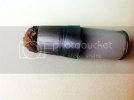
Got the exhaust nozzle painted. First a base of blue and red brown.

d812f3235edc77f87b68b5eba9dfe230_zps77e85bda.jpg

Then over coated with a mix of smoke and mettalic grey. A coat of clear will bring out the colours nicely

c1fd39b924ead8612e11d171e1537cc7_zpsc6e356c4.jpg

Really enjoying this build. Ive got some seams to fill and a bit of glue to clean up yet.

Thanks for looking 8)
 
Well be intersting too see how that canopy comes out. Nice paint work
in the cockpit 8). Gonna build me an airplane soon, so need to hang out
in the air wing a bit more often ;D
 
Thanks for the comments.

Worked on the canopy today, sanded the seam out with 2000 wet and dry, then polished it with 6000 & 8000 polishing cloth. The polishing cloth is awesome stuff, I picked up it up in japan for about 3 bucks. After the 8000 the canopy had a slightly cloudy look to it, dipped it in Future and hey presto New canopy ! ;D

Should have taken some pics of the process, but will post some of the end result.

Thanks for looking :)
 
Not a whole lot of progress as I decided to dip the canopy in future again, so need to wait for that to dry before I can get some primer on.

4fcdf8e3396c7a1419ca7d799b1bc955_zps7c077215.jpg

Thanks for looking :)
 
Nnice work Rookie :) ...The nozzle looks real good ! ...moving right along now :)

Chris.
 
Thanks for the comments guys.

Nother tiny update. Got the canopys masked and glued in place also attached the main intake vent underside. Next is primer but probably won't happen to next weekend. ???

1291a379bb2145da46fc8c286364b040_zps793d0964.jpg

Dont think I'm going to pre shade the upper surfaces as will more than likely get lost in the tri colour camo scheme.... Any thoughts???

Thanks for looking :)
 
For what it's worth, I won't pre-shade my F-16 because I think it will get lost under the dark grey and because I want to try some bleaching/post-shading techniques, but I believe that the Israeli camo scheme is rather light, and any pre-shading should come through.
 

Latest posts

Back
Top