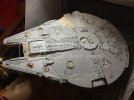
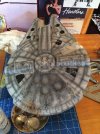
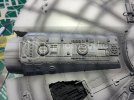
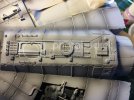
"Don't worry. She'll hold together." - 1/72 FM Falcon build

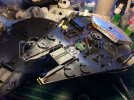
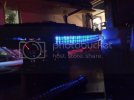
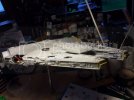
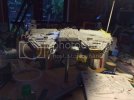
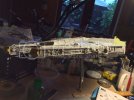
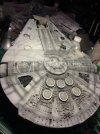
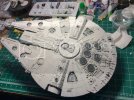
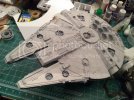
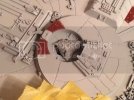
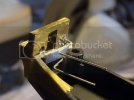
I did some work on the falcon. Mainly focused on getting the LEDs installed for the headlights. Had to dremel away some plastic and then secure the LEDs with a bit of additional styrene and white glue.

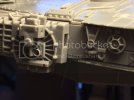
What's interesting is that the headlight Photo Etch from Paragrafix is specific to the 5' model, not the 32". The headlights on the 5' model are off center, but on the 32" they are centered. (I'm sure this is old information to everyone on this forum...) I'm thinking of my model as a hybrid between the two different models.
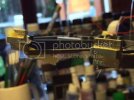
imagejpg1_zps77c27a55.jpg

imagejpg2_zps113ba734.jpg

Thanks for looking.
 
I think it's worth noting that the paragrafix kit was designed for the MPC which is based around the 5 footer,....eg.....the engine grilles have 6 ribs whereas the 32" has 8,

The details for around the turret are for the 5 footer......

The headlight things on the PE are way more detailed than the MPC, but the original FineMolds parts are superior to the PE set

J
 
Gosh I new I was wading into territory here that I lack serious knowledge about. I stand corrected and more informed now. Thanks jaitea.

As I'm looking at the fine molds part I see the extra detail there. Still I'm drawn to the Paragrafix part. I really like the off center lights. I'm gonna try to make it work.
 
Senorjacob said:
Gosh I new I was wading into territory here that I lack serious knowledge about. I stand corrected and more informed now. Thanks jaitea.

As I'm looking at the fine molds part I see the extra detail there. Still I'm drawn to the Paragrafix part. I really like the off center lights. I'm gonna try to make it work.

No matter how detailed you make it, you still have to be happy with it yourself. I know my OCD gets the better of me at times and I'll go bananas trying to make sure everything is screen accurate. But you just gotta ask yourself, do you want it to be exactly like a certain version, or do you want to make it more of an amagum of all the different versions? In the end what ever you feel looks best to you is the most important thing! :)
 
Very true, LrdSatyr. It's hard because my OCD definitely gets the better of me. All in all I'm very happy with how this build is going. Thanks for the comments.
 
I've been so busy with my 10 week old kid that I haven't had time to do any updates, but I have a small update today.

Finally got all the lighting installed and glued down. She's ready to close up for good.

52201dd9471cd6500c41faab889d8485_zpse0105a3a.jpg

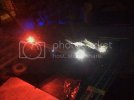
Checked for light leaks.

527e62deb6df76057ddaa4d9087292e0_zpsf7de2ee4.jpg

ddad09ec2eb9add511dae743d479ef3e_zpsc37ed5cb.jpg

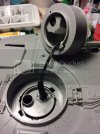
Then realized that I needed a 2.1mm plug connector between the gooseneck stand and the ship itself, or else I wouldn't be able to separate the ship from the base (which would be handy if I transport it). So I spliced in a connection and glued the female connecter inside the gun well.

b28ebd0d39a6f1c45a3738b30f6c4425_zps5f1ad6dc.jpg

Glued on the sidewalls, which pretty much means I'm glueing the model together for good. I hope those LEDs last a good long while and there are no short circuits!

c0e0820e1e2c2af79b7f3415948d9244_zpsd87c96db.jpg

935d93a1fcb36f581319386f928b0cec_zps3509b17a.jpg

2ff9a02e8bdda8032d487518d516551c_zps3692a845.jpg

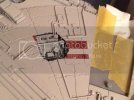
Then realized that I'm missing a piece! E33. It goes here...

3cd8ff9c85a4b2335d258af34435de9f_zps8c36b3e6.jpg

Looked high and low and it's nowhere to be found. If anyone has an any interest in making a cast of this piece, I would really appreciate it. I might have to scratch build it, which could be interesting...

Time to mask some sections off and prime her up! Really looking forward to painting her.

Thanks for looking.
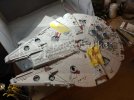
 
I finally got some primer on this guy. Used Tamiya fine light grey.

DB544ABA-2041-4A3B-88CF-46B88D5291CC_zpswhlirpuq.jpg

Then pre-shaded with german grey.

4A9C3F8E-1FF0-4899-9A63-21B009F48B2F_zpsntgju0dy.jpg

Added the PE grills.

26B3BC21-94FF-42A0-B38A-9401891086A9_zpsrac2h1qc.jpg

6F1221CE-0931-41A1-9E4D-7F24E69463B7_zpsiucdpu3n.jpg

Then started base coating it with a mixture of flat white, gloss white, with a pinch of nuetral grey and brown.

7869232B-F2AE-4AF8-AC65-5C38A788CE9B_zpsawmzggpi.jpg

Thanks for looking.
 
It was. It's my first lighting kit and I was nervous. But it was pretty simple. I had to install some styrene to hold the engine LEDs and the headlamps, but nothing crazy. The madman lighting kit makes it really easy. He has all the resistors built into the circuit board and with a wire wrapping tool there's no soldering. Though, since installing this kit, I've learned how to solder and that's not hard either.

If I had to do it over again, I'd probably program an Arduino to light the kit and play some sound effects, and tell time, and countdown to the next movie, and maybe some other things. Oh well.
 
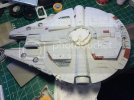
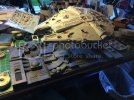
I applied the base coat to the falcon this week. Tried to keep the pre-shade effect very subtle.

E9B7C788-E1F5-47B5-8259-0674B691A0D1_zpswbjwtcww.jpg

D9963D22-ADD5-4425-B1DE-894039C5CE71_zpsokv9uiyc.jpg

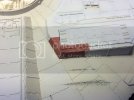
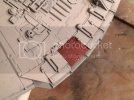
Masked off all the red panels on the upper side. Sponged on some Humbrol masking liquid for the paint chips. Applied a custom mix of muted red tamiya paint.

7CB8EB49-C509-42DB-853A-63B607C6B83B_zpst61lcx69.jpg

image.jpg1_zps2lpatmsg.jpg

image.jpg3_zpsad6nmuu3.jpg

image.jpg2_zpsahvdffk9.jpg

I think the red panels came out a little too dark, so I'm going to give them a light sanding with fine grit sandpaper to beat them back a little. Then I'll sponge on a few nuetral gray paint chips.

Still have the bottom panels to do and then I'll attach the cockpit and start the weathering.
Also, big thanks to Jaitea for casting me a replacement part!

Comments welcome. Thanks for looking!
 
Its looking great,...the paint job looks perfect & so does the chipping

I'm hooked

J
 

Latest posts

Back
Top