Build Log: ED-209 Stop Motion Armature
- Thread starter CheesyGrin
- Start date
CheesyGrin
New Member
- Joined
- Sep 1, 2012
- Messages
- 152
;D I'll likely weather them in the final stages and take away that spit shine finish.Will you look at that. Parts look factory new.
Thanks! That's very encouraging.This is so epic. Very inspiring.
Wow - a great compliment! I'm not sure about the 'smart' and 'talented', though. It's more like 'crazy' and 'determined'.Simply a beautiful work of art. You must be very smart and talented. Inspires me to keep on working.
Quick update:
Leg rail progress was made but I'll wait to post images when they're complete. In the meantime, I've been trying to figure out the threaded rod mechanism that traverses the center of the leg rail assembly. This threaded rod rotates along with the plate on the leg rail cap:
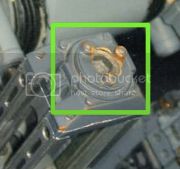
I want mine to rotate in like manner, of course!
It's clear from this image of the hero puppet that the 'rod' is an allen head screw. I'm estimating it to be a #10-24 screw. After much searching, though, I can't find a fully threaded, 4" #10-24 allen head screw. Boo. Best I could find was a 4" long 1/4-20 screw. 1/4" diameter seemed too big when compared with the hero puppet. I also struggled to discern what the screw passes through which allows 360 deg. rotation. It doesn't look like a bearing but I could be wrong:
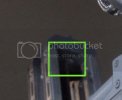
After much thinking and sketching, I've devised a solution:
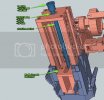
If anyone has insight or thoughts, feel free to share.
MaschinenKrueger
You want MaK with that?
- Joined
- Oct 28, 2013
- Messages
- 176
Just watched this movie again the other night. Great thread.
CheesyGrin
New Member
- Joined
- Sep 1, 2012
- Messages
- 152
Just watched this movie again the other night. Great thread.
Thank you!
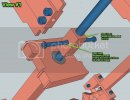
I'm posting a design update. There's been a running conversation on the RPF regarding the mechanics of the threaded rod and whether or not the original puppet used the threaded rod to move the ED up & down the leg rails.
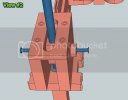
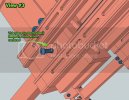
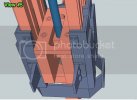
Here are the images that will hopefully illustrate my thinking on Ed's rise/lower motion. This design constantly engages the threaded rod allowing the rise/lower motion and maintains the position at all times. No mechanical clamps needed. Rise/lower is controlled by turning the threaded rod. I must admit, even if this is not how the original puppet functioned, I like it regardless. It just seems cool to have this linear motion!
Hopefully I can post build updates this weekend. Thoughts and suggestions welcomed:

CheesyGrin
New Member
- Joined
- Sep 1, 2012
- Messages
- 152
I must apologize for the lack of posts over the last 4 weeks. Life stuff took priority. Also, since my last post, I screwed up royally. I made my first major machining mistake on one of the leg rail assemblies. It was so bad I had to scrap 3 of the 4 parts and start over. It was about 16 hrs of work - POOF!- like it never happened!
But I'll put my behind in the past and let you know that I cranked everything back up today (thanks to my great wife). I re-machined the bum leg rail and added some details to the other. In all I put about 8 hrs in today's work. Here's the latest:
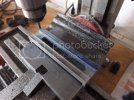
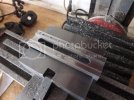
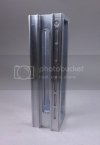
Here's both leg rail assemblies. The pin is for connecting the foot assembly to the leg rail.
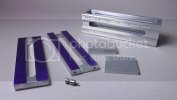
Thanks for following!
But I'll put my behind in the past and let you know that I cranked everything back up today (thanks to my great wife). I re-machined the bum leg rail and added some details to the other. In all I put about 8 hrs in today's work. Here's the latest:


Here's both leg rail assemblies. The pin is for connecting the foot assembly to the leg rail.

Thanks for following!
CheesyGrin
New Member
- Joined
- Sep 1, 2012
- Messages
- 152
Hi All,
Progress has slowed due to other commitments but I did get some shop time this weekend. Here's an update-
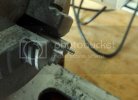
I needed to thread the shin pin #2-56 so I could attach it to the leg rail. This little threading operation took me 5 tries before I got this result:
This weekend's main goal was to get the leg rail bearings inserted. My smallest boring tool barely fit in the 3/8" hole for the bearings!
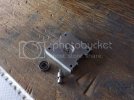
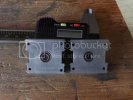
After a little more work today, I finished the assembly:
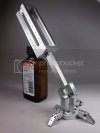
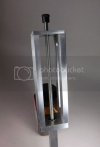
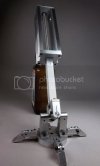
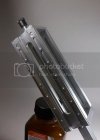
The leg rails were quite tedious (a massive understatement). I've built lots of models over the years, but nothing like this. Cutting these rails were the most nerve-racking build process I've ever undertaken. Overall, though, I'm pleased with the results.
Sorry for the limited posts. Hopefully I can pick up some speed as I move onto some less complicated pieces.
Thanks for following along!
Progress has slowed due to other commitments but I did get some shop time this weekend. Here's an update-
I needed to thread the shin pin #2-56 so I could attach it to the leg rail. This little threading operation took me 5 tries before I got this result:

This weekend's main goal was to get the leg rail bearings inserted. My smallest boring tool barely fit in the 3/8" hole for the bearings!


After a little more work today, I finished the assembly:


The leg rails were quite tedious (a massive understatement). I've built lots of models over the years, but nothing like this. Cutting these rails were the most nerve-racking build process I've ever undertaken. Overall, though, I'm pleased with the results.
Sorry for the limited posts. Hopefully I can pick up some speed as I move onto some less complicated pieces.
Thanks for following along!
stella work man, this reminds me of a 1/6 scratch built robocain build that candyman made. i wont posgt an image because its not my work but anyone interestd should check it out. he e ven has the lcd screen come out the head with the cainmation jst like the movie.
his site is here http://www.ukmonsters.co.uk/robocain/robocain.html.
his site is here http://www.ukmonsters.co.uk/robocain/robocain.html.
CheesyGrin
New Member
- Joined
- Sep 1, 2012
- Messages
- 152
nwalker78 said:stella work man, this reminds me of a 1/6 scratch built robocain build that candyman made. i wont posgt an image because its not my work but anyone interestd should check it out. he e ven has the lcd screen come out the head with the cainmation jst like the movie.
his site is here http://www.ukmonsters.co.uk/robocain/robocain.html.
Robocain's build is what gave me the gumption to attempt mine! Excellent work.
Small update. I try to think a few steps ahead throughout a build. As I've gotten closer to having ED's lower half completed, I've been thinking about the body parts. My original plan was to re-use the Horizon kit parts. But my kit is 20+ years old and has warped over time. I wasn't looking forward to repairing the parts honestly. After much pondering I don't think I'm re-using the Horizon parts. This leaves me with a clear impediment.
So I built a tool to help me reconstruct new body parts:
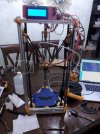
This build just took a sharp turn towards serious.
Jqaprilia4601
New Member
- Joined
- Feb 4, 2014
- Messages
- 66
My man.....I am in the engineering industry, and i must say that your quality is amazing!!! Well inpressed my friend.
Tell me, if I may ask, what tool have you constructed to help you reconstruct, I have a tecnical inclanation and had a good look at it for about 10 min, and for the love of me I cant figure out what it is ??? ??? ??? ??? hahahaha!! please can you explain!!!
Tell me, if I may ask, what tool have you constructed to help you reconstruct, I have a tecnical inclanation and had a good look at it for about 10 min, and for the love of me I cant figure out what it is ??? ??? ??? ??? hahahaha!! please can you explain!!!
CheesyGrin
New Member
- Joined
- Sep 1, 2012
- Messages
- 152
My man.....I am in the engineering industry, and i must say that your quality is amazing!!! Well inpressed my friend.
Tell me, if I may ask, what tool have you constructed to help you reconstruct, I have a tecnical inclanation and had a good look at it for about 10 min, and for the love of me I cant figure out what it is ??? ??? ??? ??? hahahaha!! please can you explain!!!
Thanks for the compliment! It's a 3D printer. A delta configuration and all open source. You can learn more about it here: http://reprap.org/wiki/Kossel
It prints parts using plastic extrusion, layer-by-layer. I can print parts at a .1mm resolution. That's pretty tight! More than sufficient for printing masters of the ED-209 body parts.
CheesyGrin
New Member
- Joined
- Sep 1, 2012
- Messages
- 152
Nice delta, where did you find it?
I found it all over! ;D It wasn't a kit. I sourced all the parts via various sources like Amazon, eBay, and even china! I have a complete bill of materials for anyone interested in building one. The print volume is 8x7x7 - fairly large for what this printer costs to build. I have ~$600 in it. Print quality is as good or better than any other printer I researched. Very simple and effective design.
I sense it may become indispensable in my model building!
CheesyGrin
New Member
- Joined
- Sep 1, 2012
- Messages
- 152
Nicelly done!
And for the soft, was it dellivered with it?
The software is free for download. I use two applications:
1. Arduino Programmer (http://arduino.cc/en/main/software)
2. Repetier Host for Mac. There's a Windows version too. (http://www.repetier.com/download/)
The entire process is not as overwhelming as the Internets can make it seem.. I'm not saying it's a piece of cake, but it's very doable of anyone who has the inclination and willingness to learn. Ping me if you want to know more details. I'm happy to help you along.
If you need some motivation, check out http://www.thingiverse.com. It's an amazing collection of cool (free) things to print. Very easy to do!
Yesterday, I tested my printer's ability to produce hi-res prints. I wasn't disappointed! Here's a sculpt a kind soul posted to Thingiverse. I was amazed that my printer was able to reproduce the skin texture details - even the slight veins under the skin. I was happy.


Jamaicanmodels69
New Member
- Joined
- Apr 17, 2011
- Messages
- 604
Great update the precision is sexy! ;D
CheesyGrin
New Member
- Joined
- Sep 1, 2012
- Messages
- 152
Great update the precision is sexy!
Thanks!
--
Hi All,
Here's the first ED-209 parts from the new printer:
First, I had to make SketchUp do what I wanted. I was mostly successful.
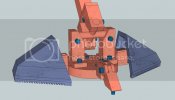
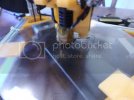
Heres' the toe pad during printing. I was pleased the printer produced the tread pattern well:
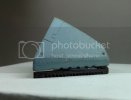
Finished and pulled straight from the printer. This is a size comparison to the Horizon kit part:
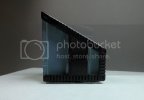
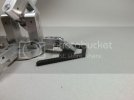
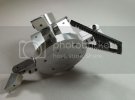
I also quickly printed the toe shroud:
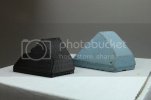
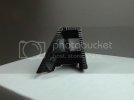
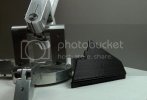
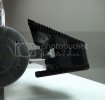
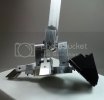
This was a cool process to work through. These results validate the 3D printer as a viable tool for creating the parts I need. Stay tuned....
Similar threads
- Replies
- 4
- Views
- 884
