AMT/Ertl "Lost in Space" Movie Robot

Ian

Member
Joined
Aug 29, 2012
Messages
910
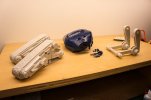
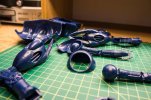
Thought this might a fun one to tackle next. Nice to have something so large, after starting with 1/48 and 1/35 scale kits for my first couple of builds.

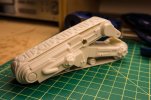
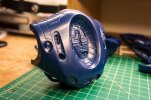
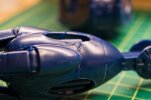
Pretty simple construction though the mold work leaves a little to be desired. I've had to use a ton of Bob Smith's CA glue to bend and hold parts in place and now I'm left with a lot of messy glue lines and seams.

I'd love suggestions on the best way to tackle these. I working with sandpaper and some Flex-I-File "Flex-Pads" at the moment, but it's slow going. I'm also not sure if the scratches will show when primed. What would be the best way to get at all those curves?

8164419993_37227ec21c_c.jpg

8164432002_ecef5e0ea6_c.jpg

8164397649_efeef28d05_c.jpg

8164430370_5621180b69_c.jpg

8164395945_d78724bcbd_c.jpg

8164393347_42e0d39850_c.jpg

8164393945_5eb51ed3d7_c.jpg

8164429366_03b60e480d_c.jpg

8164429796_db89ce3616_c.jpg

8164396465_7859db6024_c.jpg
 
Have always wondered what is inside this box. Not really surprised to see its plastic however ;)
Nice start on this one, Ian. Looks like a very promising build!
 
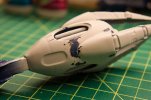
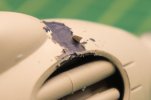
Didn't go so well this evening. After cleaning and sanding I applied some Vallejo Plastic Putty to the larger gaps, only to discover that this stuff can't really be sanded all that well even after drying. So I scraped it off and am looking for suggestions of what to use instead. Maybe just thick CA glue? It makes for difficult sanding when it dries.

I also primed a hand, noticed a few gaps, filled them with putty, discovered the aforementioned issue and so attempted to take the putty OFF, only to then have the primer come off in strips! It's looking pretty bad now, and is going to be totally uneven if I re-prime.

- Is there a way to strip it BACK to the original plastic?

- Is this how primer usually behaves? It's like it's not even adhering to the surface all that well.

8165867331_5b4b959ac4_c.jpg

8165898362_c248834668_c.jpg
 
My favorite putty is Bondo spot putty which can be found at most auto parts stores. It cures up within an hour, and is softer than the plastic, which means you can sand it pretty easily. It doesn't shrink, and does bond to the plastic pretty well.

I don't know what you used for primer but there are some pretty good paint strippers out there. Castrol super clean is the best one I have used. I have also used 90% alcohol as well. Neither of these will damage the plastic, nor remove glue, but they might take off the putty.

Solander said:
Have always wondered what is inside this box. Not really surprised to see its plastic however ;)
Nice start on this one, Ian. Looks like a very promising build!

I too have wondered what was inside the box for this kit. Thanks for showing us.
 
An overnight soak in "Simple Green" will take any paint off an not harm the plastic or glue. I've left stuff in for months and it comes out looking brand new with all the glue still holding. I don't know if it affects the putty though. A gallon jug of the stuff is about $11. It's what I use and I like it.
 
Model looks fun, and I think it's gonna be ok! :)

I know this is simple, but take off those big chunks of glue with a hobby knife, use a clean #11 blade and it won't be too hard to get through.

Looking at the primer issue, I'm wondering, did you clean the parts well before painting? If you haven't heard the deal with the release agent they use in molds, and how it's used to get the parts out, but still remains on the parts afterwards, well, now you know! lol Most people use an item you can find anywhere called "Simple Green", household cleaner. Must be diluted, cleans parts wonderfully, and is phase 1 of making sure any paint goes on well. Also, did you use a rattle can or an airbrush? If airbrush, working with your pressure can help paint problems too. With rattle cans I think you gotta go easy because you can really get too much in the first shot, you want a few nice thin coats.

Hope that helps a little, I have the beginnings of one build up at modelnoob.com, that may have some good hints for ya, and show you how working with three types of putty and epoxy all panned out. The best deal with that is try them all. They all behave a little different, and over time, you will know what to use where. :)

Good luck, can't wait to see the final!

Joe
 
Thanks guys, this is a lot of great advice for me. I really appreciate it.

- I'll look for Bondo spot putty at my local hardware/auto store. Might be worth a shot.

- I have 90% alcohol which I might try. If that doesn't work I'll give Simple Green a go.

- The primer I used is "Vallejo Surface Primer" —and I did wash the sprues before assembly— but obviously I need to give the built parts a wipe before painting. My hands were all over it and maybe there was oil transfer.

- It was airbrushed at around 20PSI, but maybe I need to lay down a thinner coat and let that completely dry overnight before attempting anything else. It had been a good two hours before I started adding in putty but it looks like I was too hasty.
 
Cool, I love the design of this robot, though I can't say the kit looks that good. Horrible fit if I can judge by the pictures.

Love to see how you'll fix it up.
 
Easy Off Oven Cleaner is also a good paint stripper. Not as safe as the other things mentioned but it works faster - your kit comes clean within a couple of hours. For fresh paint like you've got, it's almost instant.

As for the seams, I picked up red spot glazing putty at an auto parts store. I like it better than Bondo because you don't have to mix it to get it to "work" - just use it straight from the tube. It's essentially the same stuff as Squadron putties. I thin it sometimes with Testors Liquid Cement to get it into smaller seams.
 
Challenging is putting it mildly. It's definitely been a learning experience, though I might be changing my "pristine" looking robot idea to a "heavily weathered" machine.
 
I don't envy you working on this baby.
I heard horror stories about it back when it came out
 
I think it's going to be a little messy in the end, but I can't dwell too much on it. Plenty more kits to build.
 
And now more pain and suffering…

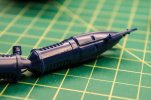
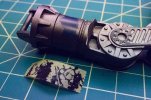
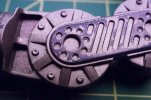
Sprayed Vallejo Black Primer (since I recently purchased some), then some thinned Tamiya Gun Metal.
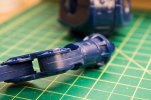
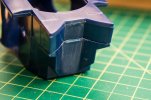
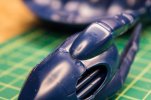
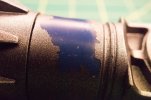
I go to mask this evening for the next bit of detailing and look what Tamiya's masking tape does!

What is going on here? Should I just axe any Vallejo primer altogether and go with something stronger?

8177708178_9dcc59605d_c.jpg

8177678303_3f2c119b83_c.jpg

8177678675_c3b1bfb1d8_c.jpg
 
I don't know about airbrushed Valejo paints.
I just use Rustoleum or Krylon rattle can paints. I leave them extra time to dry/cure, like at least 24+ hours.
I figure rattle-can paints are formulated for any idiot to use without much trouble. :)
So, that works great for me. :)
 
The Gun Metal was left for a few hours, but the black was more than a day and it just came right off. It appears to only be happening in certain areas on that piece —the larger claw section remains intact so I'm not sure what's going on.
 
I did clean it, but maybe just handling while building. Gotta be more vigilant I guess.
 

Latest posts

Back
Top