AFV Club M1126 Stryker

Joined
Sep 25, 2011
Messages
804
Here's my contest entry for the Armour category...
P4020390.jpg

P4020391.jpg

AFV Club Stryker ICV, a resin stowage set from Legend Resin, a PE & detail set from Griffon Models, and AFV Club's Stryker periscope sticker set. I'll be planning the build and starting sometime today.

Happy modelling and good luck, everyone! ;D
 
April 1st:
P4020389.jpg
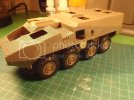
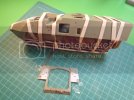
Hull halves are assembled. Rear doors are awaiting attachment. Had to scrape off some detail in prep for some eventual PE.

P4020388.jpg
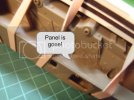
Close-up of what once was a locater panel for the suspension guards. After some chiseling, scribing, sanding, and an application of extra-thin to smooth it out a little, it's pretty much gone! PE will replace this detail.

Gotta go, T-minus 1 minute to Game of Thrones Season 2 premiere...
Happy modelling! ;D
 
So many threads to check out in this contest, still haven't got back to the workbench. Just taking a peek at what everyone else has going on. Awesome builds, everyone!!
 
Just got some surfacer slathered on the areas in question, and gave the rear doors another coat. It will probably have to harden and go off for a couple days before I can start sanding.

I've learned from my Cougar build to take care of the big seams and joints before attaching the bits to it. And there are MANY, MANY bits on this kit. The PE set I got will likely double the parts count on this kit. After matching the AFV Club instructions to the Griffon PE instructions this afternoon, I seriously had a "What have I gotten myself into?" moment. Well, fortune favors the brave!
 
Looks good so far, it looks like a pretty awesome kit. Don't feel bad I've had that same "what have I gotten myself into moment today too. lol One piece at a time, right? :-\
 
yes, lots of tread... left to right don't know where to follow!!!

the Stryker looks cool, ND!!! :D
 
Dust!!

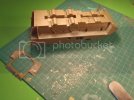
P4030388.jpg
And this is when I'm only about half-done sanding the seam flush on the first side of the hull. I guess I should have paid more attention to the seam when using all those rubber bands yesterday. Lesson 1 learned: work the seam on hull/fuselage halves to hide it while the glue sets. Don't set it and forget it!

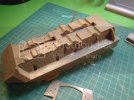
P4030389.jpg
She's the better for it, though. Polished it up to see what's left to fill, and it's a hairline crack instead of a big giant step. A couple coats of Surfacer 1200 should do the trick.

Up in the shock absorber housings, there's a couple seams that are pretty hard to get to. A tip I saw was to flood a cotton bud with some cellulose/lacquer thinners and rub them out. The trick is that when you start to feel resistance, re-flood the cotton bud with thinners. So I did just that inside the shock mounts. It worked on two of them, but on the other two, I had a little too much thinner on the bud, and it leaked out of the housing, and left a nasty ring around the housing. Good thing that the tires will hide it! Lesson 2 learned: don't flood the bud!

Having fun yet, everyone? I am having a blast! :D
 
While I don't know much about armor kits, I am following this....

I used Lacquer thinner in much the same way tonight and found out it will remove chrome.......

Which was a good thing. I didn't want the chrome where it was.
 
Snaded the seams on the hull, and they'll need maybe one more app of surfacer to finish them off. Then I can start on the undercarriage tomorrow. As for tonight...
P4050391.jpg
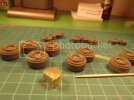
Wheels, hubs, and a PE bin. My PE set came with the PE hub guards, but i mangled them trying to bend them so they wouldn't go all octagonal on me. So I went with the plastic ones from the kit.
Now, the bin took me an hour and a half. It has hinges and locks. Is it normal for something like that to take that long?

Happy modelling. I'm calling it a night. 8)
 
You know, it's a miracle I got anything done on this model over the long weekend, between piles & piles of marks, and... well that's about it. Report card marks are due on Tuesday morning, and I've burned a 4 day long weekend at school. And it's gonna get worse this week! :'(
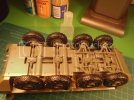
However, I did manage to fit in some time finishing off the suspension and undercarriage. It shouldn't see the light of day again until painting time. Here we go...
P4100390.jpg
Here is the suspension I've been slaving over Thursday, Friday, and Saturday. It's done.
P4100391.jpg
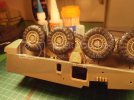
And a close-up of the PE box and suspension guards I spent Saturday & Sunday night & tonight finishing up. Each guard had about 10-odd bolt heads that had to be glued on, for a net effect of you'll never see them anyways. Reminds me of a certain group build project's suspension I undertook this winter... :p

P4100392.jpg
So here we are. It's got suspension, wheels & tires, and some sort of box thingy on the side. And all the wheels touch the ground!! Excelsior!

Happy modelling, buds! ;D
 
thats looking Mighty Fine ND the rest of it should be easy ;D
 

Latest posts

Back
Top