Academy 1/48 F-15I

yanpol

New Member
Joined
Aug 25, 2012
Messages
101
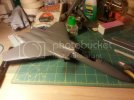
Hi everyone, I started a new build: Academy's 1/48 F-15I Ra'am.
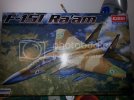
20130725_215430_zps4f7e725b.jpg

This kit seems to be of a superior quality than the two other Academy kits that I've (sort of) built. The plastic is harder (yet not brittle), the fit is -generally speaking- good, the detail is crisp and the decals are printed by Cartograf.

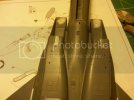
I started with the fuselage. This kit requires some sawing (a first for me), which I did with some apprehension.
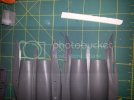
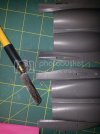
20130725_215532_zps5d38bb69.jpg

20130725_224400_zpsd7ffffc8.jpg

As I said, the fit is mostly OK, but some filling and sanding will still be needed.
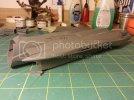
20130726_001301_zpsb528dd21.jpg

I don't want to jinx it, but hopefully this build will move a little faster than my previous, incomplete one.

Thanks for looking.
 
Thanks for your comments guys. I certainly hope this build goes better than the previous one!!
 
It will be interesting how your build goes.


You bring up a good point I'm fast realizing regarding fit.

I'm just getting back into modeling after a 20+ year absence.

I'm quick-building several inexpensive model planes (Revell-Monogram) to use as a practice surface for reacquiring my airbrushing skills as well as just getting back into the swing of building again. As a kid growing up and even into my adulthood, I had way more patience then than I do now regarding fit. Since quick-building said plane models, I've noticed what I used to pass as a good fit now I see as 'unnecessary' lousy fit on major model parts like fuselage halves and wings.

Case in point: I bought an AMT 1/48 scale F-18C. What a piece of junk! It cost as much as a Revell-Monogram F-18E but is 5 times less in quality. The fit was absolutely horrible!


I bought a 1/72 scale Hasegawa Mig 29 (That costs more than a 1/48 scale Monogram F-4C) to see if Hasegawa has kept its' quality after 35+ years I've bought and built them. Very happily; Yes, they have kept their quality! Virtually no flash and the fit is absolutely near perfect and is such a clean model.
 
CDA, I'm also getting back after more than 20 years, and I completely agree with you. Money was tighter some years ago, so my modeling was reduced to reading forums and magazines for a while. That introduced me to lots of techniques that I either knew existed, but never attempted (airbrushing, filling and sanding), or didn't even knew existed (pre and post shading, the correct way to apply decals, re-scribing, etc.). Many times I would read about some new aspect (for me) of the hobby -for example, scribing- and think "that's too much work, I will only build for relaxation so I'll never do that". Of course, I now have a scriber and a set of templates.

Anyway, some updates:

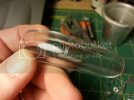
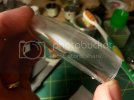
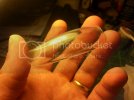
The canopy has a nasty seam line, so some sanding and polishing was in order:

20130803_195258_zps25b332cd.jpg

20130803_200728_zpsa18a708b.jpg

20130803_202553_zps0a759989.jpg

It's not perfect, and I may still have to dip it in Blem (Future), but it looks better than how it came out of the box. I'm posting these photos for any newbie like me that may be reading this: if I can do it, anyone can :).

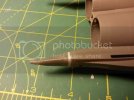
I went a little too far when I sawed the tail booms, so one was a little shorter than the other. Although it wasn't really noticeable, my OCD prevented me from leaving it at that, so I used some card to solve the problem.

20130805_180545_zps24b54d63.jpg

20130805_192355_zps02f09bac.jpg

The airbrake and the wings were glued. There is a small step where both wings join the fuselage, so I may end up using that scriber after sanding them, after all.

20130805_192405_zpse87a10ba.jpg

My "screw the underside" policy resulted in some gaps there, hopefully the CFT's will cover them.

Thanks for looking.
 
Looks good. Nice fix on the tail. Keep it going.
 
Hi everyone, a small update (otherwise, I'll be posting here every three months):

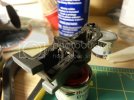
The windshield and the canopy don't really fit, so the canopy will be open. This is how the cockpit is coming so far:

20130811_195628_zps25b92d8c.jpg

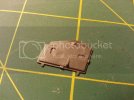
There was a small step where the fuselage joins the cockpit section, so I had to use some card. That little square of putty shows that you should do your research before starting to build the kit (there was a grill that's absent in Israeli F-15s)

20130810_204228_zpsf9c27874.jpg

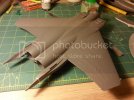
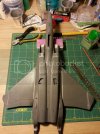
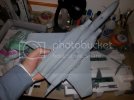
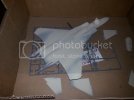
This thing is starting to look like an aircraft:

20130822_195450_zps17b6f8f5.jpg

Maybe I will be able to start priming it this weekend.

Thanks for looking.
 
Definitely looking good.
Nice work on the cockpit. Sorry to hear about some of the fit issues
 
Thanks for your comments, guys. Quaralane: except for the wings, every fit problem I've had so far has been of my own making. This is the best Academy kit I've built so far.
 
Things are moving very slowly.

As I said before, most of the fit issues I had encountered were due to my sloppy building:

20130907_002905_zpsefb0a956.jpg

20130907_002921_zpsb34357ab.jpg

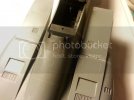
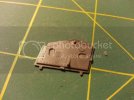
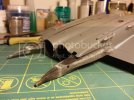
I know most manufacturers put their ejector pin marks on the inside of doors. I think that in some cases it would much easier to remove them if they were on the outside. Case in point:

20130919_162246_zps42a8a687.jpg

There's no way to sand those ejector pin marks without oblitarating all the detail around them, so I just scraped them with a blade. It took forever and the result isn't perfect, but at least I didn't end with a smooth surface.

20130919_163012_zps30f8e343.jpg

After filling and sanding, I was almost ready for priming

20130915_143113_zps4ef71dfc.jpg

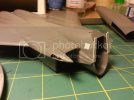
At this point, my plan was to paint everything and then glue the CFTs. However, after dry-fitting them, I realized that it would be a mess if I did it that way. So I used Tamiya extra thin cement to glue the front section of both CFTs and let it cure for a couple of days.

20130915_164458_zpsa10e4fad.jpg

Once the front of the tanks were welded to the aircraft, I used CA glue to attach the rear section.

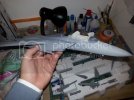
Priming didn't go as I expected. I thinned the paint too much, and had some nasty runs in some parts.

I went to bed thinking of stripping the paint and starting over, but today I decided to sand the kit with a very fine grit sandpaper, keep moving forward and try to finally get the hang of airbrushing.

20130923_230039_zps66c1f7ac.jpg

20130923_230058_zpsa35dbcbf.jpg

Again, please excuse any spelling/grammar mistakes and thanks for looking.
 
Yes, Academy makes a great kit. Not as well fitting as Tamiya or Hasegawa, but very close. So far I've built their 1/32 scale F-18C Hornet and F-16CJ Falcon. And yes, the plastic is very good quality. Not too hard and not too soft. Parts weld together without any melting from the thin liquid cement. The plastic sands very good too. Doesn't take much effort to fill and sand.

I would love to build an Israeli F-15 in 32nd scale. I've got an Israeli 1/32nd A-4M Skyhawk and a 1/32nd F-16I Sufa in my stash. I think academy makes both.

Best of luck on the build.

Joe
 
Hi everyone, it's been a while... Quaralane, letsgobrowns82 and Joem423, thanks for your comments, guys.

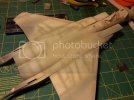
A small update: camouflage is pretty much done.

I painted the base color

2013-09-28192351_zps3b327f4c.jpg

I used a 50/50 mix of the base color and white to paint inside the panels and then added some black to the mix to pre-shade the panel lines. I then painted the base color again

2013-10-03165533_zpseb583a6e.jpg

2013-10-04234245_zps1182dad9.jpg

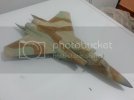
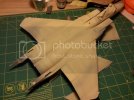
I did the same with the other two colors. Israeli F-15's paint schemes look faded, but I think I may have overdone it (still, it doesn't look so bad in person).

2014-01-28210131_zps2c12ddf2.jpg

2014-01-28211612_zpsdcceca18.jpg

It's difficult to decide how much pre-shading/fading is enough, because the previous colors are obviously masked. One also has to take into account how much of it will be affected by Future/matt varnish coats. Another drawback of this technique is that it pretty much eliminates the more superficial panel lines (I don't think I will be able to do a pin wash).

I did get a lot of glue residue from the masking tape. I also forgot to mask a small area, so I'll have to airbrush a little green over there.

2014-01-28210155_zps4054b7ab.jpg

That's all for now, at this rate, I'll be posting again in April with the underside ;).

Thanks for looking.
 

Latest posts

Back
Top