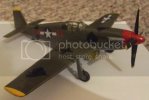
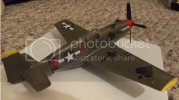
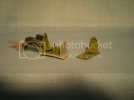
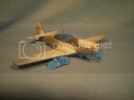
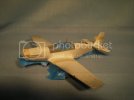
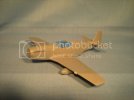
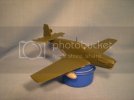
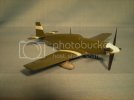
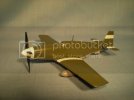
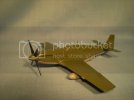
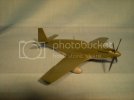
A Pair of Ponies--Monogram and ICM P-51Bs in 1/48

the Baron said:
Quaralane said:
Your missing piece is likely the tail gear and/or doors for it

No, that's accounted for, that's the long rectangular opening whose trailing edge is about even with the leading edge of the horizontal stabilizers. The opening I mean is stuffed with tissue in the photo; it's between the tailwheel well and the radiator vent. Still a mystery!

I'll add the tailwheel doors, by the way, at the very end. They've gotten their coat of neutral gray, now, too, and they're set aside till then.

you know... thats strange, on the Revell P-51D Mustangs you just install the radiator vent for the Radiator. does it look like a part belongs there or is it just a big opening? maybe the opening is too large on that model.

you probably know this but there is supposed to be a opening there to let a little air flow through with the vent closed, i cant see as well beacuse that peace of paper towel is in the way, but maybe there is no peace that goes there, it may actually be the part of the opening that is there for air flow when the radiator vent door is closed. on my P-51Ds there is a gap too!

Untitled-5.jpg
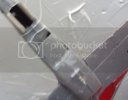
here is one picture, the vent is closed all the way, but there is still a gap

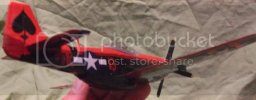
AceOfSpadesP-51greensheetpicture8.jpg
here is another picture of the Ace Of Spades P-51D Mustang, i wish i had pictures of one of my mustangs with the radiator vent that didn't have a black underside, but if you look close, you can again see the opening in the vent.

FAST FACT!!!

i love stating fast facts about the mustang!

the Mustangs liquid cooling system was special, it actually created thrust, this is one of the reasons along with its streamline design and laminar flow wings that it is so efficient, the cool air enters the radiator, then when it passes through the radiator it gets heated rapidly, and as air is heated of course pressure is made, this pressure exits out the radiator as thrust! the ammount of thrust created cancels out the drag created by the Radiator.
 
i dont think there is much of a difference between the P-51B and P-51D Cooling vent, so there is this much of a gap with a closed vent, i remember when i built this one i thought there was a part missing there too!

RadiatorHousingventgapclosed.jpg

if its about that big your probably not missing anything, its a natural vent hole.
 
That's a good shot of the vent, to compare between Monogram's -B and -D. They improved the tooling, between the issue of the razorback and the issue of the bubbletop. On their P-51B, the whole area is molded as part of the fuselage detail, with a separate overlay piece for the intake. On mine, I opened up the vents, to give them depth, if not detail. It looks like for the P-51D, they made the vent exhaust a separate piece, to allow for more detail.

But the ICM kit definitely has too big of an opening. It reaches almost from the leading edge of the vent piece, to just in front of the opening for the tailwheel. It's about 1 1/4" in length. I still might fashion a piece to cover it, from styrene sheet.

Since I agree with the position that the ICM kit owes its origins to the Tamiya kit, I plan to get the Tamiya kit and compare it to this one. That hole wouldn't keep me from buying another copy of the ICM kit, but I would bear it in mind--I got this one for $10 from Squadron, in any case, which I think was an excellent deal. I still have the fret of 5 extra figures, that made it all worth it to me ;)
 
the Baron said:
That's a good shot of the vent, to compare between Monogram's -B and -D. They improved the tooling, between the issue of the razorback and the issue of the bubbletop. On their P-51B, the whole area is molded as part of the fuselage detail, with a separate overlay piece for the intake. On mine, I opened up the vents, to give them depth, if not detail. It looks like for the P-51D, they made the vent exhaust a separate piece, to allow for more detail.

But the ICM kit definitely has too big of an opening. It reaches almost from the leading edge of the vent piece, to just in front of the opening for the tailwheel. It's about 1 1/4" in length. I still might fashion a piece to cover it, from styrene sheet.

Since I agree with the position that the ICM kit owes its origins to the Tamiya kit, I plan to get the Tamiya kit and compare it to this one. That hole wouldn't keep me from buying another copy of the ICM kit, but I would bear it in mind--I got this one for $10 from Squadron, in any case, which I think was an excellent deal. I still have the fret of 5 extra figures, that made it all worth it to me ;)

thats what i was going to say, if the gap is too big modify the vent so it is the proper size, does the second opening flap have a seperate opening for the Oil cooler? the mustangs cooling system not only had the Radiator positioned in the scoop, but the oil cooler as well, the radiator was positioned above the oil cooler, but the Radiator and oil cooler had seperate Exhaust vents, the Big one was for the Radiator, and the oil cooler had a small one just below. for each one of my mustangs i failed to make a opening for the oil cooler vent, another Detail Revell did not include!

also ironically the Revell Kit i got to make Deadly sexy, i got on sale too, for around $10 which is a bargain! its usually 12 to 14 bucks for the Revell 1/48th scale P-51D Mustang! and the Revell kit is one of the cheaper kits, so im guessing you got a really big bargain on yours!
 
A little bit of a bump -

The Mustangs are still sitting on the bench, awaiting painting, though I finally finished the pilots and installed them in their respective offices. There are some final details to install in the cockpits before I attach the canopies (basically, the gunsights), but I wanted to give this update, on the subject of the origin of the ICM kit. I picked up the Tamiya -B on Friday - the old boxing, of Don Gentile's Shangri-La, not the newer "collector's edition" bluenose - and the ICM kit is definitely a copy of the Tamiya kit. The parts are 99.99% identical. I'll take some pictures, eventually.

The mystery of the vent is still unsolved, though, if this were an episode of "Monk", we'd be at the commercial break at around :45 minutes. The summation will come next. "Here's how he did it..." Seriously, though, I think they got the area immediately behind the vent correct, and that the tail end of the piece that makes up the cockpit floor is intended to represent the piece that covers that rectangular opening. I think ICM's instructions are unclear on assembling the parts to achieve this. Also, the WWII Weekend at the Mid-Atlantic Air Museum in Reading PA is about 7 weeks away, and I intend to crawl under the Mustangs there and figure this out, once and for all.
 
i just got done building the monogram Revell kit a few months ago!

this one is different though, the detail is really good, with a exception of a few things, the kit actually had engraved pannel lines, and the manual hydraulic landing gear pump and air hose had to be attached as separate details, which really made for nice detail.

AceOfSpadesP-51B5-1.jpg

AceOfSpadesP-51B4-1.jpg
 
13aceofspades13 said:
i just got done building the monogram Revell kit a few months ago!

this one is different though, the detail is really good, with a exception of a few things, the kit actually had engraved pannel lines, and the manual hydraulic landing gear pump and air hose had to be attached as separate details, which really made for nice detail.

AceOfSpadesP-51B5-1.jpg

AceOfSpadesP-51B4-1.jpg

Love the ace of spades work!! Those are sexy paint schemes. 1 thing. the squadron coding is hand painted. the quality could improve beyond its already high standards with some simple aftermarket letter/numbering. Just a suggestion, as I have used this on a spitfire i built. happy modelling
 
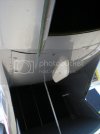
Hi, all, another bump! No progress on the kits, which are still sitting on the bench, awaiting masking the canopies. But I made it to the MAAM's WWII Weekend, and crawled under a P-51 for this picture:

7P-51radiatorvent.jpg

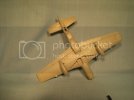
After I saw this area, I think I see what the kit intends. Here, again, is the ICM/Tamiya kit, viewed from below:

4-4ICMPaintbegins.jpg

Please note how big the rectangular opening is, immediately behind the radiator vent. This is what I've been on about. It's too big, but I think that it's intended that the back end of the flight deck piece is supposed to cover this hole. Here, again, is the flight deck piece (at the left of the photo):

2-5Cockpits.jpg

The ICM instructions give you no hint of this. Not sure if the Tamiya instructions are clearer. But it's clear to me now, that the end of that piece should be fitted in such a way as to close that hole and form the outer skin of the fuselage, as in the photo at the top of this post. I can even see detaching it from the rest of the flight deck piece, in order to fit it to that opening. Too late to fix this now on the ICM kit, but I have picked up the Tamiya kit in the meantime, so I can plan for this from the start.

Hopefully, I'll get back to these and finish them, if for nothing else, just to get them off the bench :D

Thanks for looking!
 
Well, here's another little bump to this long-dormant thread...

I combined some practice with my Paasche VL with a lesson in working with canopies.

Masking and attaching the canopies on these models was a real mental hurdle for me. For months, they've sat on the bench, the canopies dipped in Future and cured, under cover, waiting for me to get over the idea that something would go wrong.

Well, this weekend, I told myself to get up and get moving. I masked the canopies, using 3M blue painter's tape and a sharp No. 11 blade. It was tedious but much easier than I had worried, almost meditative (like drilling out the dive brakes on a Monogram SBD ;) ). And it felt good to get these attached. I may now have them finished in time for my December club meeting (just one year late, is all :D )

Here is the Monogram kit:

5-1Monogramcanopyattached-Copy.jpg

and from the port side:

5-2Monogramcanopyattached-Copy.jpg

As much as I am a nostalgia builder, and enjoy building Monogram kits, I concede that they have their issues. With this one, it's the canopy fit. There were serious gaps all around, where the windscreen meets the top of the fuselage, where the center section meets the windscreen and the rails, and around the side windows. I decided to use white glue to fill the gaps, and then paint over it. After the glue dried, I sanded ever so lightly with a really old, worn-down piece of 400 grit, practically a polishing cloth. I think the touch-ups will disappear under the paint.

Here's the ICM kit, then:

5-3ICMcanopyattached-Copy.jpg

and

5-4ICMcanopyattached.jpg

Fit here was decidedly better--after all, ICM copied the Tamiya kit. The only issue was that I'm using the pilot, and I had to file his bum (well, his chute pack, really) to get him to sit low enough in the seat for the canopy to fit. I said fit was better, but it also had its issues, and some filing was required at the jag where the windscreen meets the center section, to minimize the gappage.

Here's where the airbrush lesson came in. I wanted to try a tip I learned from Tommy Kortman and others at DVSM, to use Future to seal the masking and prevent seepage. So, I shot a coat of Future, straight, undiluted, and it looks OK. Next phase is to apply interior green, which is another airbrush exercise, and then the OD, which is rattle can.

I enjoyed myself so much--it's actually been a while since I was able to spend a whole afternoon at the bench--that I masked and sealed with Future the canopy sections for my A-24 build (Monogram's SBD). But that is a story for another time....

As always, thanks very much for looking, and comments/criticisms/tips are welcome (you've all helped me so much, so, if my article gets discussion going that helps someone else, I will be happy)
 
Looking good B! ;)

I'm actually doing some vids on masking canopies. The first one is almost done.

I hate masking canopies! :mad:
 
Thanks, guys! It's good to feel the modeling blood flowing again (and not because of a dropped X-Acto knife ;) )

Jim, I'm sure you'll post when your vids are done? I'd like to see what you're doing. Canopies were more of a pain, but I think I've hit a stride now. Still need to get a little surer though with Jon's bane, vacuforms.
 
Hi, all, here's the latest in my progress on this build....

In the last installment, I got over my fear of canopies, finishing the masking on these Mustangs, and attaching the canopies. That opened the door for applying the final colors, or basic exterior colors, I should say.

Prior to getting to the canopies and freezing in my tracks, I had applied USAAF neutral gray to the undersides, since both subjects are in olive drab over gray. I'm using Tamiya's aircraft color line in rattle cans for those colors, by the way.

In this step, I masked the undersides, using the blue 3M painter's tape again. So far, I can recommend it. My experience has been that it cuts easily, it's relatively low-tack, so it doesn't pull up paint orleave a lot of residue--when I have seen some, I cleaned it with a cotton swab dipped in Windex--and it's cheaper than Tamiya's tape, and apparently made to similar specs. So, it makes my Dutchy senses tingle.

Then it was just a matter of spraying the OD on, in several passes of light coats, to build up the solid color and avoid runs. Here is the ICM kit, with the colors on:

6-1ICMODandgray.jpg

and from the port side:

6-2ICMODandgray.jpg

I was pleased with the demarcations, and absence of bleeding. The Monogram kit also came out relatively nice:

6-4MonogramODandgray.jpg

However, some of the areas along the theater markings and the demarcation line are a little ragged, as can be seen. Also, on the starboard side of the fuselage, above the radiator area, I made a masking error, and a piece of tape was folded down too far:

6-3MonogramODandgray.jpg

Not a major problem, but as you can see, I had gotten a little eager in removing the masking and removed the masking on one of the stripes. I had to curb my enthusiasm, remask and redo that area. For the second pass, instead of using tape for everything, I used old envelopes (business size, I forget the stationer's number, though) to cover the wings and tail, then masking close in around the area to be painted. Problem solved, and on to the gloss coat.

For the gloss, I used Future, applied with the airbrush (Paasche VL), shot at 15 psi. Here's "Ding Hao!", with the white stripes revealed, and a little Future:

7-1Monogramfutured.jpg

and from the port side:

7-2Monogramfutured.jpg

I'm still feeling my way with the airbrush, and there is a little bit of blotching to the Future coat. I think it might be with the needle setting, so I have to experiment and practice some more. Here's the ICM kit, "Tommy's Dad", with its Future coat:

7-3ICMfutured.jpg

and

7-4ICMfutured.jpg

The propellers are just stuck on for the photos, by the way; they'll remain loose, until final assembly.

So, I'm all set to apply decals tonight. For "Tommy's Dad", I'm using the kit decals, which look OK. For "Ding Hao!", since this was an eBay find-bagged kit, with no decals (or instructions, you may recall), I bought Mike Grant's excellent set.

I'm on schedule to finish these for my club meeting, Friday night. I'm off Friday, which will help.

As always, thanks for looking, and comments/criticisms/tips are always welcome!

YbiC
Brad

PS--I added this postscript, anticipating comments about the horizontal stabs on "Tommy's Dad", they wracked into a positive dihedral, but I don't know why, I think it happened while the glue cured, but I didn't notice it until much later. Meh. I'm living with it ;)
 
Hello, again, everybody! The word for today is "FINISHED!" Also, "FINALLY!" Just a year after my original
target date to finish these Mustangs, I think I'm done, and in time for tonight's meeting.

In the final lap, there were some issues, including decals that curled, some paint that came away when canopies were unmasked, and gaps that opened up again. Also, a weathering color mixed with isopropyl actually ate through DullCote and the color underneath. But it was nothing that couldn't be touched up, and that won't be noticeable from a couple feet away, though these digital images will show every little flaw...

First up, here is the ICM kit, finished with the supplied markings as Major Herbst's "Tommy's Dad", flying in China in '44:
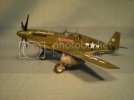
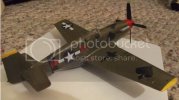
8-1ICMfinished.jpg

I had no references, other than the kit instructions and the box art, so, it might not be too accurate.
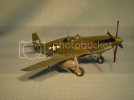
8-2ICMfinished.jpg

Chipping was done using a Prismacolor marker. The ink really does dry flat, not matte, but levelled out to a really thin layer.
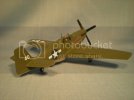
8-3ICMfinished.jpg

The aircraft number "40", I had to replace. I was applying the marking on the port side, and it got folded over on itself. After much trying and some choice words, I gave up, and replaced the digit with some numerals from the stash. Not the right font, but who cares?
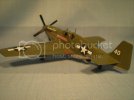
8-4ICMfinished.jpg

I had similar problems with the smaller decals, like the stencils, and after getting the more conspicuous markings down, I decided to leave off the rest. Now, the national markings settled down very well, with no
setting solutions, and were absolutely matte in finish. But the stencils were pretty crappy, on half of them,
the text was half-printed, and so, I didn't mind leaving them off. I do regret that Maj. Herbst's name plate and that of his crew chief wrinkled into a mess and couldn't be salvaged, either.

Apart from the chipping, the only other weathering I did here, was to use chalk pastels for the engine exhaust and the gun blasts. I tried to keep the blast stains subtle. As I become more proficient with the airbrush, I'll attempt panel fading/shading.

Next up is Major Howard's "Ding Hao!", which I've been keen to rebuild, since getting back into modeling. Since I got the kit off eBay, minus decals, I used Mike Grant's set for this subject.
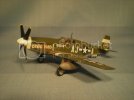
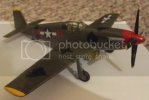
9-1Monogramfinished.jpg

I have been staring at a color photograph of "Ding Hao!" on my desktop for the past 2 months, noticing little nuances of wear and fading, some of which I attempted to reproduce.
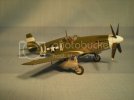
9-2Monogramfinished.jpg

For one thing, the left strut is painted with a chromate green, while the right strut is painted with aluminum paint (I assume it's a paint/lacquer, and not the natural metal finish. Others may know better). For another, there is a patch worn off at the port wing root, forward, showing the chromate primer, with some black smudges. I don't know if this was a repair of some kind, but I smudged on a little zinc chromate and black, to replicate this. There was also a lot of staining, that appeared to be leakage, which I also began to reproduce, but the Monogram kit, while not a bad one, doesn't have the level of panel detail to do it right, so I held back.
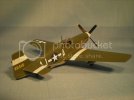
9-3Monogramfinished.jpg

Despite laying down a gloss coat, there is some silvering to the decals, like the squadron codes. A drop or two of Future applied when decaling might have helped there.
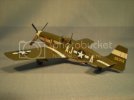
9-4Monogramfinished.jpg

When I removed the masking on this bird, some of the framework paint came away, so I touched it up with Tamiya OD from the bottle, thinned with a couple drops of Tamiya thinner. I did that in a couple of passes, building up the color. I thhink that's the secret to using Tamiya's airbrush-formulated paints out of the bottle. I also had the seam open up on the left rear window. The worst part of the Monogram kit is the fit of the canopy. Though I had sealed up the perimeter seams when attaching the canopy, the piece did not want to stay closed. Looking back, I should have detached the two rear panels and glued them in place separately, and then dealt with the seam between the center section of the canopy and the rear panels. As it was, I filled the new gap with white glue. I will touch that up with more OD. Also, there was some fogging on the insides of the canopies, but nothing can be done about that now. Still, you can see pretty well into the cockpits, and see the pilots.

But at least they're finished! It's nice to be done, and I had a lot of fun building these kits, especially the Monogram kit. It took me back to junior high, when I built it the first time, and yes, I did do some rolls and
dives with it, while making (Packard) Merlin noises!

Thanks for looking, comments/critiques/tips welcome as always!

YbiC
Brad
 
Thanks, Quaralane! It feels good to have them finished.

I have the new/current Revell-Monogram kit and the Tamiya P-51B in my stash, so I can do a "siblings" or "ancestor" build at some point, too.
 
Thanks, Ace! I thought of your Mustangs while I was building, too. And Happy New Year to you, since it's the first time I'm talking to you in Twenty-Twelve!
 
Fantastic work man! Love the comparison work here too. On to the competition with those beauties.
 
Couple of real nice birds there Baron ....well done :)

Chris.
 

Latest posts

Back
Top