A Pair of Ponies--Monogram and ICM P-51Bs in 1/48

the Baron

Ich bin ja, Herr, in Deiner Macht
Joined
May 12, 2009
Messages
1,973
Hi, all! I'd like to share a look at my current project, two P-51B's in 1/48. One is the classic Monogram kit, which I got as a bagged kit, without instructions or decals off eBay, and the other is the ICM kit that I got from Squadron in their July sale. I'm building these for the December meeting of my club; our theme is "Mustangs". I've been looking for an opportunity to build the ICM kit since I got it, so this was a happy coincidence.

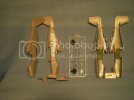
This first picture is of my first step, which was to prep the interiors of the kits:
1Beginnings.jpg

The Monogram kit is on the right, with an interior green laid down. In the center is the ICM clear sprue, which includes a second instrument panel marked "not to be used" in the instructions. Since the Monogram kit had no panel, I'll use the extra there. It might not be 100% for a -B, but the canopy will be closed, and it's better than nothing.

Next, shots of the cockpits of each kit, with pretty much all of the detail that I'm going to use. The Monogram kit, left and right halves:
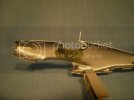
2-1Monograminteriorleft.jpg

2-2Monograminteriorright.jpg
and the ICM kit, left and right halves:
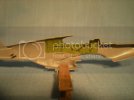
2-3ICMinteriorleft.jpg

2-4ICMinteriorright.jpg

Comparing the two kits, the Monogram kit has better and more accurate side panel details than the ICM kit, despite its relative age. The ICM kit has the side panels molded as separate parts that must be attached to the fuselage halves, and details do not match the photos I have in Squadron's "P-51 In Action", and "Mustang at War". The Monogram sidewalls are pretty much spot-on. Also, the ICM kit has a nasty sink mark right in the middle of the switch box on the right side at the front. I left it as-is, though, because again, the canopy will be closed, so it won't really be seen.

I've heard, by the way, that the ICM kit is a copy of another manufacturer's kit--maybe Tamiya? Maybe one of you knows for sure.

Here are the seat sections of the respective kits' cockpits, ICM on the left and Monogram on the right:
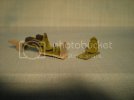
2-5Cockpits.jpg

Now here, the ICM kit does have better detail. The Monogram floor is simple, with just some raised detail to suggest rudder pedals (which, you Mustang fans know, were mounted under the instrument panel, not on the floor). The ICM kit includes the radio deck behind the cockpit, which is represented on the Monogram kit by the top radio box, molded on the fuselage halves. Again, though, when everything is closed up, I suspect that the ICM radio deck will not be that visible. The ICM kit also includes the radiator and detail for the ducting. The Monogram kit doesn't depict this at all; the intake and the exhaust vent are molded shut. I have opened them, so that at least they will be open on the finished model.

Here are the instrument panels:
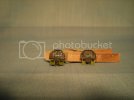
2-6Instrumentpanels.jpg

The panel on the left is the panel that the ICM instructions direct me to use for this kit; the one on the right is marked not to be used, in the instructions. I'm not sure why they have the two panels, because I'm not sure that there differences in the -B/C series panels. In any case, since there's no panel in my Monogram kit--I can't remember if this kit had one or not, or if it used a decal; it's been over 30 years since I last built it--I'll use this extra panel in the Monogram kit. The extra panel also has the rudder pedals molded onto the piece; the other panel consists of the panel and a separate part for the pedals. I was going to try painting the back of the pieces black, and painting the bezels and frame black, leaving the faces clear, but in the end, it was easier to use the usual method of painting the whole front black, drybrushing white, and then adding a drop of Future in each instrument face, and I'm happy with the way they turned out.

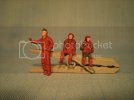
The last picture is a shot of the figures, which you all know, are one of the things I like about my aircraft, I really do:
2-7Pilotfigures.jpg

From right to left, the Monogram pilot, who also flies their P-47 kits; the ICM pilot, who is very reminiscent of the Eduard pilot in the P-39 kits; and a spare standing figure that I have, who will be posed on the ground with either of these kits. I'm not sure if he's a Monogram figure, or if he's a Tamiya figure. He's very similar to one of the standing figures included with the classic large bomber kits, but the pose is slightly different. My buddy Joe Leonetti gave me that figure in a swap, so I don't really know where he came from. Maybe one of you knows?

Right now, I have to finish the pilots, before I can close up the fuselages. Test fitting shows that I will have to sand the ICM cockpit to get the halves to close snugly. The Monogram kit has a little bit of gappage, but nothing that gentle pressure during glue curing can't fix. Also, the ICM kit has no locator pins, at all. There are some tabs and slots on some pieces, but otherwise, I need to apply care.

I hope to have more progress to share over the next couple of days, since I've got time to devote to this project. As always, comments/criticisms/tips are welcome, and thanks for looking!

YbiC
Brad
 
After looking more closely at the photos, I've already spotted some touching up that needs to be done ;)
 
Well except the green internal layer (and it won't be visible that much), i don't see the touch ups you need to do, nice work.
Cockpits look fine and detailed, figures look good, keep up ;)
 
Photos will usually end up showing flaws that you can't see. Something to do with the flash and such. Then again, we are our own worst critics. I look at pictures of my own kits and can pick out flaws and such, and generally think the over all look sucks, but in person sans camera, you don't pick up those little details.

Maybe what they say that the camera does add 10lbs is true!! LOL
 
Jingles said:
We really should do a 'hand painted' build off at some point in the future. A 'no airbrush!' rule would really separate the men from the boys... ;D

Does it have to be beautiful, or just hand painted? ;)
Just kidding, i don't know much about paintbrush technique, so if there is a way to get nice even surfaces with it, i don't know it.
And i don't want to hijack the topic, so i'll ask the question in the right section.
 
Thanks, guys! Hi, everybody, here's my next update on this Pair of Ponies--Assembling the fuselages.

First, here is the ICM kit, in glue-up stage:

3-2ICMP-51glue-up.jpg

The fit is fiddly, and it's not helped by the lack of locator pins. I found it best to work around the perimeter of the fuselage, starting with the upper seams. Once the upper seams cured, I moved on to the lower seam.

Problem areas are the seam forward of the cockpit, and the roof above the radio deck. The forward seam has a cavernous gap. Not a problem, in terms of detail, because Tamiya/ICM engineered the kit with the hood as a separate piece, probably the best way to represent the seam between the left and right hood panels on the 1:1 P-51. But the gap makes me worry that this area won't have a good bond. Test-fitting the hood later proved that my fear was unfounded. As for the roof over the radio deck, I was worried, because the kit parts taper to the narrow roof between the rear windows. But I lined the parts up, flowed some liquid cement into the seam, and held it while it cured. It came out pretty nice.

The seam at the root of the vertical stabilizer was another matter. As you can see, to get the parts to close, I added the clothespin, to provide the necessary pressure:

3-2ICMP-51glue-up.jpg

Also, test-fitting revealed fit problems with the cockpit. It turned out that the piece was out of alignment, so that the cockpit floor was hitting a ledge in the right fuselage half, intended to support the floor, instead of resting on top of it. I wound up grinding the ledge away with the Dremel, and then the halves closed up nicely.

Now, to the Monogram P-51. Here it is, with the cockpit installed in the left fuselage half:

3-3MonogramP-51cockpitinstalled.jpg

So far, so good. But in test-fitting the halves, I found that I outsmarted myself. You may remember, I took the spare instrument panel from the ICM kit, to provide the panel for this original version of Monogram's Mustang. Well, it's too wide; it was banging up against that beautiful sidewall detail in the Monogram 'pit. I needed to grind away enough material to get it to fit. The Dremel is too risky for this kind of work; one slip, and the whole panel is shot. Hand work with a file and sandpaper did the trick. I also had to cut the rudder pedals off, so the pilot could fit. I'm not worried about losing these details, because they really can't be seen. So much for, "The Lord and I know that it's there!" Anyway, dry-fitting showed that the problem was solved:

3-1ICMP-51glue-up.jpg

I followed the same sequence with this kit as with the ICM kit, working around the perimeter a section at a time, except that I was able to do the top and bottom of the nose in one pass:

3-4MonogramP-51glue-up.jpg

Top seams weren't too bad, but there is some gappage on the underside:

3-5MonogramP-51glue-up.jpg

Since I had to break out the putty and acetone, I applied it to the upper seams on the nose, too:

3-6MonogramP-51seamwork.jpg

I'm afraid I lost some of the fine detail that Monogram included here; they did a nice job representing the fasteners that hold the hood panels in place. We'll have to see, once the paint goes on. On the underside, it really was necessary to fill the gaps:

3-7MonogramP-51seamwork.jpg

It looks worse in the photo than it really is, because of this silver plastic. But with primer and neutral gray, all will be well.

Since I took these photos, I've since finished gluing the underside seams on the ICM kit, working in small sections. I have also attached the lower wing piece to the Monogram kit, after debating whether to attach the upper wing halves to the wing roots, or to attach the lower wing first. Attaching the upper wing halves to the wing root can eliminate the seams so common to our builds. But test-fitting indicates that the seams won't really be an issue, and there wasn't a lot of surface to attach to, so I decided to attach the bottom piece first.

That's all for tonight's post, but I'll have another update tomorrow night. As always, comments/criticisms/tips are welcome, and thanks for looking!

YbiC
Brad
 
A quick post-script--over at Agape Models, Gil Hodges clarified the ICM kit's origins, it's a re-pop of the Tamiya P-51B. I want to get the original, to see how it compares. I imagine, for one thing, that it has locator pins ;D
 
I would be suspicious about it being a Tamiya re-pop. If the Tamiya kit has the locator pins but the ICM kit doesn't....that I would say that it isn't a Tamiya re-pop. I can't see ICM going to the expense of changing the the Tamiya molds just to eliminate the locator pins. It would be a huge unnecessary expense.
 
you know... you commented on the raised rudder pedals for the mustang for one of the kits, rather than having them come from under the Instrument panel like the real mustang, they are raised details. the Revell P-51D Mustang also have the raised detailed rudder pedals, which irritated me, because they come out from under the instrument panel, and do not AT ALL look like the ones in the Revell kit. it kind of frustrates me because they could easily make a set of rudder pedals for it that glue onto the back of the instrument panel, and they would look ALOT!! more like the original ones!

the mustang had one of the best cockpits of any fighter, its interior was spacious, and could be adjusted to the pilot, gauges and controls where well placed, and control forces where manageable! and the D models bubble canopy allowed superior view of the battlefield for the pilot! people often argue beacuse of this its one of the easiest planes to fly!
 
Evening, everybody! I apologize for disappointing anyone who was looking for an update earlier this week, but it's been a busy week, and I didn't get to stop and take photos until tonight.

I'm disappointed, too, because I wasn't able to finish the Mustangs in time for my club meeting, and as it turned out, because of a little crisis at work today, I got home too late to drive down to Philly for the meeting, anyway. But it's a blessing in disguise. Now, I can take it a little slower and not push it to finish by a deadline.

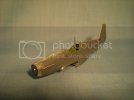
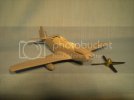
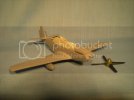
So, here's where I am with the kits. I've started laying down color. As you may recall, I'm finishing the Monogram kit as Major James Howard's "Ding Hao!". To reproduce the white recognition markings, I decided to paint the white first, makes the stripes, and then lay down the OD and gray in the next pass. So, here is a shot of the model, with flat white laid down for the stripes and nose markings:

4-1Monogrampaintbegins.jpg

The masking on the cockpit area is temporary; once I've got the canopy masked, I'll remove the temporary masking and attach the canopy. I have to finish painting the pilot first.

I have to correct what I said earlier about the decals I got for Major Howard's mount, they're not from EagleCal, they're from Mike Grant, apologies, Mike! They look superb, too, and the info insert has been very helpful.

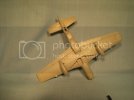
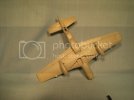
Here is a shot of the underside:

4-2Monogrampaintbegins.jpg

According to my sources, the recognition stripes were 15" wide. In 1/48 scale, that would be a hair over 1/4", so I cut a length of masking tape to 5/16" and used that. The stripe on the vertical stabilizer was 12", but I used the same tape that I cut. Another inaccuracy that I'm not going to address is the fact that the Monogram pilot figure is too small to represent the 6'2" Howard :D He was so tall that he had to have the seat and rudder pedals set as far apart as they would go.

After taking this shot, I started laying down the neutral gray. I'm trying to add it almost by misting, to avoid piling on too much.

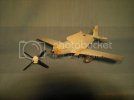
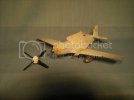
Next, here is the ICM kit:

4-3ICMpaintbegins.jpg

There were fit issues with the wings, just as with the fuselage, and I used the same approach, working around the perimeter of the wings, gluing a section at a time. I ended with the wing root areas, and used a piece of tape to pull the wings into dihedral. They ended up in a little mismatch, but I resolved not to take any head-on shots ;) And the horizontal stabilizers actually contracted a little, and they're out of horizontal.

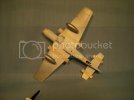
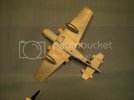
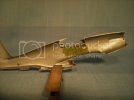
Here's a shot of the underside, with a coat of neutral gray applied:

4-4ICMPaintbegins.jpg

This shot reveals another problem with this kit. You may have noticed the square hole just aft of the radiator outlet vent. I suspect that the kit has a piece missing. Not that it fell off the sprue--there's just no piece to fit that hole! From all of the photos that I can find, that hole shouldn't be there. Even if you glue the vent cover in its closed position, it doesn't cover that hole. Now I really am curious to get the Tamiya kit and compare.

Same comment for the ICM kit regarding the cockpit masking, what you see is temporary, until I mask and attach the canopy. The pilot figures are also almost finished, and will be seated in their respective aircraft. I don't want to take a picture until they're done, though; the process to paint them has been so incremental, that it hasn't been worth it to take pictures during the process.

Tomorrow is one of those great days where I won't have to be anywhere specific, at any specific time, so I can spend some more time, and hopefully take some more progress pics to share.

As always, comments/criticisms are welcome, and thanks for looking!

YbiC
Brad
 
13aceofspades13 said:
you know... you commented on the raised rudder pedals for the mustang for one of the kits, rather than having them come from under the Instrument panel like the real mustang, they are raised details. the Revell P-51D Mustang also have the raised detailed rudder pedals, which irritated me, because they come out from under the instrument panel, and do not AT ALL look like the ones in the Revell kit. it kind of frustrates me because they could easily make a set of rudder pedals for it that glue onto the back of the instrument panel, and they would look ALOT!! more like the original ones!

the mustang had one of the best cockpits of any fighter, its interior was spacious, and could be adjusted to the pilot, gauges and controls where well placed, and control forces where manageable! and the D models bubble canopy allowed superior view of the battlefield for the pilot! people often argue beacuse of this its one of the easiest planes to fly!

That's a good point about the cockpit. I'm curious to see what the retooled P-51B kit looks like. Monogram's P-51D had a little more detail added to the cockpit; the floor and the radio deck were molded in a single piece, and an instrument panel was included, though the dials are represented by raised, plain round shapes. And the pedals are still molded on the floor. But that is a kit for a later build...
 
the Baron said:
Evening, everybody! I apologize for disappointing anyone who was looking for an update earlier this week, but it's been a busy week, and I didn't get to stop and take photos until tonight.

I'm disappointed, too, because I wasn't able to finish the Mustangs in time for my club meeting, and as it turned out, because of a little crisis at work today, I got home too late to drive down to Philly for the meeting, anyway. But it's a blessing in disguise. Now, I can take it a little slower and not push it to finish by a deadline.

So, here's where I am with the kits. I've started laying down color. As you may recall, I'm finishing the Monogram kit as Major James Howard's "Ding Hao!". To reproduce the white recognition markings, I decided to paint the white first, makes the stripes, and then lay down the OD and gray in the next pass. So, here is a shot of the model, with flat white laid down for the stripes and nose markings:

4-1Monogrampaintbegins.jpg

The masking on the cockpit area is temporary; once I've got the canopy masked, I'll remove the temporary masking and attach the canopy. I have to finish painting the pilot first.

I have to correct what I said earlier about the decals I got for Major Howard's mount, they're not from EagleCal, they're from Mike Grant, apologies, Mike! They look superb, too, and the info insert has been very helpful.

Here is a shot of the underside:

4-2Monogrampaintbegins.jpg

According to my sources, the recognition stripes were 15" wide. In 1/48 scale, that would be a hair over 1/4", so I cut a length of masking tape to 5/16" and used that. The stripe on the vertical stabilizer was 12", but I used the same tape that I cut. Another inaccuracy that I'm not going to address is the fact that the Monogram pilot figure is too small to represent the 6'2" Howard :D He was so tall that he had to have the seat and rudder pedals set as far apart as they would go.

After taking this shot, I started laying down the neutral gray. I'm trying to add it almost by misting, to avoid piling on too much.

Next, here is the ICM kit:

4-3ICMpaintbegins.jpg

There were fit issues with the wings, just as with the fuselage, and I used the same approach, working around the perimeter of the wings, gluing a section at a time. I ended with the wing root areas, and used a piece of tape to pull the wings into dihedral. They ended up in a little mismatch, but I resolved not to take any head-on shots ;) And the horizontal stabilizers actually contracted a little, and they're out of horizontal.

Here's a shot of the underside, with a coat of neutral gray applied:

4-4ICMPaintbegins.jpg

This shot reveals another problem with this kit. You may have noticed the square hole just aft of the radiator outlet vent. I suspect that the kit has a piece missing. Not that it fell off the sprue--there's just no piece to fit that hole! From all of the photos that I can find, that hole shouldn't be there. Even if you glue the vent cover in its closed position, it doesn't cover that hole. Now I really am curious to get the Tamiya kit and compare.

Same comment for the ICM kit regarding the cockpit masking, what you see is temporary, until I mask and attach the canopy. The pilot figures are also almost finished, and will be seated in their respective aircraft. I don't want to take a picture until they're done, though; the process to paint them has been so incremental, that it hasn't been worth it to take pictures during the process.

Tomorrow is one of those great days where I won't have to be anywhere specific, at any specific time, so I can spend some more time, and hopefully take some more progress pics to share.

As always, comments/criticisms are welcome, and thanks for looking!

YbiC
Brad
MAN!! you are really paying fine attention to detail, you measured the recognition stripes!? when i did the D Day stripes on the Deadly Sexy P-51D i really just winged it and they look good, but they are probably not exact!
 
Quaralane said:
Your missing piece is likely the tail gear and/or doors for it

No, that's accounted for, that's the long rectangular opening whose trailing edge is about even with the leading edge of the horizontal stabilizers. The opening I mean is stuffed with tissue in the photo; it's between the tailwheel well and the radiator vent. Still a mystery!

I'll add the tailwheel doors, by the way, at the very end. They've gotten their coat of neutral gray, now, too, and they're set aside till then.
 
13aceofspades13 said:
MAN!! you are really paying fine attention to detail, you measured the recognition stripes!? when i did the D Day stripes on the Deadly Sexy P-51D i really just winged it and they look good, but they are probably not exact!

LOL, well, only because Mike Grant included that info in the diagrams that came with the decals. If I hadn't had those measurements, I would have eyeballed the width. Though, I would still have cut the tape to a uniform width. Even if the width is off, if the stripes are uniform, they'll look OK to most observers.

I was not so exact about placing the stripes. The diagrams indicate that the stripes' inside edge is 40" from the centerline of the aircraft. That would have been too much of a pain to measure, so I just eyeballed the first one on the left side, then did my best to make the one on the right a mirror image, dressing off the panel lines and other details. The stripes on the horizontal stabs, too, should line up with the wing stripes. The rudder stripe was later painted over in OD, even before Howard's Mustang was fitted with a Malcolm hood, so mine will be the earlier version.

Still, I'm having fun with these kits, they have just the right level of detail, not too much, not too little. And I like comparing different manufacturer's versions of the same subjects. ICM also has a P-51A, and I'd be curious to take a look at that one. I wonder if it's related to the Accurate Miniatures Apache...
 

Latest posts

Back
Top