thanks for the encouragements guys.
")
CDA 455 said:
yanpol said:
Nice build. Mr. Surfacer is also great for representing the rough sections of bombs. Hope this photo explains what I'm referring to:
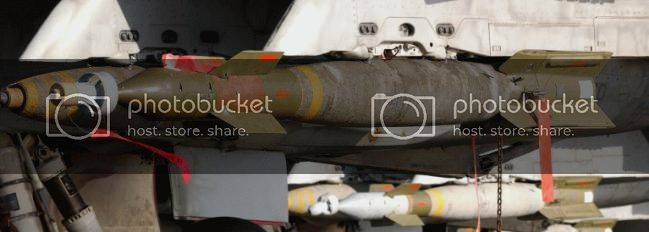
(U.S. Navy)
FYI; The U.S. Air Force doesn't use the thick ablative fire-retardant coating on their bombs that the U.S. Navy uses on theirs.
In fact, if a modeler has bombs for a USN model and wants to use them on a USAF model, the coating has to be sanded off (If the USN bombs are accurately represented) to keep the USAF model accurate.
Thanks for the info CDA 455 & yanpol. I did not know that either.
I was just working on the masking for the last two colours, I hope to post some pictures in the next couple days. The paint work on this is a little more complicated/laborious than I originally thought. Would have gone a lot faster if I'd felt comfortable free handing it.
yanpol said:
What do you think of Vallejo primers? I want to start using acrylics but I read somewhere that if you need to sand a primed surface, Vallejo primers tend to peel off.
I really like them, (the black is the best). As i mentioned before, they are very low odour. I have not done a cost comparision, but i would bet that I can spray (prime) more models, than if i used a similar priced Tamiya spray can ( that being said, some hardware store primers can work for even less cost). I've been using the Vallejo primers for about two years now. I have sanded them just fine in the past.
Here's some tips that I've either received from my own experience or other users of the Vallejo primer line;
1. Make sure your plastic surface is clean and free of oils. I wash everything with warm water and dish soap. Make sure washed parts are fully dry before priming.
2. Shake the primer really well, then shake it again.
3. I spray the primer at a higher pressure than I normally paint at (between 20-30 psi depending on the colour).
4. Although YouTube videos show that the Vallejo primer can be sprayed on heavy and that it self levels really well, I find I get much better adhesion if I spray light even coats.
5. Even though the primer may feel dry to the touch in a few minutes, leave it overnight to dry.
Hope that helps, and answers your question.
Jason


