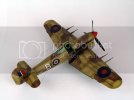
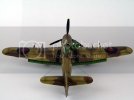
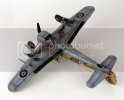
1/48 Typhoon Mk 1b (Hasegawa) Ready for inspection.

suavetomcat

New Member
Joined
Mar 4, 2013
Messages
303
A few weeks ago Scott kindly made a video for the Scale model addict utube channel of my work. I thought I'd add some more photos of the work in the video. I hope you enjoy.

This is Hasegawa's Hawker Typhhon Mk 1b in 1/48. I added Eduards photo etch set and aftermarket decals.
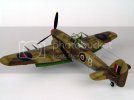
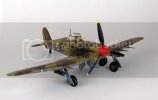
IMG_0191_zps6cgswok9.jpg

IMG_0188_zpslb31aufm.jpg

IMG_0194_zpskzghwwhq.jpg

IMG_0199_zpsajlsdlpi.jpg

IMG_0201_zpsqgoyjyfq.jpg

Thanks for checking out my build.

Chris
 
Thanks guys.

I was really pleased how this one turned out. It's unusual seeing the Typhoon in those colors, which is why I picked to do it.

The kit was lovely too, except for that cockpit tub (they made the fuselage for eaither the car door type or the bubble top). You had to insert a part of the fuselage to suit the type you were building, and it took some sanding and rescribing to get it to look good.

Chris
 
You got to be kidding me Chris! :eek: What a finish!! Almost too good if there is such a thing lol Fantastic mate!!

Thanks for sharing this!

Pearse
 
Thanks guys. Appreciate the kind words. I am really pleased with this one. Like every build there's things I would have liked to have done differently, but overall this one turned out quite well.

Chris
 
Goes without saying a beautiful finish, but I want to single out the fact that you did panel shading....on two tone camo! As someone who has built enough planes and tanks knows, that requires a double process and I commend you for it. I chickened out on my latest build because of that and went monotone. Your results though show it to be well worth the effort.
 
Thanks Sunsanvil for the kind words. :D

Next time give it a go, sure whats the worst that could happen.... lol

Here's how I did mine. I don't preshade something like this, I find it much easier post shading, especially with a two or more toned camo. Obviously starting with the lighter of the two colours. Airbrush the base coat before cutting the original colour with white to lighten the centre of the panels. Once your happy with the tones and initial shading (there's more to come later), mask up for the second colour. Just repeat this process, base colour, then lighten the panel centres. When the masking has been removed, then use either Tamiya smoke (X-19) or a mix of black/brown paint (both heavily thinned) to go over the panel lines. This will blend the two colours together. Don't over do this stage, as it's easier to add more if you need it. It took me a couple of goes before I started getting any descent results but stick with it! The biggest hurdle to get over is being able to get a similar shading difference between the two camo colours, so one shade isn't more faded than the other. A good start is to make sure you cut both paints with the same amount of white paint when you go to do the shading.

Let me know how you get on, or if there's anything else I can help with just let me know. But thanks again for checking out my build.

Chris
 

Latest posts

Back
Top