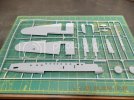
1/35 Academy/MRC UH-1C Heavy Hog

Holden

New Member
Joined
Jun 16, 2012
Messages
107
After few weeks break from the work bench I went to my LHS and found some of the big Academy Helo kits on sale. I picked up this 1/35 Huey gunship and the Blackhawk gunship for a good price. Even though I'm busy a lot with work I'm still trying to find some time for modeling and improving my skills. I really like working in the bigger scale and so I will be keeping an eye out for sales on 1/32 scale planes.
Looks like this kit is going to be a lot better than the 1/48 B-25. After doing some test fitting the seams are going to be easier to deal with.

003-4.jpg


002-3.jpg


001-4.jpg


Still a lot to do yet before I can button up the fuselage halves but just taking my time and enjoying the build. Heck I even scratch built some comm cords, I think they look pretty convincing. I had to fix the control sticks to with paper clips since I snapped both of them trying to insert them in their holes in the floor. Next up to work on will the IP and the weapons sighting system.
 
Outstanding work on the cabin and cockpit Holden. The colors and finish look right on the money.

Dave Fassett
 
Thank you all for the kind words.

The kit is already well detailed and I think just by adding little extras here and there it will make it look better. I have also been thinking since the 2 front doors are separate maybe adding some detail to the inside of them and posing them open. From looking at my reference pics it doesn't look like it would be to hard to scratch build something for them.
 
I have heard these were dynamite looking kits
when they are done. Yours is looking very good
already.
I am tagging along. Thanks for sharing this, Holden
 
Was finally able last night to sit down and get a little more done on the project, painted and weathered the engine. Not a lot by any means but its at least something worked on this week.

006-2.jpg


004-2.jpg


I tried to go for a dirty blackened sooty look for the exhaust with the weathering, I don't think its half bad for my first attempt.
 
Wow, i dunno how I missed this earlier. I totally agree with the others - Great work Holden.
Looking forward to more updates.
 
Today was a big day! ;D

After 9 years I have finally upgraded my camera and went out and got a Nikon Cool Pix L810. Not as pricey as the really high end cameras but still way better than my old DXG 552. So I've re-shot some WIP pics to share. Now I just need to figure out how to post larger pics. It seems no matter what size I re-size them to at photo bucket they still post the same size here in the forums. If someone could let my know what I'm doing wrong or not doing I would appreciate the help, anyway here are a few pics.

002-5.jpg


001-6.jpg


003-5.jpg


005-1.jpg

004-3.jpg


And I can't say it enough, thanks everyone for your encouragement and advice
 
Awesome work there!

With Photobucket, after you've uploaded and saved them to your folder (online), go to the pic and find the 'Links' area (mines on the right of the screen. COPY the ' IMG ' link and paste that into the text box for your 'reply' on SMA. That should work.

I ditched Photobucket because it took forever for their server to upload. i went with http://imageshack.us/ . Their folder proceedure I haven't figured out yet, but I can upload. They offer the choice to resize or not, and they have a few different ways of posting pics for forums. There under ' embed this image ' I use the normal ' forum ' ling and copy it to my reply box on SMA. Since I didn't resize, when the pic shows up on the post its a bit smaller to fit the screen, but when you click on it it gets much bigger, biggre than photobucket allowed.

Hope that helps, keep up with the build!
Cheers!
 
Sorry guys and gals that it's been a few weeks since I've updated anything. You know how it is sometimes, life just gets in the way of our terrific hobby.

I mainly have the flight cabin and engine compartment done, just need to work on the main rotor assembly and do some minor surgery to the fuselage halves to make the C model of the aircraft before I can button everything up.

The IP is not accurate for the aircraft. I tried 4 times to paint it a grey panel with black instruments faces. I couldn't get a nice sharp panel so I painted it black and dry brushed the details.

009.jpg

Future was added to the instrument faces to simulate glass.

I'm pretty much happy with how the engine turned out. More than likely in the end I'll display the model with an open engine compartment door.

008.jpg


010.jpg


011.jpg


That's all for now, happy modeling everyone. ;D
 

Latest posts

Back
Top