Noddy4000
Acquainted with the idea of being sensible....
- Joined
- Jun 23, 2010
- Messages
- 91
Well, although I have 6 builds on the go at the moment only two of them are really worth posting about. One is the Armoured Fighting Suit and the other a 1/6 Judge Dredd figure for a Heroes and Villains group build over on http://www.scifimodels.org.uk/
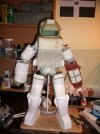
So, this project was started several years ago when I was sharing a flat with my girl friend and space was at a premium. I built it using my lap and a large bread board as a work table, sitting on the sofa in front of the tv. I got this far:
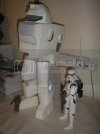
but stopped when we moved to a new place and never really got back into it...till now . I decided to really go to town on the detailing of this build, as it made no sense to carry on with the original idea of just doing a shell and detailing the helmet interior. So I cut the torso shell apart to enable the building of a complete engine and cockpit interior:
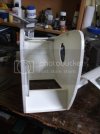
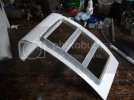
This is the engine bay and hatch prior to starting on the fiddly bits.
The bits and pieces I've used for the engine:
http://i919.photobucket.com/albums/ad39/Noddy4000/Armoured%20Fighting%20Suit%20No%201/070410020.jpg
In it's basic form:
http://i919.photobucket.com/albums/ad39/Noddy4000/Armoured%20Fighting%20Suit%20No%201/070410030.jpg
Some of the detailing for the bulkhead behind the engine:
http://i919.photobucket.com/albums/ad39/Noddy4000/Armoured%20Fighting%20Suit%20No%201/070410057.jpg
Engine in place:
http://i919.photobucket.com/albums/ad39/Noddy4000/Armoured%20Fighting%20Suit%20No%201/070410054.jpg
And with lots of extras to busy it up! This was taken a while ago as there's been a fair bit more added including hazard/caution/warning notices etc. It all needs a bit of weathering yet plus dents, dings and scratches.
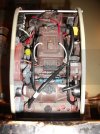
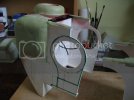
The front section cut from the torso:
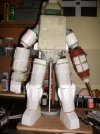
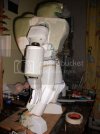
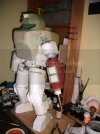
This is where I'd got to about a week or so ago. The hip/waist joint isn't completely done yet so the top of the model is being held upright by a styrene tube out of sight behind the leg but it gives an idea of what it'll look like. Stands about 25/26 inches tall. I'm quite happy with it so far but boy is there a ton still to do! Starting on the arms and the cockpit interior sometime soon, once I've got Dredd done and mounted:

Any comments or criticisms/ideas/recommendations most welcome as it all helps to make for a better effort and a better result.
Thanks for looking!
So, this project was started several years ago when I was sharing a flat with my girl friend and space was at a premium. I built it using my lap and a large bread board as a work table, sitting on the sofa in front of the tv. I got this far:

but stopped when we moved to a new place and never really got back into it...till now


This is the engine bay and hatch prior to starting on the fiddly bits.
The bits and pieces I've used for the engine:
http://i919.photobucket.com/albums/ad39/Noddy4000/Armoured%20Fighting%20Suit%20No%201/070410020.jpg
In it's basic form:
http://i919.photobucket.com/albums/ad39/Noddy4000/Armoured%20Fighting%20Suit%20No%201/070410030.jpg
Some of the detailing for the bulkhead behind the engine:
http://i919.photobucket.com/albums/ad39/Noddy4000/Armoured%20Fighting%20Suit%20No%201/070410057.jpg
Engine in place:
http://i919.photobucket.com/albums/ad39/Noddy4000/Armoured%20Fighting%20Suit%20No%201/070410054.jpg
And with lots of extras to busy it up! This was taken a while ago as there's been a fair bit more added including hazard/caution/warning notices etc. It all needs a bit of weathering yet plus dents, dings and scratches.

The front section cut from the torso:

This is where I'd got to about a week or so ago. The hip/waist joint isn't completely done yet so the top of the model is being held upright by a styrene tube out of sight behind the leg but it gives an idea of what it'll look like. Stands about 25/26 inches tall. I'm quite happy with it so far but boy is there a ton still to do! Starting on the arms and the cockpit interior sometime soon, once I've got Dredd done and mounted:

Any comments or criticisms/ideas/recommendations most welcome as it all helps to make for a better effort and a better result.
Thanks for looking!

