1/12 GT-40 MkII 1966 (Ken Miles version?)

airdave

Active Member
Joined
Oct 11, 2012
Messages
119
While its not my first pick for the particular mark of the GT-40, it is what I got, its 1/12 scale(!), and it is the car from the Ford vs Ferrari movie (which I liked).

I'm a paper modeler...haven't built much plastic in the last decade, and nothing before that for about 30 years.
So this is my first big adventure back into the medium.
I wanted to build a big Hurricane...and then I saw the BIG Jungle Jim Funny Car!...and while shopping, I came across the Magnifier 1/12 "US Sports Car".
I threw all these Christmas suggestions at my Daughter - and this is what appeared under the tree!
Oh lucky me!
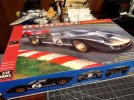
IMG_20221227_090146507.jpg

Now I honestly can't say when I will be starting this.
In fact, right now, I am doing my research.
Since I am a sucker for the Gulf paintjob, I'm leaning towards the similar light blue and orange Ken Miles version.
Not that the black car isn't sweeet, but the movie is speaking to me and pulling me in that direction.

I'd also like to build this into a diorama...or at least display it in something like a LeMans race Pit setting.
That way it would make sense to have the lids up and doors open.

And dirty it up a bit, as it might have looked after many hours at LeMans or after winning the 24 hrs at Daytona.
(although I think the paintjob was different at Daytona?...I will have to research that.)

I did a quick search but didn't find anyone else who had built this model.
Yet.
I'm sure someone will get it built long before I ever do.

What a model kit it is! So many parts too.
Wish me luck.

...
My other Gt-40 model.
Its only 3" long! and a lot simpler!
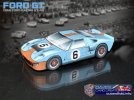
file.jpg
 
Last edited:
Nice project! I look forward to seeing your progress on this one. And welcome back to styrene! :D
 
Well, I've already found two errors with this kit.
I noticed that the Ford v Ferrari movie Hero car has the "Gurney Bubble" on the upper door/roof section,
whereas the original race car (1966) did not...since the Gurney bubble was installed (only?) on the cars Dan Gurney drove.

And it looks like the plastic model has it too!
So I guess I will be filling and repairing that at some point.

And, the kit includes a roll bar/cage element which the real car did not have.
Easy enough to leave out, but I will have to fill a couple of holes in the tops of the fuel tanks.

As I said, I am in research stage...sussing out as many photos as possible of the original race car.
The car is in the Shelby Museum (Florida?), and I found an Adam Corolla video on youtube, where he was able to look inside the car.
Nice to see inside the real thing, and I made some screengrabs that will help me with details.
 
So, I'm getting started on the kit...be nice to me.
This is all new again. I'm used to paper kits where everything is "pre-painted".

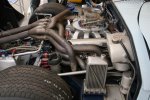
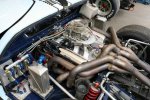
I took a bunch of screengrabs of the actual car from that youtube video.
I got some real nice views of the engine.
So, I will refer to those for as much detailing as possible.

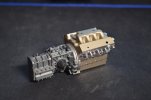
For the engine, I assembled the first basic plastic parts.
To be honest, the construction doesn't make a lot of sense.
The middle block is separate from the top of the cylinder head and the lower oil pan.
And, its split into two sides that dont connect in the center.

And the side block panels have been chromed...I don't know why.
The upper and lower block part has been prepainted a type of gold colour.
I take it, this is what the original block was painted?
I can't see it well in my photos.

DSC_8719_800x530.jpg

I should have dechromed the plastic parts, and then repainted the entire block.
But I mixed up a gold colour from a pearlized gold mix that I have.

Right now, I am using Createx Auto Air acrylics, since I have a lot of it from my airbrushing days.
The gear box was darkened with some black, and then some gray, and then more black, and some silver drybrush.
I also brushed the engine block with some black.
It looks okay, I just wish it wasn't show glossy.
I tried brushing on some old flat clear, but it didn't do much,
so I will have to order some nice flat lacquer.

I left the valve covers chrome, since they are chrome on the real thing.
Just dull...so I will probably dirty them up a bit more.


DSC_8721_800x530.jpg

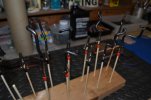
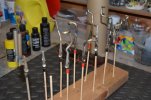
Before I do anything else, I want to prepare the exhaust pipes.
I wish I could assemble them all, then paint them...but they will need to be installed one pipe at a time.

First, I gave them a light coat of Auto Air black with the airbrush.
All but two of the pipes had been oxide primered, so I wasn't too heavy with the black coat.

Once I emptied the airbrush cup of the black for the last time, I didn't clean it.
I thinned some Auto Air Pearlized silver, and poured it into the airbrush cup.
Then quickly dusted everything with the dirty silver-black.
As I added more and more of the silver and coated everything more and more, it all got more silvery, but dirty.

Then I sprayed a light dusting of Root Beer, to give it all that brown colour.


DSC_8724_800x530.jpg

DSC_8726_800x530.jpg

Then I dusted all the inside radiuses (radii) with some blue, and the outside curves with some gold.

I heat gunned everything (lightly) and gave it all a coat of dull-cote.
I'll probably come back later with a paint brush and add a bit more colour on the bends.
Maybe I'll wait and see what it looks like after assembly?

DSC_8729_800x530.jpg
 
So, I'm getting started on the kit...be nice to me.
This is all new again. I'm used to paper kits where everything is "pre-painted".

I took a bunch of screengrabs of the actual car from that youtube video.
I got some real nice views of the engine.
So, I will refer to those for as much detailing as possible.

For the engine, I assembled the first basic plastic parts.
To be honest, the construction doesn't make a lot of sense.
The middle block is separate from the top of the cylinder head and the lower oil pan.
And, its split into two sides that dont connect in the center.

And the side block panels have been chromed...I don't know why.
The upper and lower block part has been prepainted a type of gold colour.
I take it, this is what the original block was painted?
I can't see it well in my photos.

View attachment 96550

I should have dechromed the plastic parts, and then repainted the entire block.
But I mixed up a gold colour from a pearlized gold mix that I have.

Right now, I am using Createx Auto Air acrylics, since I have a lot of it from my airbrushing days.
The gear box was darkened with some black, and then some gray, and then more black, and some silver drybrush.
I also brushed the engine block with some black.
It looks okay, I just wish it wasn't show glossy.
I tried brushing on some old flat clear, but it didn't do much,
so I will have to order some nice flat lacquer.

I left the valve covers chrome, since they are chrome on the real thing.
Just dull...so I will probably dirty them up a bit more.


View attachment 96551

Before I do anything else, I want to prepare the exhaust pipes.
I wish I could assemble them all, then paint them...but they will need to be installed one pipe at a time.

First, I gave them a light coat of Auto Air black with the airbrush.
All but two of the pipes had been oxide primered, so I wasn't too heavy with the black coat.

Once I emptied the airbrush cup of the black for the last time, I didn't clean it.
I thinned some Auto Air Pearlized silver, and poured it into the airbrush cup.
Then quickly dusted everything with the dirty silver-black.
As I added more and more of the silver and coated everything more and more, it all got more silvery, but dirty.

Then I sprayed a light dusting of Root Beer, to give it all that brown colour.


View attachment 96552

View attachment 96553

Then I dusted all the inside radiuses (radii) with some blue, and the outside curves with some gold.

I heat gunned everything (lightly) and gave it all a coat of dull-cote.
I'll probably come back later with a paint brush and add a bit more colour on the bends.
Maybe I'll wait and see what it looks like after assembly?

View attachment 96554
It's looking great so far. Keep posting to show us as you go. Will any of this work you have done so far be seen on the final build?
Pantherman
 
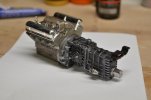
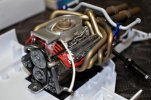
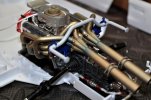
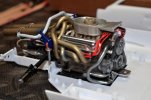
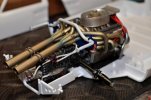
So this is it for the motor...for now.
I like it, and some of it, I don't like...some of the paint work isn't what I had hoped for.

I followed the Assembly book, item by item...and wished I hadn't.
There are a couple of things that would have easier before other things.
Like running the braided oil lines...one of which goes up under the exhaust to the rear of the engine block.
The exhaust fits so tight to the block, there was just no room to put it where it was supposed to go.

And the exhaust, thats another hair pulling adventure.
Fitting those pipes one by one, after they have been painted, trying not damage the paint.
And they don't all line up...I had to heat gun half of them, to stretch them into shape.

Anyway, this is what I've got...I aint' going back now!
There are a few more details I want to add, but plenty of time for that.

DSC_8731_800x530.jpgDSC_8732_800x530.jpgDSC_8733_800x530.jpgDSC_8734_800x530.jpg
 
So, its been a while...not a lot accomplished.
Firstly because I needed some primer, paint and other supplies.
I finally got those ordered and delivered.

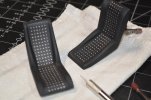
I tried painting, and repainting, and repainting the seats.
I got the colour and finish just right, then made a mess of the silver rivets.
Tried hand painting them and got silver paint everywhere.
So I ended up stripping and starting again 3 or 4 times.

The molded rivets are way smaller than the real thing.
I think this makes it a lot more difficult to paint them realistically.

In the end, I got a decent soft cloth finish on the chairs...
and I bought a silver metallic Sharpie marker.
The round tip made it real easy to hit the rivets (mostly).
And then I hand drilled every rivet which greatly improved the look.

This will be the final look.DSC_8774_1600x1060.jpgDSC_8775_1600x1060.jpg
 
After I got some Tamiya putty and some decent Primer I started work on the body parts.
First to fix was the door...removing/filling the spot for the roof bubble.
Not needed on the Ken Miles car.

I also had to repair a broken section on the front chassis.
very thin parts up there, and one of those thin cross braces had snapped.
Hopefully i don't break it again.


DSC_8782_1600x1060.jpgDSC_8778_1600x1060.jpgDSC_8777_1600x1060.jpg
 
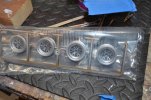
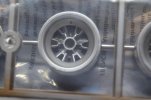
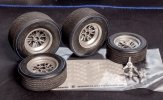
I also changed the gold wheels to silver.
Darker in the centers with some highlighting on the raised edges.

Ive started bagging everything once its prepared and/or painted, since I've had a couple of overspray accidents.

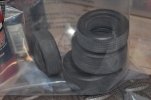
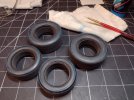
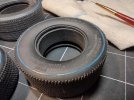
I've also prepped the tires.
Sanded the tread areas.
But I've tried 6 times to paint the very fine blue pinstripes on the sidewalls...I just can't do it.
Just too thin for my shaky hands...I end up with a mess, and have to wash it off.
Anyone got any tricks for that?

DSC_8779_1600x1060.jpgDSC_8780_1600x1060.jpg


DSC_8781_1600x1060.jpg
 
well, no suggestions...is this thing on?...lol...so I gave it another shot.

I found an old but decent brush that wasn't already falling apart, and I carefully trimmed it down to about 4 to 6 bristles.
Then, with my smooth airbrush acrylic, I just followed the channel of the raised stripe.
I had to go very slow. And the channel is so shallow and narrow.
But after a while, I got a flow going, and...

I love the molded details on these tires, and I love the finish and texture.
But man, oh man, are they a magnet for dust and lint!
I clean a tire and as I am painting, I can watch the dust reappearing.

The stripes aren't perfect, but they will have to do

IMG_20230402_155607687_1600x1200.jpg


IMG_20230402_160751227_HDR_1600x1200.jpg
 
How long has it been?

...April was my last post.
yeah, been busy rebuilding a couple of websites and finishing up my latest tabletop game.
Finally got it published last month, and now free (for a while) to get back at this GT40 model.

Last post I made was about the Tires and wheels.
I now have all four Rims fitted into the Tires.
The blue pinstripe on the tires appears to be holding up okay, so thats good.
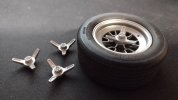
I painted the spinners to match the rims, but noticed they are missing the large central locking hub.
Referring to photos of the real car, I created some paper designs (being a paper modeler) and fitted them to the spinners.

Next thing to do is put on the Goodyear decals.
But I've seen a couple of videos and now I'm scared to go ahead.
One guy said the installation incredibly difficult.
And I the finished look wasn't great. The surrounding clear area of the decal was very obvious.

How well does decal set solution work on rubber? Or will it also leave something visible?

IMG_20230902_144319505.jpgIMG_20230902_144521324_1600x900.jpg
 
Plodding along...I am jumping back and forth, all over the place...

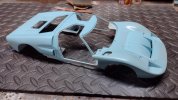
I mixed a decent Arcadian Blue (Ford colour) and gave the body parts a spray.
Maybe a mistake...I'll explain later.

*Wow! are there so many different Arcadian Blues on the Internet!
Both from paint companies and modelers who have painted their models all kinds of shades of Blue.
I remember this colour from back in the day. (I'm old)
I thought it was one of the ugliest paint colours Ford had.
Not quite blue, but not light enough to be clean - it just looked faded and dirty to me.
MY buddy had an Econoline Van in this colour, and another friend had a notchback Mustang in it (he repainted it yellow).
The biggest problem today is that everyone has the Gulf colours in their mind's eye.
And thats a much deeper "baby blue" or almost "sky blue".
But I think it it influences the mix of Arcadian Blues.
You can see the evidence on Ken Miles car, as it sits in the Peterson Museum today (or wherever it is now).
If you didn't know, Ken Miles 1966 winning #2 GT40 was repainted just after the LeMans race.
It was painted black with #1 markings, and it went on tour for a year or so, as the (not) first place car.
I believe when it was repainted blue,,,or at some later date repainted again?...the blue got darker, stronger.
A bit more like the Gulf livery.
At least thats how it appears in the videos and photos online.
Just in case you don't know the colour, this video (of this 65 Mustang) was shot under overcast lighting
...the best way to photograph...and shows the Arcadian Blue colour well:


Anyway! I digress!
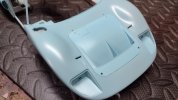
You'll notice the hood insert panel is a different colour.
This is because I did not prime that piece, and the primer is affecting the blue colour.
No worries, I have since primed and repainted the hood part.

But I may have rushed the gun with painting the arcadian blue, since I already found that I will have to repaint the center cockpit section.
After I paint all the underside, and framework of the chassis.
More of this car is the dark blue, and its easier to paint all that, and then mask.
Trying to mask the light blue I just painted, turned out to be a lot more difficult, and there was leakage.
So I have to do fixes anyway.

Oh, and the dark blue isn't the right blue either.
It looked good in the bottle, and on samples...but as it gets coated, it became to bright. To brilliant.
Its not right.
So I've already found a better dark blue.

IMG_20230902_142926442_1600x900.jpg
IMG_20230902_142936219_1600x900.jpg
IMG_20230902_143035551_1600x900.jpg
IMG_20230902_143120577_1600x900.jpg
 
Plodding along...I am jumping back and forth, all over the place...

I mixed a decent Arcadian Blue (Ford colour) and gave the body parts a spray.
Maybe a mistake...I'll explain later.

*Wow! are there so many different Arcadian Blues on the Internet!
Both from paint companies and modelers who have painted their models all kinds of shades of Blue.
I remember this colour from back in the day. (I'm old)
I thought it was one of the ugliest paint colours Ford had.
Not quite blue, but not light enough to be clean - it just looked faded and dirty to me.
MY buddy had an Econoline Van in this colour, and another friend had a notchback Mustang in it (he repainted it yellow).
The biggest problem today is that everyone has the Gulf colours in their mind's eye.
And thats a much deeper "baby blue" or almost "sky blue".
But I think it it influences the mix of Arcadian Blues.
You can see the evidence on Ken Miles car, as it sits in the Peterson Museum today (or wherever it is now).
If you didn't know, Ken Miles 1966 winning #2 GT40 was repainted just after the LeMans race.
It was painted black with #1 markings, and it went on tour for a year or so, as the (not) first place car.
I believe when it was repainted blue,,,or at some later date repainted again?...the blue got darker, stronger.
A bit more like the Gulf livery.
At least thats how it appears in the videos and photos online.
Just in case you don't know the colour, this video (of this 65 Mustang) was shot under overcast lighting
...the best way to photograph...and shows the Arcadian Blue colour well:


Anyway! I digress!
You'll notice the hood insert panel is a different colour.
This is because I did not prime that piece, and the primer is affecting the blue colour.
No worries, I have since primed and repainted the hood part.

But I may have rushed the gun with painting the arcadian blue, since I already found that I will have to repaint the center cockpit section.
After I paint all the underside, and framework of the chassis.
More of this car is the dark blue, and its easier to paint all that, and then mask.
Trying to mask the light blue I just painted, turned out to be a lot more difficult, and there was leakage.
So I have to do fixes anyway.

Oh, and the dark blue isn't the right blue either.
It looked good in the bottle, and on samples...but as it gets coated, it became to bright. To brilliant.
Its not right.
So I've already found a better dark blue.

View attachment 105470
View attachment 105471
View attachment 105472
View attachment 105473

Looking good. Pantherman
 
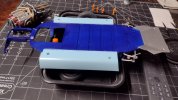
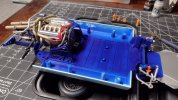
Since I am a paper modeler, I am incorporating some paper model elements into this kit.
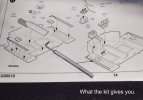
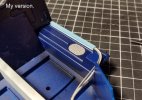
I've been working on the interior tub, and one of the things I didn't like was the chrome parts that fit along each side of the fuel tanks.
Just inside the doors, these are supposed to be a channel cover, hiding hoses (fuel and oil lines? water hoses?).
Anyway, the chrome parts are flat, not really very boxy, and chrome plated.

So I found some plastic channel, sanded it down and shortened the height, and painted it light blue.
Then added a printed paper base part, pre-coloured (with the bolt heads).
A couple of lines of vinyl clad wiring, and it looks a bit more like the real thing.

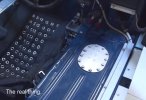
Oh, I also made a "plate" and covered the hole for the roll bar at the front of the fuel tank, just like on the real car.
The roll bar disappears behind the dash (something I have to try to recreate).


file.jpg
file.jpg
file.jpg
 
Since I am a paper modeler, I am incorporating some paper model elements into this kit.
I've been working on the interior tub, and one of the things I didn't like was the chrome parts that fit along each side of the fuel tanks.
Just inside the doors, these are supposed to be a channel cover, hiding hoses (fuel and oil lines? water hoses?).
Anyway, the chrome parts are flat, not really very boxy, and chrome plated.

So I found some plastic channel, sanded it down and shortened the height, and painted it light blue.
Then added a printed paper base part, pre-coloured (with the bolt heads).
A couple of lines of vinyl clad wiring, and it looks a bit more like the real thing.

Oh, I also made a "plate" and covered the hole for the roll bar at the front of the fuel tank, just like on the real car.
The roll bar disappears behind the dash (something I have to try to recreate).


View attachment 106094
View attachment 106095
View attachment 106096
Nice work. Pantherman
 
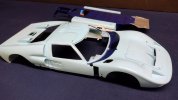
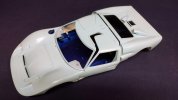
I've resprayed everything to match the center cabin section.
And I can live with it.
For some reasons, the doors will not match.
They're closer, but still not the same blue.

I don't know why, except for the fact that I primered the doors more than once because I was filling the roof holes, etc.
Its the same Mr Hobby light gray primer I used on everything else, so it shouldn't matter, right?

Anyway, the finish of the Acqueos paint is amazing.
Its dead smooth with no sanding, and just a light gloss.
I'm not a fan of high gloss on a scale car, it doesn't look realistic to me.

I am reluctant to touch the finish.
I was going to apply clear after the decals were in place, but now I am rethinking that.
On the real thing, decals and vinyl striping and painted markings, were not clearcoated over.
The deciding factor will be how well I apply the red on the front of the car.

Anyway, its starting to look like a GT40

IMG_20230923_174626990_1600x900.jpg

IMG_20230923_174737971_1600x900.jpg
 
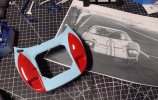
Well, I am happy with this.
Used some old 1/4 blue vinyl tape (from my airbrushing days).
I referenced some original 1966 photos to see the exact placement of the red "eyes".
I think I got it pretty close...close enuf for my eyes.
And the red paint is real nice. Aqueous again. Red #327

I'll give it a couple of days, and then a dry polish with some cotton cloth to cut down the paint edges.
And it'll cut the gloss a bit.

And...I'll paint the headlamp pots flat black.
...and then the decals.

nose red gt40.jpg
 

Latest posts

Back
Top