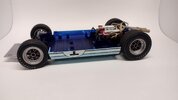
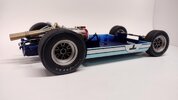
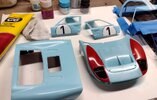
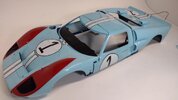
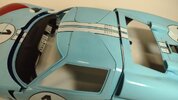
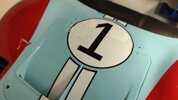
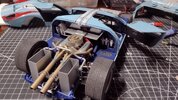
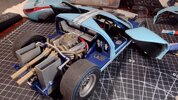
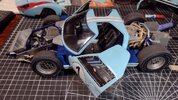
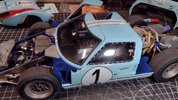
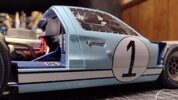
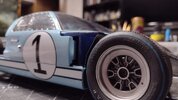
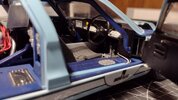
1/12 GT-40 MkII 1966 (Ken Miles version?)

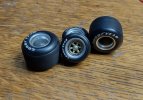
As far as the tires and wheels go..I have had good luck using this technique.
ngW4sXp.jpg
f83rEwm.jpg
NuDRV5W.jpg
Once the wheels have been painted and installed in the tires, apply the decals on a dried bed of clear to avoid silvering, then mask off the wheel and hit it with your favorite dullcoat or matte finish. I do this with the wheel in place so that the matte coat doesn't crack while installing the wheels.
I also do a little grime wash before final clear to tone down the brightness of the tire logo.
Hope it helps
 
You've illustrated the first problem I have with these decals...
the Goodyear logo is wrong for these 60s tyres.
The older lettering is much thinner, more lightweight.
Later Goodyear logos are thicker/bolder (like what Belugawrx shows).

Unless I can find some more period correct whites, I may leave them off.

Thanks though...for the tips...I will dullcote the tyres before I think about putting on the decals.2f36170d458ee1710457934ebe5a892e-1101003910.jpg
 
Last edited:
As I said earlier, I don't like the weight and modern look to the Goodyear decals (for the tyres).
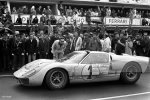
The original 1966 tyres look stenciled on and somewhat worn, not to mention a lot lighter typeface.

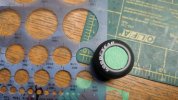
So, I found a good side view of the GT40 wheel and imported it into Coreldraw.
I scanned my model wheels to establish the correct scale size.
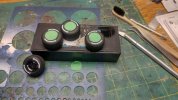
Then printed out front and rear artwork on some cardstock...which I hand cut into stencils.

IMG_20231010_194712146_HDR_1200x675.jpg

Center as best as possible onto the tyres and spray with Createx Auto Air sealer white.
I deliberately left them a bit faded and weak, hopefully to give them that race worn look.

They're not perfectly in position, but i still like the look over the decals.

IMG_20231010_193706069_1200x675.jpg

I think I've got the paintwork sorted...time to add the rest of the body striping (decals).

IMG_20231010_193606972_HDR (1)_1200x691.jpg
 
y9biijT.jpg
 
Question for those who know...
whats with cracking decals?
Not just cracking during installation, but cracking while soaking in water to release.

I tried the hardest stripe first...the roof striping.
It has to deal with small louvers at the rear, and over the edges of the door flaps.
I used decal set and soften, but the decals started cracking wherever I had to shape to the surface.

Eventually it had broken up so badly, I wet it and slid it back into the water (in almost one piece).
I tried more decal softener on the surface and tried a second application, but things got worse.
Eventually I cleaned it off and started masking for painted stripes.

During all this, I noticed that I had rubbed off a small section of the door decal.
It has been on there for a week or two.

I've made a repair, but it'll need some clearcoat to secure it.

I will try the other stripes, since they all cover flat (slightly curved) surfaces,
but as I said, I am seeing decals cracking while soaking in water.

Is this because they are old? or what?
 
My attempt at painted stripes.
The outer edges are kinda rough.
And I accidentally painted over the center...its supposed to be the light blue.
I will fix that.

IMG_20231016_123050271_HDR.jpg
 
Old decals can crack and break apart like that. You could try liquid decal film. You paint it over the decals and let it dry prior to using them. It helps keep them together.
 
okay. thanks.
seems my local hobby supplier is out of stock.
and its too expensive from amazon.
I will have to keep an eye out for some before I try the other decals.
 
Question for the original post.

So let me get your order of oprations straight. Please correct me if I am wrong.

1. Paint wheels and install them in tires.
2. clearcoat tires
3. Install decals
3. Dullcoat tires with decals on them
4. Weather as needed for more realistic look

Is this correct?
 
No, I didn't use decals.
As I mentioned, they are a bolder, more modern look to the Goodyear logos.
I don't like them.
If you look at photos from the 1966 LeMans, the painted logos are less obvious.

Yes, I painted the wheels first.
Then I sanded the treads of the tyres.
Then painted the blue pinstripes on the tyres.
Then installed the wheels into the tyres.
I sprayed either dullcote or aqueous matte clear, I can't remember which, on the tyre sidewalls.
Then I stencilled and sprayed the old style Goodyear logos with Createx base white. ( I didn't spray a lot)
Then I sprayed aqueous matte clear onto the tyres again.
I have since brushed transparent black over the rims to "dirty" them up.
(They need more dirtying, but I'll do that later)

...
On a similar note, I installed the four wheels onto the chassis.
Funny, that the front wheels are held in place by a screw.
2 screws are provided.
However, the rears install in almost exactly the same manner...but there are no screws.
The kit doesn't come with the necessary screws, and the instructions don't show using screws.
But the wheel will not pull in far enough, or stay secure, without screws!

The holes in the ends of the rear axles are small, and a smaller screw is needed (than the front).
I managed to take apart an old PC Mouse, and found some small screws of the correct length and thickness.
The wheel are now secure.

IMG_20231020_141225704_1600x900.jpg

IMG_20231020_141243943_1600x900.jpg
 
Unfortunately the model has suffered a major paint disaster.

First, I tried repairing my painted roof stripes and wasn't happy with the result.
So I ended up stripping the stripes with minimal damage to the light blue (which I have already resprayed).

But then, because I'm worried about the cracking, I tried sealing the door decals with some clearcoat - Krylon Crystal Clear
I sprayed the front end of the car body with it too.

First coat went on fine, it seemed, but then second coat reacted with the blue paint.
Everything went wrinkly.
Everything except where the decals are. Weird.

I'm going to try wet sanding...I've already done a little.
I need to stay away from these old decals, and I've already burnt through some of the light blue and red paint.
Easy touchups...if I have the paint.

I am almost out of the light blue, and since that was a custom mix, theres no way I can match it.
If I don't have enough, I will have to respray the entire body with a new light blue mix.

Then theres the clearcoat...I had good luck spraying some Acrylic Lacquer earlier.
Its a spray bomb, but I sprayed into a small paint jar...then added some reducer...then sprayed it through my Infinity airbrush.
Worked a charm on the chassis over decals, so I will respray the messed up body parts with that.
No more Krylon clear.

I wish I had ordered some Aqueous gloss clearcoat in the beginning.
My post was directed at Belugawrx. Oops, I thought that was the original post. It was the top post of page 2.
 
Anyone else built this kit or the original Trumpeter version?
MAG00019
...and did you build the black #2 version (not using the #1 decals)?
...and you wish to donate or swap the unused decals to me?

Hey, it was worth a try.

I've reached a point where I have ruined the paint finish on the nose section and doors of this model.
I tried airbrushing some clear gloss Lacquer on the parts over the weekend, the same way I did the lower body (successfully).
The clear went on nice, but trying to cover such larger areas was proving to be a problem.
I could not get enough clearcoat down to achieve the gloss I wanted.
In the end, I laid down a good base of Lacquer, then started shaking the rattlecan.

For some unknown reason, again, a solid coat of Lacquer (from the spray can) looked good at first...
then turned to a real bad wrinkle/orange-peel finish.
I let it dry for a couple of hours, heat gunned it, then started sanding out the roughness.
I had to repair the nose red areas and some light blue areas from sanding damage.
I avoided sanding over any of the decals (although the clear never wrinkled over any decals).

I tried another coat of Lacquer, but it did the same thing.
Not as bad, but still the same.

I repeated the cleanup, sanding, and paint touchups, and tried one more coat clear.
This time I went back to the Krylon Clear.

Not only did it orange-peel in a few places...it caused this weird patchy dirty reaction in various areas.
The hood insert shows it worst, but its its all over. (hard to photograph)
Sanding isn't going to repair this.

This angers me because I had not planned on clearcoating.
The Aqueous paint finish is beautiful, with its low sheen finish.
But once these decals started falling apart, the need for some clear sealing became necessary.

I'm out of the light blue colour now, and because it was a free custom mix, theres no way to match it properly.
I'll have to buy new paint, mix a new batch, and repaint everything to get an even colour.
Unless I get a new set of decals, I might just repaint everything in Gulf colours and forget decals altogether.
What do you think?
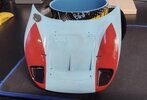
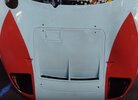
IMG_20231023_101425526_HDR_1174x800.jpg

IMG_20231023_101957688_HDR_1098x800.jpg
 
Last edited:
That is strange. What clearcoat are you using? What type of paint is that?

For large parts you need a mini spray gun, or an airbrush with at least a .5mm needle. Otherwise your spray pattern is much too small.

And with spray cans you have to apply clear in very light coats. And let each coat have a chance to cure at least a little bit. Once you have a couple light coat on and they are nice and tacky, then you can try adding some wet coats.

But the strange thing is your technique worked on the bottom..... Thats weird.
 
The paint is Aqueous (Mr Hobby) with the MrHobby thinner.
(It does not work with alcohol/water thinner that I can use with other water based paint)

I think the MrHobby clear would have been a good choice.

Why the thinned and airbrushed Rustoleum Lacquer worked well on the lower body,
and not on the other parts,
is a mystery to me.

But a different Lacquer clear, and the Krylon Crystal Clear, both have reacted in a similar fashion.

The weird blotchy dark patches seem to be a side effect of switching clear coat types during this.

Anyway, I have been wet sanding all day!...and compound polishing all the body parts.
I've managed to removed most of the wrinkles.
My compound has smoothed out much of the surfaces and returned the finish to a low gloss look.

I like the low gloss, more realistic than a high gloss, especially for this car.
(I've also repaired paint burn-throughs and did some fixes.)

I haven't been able to get rid of the dirty blotches on the bonnet, but thats okay.
I've gone back to my original plan of making this car look race driven...dirty, stained, and unclean.
I'm actually liking the damaged finish I have so far.
It just might work well with the race worn look.

Next step is attempting to get the striping decals in place.
I have coated the decal sheet with a thin coat of Krylon clear.
Hopefully that keeps the cracking to a minimum.

The roof - I am attempting a repaint of the stripes (since i don't have this decal).

IMG_20231024_193716664.jpg
 
I wish I could leave it like that, but the remaining decals are not going on easily.
And not staying on well.
I'm using Decal Set but they are still somewhat brittle (even with the clearcoat I applied to them).
They will still require some extra sealing.

Then there's the roof stripes, which I had to handpaint.
That will require clearcoat.
And I've got a few paint touchups over missing decal areas.

So, I will lose the lovely Aqueous paint finish, but I might be able to recreate the low gloss by using compound again on the final topcoat.
My first step is to test clearcoat again and try to avoid more wrinkling and orange peel.
 
Another couple of weeks has passed...
I'm at the stage of: a. giving up. b. sanding it all down and repainting (most likely in Gulf colours). c. leaving it as is.

I've finally got an all over relatively smooth finish, and a few coats of clearcoat on all of the body parts.
I still plan on rubbing some compound to flatten out the finish and reduce the gloss.

Unfortunately the decals just kept cracking and falling apart.
Even after applying some clear to the decals before installation, and after.
I had to repaint a lot of of the striping by hand.
(I finally got a handle on the masking and produced decent looking stripes!)

But then I had to repair the front number roundel...it completely fell apart during handling.
Not as easy to paint as the striping though, so I used pieces of the extra set of decals to fill in some of the areas, and paint for the rest.
It looks rough.
I thought some clearcoat might help even out the tones, but no luck.

And then...theres the doors.
I mentioned it before, for some unknown reason the doors came out a slightly different blue.
Same primer, same paint, same airbrush, same clearcoat, etc.
But they are very obviously different.
I would try repainting them one more time, but I have run out of the custom mix colour.

My only option is repainting the entire car, and if I have to do that, its going into Gulf colours (since I don't have decals for the Ken Miles car).
I also discovered that the black outlining on the striping and roundels...should be blue!
So much for accuracy.

Opinions?

IMG_20231117_165809815_BURST000_COVER_1200x675.jpg

IMG_20231117_165816208_BURST000_COVER_1200x675.jpg

IMG_20231117_165825957_BURST000_COVER_1200x675.jpg
 
I give up.
I mean, I give up trying to change things.
After much deliberation I decided I wanted to sand down the badly flaking decals and toss out the bad paint and repaint it Gulf colours
(even though this particular car was never in those colours. That was a later GT40).

But then I realized how much trouble it would be to paint the lower body/chassis.
Not only decals to strip, but I'd have to break apart a lot of parts already fitted to the lower section..
It would be a nightmare.

So, eventually I said "I give up. Its stays like this. And I am finishing it. It will never win any awards, so why stress?!"
And got on, I did, with the rest of the construction.

Side note...I still plan to experiment with track weathering and rain wash.

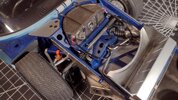
Heres a bunch of photos of where I am now.
Question, how do you guys glue in "glass".
Obviously the frames have paint on them now.
I tried Tamiya Cement. I tried CA glue sparingly.
Eventually some Revell Contact cement seemed to work best, but difficult to apply in a clean bead. I had to brush it on.

IMG_20240304_112427003_1600x900.jpg

IMG_20240304_112444941_1600x900.jpg

IMG_20240304_112500697_1600x900.jpg

IMG_20240304_112506887_1600x900.jpg

IMG_20240304_112533543_HDR_1600x900.jpg

IMG_20240304_112551581_1600x900.jpg

IMG_20240304_112604184_1600x900.jpg

IMG_20240304_112615283_1600x900.jpg
 

Latest posts

Back
Top