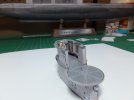
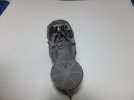
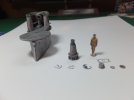
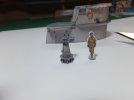
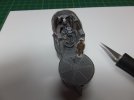
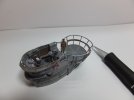
1/100 U-VII C U-Boat

Hello again. Time for another update on my sub.

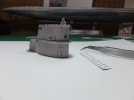
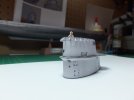
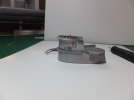
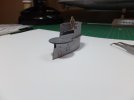
Spent today working more on the conning tower.
The step rail and the inside top railing has been added.
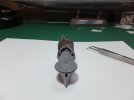
Conning2_zpsb012d676.jpg

Conning3_zpsdd06eb72.jpg

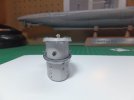
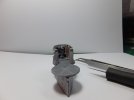
The instrument panel was assembled and installed along with two ventilator shafts near the rear.
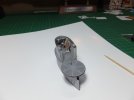
Conning4_zpse81a7843.jpg

This is all for tonight. Lots more detail to add yet.
Lots of tiny bits to try my patience tomorrow. ::)

Jim
 
That's pretty detailed for just paper! Very cool model, must be hard to make all those little, precise folds.
 
Hi Cave Dweller, thank you.
Once you learn the basic techniques and have some of the right tools , most pieces are not that hard.

Jim
 
Good evening.

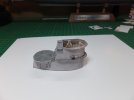
Added more detail to the interior and exterior of the conning tower.

Conning5_zps1cce3c29.jpg

Conning6_zpsa591ac5b.jpg

Conning7_zps0655811c.jpg

Conning8_zpsdd4f4bda.jpg

Those wooden walls in the interior took a bit of trimming to make them fit.

Conning9_zps5455248a.jpg

Back at it again tomorrow. Some complicated pieces to be assembled for the interior. It's starting to get full in there.

Jim
 
Short update tonight.

Added some more detail to the outside of the conning tower.
The hull detail under the gun platform and the life ring.

Conning10_zps6e5855a6.jpg

Inside the conning tower the forward periscope shaft was added as well was the quadrant.
This quadrant took time to construct, 16 pieces and most microscopic. Without my lit suspended magnifier, this project would be dead it the water, so to speak. ;D

Conning11_zpsbc79d741.jpg

That is all for tonight. We'll see what can be done tomorrow.

Remember, your build should not be a chore, this is a hobby.

Jim
 
I have been out with family , so did not get much done with the build today.
This morning did spend a couple of hours, built and installed the hatch inside the conning tower.
That latch wheel on the hatch, I tried to cut out the spokes 3 times and failed miserably. Ended up leaving them uncut. Would need more magnification and a finer blade, not worth it. Even in the instructions they did not have them cut out. It just would have been nice. :(

So here is where we are at.

Conning12_zpsb27687c5.jpg

Conning13_zpsee12deaf.jpg

Hope to have a more productive day tomorrow. ::)

Jim
 
Again not a lot to show for an update tonight.

Been working on the #2 periscope tower. Lots of little pieces and fine cuts. Not everything cut out yet, don't want to loose anything. So, cut it as I need it.

Conning14_zps76e240b2.jpg

This will be complete tomorrow and installed. I have to rest my eyes from the tiny bits for tonight.
Thanks for watching, and questions and comments are welcome.

Jim
 
Tonight's update.
This #2 periscope tower was a real fiddle to assemble. the top supports and gimble were too flimsy, because they are so small. Stiffened them up with some CA and they were more manageable after that. Still took time to get it glued together. I do like how it turned out though.

Conning15_zps01e91277.jpg

It is now installed in the conning tower. It is getting quite busy up there.

Conning16_zps4a2b18a5.jpg

I'm loving the included detail in this build. More than I was expecting actually.It seems every corner I turn on this model,I am learning something new about these craft. 8)

The parts for the next section have been laminated to make them thicker and are in the press to dry flat. That is tomorrows project.

Comments and questions are always welcome.
Good night herd.

Jim
 
Today's Update.
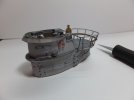
It has been a long but fruitful day. Constructed and installed a lot of external detail to the conning tower.

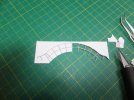
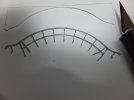
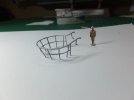
At the beginning of this build I was not sure if I was going to be able to use the paper railing for the gun deck. I thought that it may be just too fine to be able to cut out properly, and was prepared to use wire or styrene and scratch it. Took a gamble and started to cut that thing out. Expecting any moment to slip and destroy it, but I took my time and only cut a bit at a time. Then rested before going on, so as not to get fatigued.

Conning17_zpsce77a4b7.jpg

I surprised myself. I was sure it would have to be restarted a couple of times, but got through it with a pretty clean cut the first go through.

Conning18_zps22472f3e.jpg

Pre-shaped it to it's required curves fairly easily before install.

Conning19_zpseedb7def.jpg

Strategically glued the centre leg of the rail to the gun deck then the ends to the conning tower. After that dried, then attached the other legs. After that was dry then cut out and installed the wooden seats to the rail.
It was now time to cut out and install all the hand rails for the conning tower, as well as the foot stirrups.

This is how she looks tonight.

Conning20_zps6bd8ef6b.jpg

Conning21_zps6902bad1.jpg

Yes there are things that could have been done better," each build is a learning experience ", but I am happy with the result.
Must move on, still lots more to build before this one is done. ;)

Have a good evening.

Jim
 
:eek: WOOOOOW!!

1st time i see one of those, georgeous, looks like a lot of work! I must try one someday! ;D
 
Hi Drpepeprz.
Thank you. You should try a paper model sometime. They are a lot of fun and a challenge. They are also good for your motor skills also and cheap. ;D

Jim
 

Latest posts

Back
Top