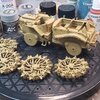
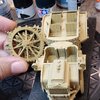
Pavesi P4-100 Gun tractor 2025-06

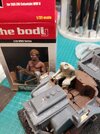
...time to start thinkin' about how to get a figure to smoosh down into the driver's seat. Not essential, but would add a nice touch.
The required plastic surgery will be non-trivial, let's hope the patient survives!
It's nice to shift gears once in a while, especially when it is taking hours to place these detailed parts Mr. Barley insists on adding. :rolleyes:

17516582717115038078848212430655.jpg
 
Oh, that's one of those jobs I dislike — having to cut up and tweak figures so they will fit in some awkward space in a vehicle :)
 
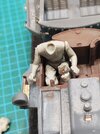
... after pinning the extremities, and lots of futzing about, think I have the basic position.
At a later point I'll putty the figure and hopefully restore his shirtless buff physique... smooth, seamless skin will be a bit more challenging than cloth that can have creases and folds.
I had to extend the torso a smidge, so his armpits clear the edge of his seat.

17517586787177880788899436153449.jpg
 
All the patentes & bebels (French Canadian for doohickees & trinkets) added... as well as spade and pick from the accessory spares box.

Still to do:
Tomorrow I'll look it over & sand/scrape rough areas, then gonna try mahogany rattlecan Mr Surfacer to prime overall.
After that it's paint time!
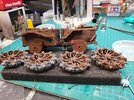
Then wheels get put on...
I'll have to dig up some markings from the decal spares drawer.
Then bring on the mud splatter!
Then Giuseppe gets finished and installed, then steering wheel and gear shift.

20250706_004847.jpg
17517776977778862847642462647127.jpg
 
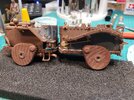
... so the base is down, a bit more gold than I would like, but I can address that with filters.
Moved it to the bench for hand painting and weathering.
I've learned from others to hold off until there is no more smell, so that's what I'll do!
There's a couple of rough spots I think I'll address before the painting though, they show up in this particular lighting.

17519247756028085978749354642099.jpg
All in all, "so far", looking much better than first anticipated at the start of the build. :cool:
 
...so after do tests, I found that filters wouldn't bring about the desired effect without first lightening the base colour with a very thin coat of paint.
It won't get me exactly what I want, but close enough (a few areas need touchup), with still pin wash, shading, highlights, weathering and mud to come.

20250709_114521.jpg
 
Looking at that photo, what I feared has happened: you can see the print lines through the paint :(


Write your reply...

Latest posts

Back
Top