Black cat.

Scale Model Addict - Model Tips, Guides, Tools & Tech, Tutorials, and Community

Help Support Scale Model Addict:

That makes sense. Some of these guys really know their stuff and I'm just kind of floating through it all.
Yep. Especially with my mouth. You get a couple models under your belt and you think you're the king s***. I know everything now. You know? Kind of like when you're 18 and you think you're Bulletproof? Well, there's guys on this forum that will school you cuz they've been there, done that. And they've done all the research. Something I don't do too much of.
 
are the side skirts supposed to be held away from the main body?
On a Panther D and A, there was a little bit of a gap between them and the lower edge of the upper hull side. They attach to Γ-shaped hangers under the sponson floor, and those stick a little outboard of the armour.

The Ausf. G used a different arrangement, with a kind of rail running along the hull side that the plates hung from.

according to Jakko
… who is most certainly not a Panther expert :) I know a little about them, probably more than the average person interested in tanks, but nowhere near what proper German armour fans do :)
 
On a Panther D and A, there was a little bit of a gap between them and the lower edge of the upper hull side. They attach to Γ-shaped hangers under the sponson floor, and those stick a little outboard of the armour.

The Ausf. G used a different arrangement, with a kind of rail running along the hull side that the plates hung from.


… who is most certainly not a Panther expert :) I know a little about them, probably more than the average person interested in tanks, but nowhere near what proper German armour fans do :)
Well, you're the only one chiming in with what we want to hear so you be the man
 
On a Panther D and A, there was a little bit of a gap between them and the lower edge of the upper hull side. They attach to Γ-shaped hangers under the sponson floor, and those stick a little outboard of the armour.

The Ausf. G used a different arrangement, with a kind of rail running along the hull side that the plates hung from.


… who is most certainly not a Panther expert :) I know a little about them, probably more than the average person interested in tanks, but nowhere near what proper German armour fans do :)
How big of a gap? And here's where I contradict myself worried about accuracy, LoL, if on the actual panther the gap was 1-2" or 2.5-5cm that wouldn't show on a 1/35 model. It would be important to not weld the seam but wouldn't be necessary to show a gap.
 
How big of a gap? And here's where I contradict myself worried about accuracy, LoL, if on the actual panther the gap was 1-2" or 2.5-5cm that wouldn't show on a 1/35 model. It would be important to not weld the seam but wouldn't be necessary to show a gap.
There was a 15 to 30 cm Gap and it was angled. The purpose was to cause the round to Tumble or even skip right off the main armor
 
As an Amazon Associate we earn from qualifying purchases. Product prices and availability are accurate as of the date/time indicated and are subject to change.
if on the actual panther the gap was 1-2" or 2.5-5cm that wouldn't show on a 1/35 model.
Yes, it would :) A 5 cm gap is 1.4 mm in 1:35 scale — or to Americans, about ¹⁄₁₆″. This photo shows well how far away the plates were from the hull:

Bundesarchiv_Bild_183-H26258%2C_Panzer_V_%22Panther%22.jpg


This is an Ausf. D, but the arrangement was exactly the same on the Ausf. A.
 
There was a 15 to 30 cm Gap and it was angled. The purpose was to cause the round to Tumble or even skip right off the main armor
I think you're talking about the distance between the Schürzen plates and the main armour of the lower hull sides (behind the wheels), which was a little bit more than the width of the tracks — so something like 75 cm, as the tracks were 67 cm wide — while Ron is referring to the gap between the Schürzen and the bottom edge of the upper hull side.
 
Yes, it would :) A 5 cm gap is 1.4 mm in 1:35 scale — or to Americans, about ¹⁄₁₆″. This photo shows well how far away the plates were from the hull:

Bundesarchiv_Bild_183-H26258%2C_Panzer_V_%22Panther%22.jpg


This is an Ausf. D, but the arrangement was exactly the same on the Ausf. A.
I'd disagree with you for two reasons. First I don't think 1/16" is going to be noticeable. Second, your math is wrong it's 0.14 cm which is 0.056 of an inch and you are definitely not going to notice that! Now blowing the image up with your phone or computer- sure you may pick out 1/16" but still not really going to discern 0.056".
 
My maths isn't off: 1.4 mm = 0.14 cm = 0.014 dm = 0.0014 m :) People used to the metric system use prefixes as suits the situation (though most commonly only milli-, centi-, kilo- and the base unit). They/we may say that 5 cm divided by 35 is 0.14 cm or that 50 mm divided by 35 is 1.4 mm, in both cases to keep the unit the same, but also, like I did, that 5 cm divided by 35 is 1.4 mm. The ×10 factor caused by going from cm to mm in mid-calculation is just taken in stride.

But I can see how it confuses those not used to metric calculations. Just like I have to do minor maths to equate 54 inches to 4.5 feet, which you probably do without thinking, too.
 
My maths isn't off: 1.4 mm = 0.14 cm = 0.014 dm = 0.0014 m :) People used to the metric system use prefixes as suits the situation (though most commonly only milli-, centi-, kilo- and the base unit). They/we may say that 5 cm divided by 35 is 0.14 cm or that 50 mm divided by 35 is 1.4 mm, in both cases to keep the unit the same, but also, like I did, that 5 cm divided by 35 is 1.4 mm. The ×10 factor caused by going from cm to mm in mid-calculation is just taken in stride.

But I can see how it confuses those not used to metric calculations. Just like I have to do minor maths to equate 54 inches to 4.5 feet, which you probably do without thinking, too.
Haha. Ah damn. I thought, he's a metric guy he should know this". Duh. I concede defeat.
 
My maths isn't off: 1.4 mm = 0.14 cm = 0.014 dm = 0.0014 m :) People used to the metric system use prefixes as suits the situation (though most commonly only milli-, centi-, kilo- and the base unit). They/we may say that 5 cm divided by 35 is 0.14 cm or that 50 mm divided by 35 is 1.4 mm, in both cases to keep the unit the same, but also, like I did, that 5 cm divided by 35 is 1.4 mm. The ×10 factor caused by going from cm to mm in mid-calculation is just taken in stride.

But I can see how it confuses those not used to metric calculations. Just like I have to do minor maths to equate 54 inches to 4.5 feet, which you probably do without thinking, too.
And, hate to admit this, but I use metrics at work. Mostly mg and ml and then I revert to inches if I have to document a wound.
 
That's a bit like here, where TVs etc are measured in inches (but only modern flatscreen ones: CRT TVs were measured in centimetres*) but people will be hard-pressed to say how big those TVs are in metric, or to use inches for measuring anything else than screens.

I think that it's likely easier for you guys to switch between unrelated units, because you have so many already, meaning that a few more won't cause much inconvenience. Whereas for us metric folks, all these odd units are more difficult because of the weird multipliers.


* And the odd thing is that most screens I've measured were actually a whole number of centimetres. The dimension quoted is generally that, rounded to a convenient number of inches.
 
That's a bit like here, where TVs etc are measured in inches (but only modern flatscreen ones: CRT TVs were measured in centimetres*) but people will be hard-pressed to say how big those TVs are in metric, or to use inches for measuring anything else than screens.

I think that it's likely easier for you guys to switch between unrelated units, because you have so many already, meaning that a few more won't cause much inconvenience. Whereas for us metric folks, all these odd units are more difficult because of the weird multipliers.


* And the odd thing is that most screens I've measured were actually a whole number of centimetres. The dimension quoted is generally that, rounded to a convenient number of inches.

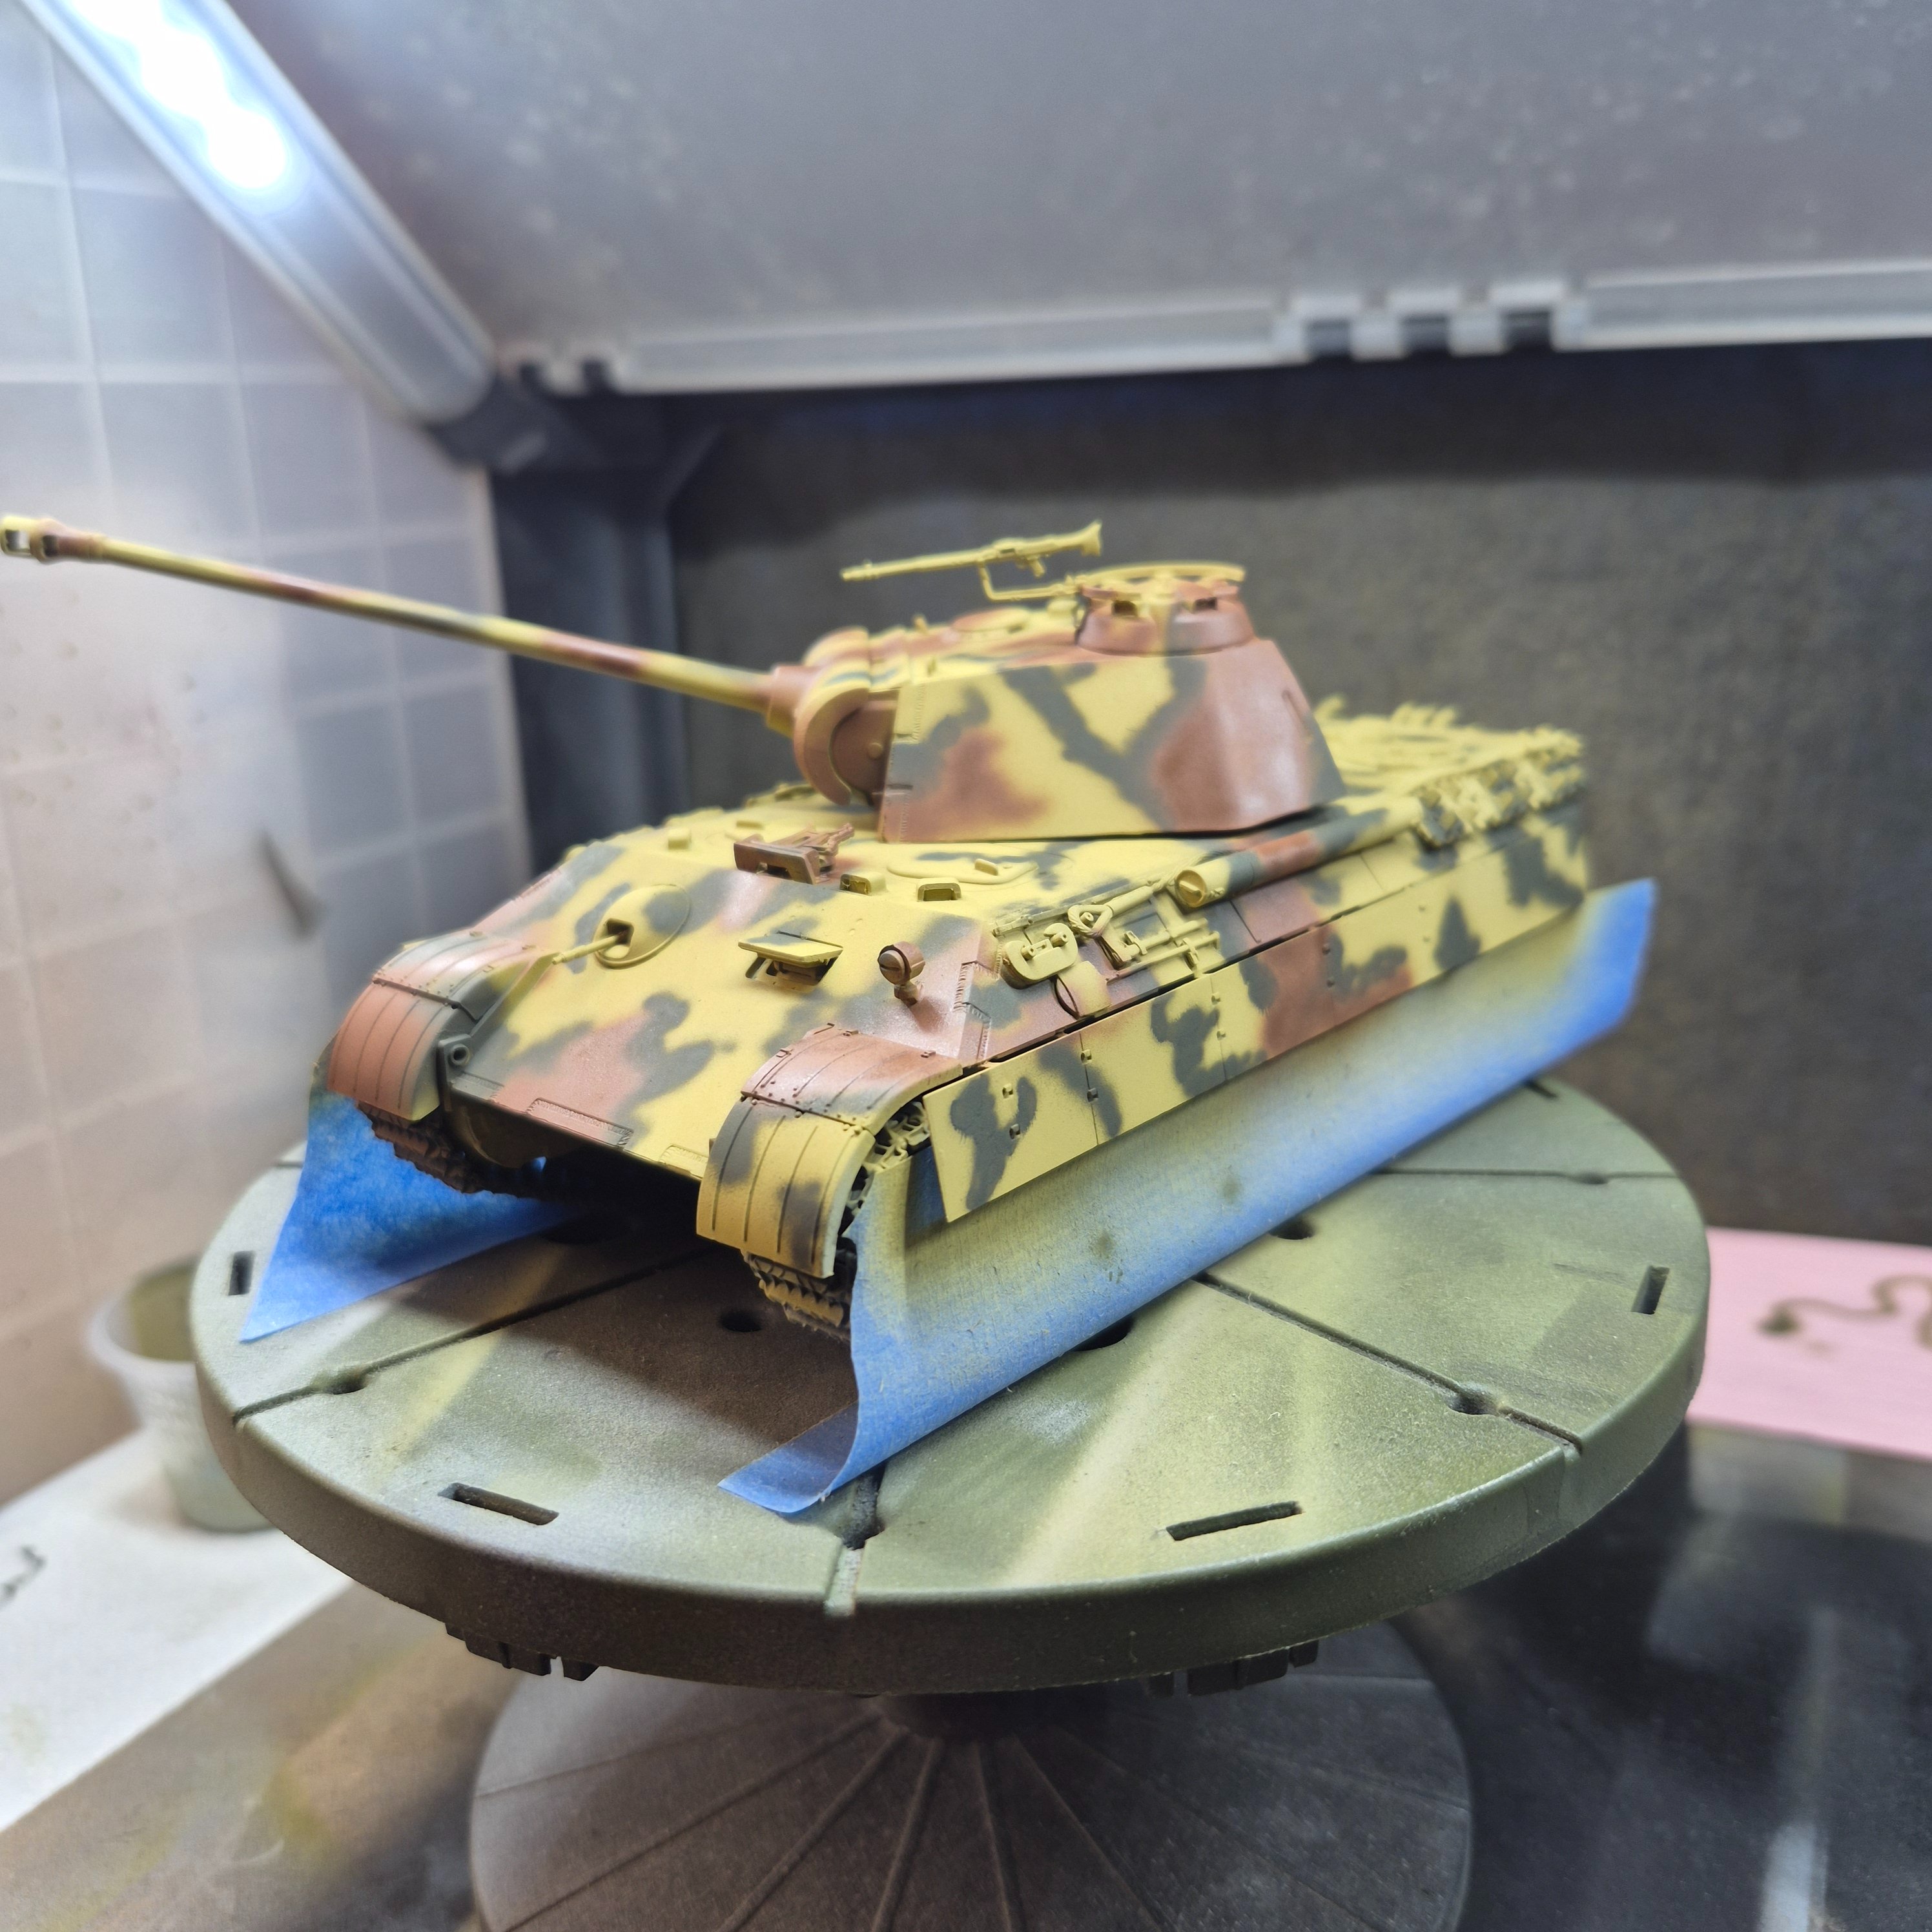
Okay. It's getting there. And for all you guys that like measurements out there? This model is exactly 5 1/2 inches plus two "C" hairs long.😆
Looks good curly!
 
It was mainly applied at the factory, in a laborious process involving (IIRC) smearing it on, drying it somewhat with a blowtorch, repeatedly stabbing it with a wide putty knife to create ridges until those ridges stop collapsing, and then drying it with a blowtorch some more.....
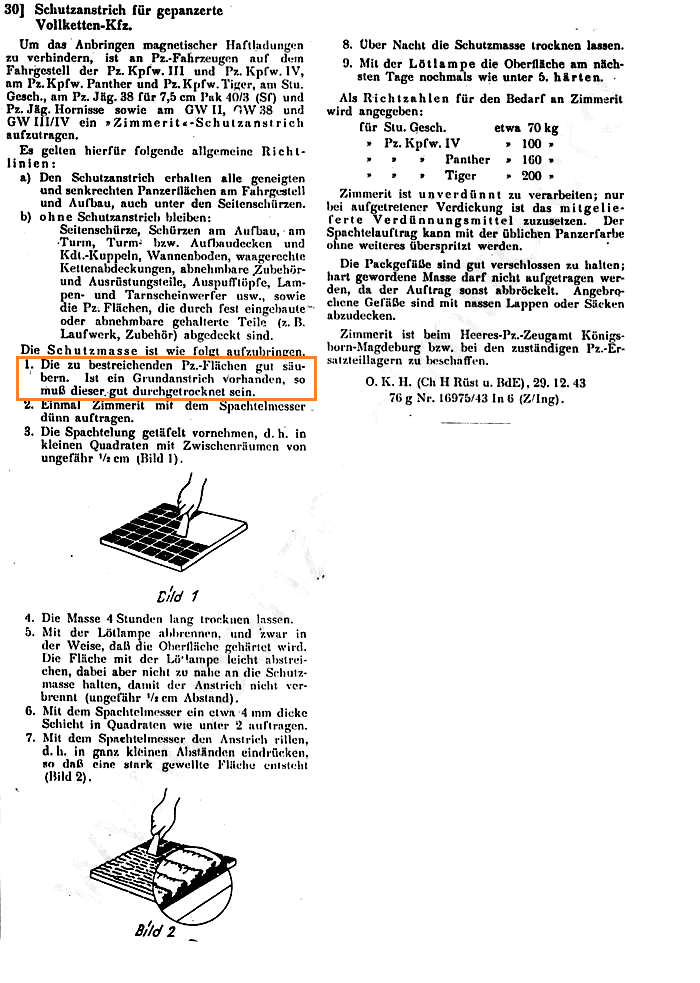
Each factory had their own particular pattern/methodology for the application of Zimmerit but the general guide was as follows:
Zimmerit-order-BW-01a.png

30] Protective coating for armoured full-tracked vehicles.

In order to prevent the attachment of magnetic adhesive charges, a protective coating of Zimmerit must be applied to the chassis of the Pz.Kpfw. III and Pz. Kpfw. IV, the Pz.Kpfw. Panther and Pz.Kpfw. Tiger, the Stu. Gesch., the Pz. Jäg. 38 for 7.5 cm Pak 40/3 (Sf) and the Pz. Jāg. Hornisse as well as the GW II, GW 38 and GW III/IV.

The following general guidelines apply:
a) All inclined and vertical armoured surfaces on the chassis and superstructure, including under the side skirts, receive the protective coating.
b) remaining without protective coating:
Side skirts, skirts on the superstructure, on the turret, turret or superstructure ceilings and command cupolas, hull floor, horizontal track covers, removable accessories and equipment parts, exhaust pipes, lamps and camouflage searchlights, etc., as well as the tank surfaces that are covered by permanently installed or removable mounted parts (e.g. running gear, accessories).

The protective compound is to be applied as follows.
1. Clean the Panzer surfaces to be painted thoroughly. If a base coat is present, this must be thoroughly dry.
2. Apply Zimmerit thinly once with the spatula knife.
3. Apply the filler in a panelled pattern, i.e. in small squares with gaps of approximately 1/2 cm (Figure 1).
3295169_4b65de2a9c56cf993e839d8f2ec04004.png

4. Allow the mixture to dry for 4 hours.
5. Burn with the blowtorch in such a way that the surface is hardened. Lightly brush the surface with the blowtorch, but do not hold it too close to the protective compound so that the coating does not burn (approximate distance).
6. Using the spatula knife, apply a layer approximately 4 mm thick in squares as shown in 2.
7. Use the spatula knife to groove the paint, i.e. press it in at very small intervals, so that a strongly corrugated surface is created (Image 2).
3295169_b5939ee404e24e0bc20a3be63f2f2383.png

8. Allow the protective compound to dry overnight.
9. The next day, use the blowtorch to harden the surface again as described under step 5.

The following are guidelines for the need for Zimmerit:
StuG about 70 kg
Pz. Kpfw. IV about 100 kg
Panther about 160 kg
Tiger about 200 kg

Zimmerit should be used undiluted; the thinner supplied should only be added if it thickens. The filler coat can easily be sprayed over with the usual armour paint.
The packaging containers must be kept well closed; hardened mass must not be applied, as otherwise the coating will crumble. Opened containers must be covered with wet cloths or bags.
Zimmerit can be obtained from the Army Tank Equipment Office in Königsborn-Magdeburg or from the relevant tank spare parts warehouses.

Ο. Κ. Η. (Ch H Rüst and BdE), 12/29/43 76 g No. 16975/43 In 6 (Z/Ing).
 
5. Burn with the blowtorch in such a way that the surface is hardened. Lightly brush the surface with the blowtorch, but do not hold it too close to the protective compound so that the coating does not burn (approximate distance).
The bit I made bold actually says in the original "(approximately ¹⁄₂ cm distance)" :)
 
Each factory had their own particular pattern/methodology for the application of Zimmerit but the general guide was as follows:View attachment 193965
30] Protective coating for armoured full-tracked vehicles.

In order to prevent the attachment of magnetic adhesive charges, a protective coating of Zimmerit must be applied to the chassis of the Pz.Kpfw. III and Pz. Kpfw. IV, the Pz.Kpfw. Panther and Pz.Kpfw. Tiger, the Stu. Gesch., the Pz. Jäg. 38 for 7.5 cm Pak 40/3 (Sf) and the Pz. Jāg. Hornisse as well as the GW II, GW 38 and GW III/IV.

The following general guidelines apply:
a) All inclined and vertical armoured surfaces on the chassis and superstructure, including under the side skirts, receive the protective coating.
b) remaining without protective coating:
Side skirts, skirts on the superstructure, on the turret, turret or superstructure ceilings and command cupolas, hull floor, horizontal track covers, removable accessories and equipment parts, exhaust pipes, lamps and camouflage searchlights, etc., as well as the tank surfaces that are covered by permanently installed or removable mounted parts (e.g. running gear, accessories).

The protective compound is to be applied as follows.
1. Clean the Panzer surfaces to be painted thoroughly. If a base coat is present, this must be thoroughly dry.
2. Apply Zimmerit thinly once with the spatula knife.
3. Apply the filler in a panelled pattern, i.e. in small squares with gaps of approximately 1/2 cm (Figure 1).
3295169_4b65de2a9c56cf993e839d8f2ec04004.png

4. Allow the mixture to dry for 4 hours.
5. Burn with the blowtorch in such a way that the surface is hardened. Lightly brush the surface with the blowtorch, but do not hold it too close to the protective compound so that the coating does not burn (approximate distance).
6. Using the spatula knife, apply a layer approximately 4 mm thick in squares as shown in 2.
7. Use the spatula knife to groove the paint, i.e. press it in at very small intervals, so that a strongly corrugated surface is created (Image 2).
3295169_b5939ee404e24e0bc20a3be63f2f2383.png

8. Allow the protective compound to dry overnight.
9. The next day, use the blowtorch to harden the surface again as described under step 5.

The following are guidelines for the need for Zimmerit:
StuG about 70 kg
Pz. Kpfw. IV about 100 kg
Panther about 160 kg
Tiger about 200 kg

Zimmerit should be used undiluted; the thinner supplied should only be added if it thickens. The filler coat can easily be sprayed over with the usual armour paint.
The packaging containers must be kept well closed; hardened mass must not be applied, as otherwise the coating will crumble. Opened containers must be covered with wet cloths or bags.
Zimmerit can be obtained from the Army Tank Equipment Office in Königsborn-Magdeburg or from the relevant tank spare parts warehouses.

Ο. Κ. Η. (Ch H Rüst and BdE), 12/29/43 76 g No. 16975/43 In 6 (Z/Ing).
Wasn't zimmerit only used for a little over a year? Nice bit of info here!
 
Yes, because on the one hand, the expected enemy magnetic weapons didn't materialise, and on the other, it added build time and materials to each tank that could be better spent getting tanks out the door faster.
 
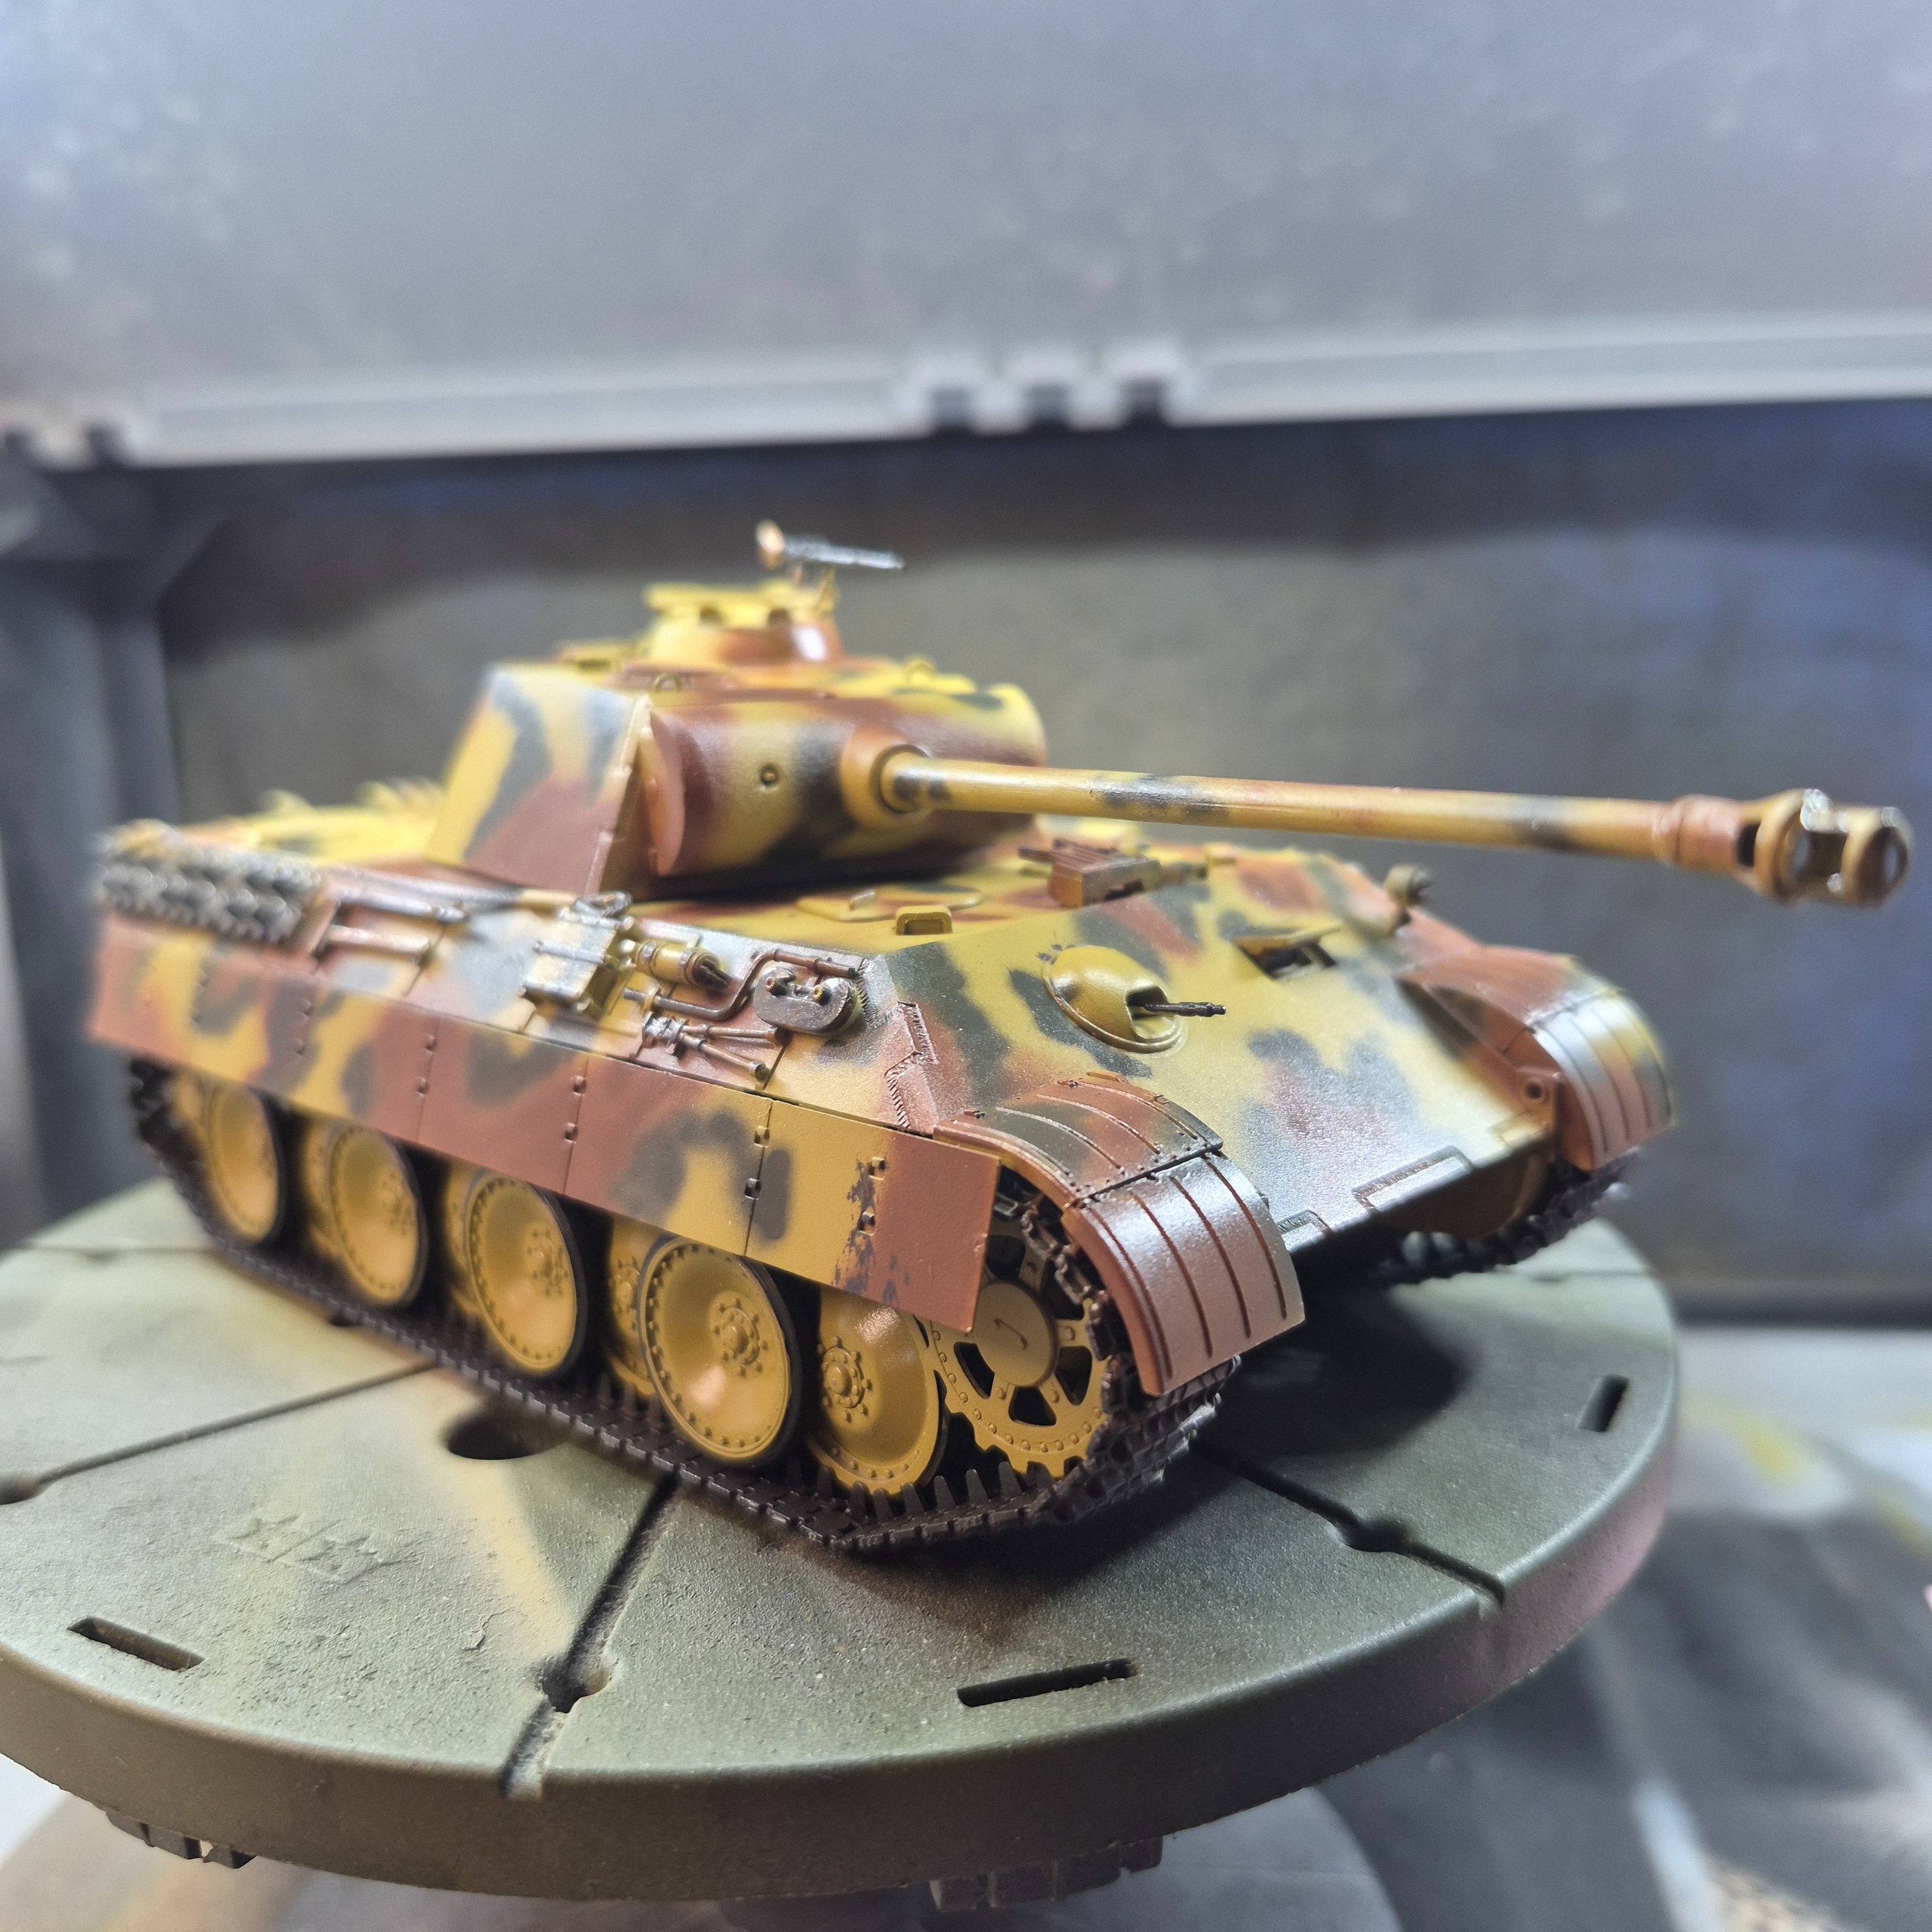
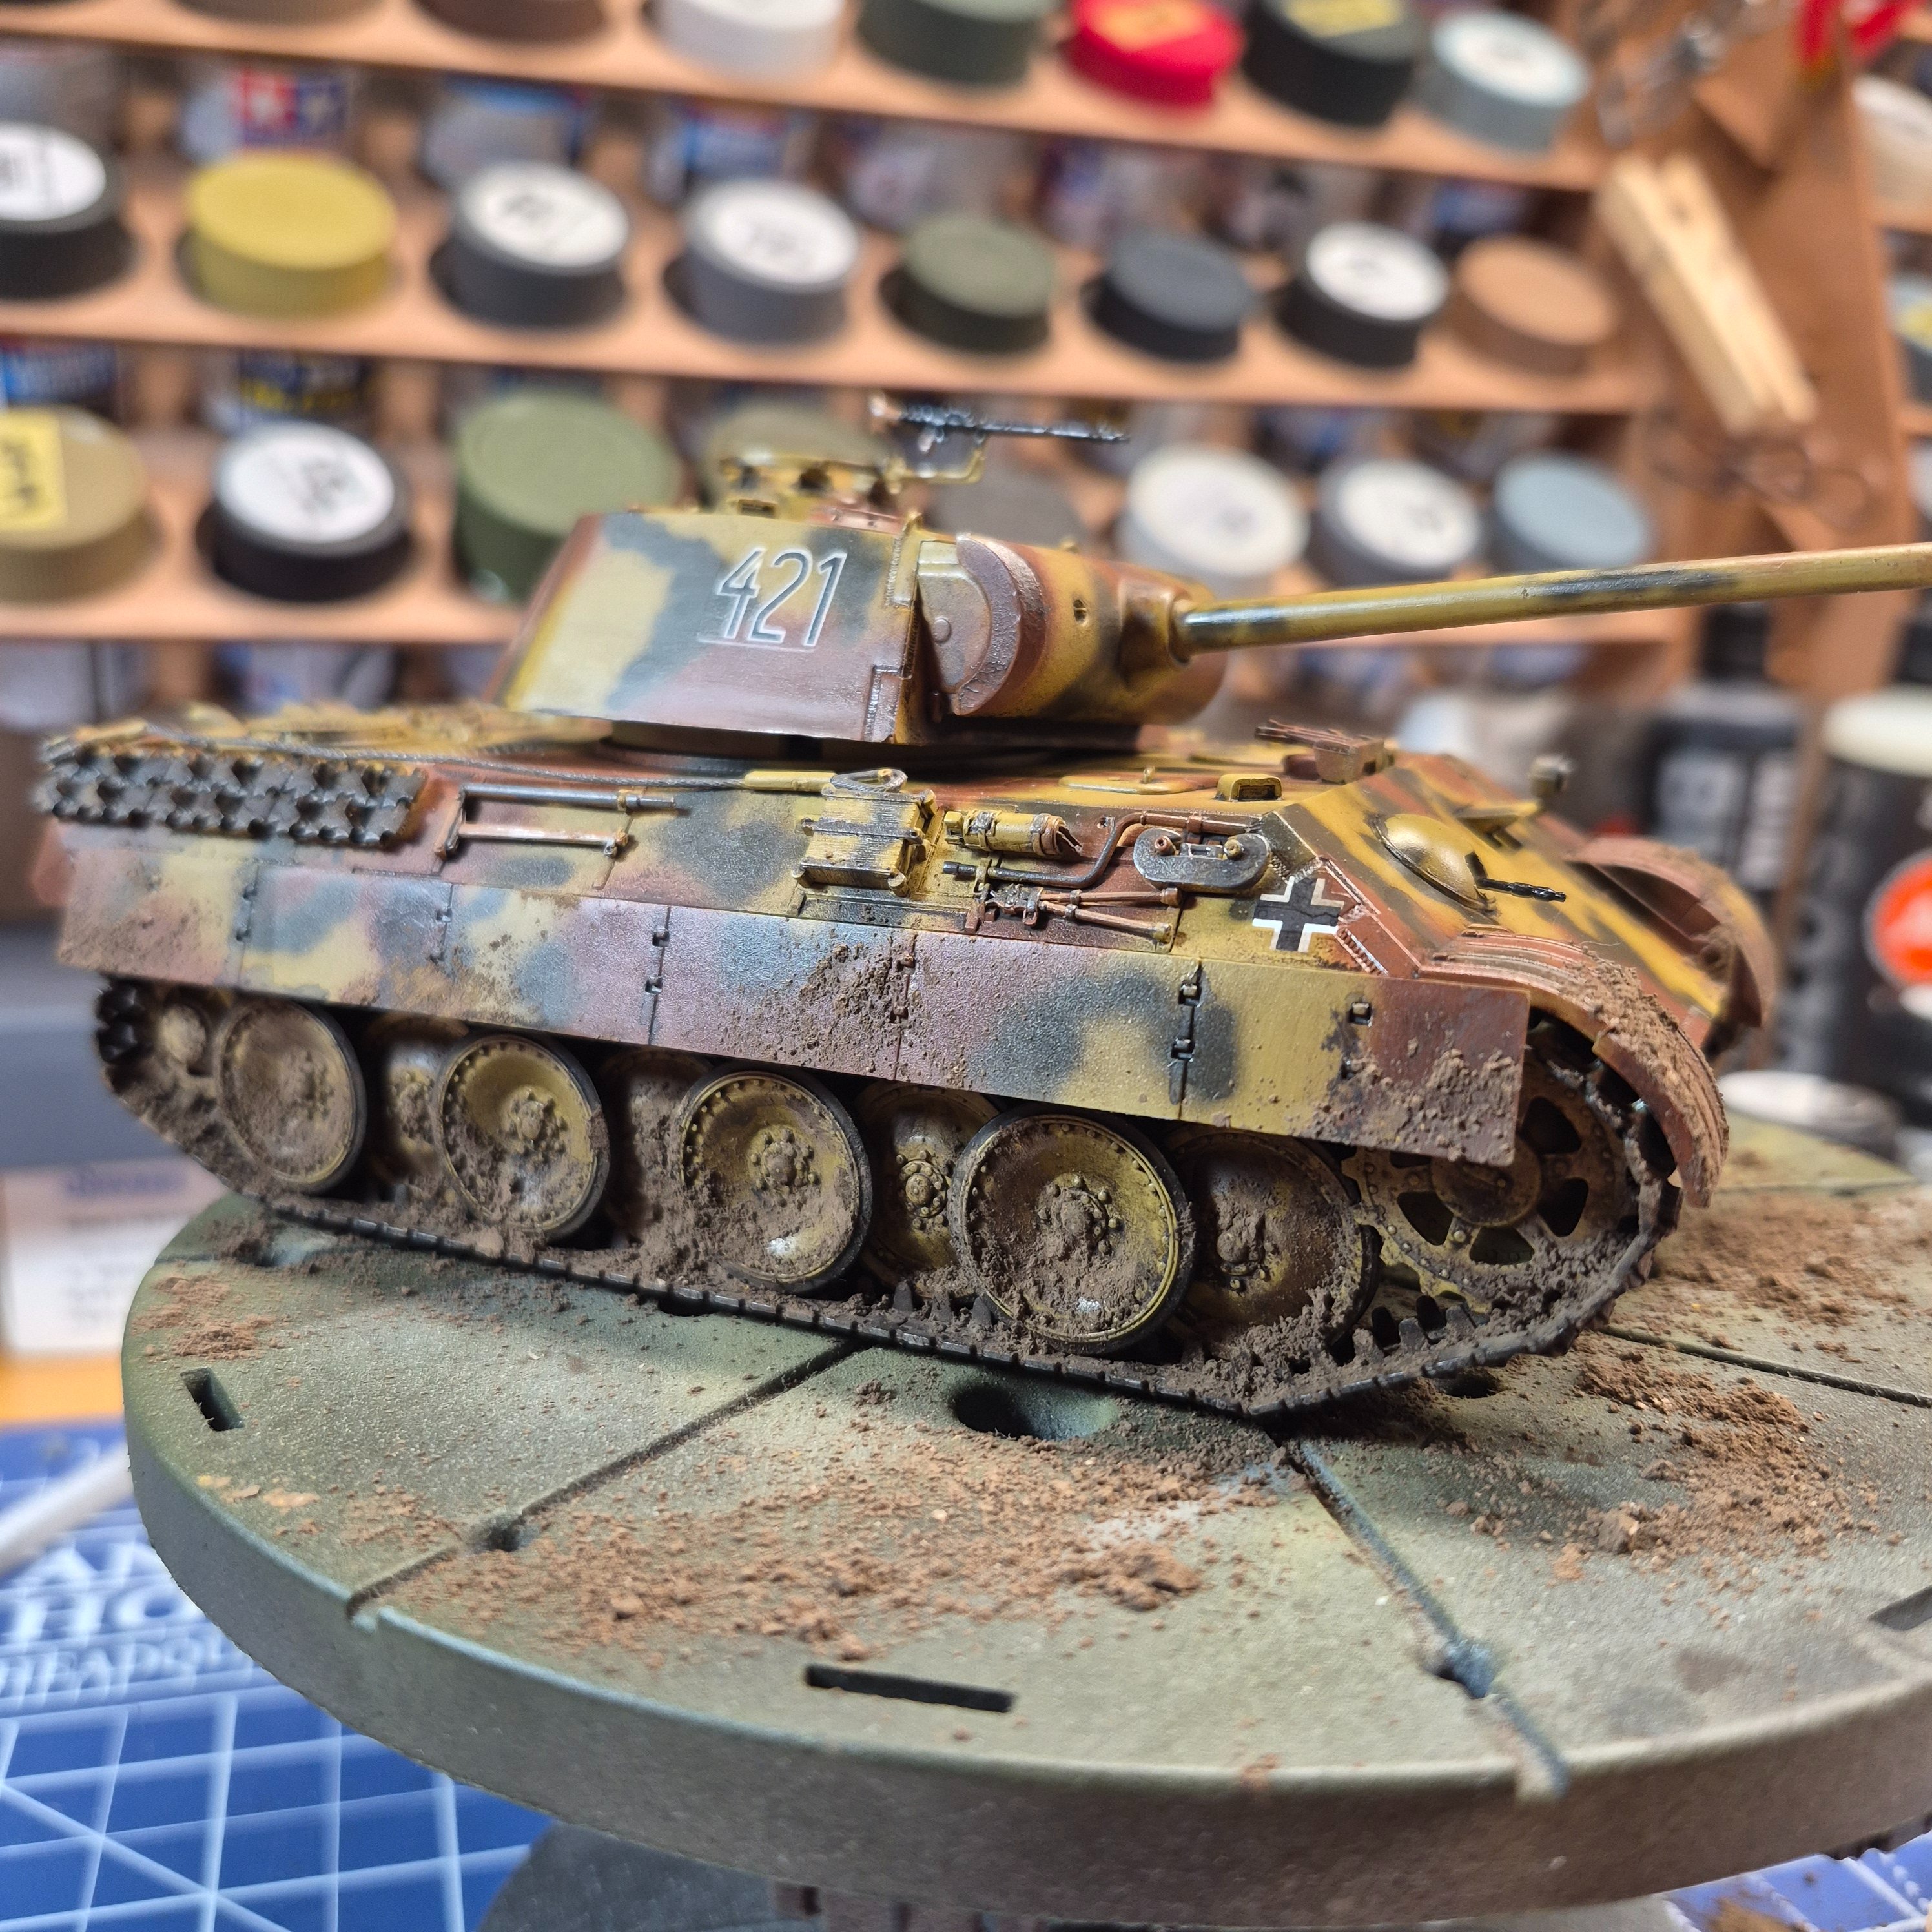
Threw on some mud
Nice. That cat needs a bath!
Like the splatter on the track guards.

Someday I gots to try the mud fling...

I know that there were periods of intense rain in north Africa, even flash flooding in the desert wadis: you'd not want to make the mistake of hiding from air predation in one of those and have a freak storm hit with all of the rain for the year!
 
Nice. That cat needs a bath!
Like the splatter on the track guards.

Someday I gots to try the mud fling...

I know that there were periods of intense rain in north Africa, even flash flooding in the desert wadis: you'd not want to make the mistake of hiding from air predation in one of those and have a freak storm hit with all of the rain for the year!
Believe it or not. That was my first attempt at Mud on a tank. I think it looks really amateurish because I really didn't take my time. I put some pigment fixer in different places and then sprinkled on City dark dust. I don't know. Some folks get into weathering and I have to agree it really looks neat. Some guys can make it look so real it's astounding. Me? Not so much. I'm getting to where I like nice and clean models but you also have to put in some weathering just to make the thing look real instead of a plastic airplane or tank. Sometimes I just like Factory fresh. Besides. It makes a real hard to dust it when it's full of mud and cracks and crevices:-). And yes. Flash flooding. I live in Arizona. I know all about it. And yet every time there's major thunderstorms up north in the high desert? Whole family's die. Sad and stupid.
 

Latest posts

Back
Top