Quick, Champagne!

Scale Model Addict - Model Tips, Guides, Tools & Tech, Tutorials, and Community

Help Support Scale Model Addict:

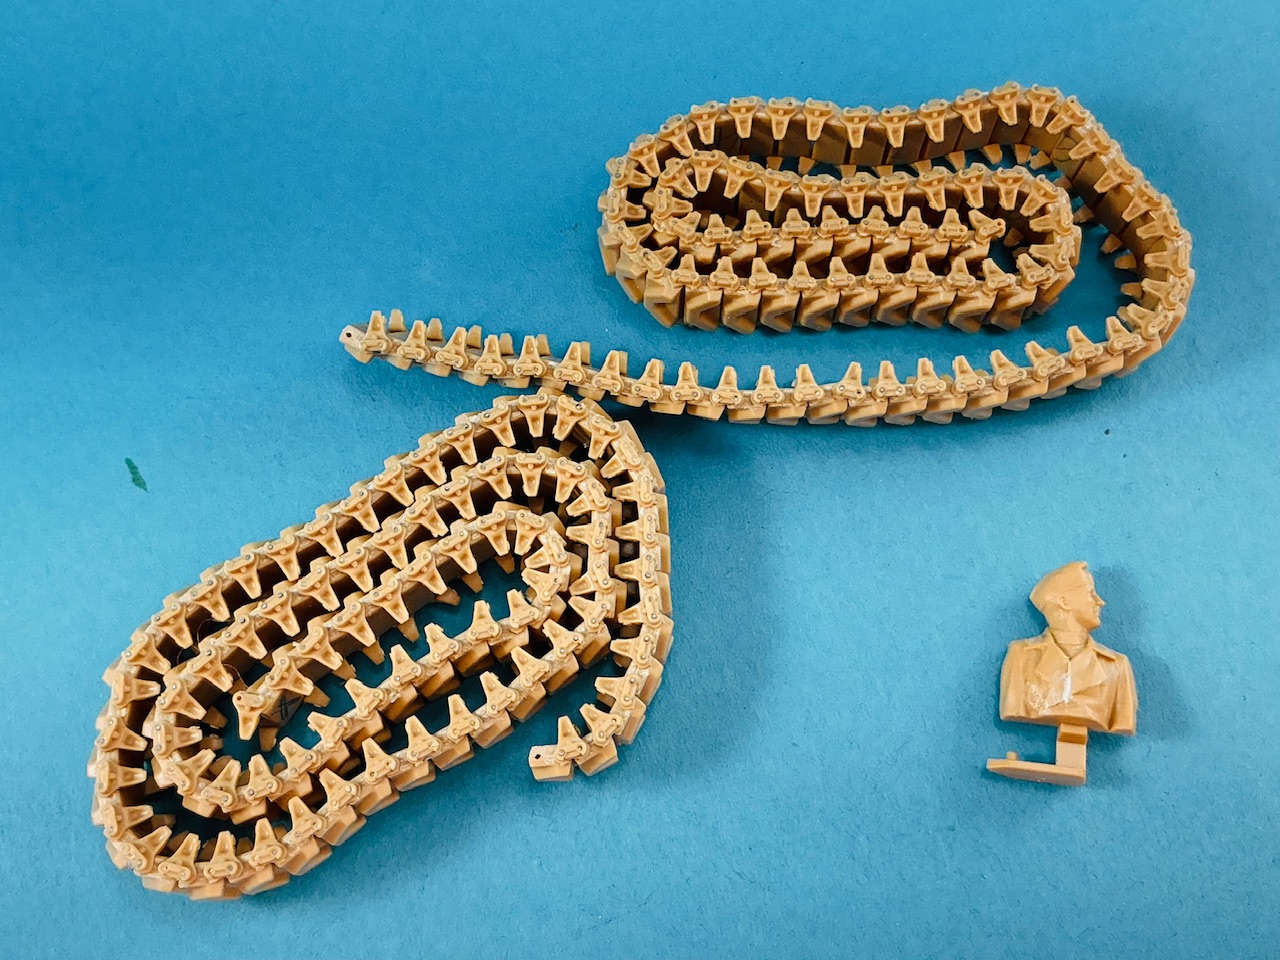
Almost as many as manufacturers, it seems ;) The most common ones for workable tracks seem to be:
  • Holes moulded into the sides of the links, with pins that go in those (for good tracks, the pins are press-fit, but the not-so-good ones need a drop of glue on each pin);
  • Pins moulded to the ends of the links, that connectors slide onto (with hopefully enough friction that they stay on);
  • Links in two parts that are glued together to trap pins between them (either moulded-on pins or ones supplied as separate parts);
  • Links that snap together, with moulded-in pins that fall into moulded-in hollows.
This kit's tracks are basically the first type, with the peculiarity of having pre-cut metal pins that still need glueing. My preferred type is the second, because they're generally the least amount of work. The third type can be easy or hard to assemble, depending on the exact design and how small the parts are. The fourth type is easy in principle, but you have to be careful not to break any pins because if you do, the links will come apart.
 
And that makes two:

IMG_4298.jpeg


The figure will be the tank commander. He's actually a German, from Tamiya's Hotchkiss 39, but I'm going to put him inside the turret, so you'll only see him from above, and in that case a few small changes to his jacket and his cap will do to turn him into a Frenchman wearing an American uniform :)
 
you surely know that 99% will never notice :-)
True, but I do notice myself, and so I want it to be (or at least look) correct. And since I post this stuff online, you can be sure there will be some others reading my posts who will also notice and will then either have the satisfaction of seeing I got it right, or the satisfaction of pointing out my mistake ;)
 
As an Amazon Associate we earn from qualifying purchases. Product prices and availability are accurate as of the date/time indicated and are subject to change.
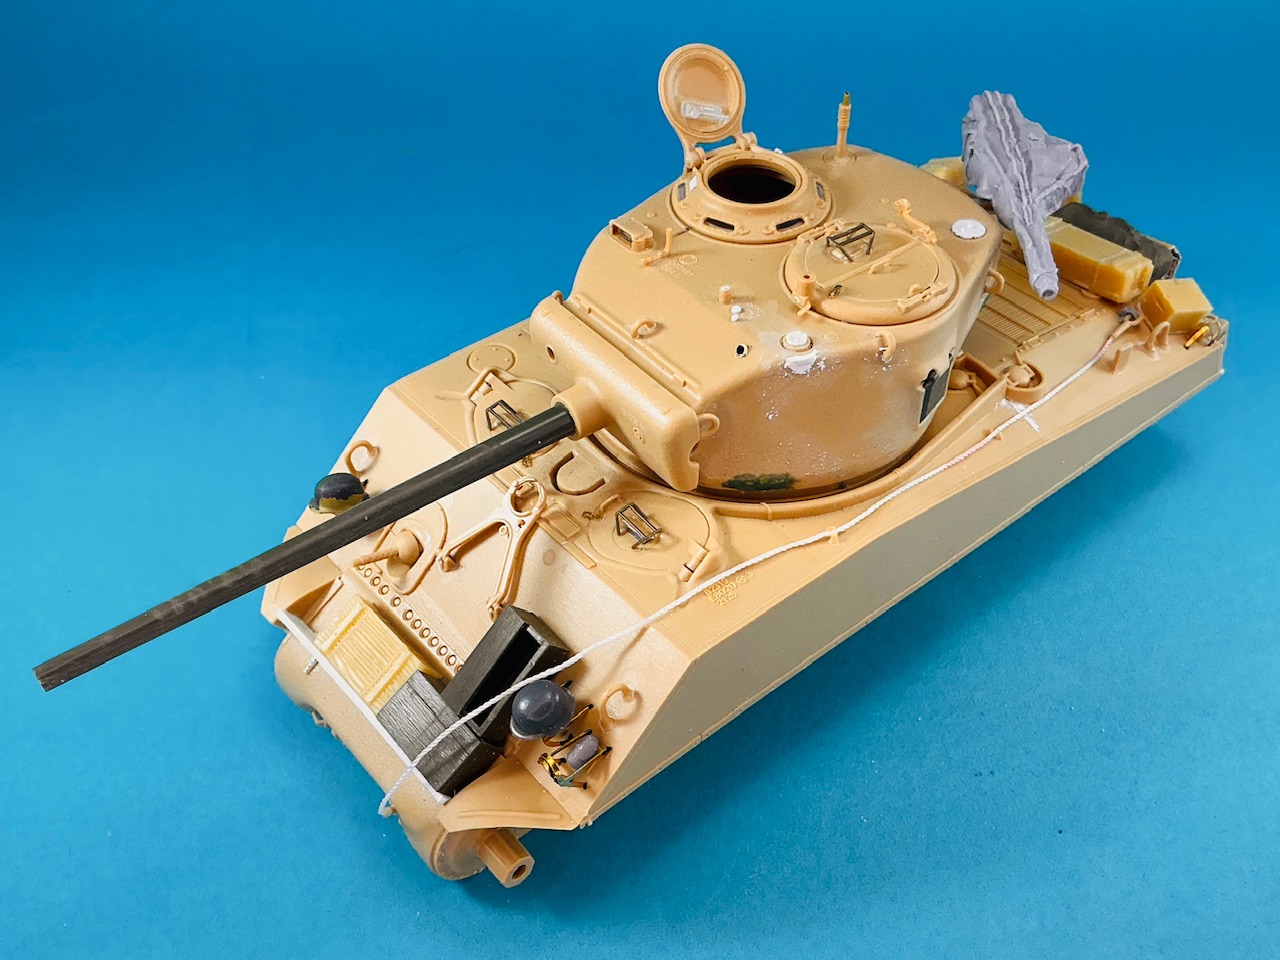
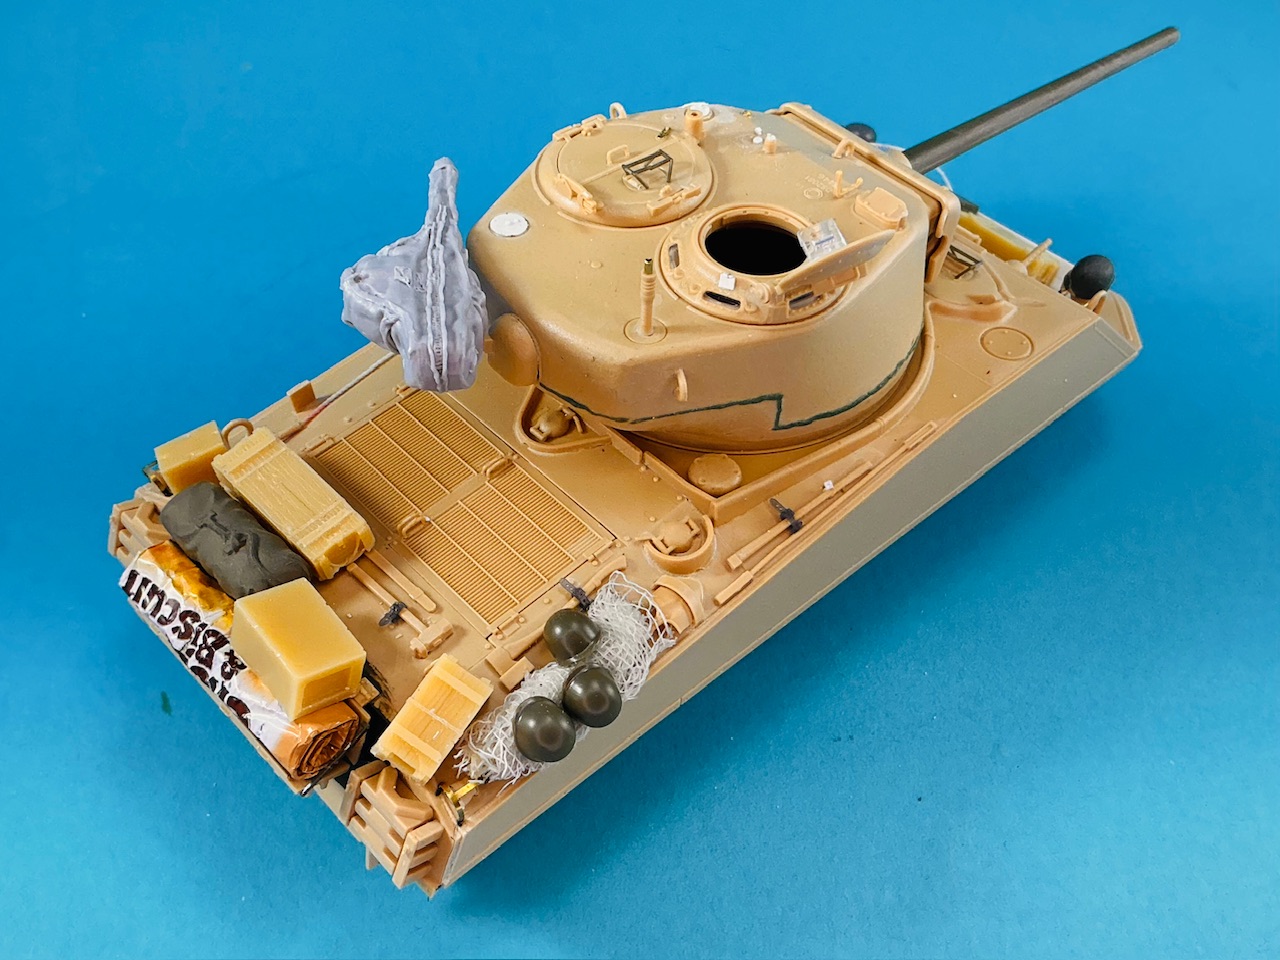
We're now really getting there :) I made a camouflage net from a bit of bandage and thinned PVA glue, stuck three helmets to that (visible on the real Champagne), made a rolled-up tarp from another piece of wrapper from an Aldi chocolate bar (with a lot of extra aluminium foil inside to get it to a reasonable thickness) and went through my spares to find boxes and stuff that can pass for what was on the real tank:

IMG_4299.jpeg
IMG_4300.jpeg


The net, helmets and tarp are already glued on, the rest isn't. I still need to add a few straps over the tarp and a locking device on the commander's hatch, but I think after that I can paint the model. The resin boxes I suspect to be casts taken from Verlinden parts, which I was given very long ago by someone whose name I don't even recall, the plastic ones on the glacis are Tamiya, as are the kit bag and the helmets. The machine gun in its cover on the back of the turret is by Tiger Model Design and the German helmets on the headlight guards look like they're from Italeri.
 
True, but I do notice myself, and so I want it to be (or at least look) correct. And since I post this stuff online, you can be sure there will be some others reading my posts who will also notice and will then either have the satisfaction of seeing I got it right, or the satisfaction of pointing out my mistake ;)
I once had someone point out that I had placed a tiny decal on upside down. I had to hold the model under my magnifying lamp to see what he was talking about. I found it very odd that he felt compelled to tell me this and even more odd that he looked so closely at the posting.
 
... Seeing the 'Biscuit' plastered on the front like that is rather hilarious... 😝
I decided to put the printed side out this time round, because the last times I used these wrappers, I discovered that the paint doesn't stick that well to the bare side. Maybe I should have cleaned those from the fat left on it by the chocolate, of course … I'm guessing/hoping that the printed side will fare better.

I took the bandage off to throw it away, but I looked at it and thought camo net!
It's been the go-to for camouflage nets since forever, really :) Though it's probably rather on the small side for your 1:16 scale models.

So this is what you do when you don't want to do a lot of work???
Not really, what I would have done for that was make a Dutch Army M4A1 ;) (Good news on that front, BTW: the shop mailed me to say they've got the missing sprue for me.)
 
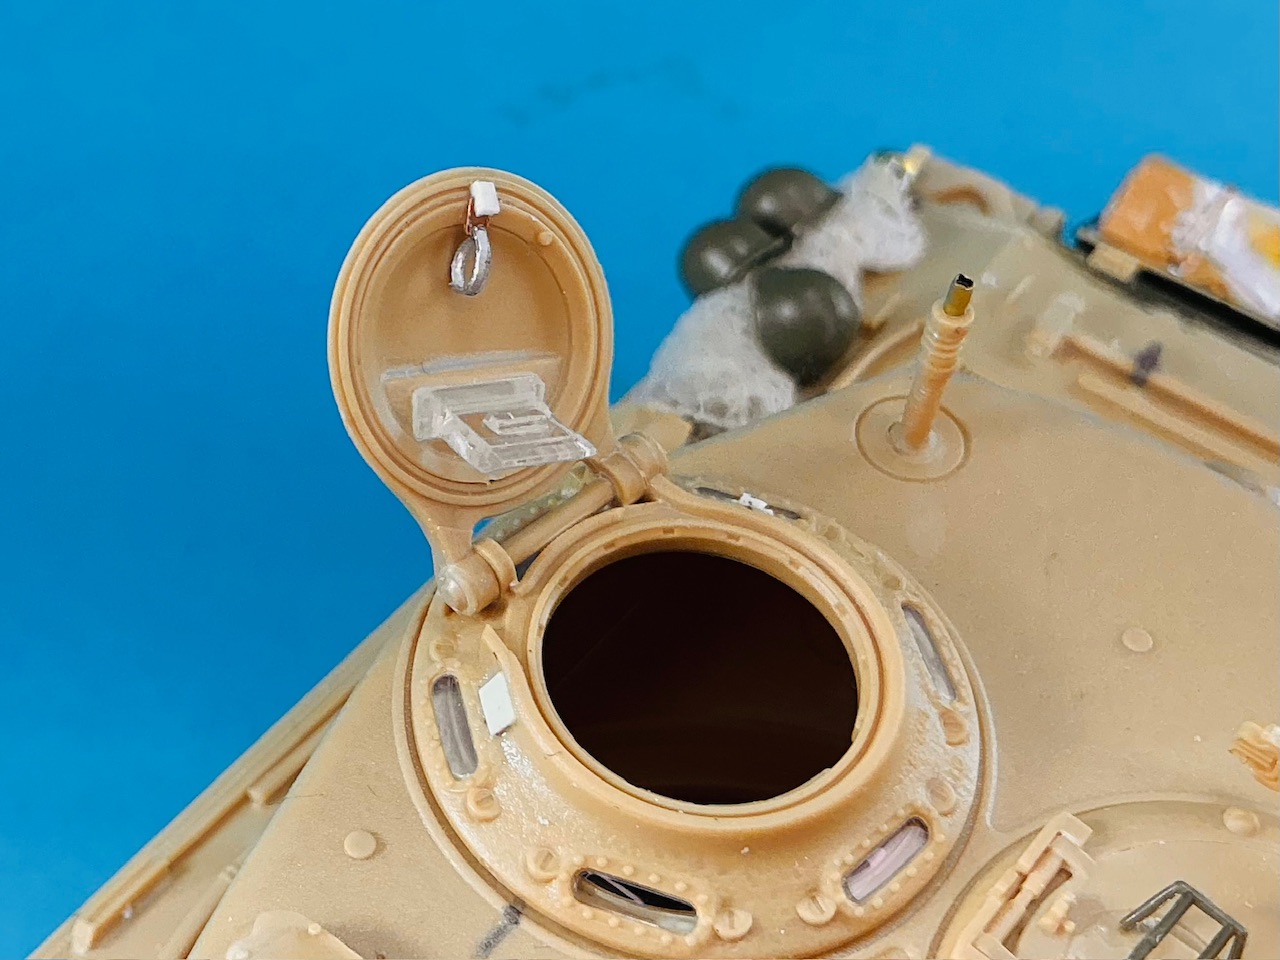
The only thing remaining was to make the clasp for the commander's hatch. A bit of plastic strip, a bent piece of thin copper wire and a strip cut from some aluminium sheet later:

IMG_4301.jpeg


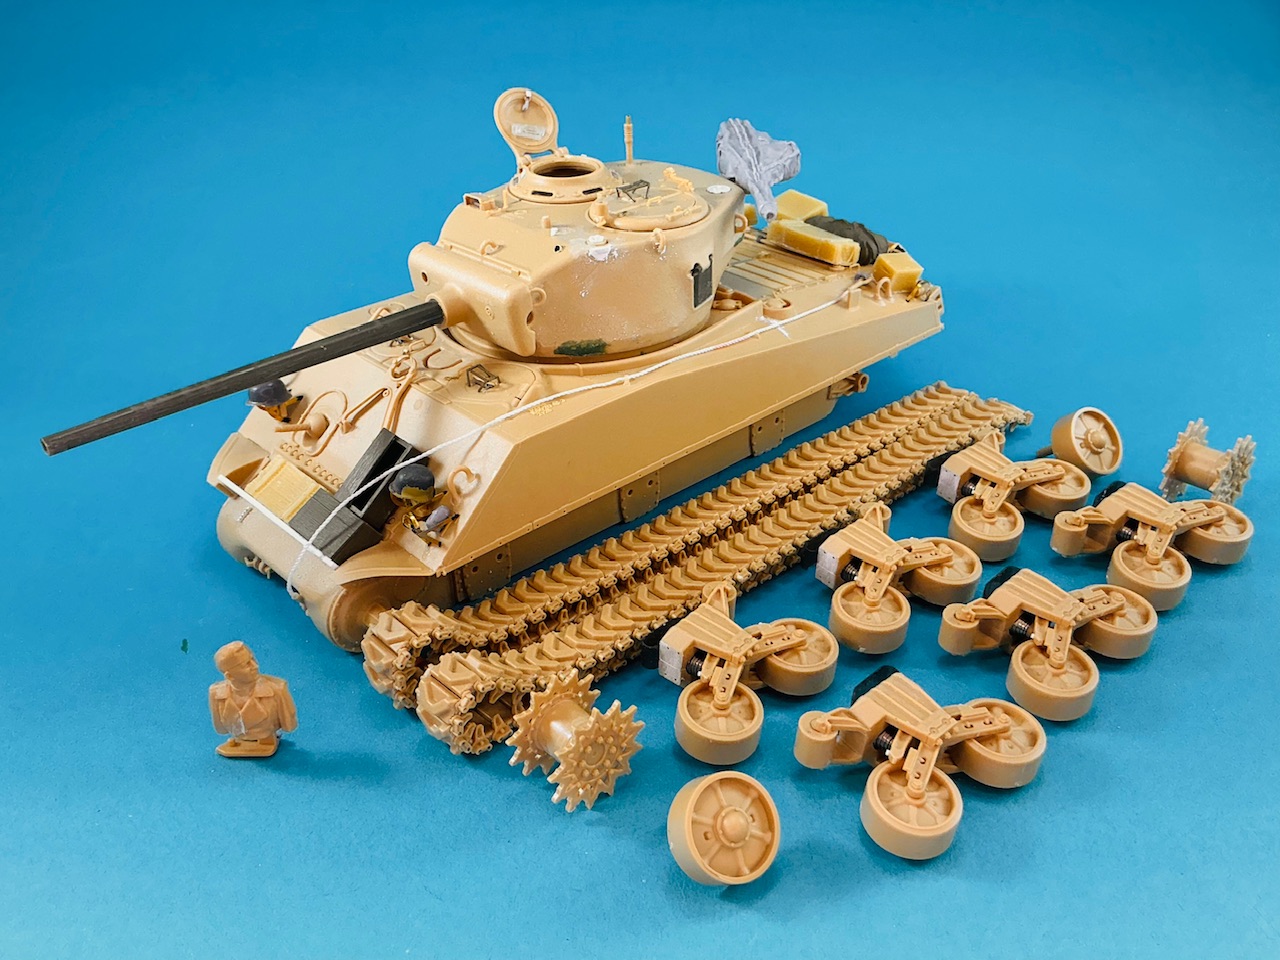
And the build part is done:

IMG_4302.jpeg


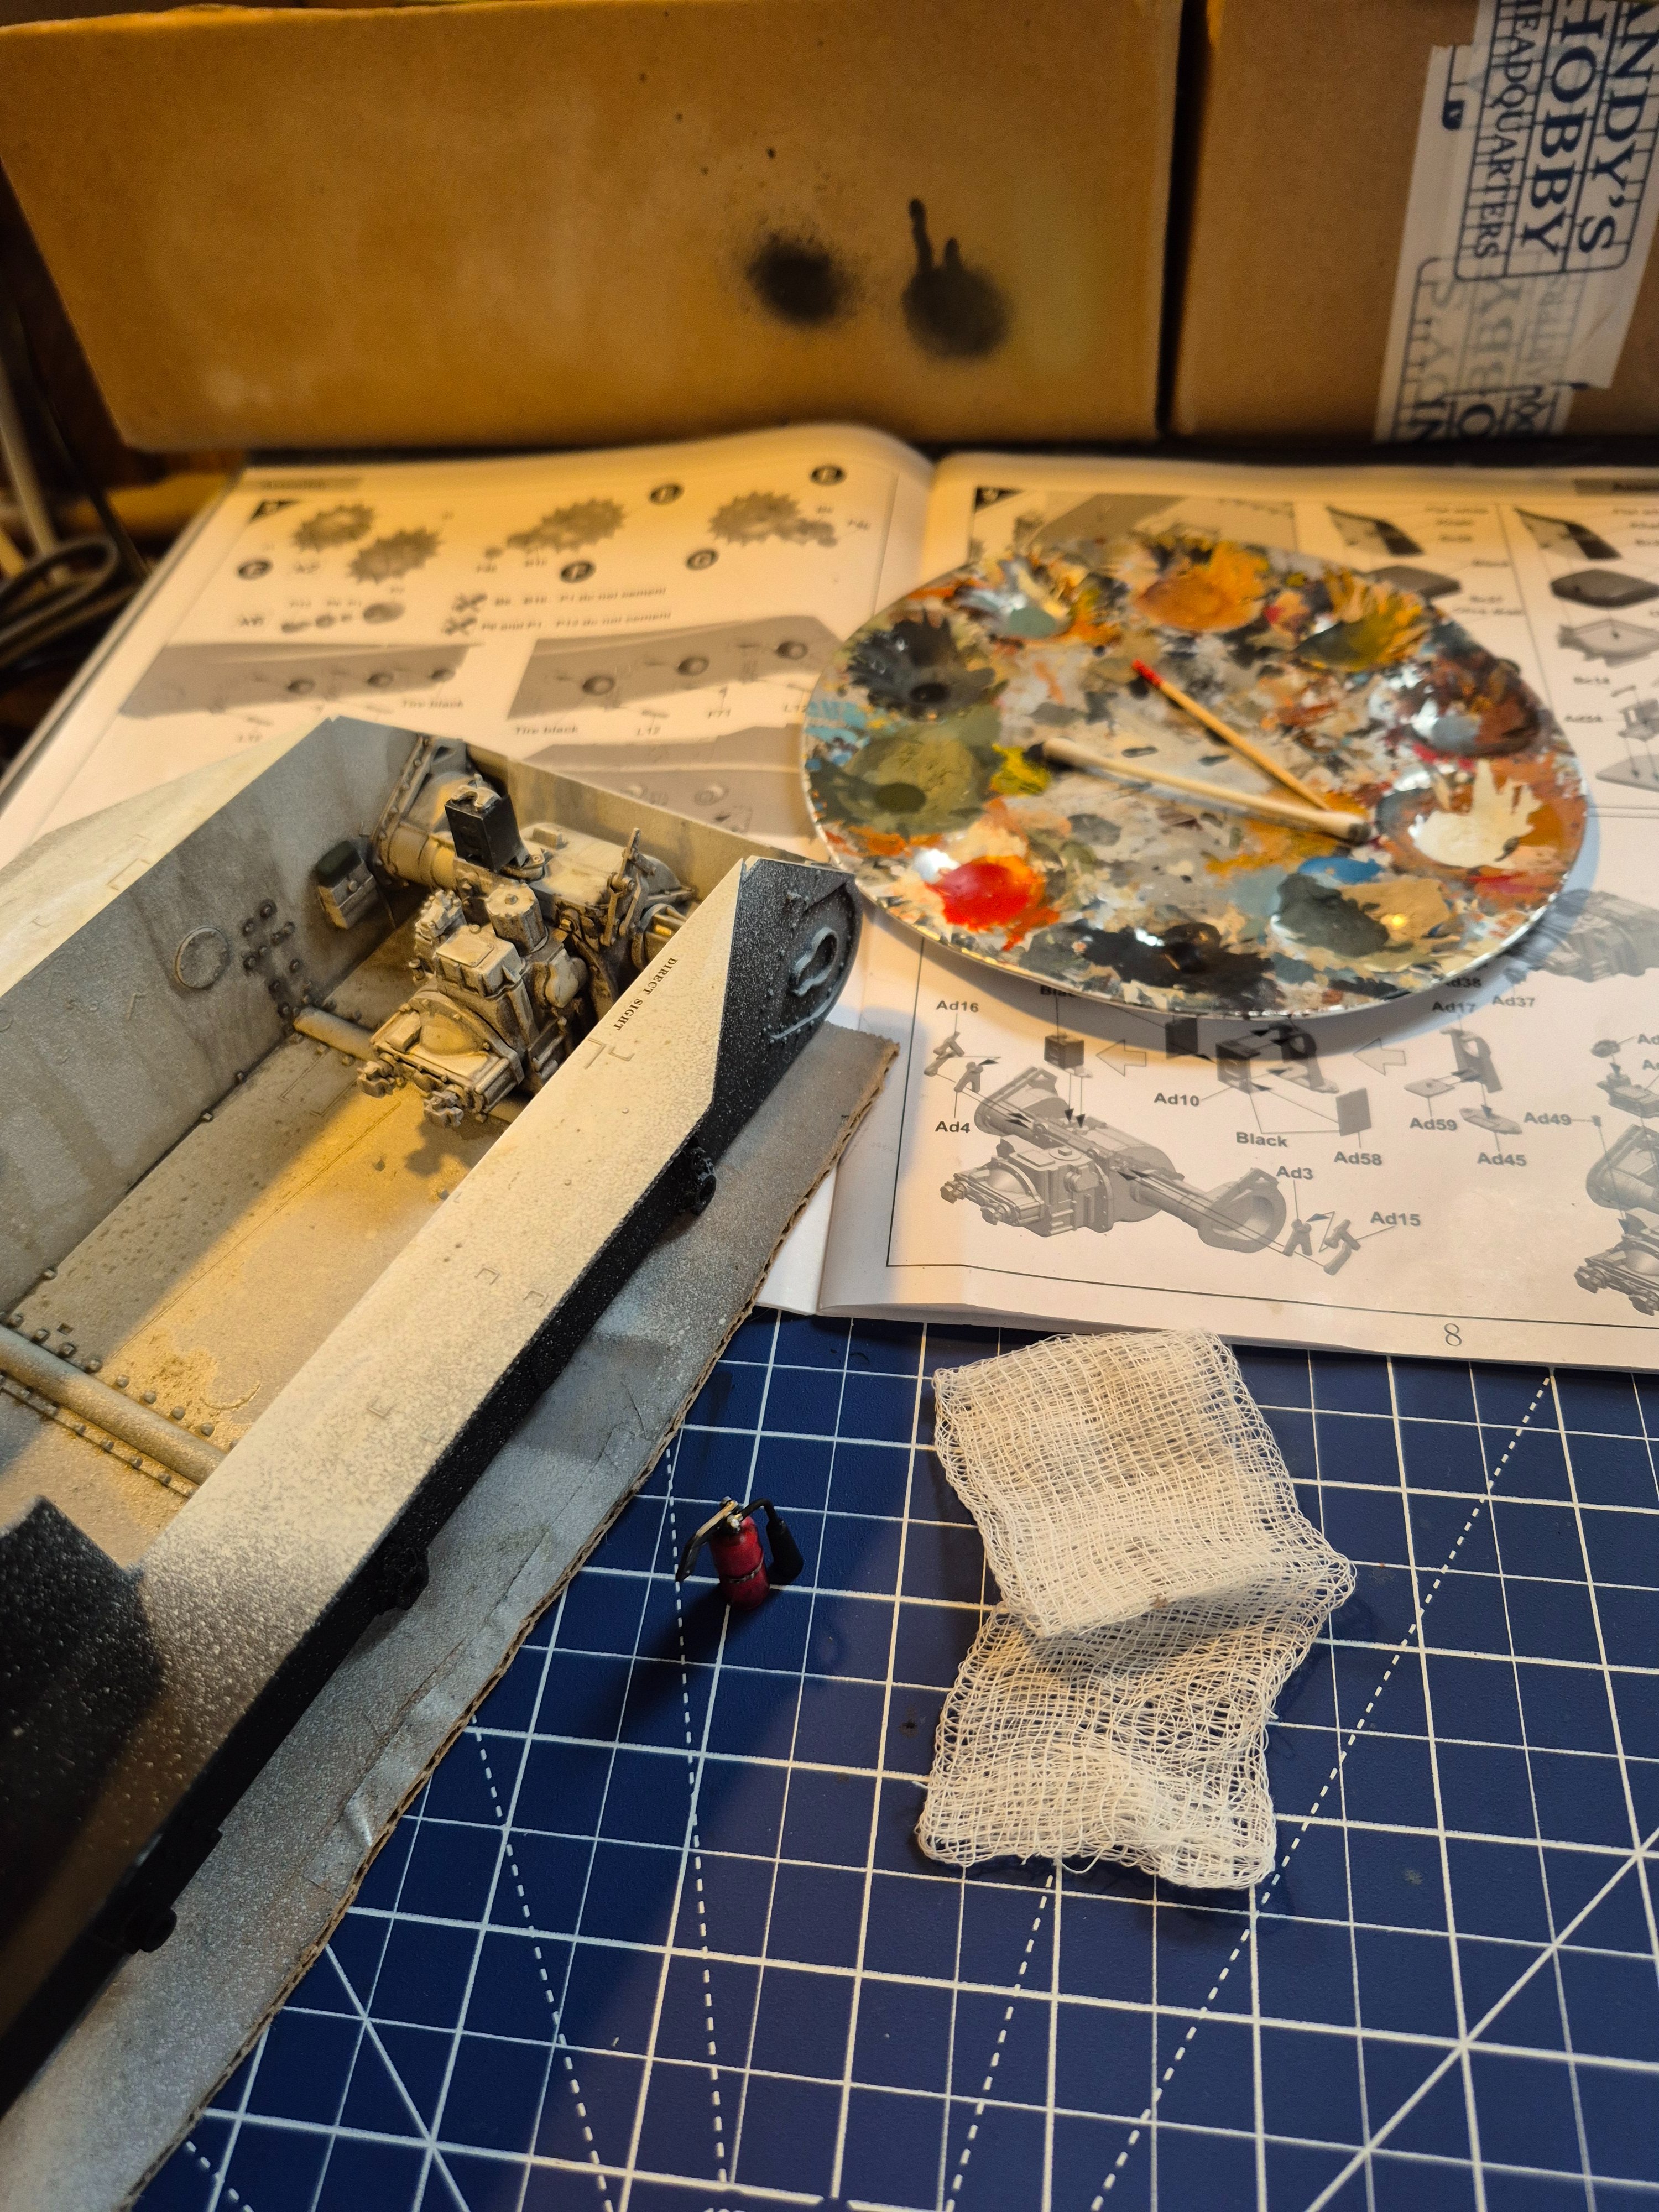
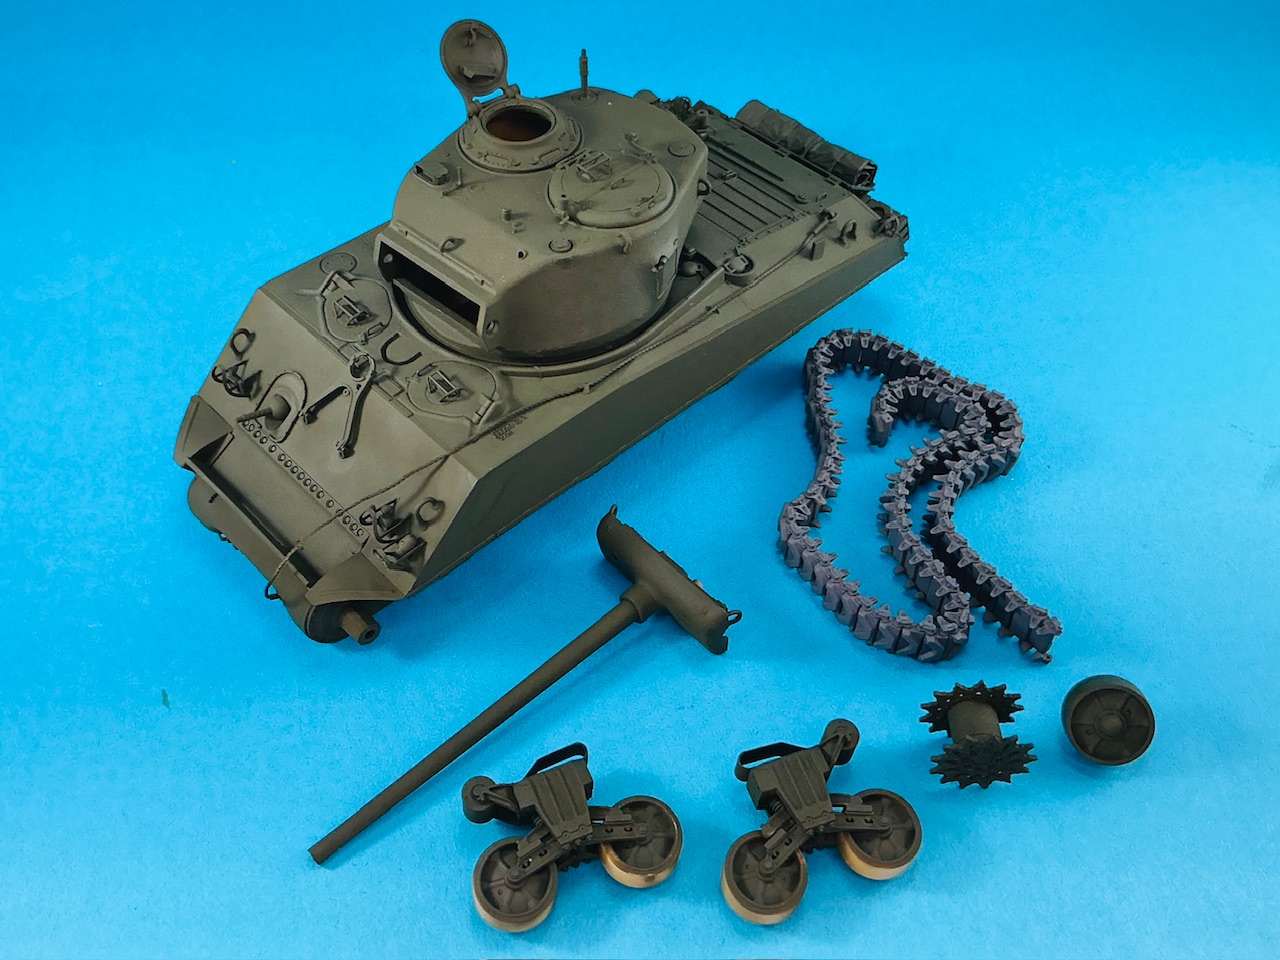
Right after taking this photo, I took my new airbrush, put the 0.5 mm needle in, and:

IMG_4303.jpeg


The tank is now Tamiya XF-62 Olive Drab, with the tracks XF-24 Dark Grey. Since it was almost 30 degrees still in my hobby room, despite outside temperatures having dropped to the low 20s today, the paint was dry very quickly. I'm not sure yet I that want to continue painting tonight, though, in that heat :)
 
The only thing remaining was to make the clasp for the commander's hatch. A bit of plastic strip, a bent piece of thin copper wire and a strip cut from some aluminium sheet later:

View attachment 191102

And the build part is done:

View attachment 191103

Right after taking this photo, I took my new airbrush, put the 0.5 mm needle in, and:

View attachment 191104

The tank is now Tamiya XF-62 Olive Drab, with the tracks XF-24 Dark Grey. Since it was almost 30 degrees still in my hobby room, despite outside temperatures having dropped to the low 20s today, the paint was dry very quickly. I'm not sure yet I that want to continue painting tonight, though, in that heat :)
The 20s?? Where in the world do you live, the Antarctic?
 
And that's why I hate airbrushes … This afternoon, everything went fine, so tonight I put in the 0.3 mm needle and some AMMO/Mig airbrush-ready paint. After a little bit of test spraying on a piece of kitchen roll, very soon nothing at all came out anymore, A bit of fiddling later and it started blowing bubbles in the paint cup. What followed was almost fifteen minutes of messing around with the airbrush (trying to spray, pour out the paint, put water in, disassemble bits, blow things through, wipe it clean, reassemble, put in paint, go back to the start of this bit in brackets) and it worked again. Good! So I took the model to hand and started spraying a little test patch on the underside, to see if the colour was right … Except that no paint came out anymore again …

Bastard thing! Ten minutes into the ultrasonic cleaner with it. That did it, afterward it sprayed water just fine again. Put some paint back in, and what do you think? Exactly: it clogged up immediately. It didn't want to spray any paint anymore, soon started blowing bubbles in the paint cup again, etc. Another ten minutes in the ultrasonic cleaner, and then back into the box — I've had it with this lark for today.

This with two different bottles of airbrush-ready from two manufacturers, BTW. I think I'll need to try this same paint in my Iwata to see if it does work in that (it always has, though), and also try totally different paint in this cheap airbrush. But not tonight.
 

I've a friend in India, it was 46 there last week!
I've spent most of my life in the Chicago area, so glad to get away from those winters. Right now with temp and humidity I can get so much painting done. Yesterday I put a final coat on in the morning and hit it with varnish in the eve. That was an experiment! Haha thankfully it worked!
 
I've spent most of my life in the Chicago area, so glad to get away from those winters. Right now with temp and humidity I can get so much painting done. Yesterday I put a final coat on in the morning and hit it with varnish in the eve. That was an experiment! Haha thankfully it worked!
I get it bro!

Grew up in Houston, first 17 years of my lifge where 100+ was normal but the 80-95% humidity got added in, Like Atlanta or New Orleans. Moved to Austin at age 17, still gets over 100, but 60-80% humidity was like heaven, even though the local bish up a storm.

I have friends in the Southwest, where 110-120 is normal. They say it is a "dry heat", to which I reply "so is my oven"!

We get over 110 from time to time, but all that said, I do hate the high heat, but I've shoveled a driveway before too, that is worse!
 
I get it bro!

Grew up in Houston, first 17 years of my lifge where 100+ was normal but the 80-95% humidity got added in, Like Atlanta or New Orleans. Moved to Austin at age 17, still gets over 100, but 60-80% humidity was like heaven, even though the local bish up a storm.

I have friends in the Southwest, where 110-120 is normal. They say it is a "dry heat", to which I reply "so is my oven"!

We get over 110 from time to time, but all that said, I do hate the high heat, but I've shoveled a driveway before too, that is worse!
I used to say the same thing. Sometimes it feels like an oven!
 
And that's why I hate airbrushes … This afternoon, everything went fine, so tonight I put in the 0.3 mm needle and some AMMO/Mig airbrush-ready paint. After a little bit of test spraying on a piece of kitchen roll, very soon nothing at all came out anymore, A bit of fiddling later and it started blowing bubbles in the paint cup. What followed was almost fifteen minutes of messing around with the airbrush (trying to spray, pour out the paint, put water in, disassemble bits, blow things through, wipe it clean, reassemble, put in paint, go back to the start of this bit in brackets) and it worked again. Good! So I took the model to hand and started spraying a little test patch on the underside, to see if the colour was right … Except that no paint came out anymore again …

Bastard thing! Ten minutes into the ultrasonic cleaner with it. That did it, afterward it sprayed water just fine again. Put some paint back in, and what do you think? Exactly: it clogged up immediately. It didn't want to spray any paint anymore, soon started blowing bubbles in the paint cup again, etc. Another ten minutes in the ultrasonic cleaner, and then back into the box — I've had it with this lark for today.

This with two different bottles of airbrush-ready from two manufacturers, BTW. I think I'll need to try this same paint in my Iwata to see if it does work in that (it always has, though), and also try totally different paint in this cheap airbrush. But not tonight.
Do you ever run lacquer thinner through your brush?
 
I once had someone point out that I had placed a tiny decal on upside down. I had to hold the model under my magnifying lamp to see what he was talking about. I found it very odd that he felt compelled to tell me this and even more odd that he looked so closely at the posting.
Some people do it just to score points but others will just be trying to help you, and those interested in the subject, to make a better or more accurate model. I would be flattered that this person was moved to scrutinise the work so finely 🧐
 
Do you ever run lacquer thinner through your brush?
Not normally, but I may have to try something like that if this keeps up. The thing is, this airbrush is brand new — all that went through it with that 0.3 mm needle in, was some water with ink and maybe five drops of premixed airbrush paint, immediately after which I sprayed water and suitable airbrush cleaner through it until that came out clean. As it clogged up right away again after ultrasonic cleaning, I suspect the paint is the issue — or perhaps the combination of airbrush and that particular type of paint. But making sure means experimenting with two different airbrushes, both of which then need to be cleaned, and if there's one thing I hate about modelling, it's cleaning bloody airbrushes :)
 
Not normally, but I may have to try something like that if this keeps up. The thing is, this airbrush is brand new — all that went through it with that 0.3 mm needle in, was some water with ink and maybe five drops of premixed airbrush paint, immediately after which I sprayed water and suitable airbrush cleaner through it until that came out clean. As it clogged up right away again after ultrasonic cleaning, I suspect the paint is the issue — or perhaps the combination of airbrush and that particular type of paint. But making sure means experimenting with two different airbrushes, both of which then need to be cleaned, and if there's one thing I hate about modelling, it's cleaning bloody airbrushes :)
That's strange and I'd have to agree probably an issue with the paint- maybe it's just so cold there you had ice crystals forming! I don't understand the comment about cleaning the brush though. When I'm done I run lacquer thinner through the brush a few times, disassemble and clean it by hand with the same and I'm done- maybe 5 mins. I know some claim the orings wear out quicker using LT but to me it's a small price to pay and it's been about every 6 months for me.
 

Latest posts

Back
Top