BARE METAL FOIL!

Scale Model Addict - Model Tips, Guides, Tools & Tech, Tutorials, and Community

Help Support Scale Model Addict:

mjensen939

Well-Known Member
Joined
Sep 22, 2025
Messages
171
Hello everyone. So I have made up my mind that I want to try Bare Metal Foil. I've come to understand that it can be quite difficult for a beginner but I think I can handle it.
I'd like to invite anyone, with experience they'd like to share, to pop in on this if you would be so kind. Any tips or suggestions or general thoughts would be greatly appreciated.
 
Howdy mjensen, I have been using BMF for about a year, I'm certainly no expert but I have learned a few things.

The tools required; toothpick, sanded to a fine point on one side and rounded flat edge on the other, tight/pointed cotton buds. Pointed toothpick end should be pulled along edges/details backwards, or sharp point can tear BMF. Gentle pressure, working into details works best.

New blades are a must, and as you cut the shapes you need, the blade will dull, (rather quickly depending on the blade manufacturer). I have changed blades several times, depending on how much BMF I use and how much trimming is required.

There are numerous YT videos out there, watch a few and experiment, find what works best for you.
One of the videos I watched, recommended cutting a shape larger than the window, applying it to the entire area then cutting the inside out and trimming to fit. I find by cutting in strips, or smaller shapes closer to the shapes I need for the trim/edging/etc., I can control it better, place it closer to the edges of the work area (often requiring less cutting) and adjusting as needed.

I have found using the entire blade (in my case an Xacto blade, lying parallel on the cut helps the cuts from getting "jagged" or torn edges.
I also found, steadying your hand along as you go to be helpful. I purchased a rod/ball hand steadier on Amazon, but by using my fingers as a guide to making the cuts, they got straighter and cleaner. This works for straight runs, but for curved runs, lift the blade to allow contouring. Wobbly edges will happen, especially after multiple cups of coffee. :cool:

When removing the foil from the sheet, (the edges are often non-stick, don't use those on your work), peel slowly, moving the tweezers closer to the area being removed to reduce the "curling" of the strips. A long strip, pulled from one end can tear, or worse, curl up onto itself and stick to itself, think a long piece of tape that rolls into itself and is now a tangle sticky mess, lol.

I once tried masking to the edge of the BMF, in a hope it would allow removal of the mask to reveal a cleaner line, it didn't work. But it may assist in cutting cleaner edges.

Measure 3 times, and measure again, oversize can be trimmed, too small requires more BMF to cover.

Any smaller gaps or areas that you missed, can be hidden by Molotow (either pen or paint applied by toothpick or small brush). *By small I mean 1 or 2 mm, anything larger will stick out.

Be patient, it may take several tries, you may have to start over, and if you get frustrated, take a break and come back to it.


Hope this was helpful.

20251130_112906.jpg
 
Howdy mjensen, I have been using BMF for about a year, I'm certainly no expert but I have learned a few things.

The tools required; toothpick, sanded to a fine point on one side and rounded flat edge on the other, tight/pointed cotton buds. Pointed toothpick end should be pulled along edges/details backwards, or sharp point can tear BMF. Gentle pressure, working into details works best.

New blades are a must, and as you cut the shapes you need, the blade will dull, (rather quickly depending on the blade manufacturer). I have changed blades several times, depending on how much BMF I use and how much trimming is required.

There are numerous YT videos out there, watch a few and experiment, find what works best for you.
One of the videos I watched, recommended cutting a shape larger than the window, applying it to the entire area then cutting the inside out and trimming to fit. I find by cutting in strips, or smaller shapes closer to the shapes I need for the trim/edging/etc., I can control it better, place it closer to the edges of the work area (often requiring less cutting) and adjusting as needed.

I have found using the entire blade (in my case an Xacto blade, lying parallel on the cut helps the cuts from getting "jagged" or torn edges.
I also found, steadying your hand along as you go to be helpful. I purchased a rod/ball hand steadier on Amazon, but by using my fingers as a guide to making the cuts, they got straighter and cleaner. This works for straight runs, but for curved runs, lift the blade to allow contouring. Wobbly edges will happen, especially after multiple cups of coffee. :cool:

When removing the foil from the sheet, (the edges are often non-stick, don't use those on your work), peel slowly, moving the tweezers closer to the area being removed to reduce the "curling" of the strips. A long strip, pulled from one end can tear, or worse, curl up onto itself and stick to itself, think a long piece of tape that rolls into itself and is now a tangle sticky mess, lol.

I once tried masking to the edge of the BMF, in a hope it would allow removal of the mask to reveal a cleaner line, it didn't work. But it may assist in cutting cleaner edges.

Measure 3 times, and measure again, oversize can be trimmed, too small requires more BMF to cover.

Any smaller gaps or areas that you missed, can be hidden by Molotow (either pen or paint applied by toothpick or small brush). *By small I mean 1 or 2 mm, anything larger will stick out.

Be patient, it may take several tries, you may have to start over, and if you get frustrated, take a break and come back to it.


Hope this was helpful.

View attachment 171508
Wow! What an awesome first reply to my inquiry. That's exactly what I was looking for! You pretty much covered the gamut here; complete with tips and details and observations with analogies no less!

I have some questions, if you don't mind, regarding a few things you mentioned.

First, an easy one:
When you say, "rod/ball" hand steadier, I'm thinking you're referring to a mahl stick....is that correct?

Second up:
When you say you're using the entire blade laying parallel to the cut I'm trying to visualize that. What I came up with is that, instead of using just the tip of the blade held at about a 60° angle, like I normally do, I might want to try bringing the angle down to as close to zero as I can get and still have pressure on the point rather than the heel...?? Does that sound about right?

Third question:
When you say the edges are often non-stick, are you referring to the edges of the main sheet or is that to include any cut edges from pieces you've cut away as well? Also, how far in from the edge is it non-stick?

Which brings us to this:

"I once tried masking to the edge of the BMF, in a hope it would allow removal of the mask to reveal a cleaner line, it didn't work. But it may assist in cutting cleaner edges."

Maybe it's because I'm just a dough - head, but I'm totally missing the context of the whole paragraph. I'm not sure what's happening here.
 
LOL, Thanks- Glad you found them helpful, I tend to be a bit long-winded when typing.. and type as I think, sometimes it's a bit of a mess.

Let's see if I can help clear up (what was picture perfectly in my mind, but didn't translate so well to my descriptions).

When you say, "rod/ball" hand steadier, I'm thinking you're referring to a mahl stick....is that correct?
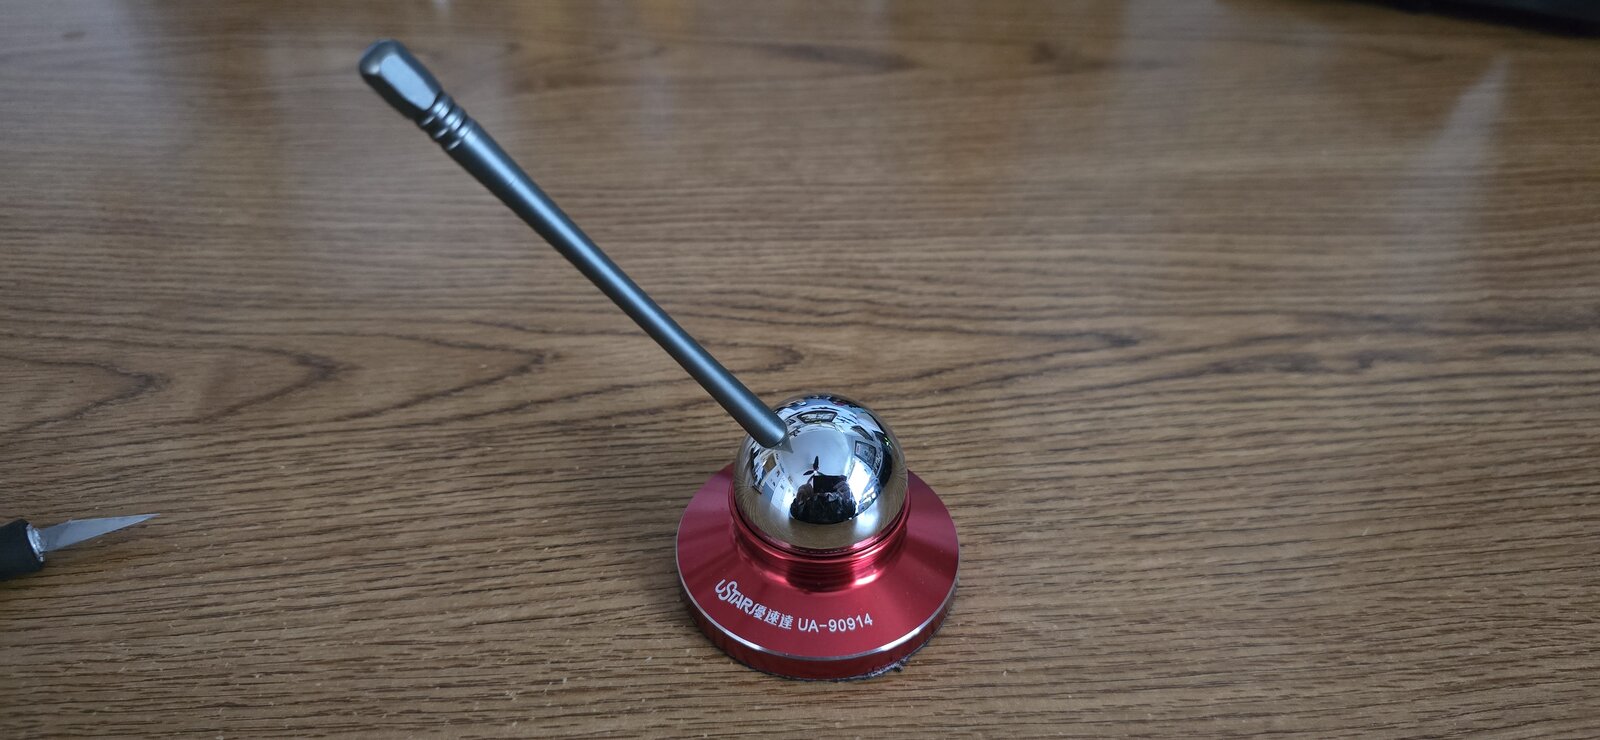
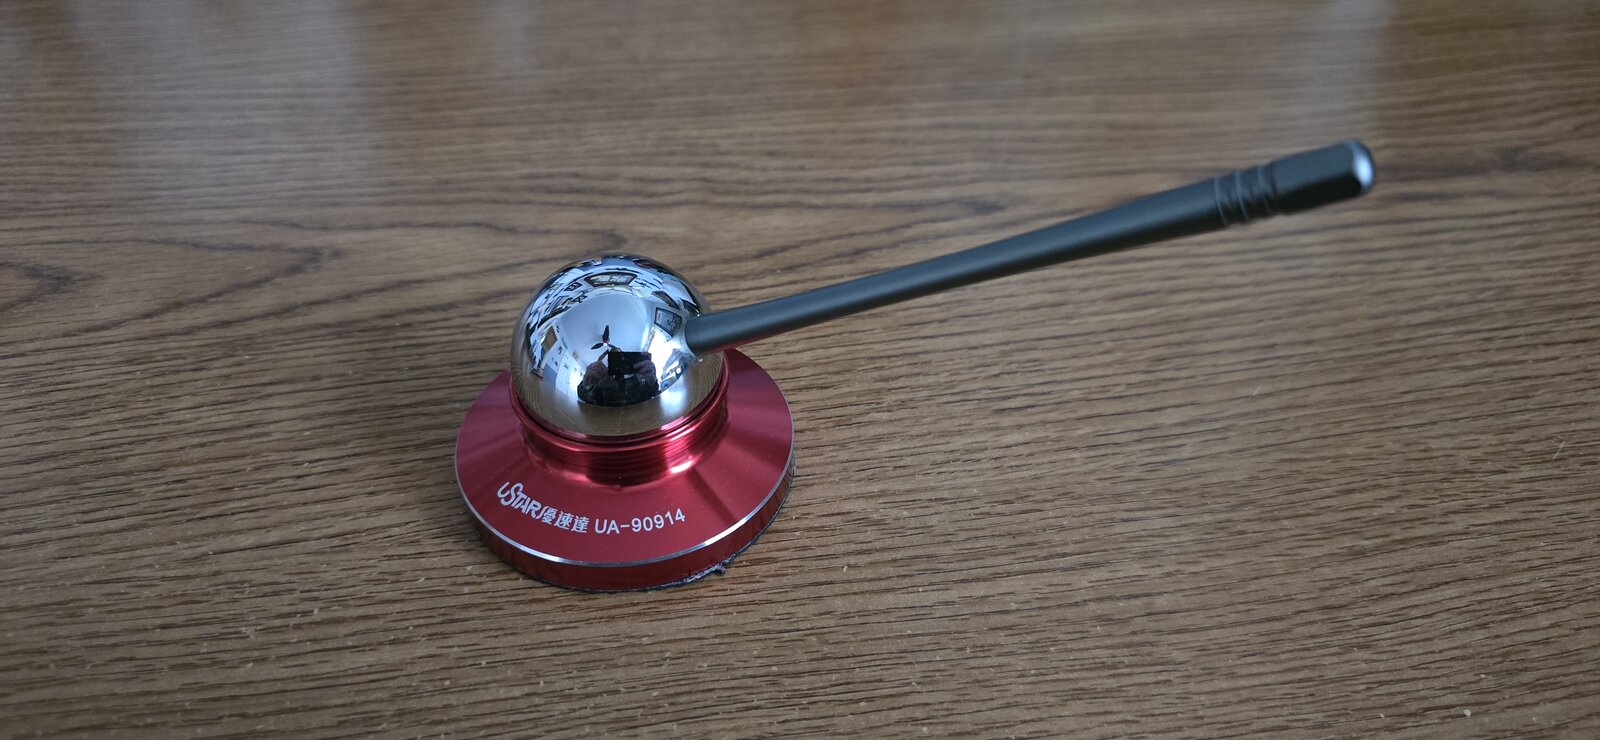
Not sure what a mahl-stick is, but I was referring to what I picked up on Amazon. It's a ball and rod, seated in a mount. It's very well machined and the ball sits in the socket with almost a suction seal, freely rotating and moving while maintaining a steady base.
It sounded like a good idea, and it does steady one's hand. The problem is it doesn't make straight lines. See photos below. If the correct term for it is mahl-stick, I learned something new. :cool:

When you say you're using the entire blade laying parallel to the cut I'm trying to visualize that. What I came up with is that, instead of using just the tip of the blade held at about a 60° angle, like I normally do, I might want to try bringing the angle down to as close to zero as I can get and still have pressure on the point rather than the heel...?? Does that sound about right?
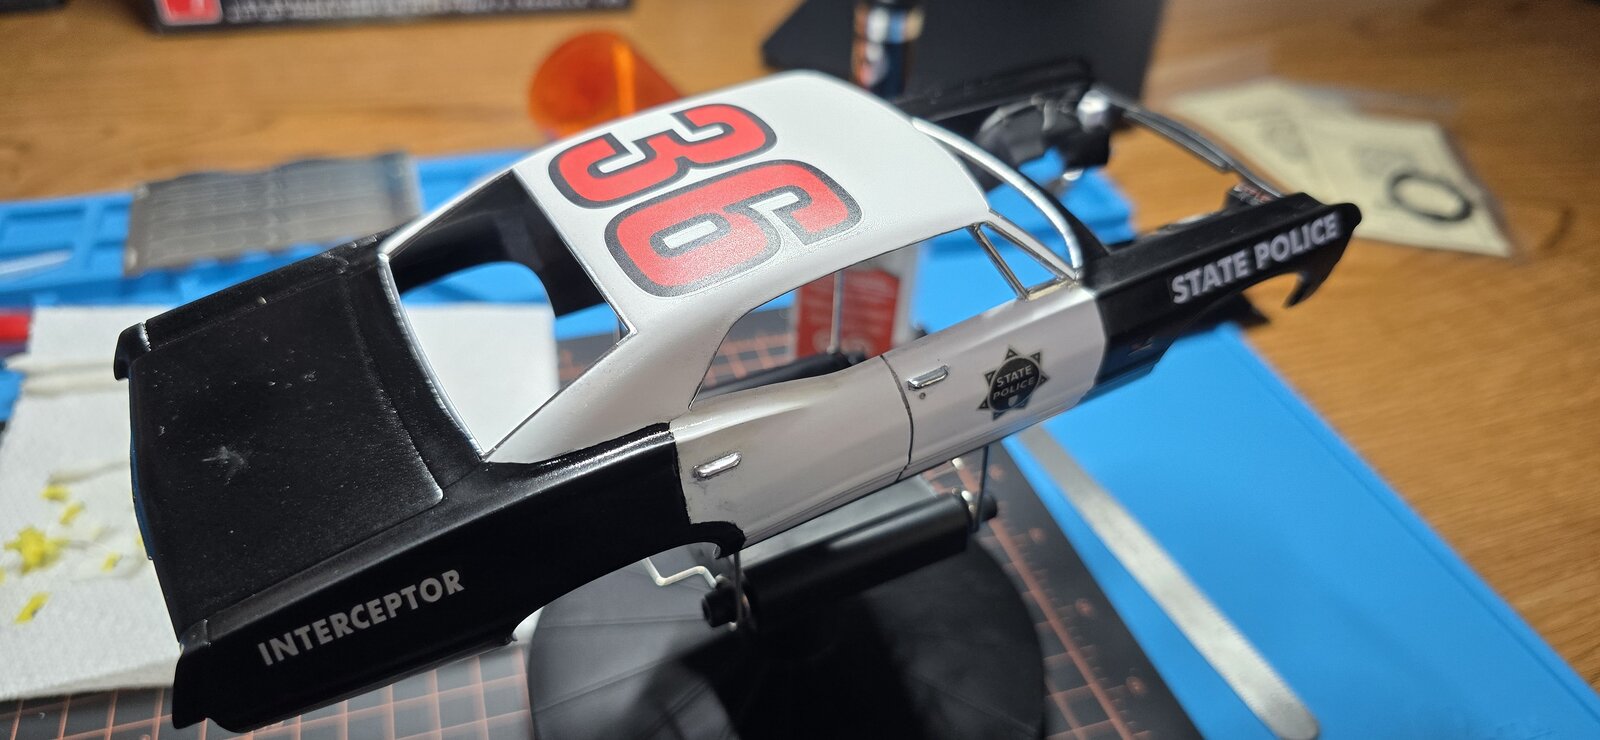
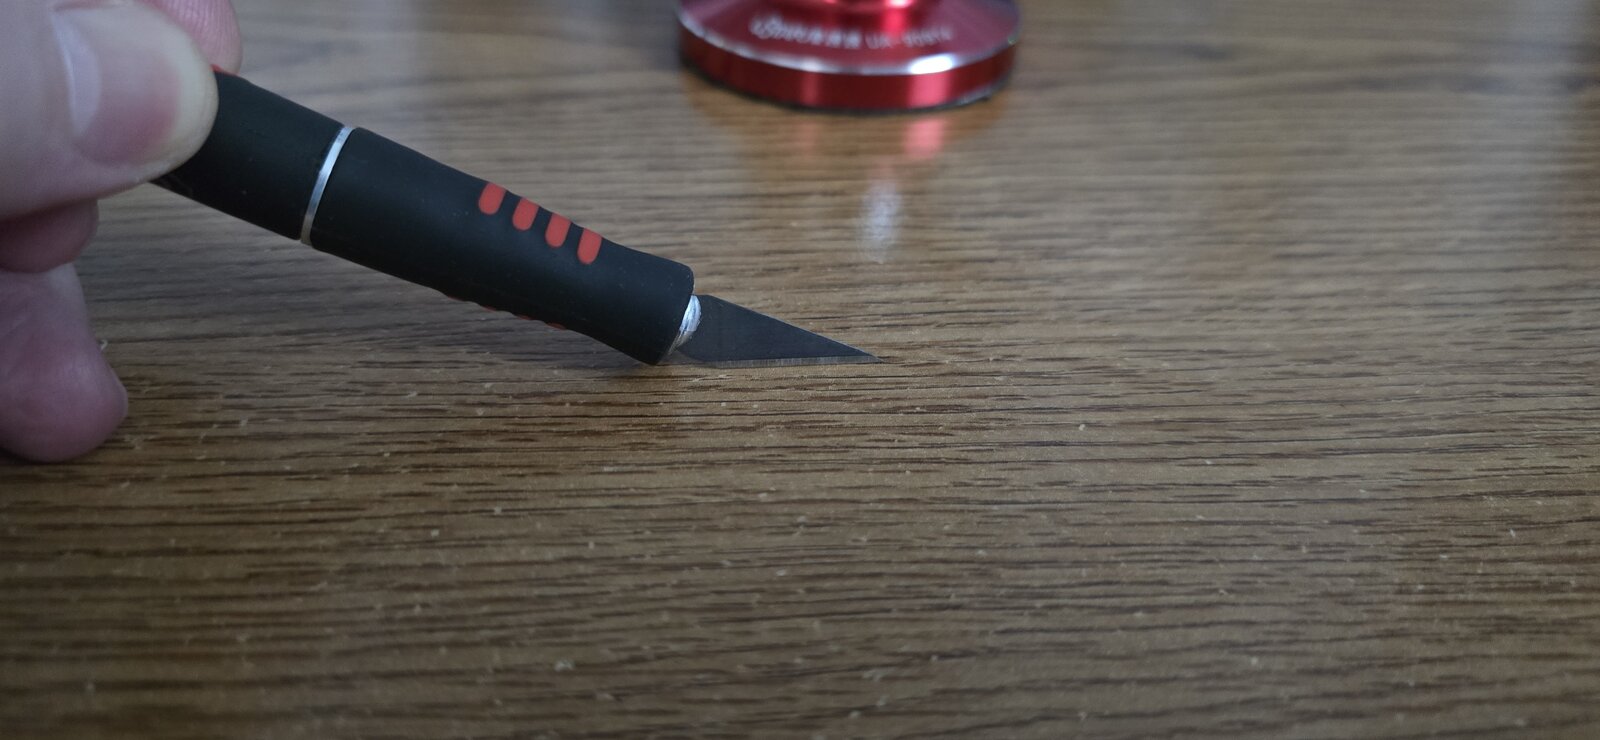
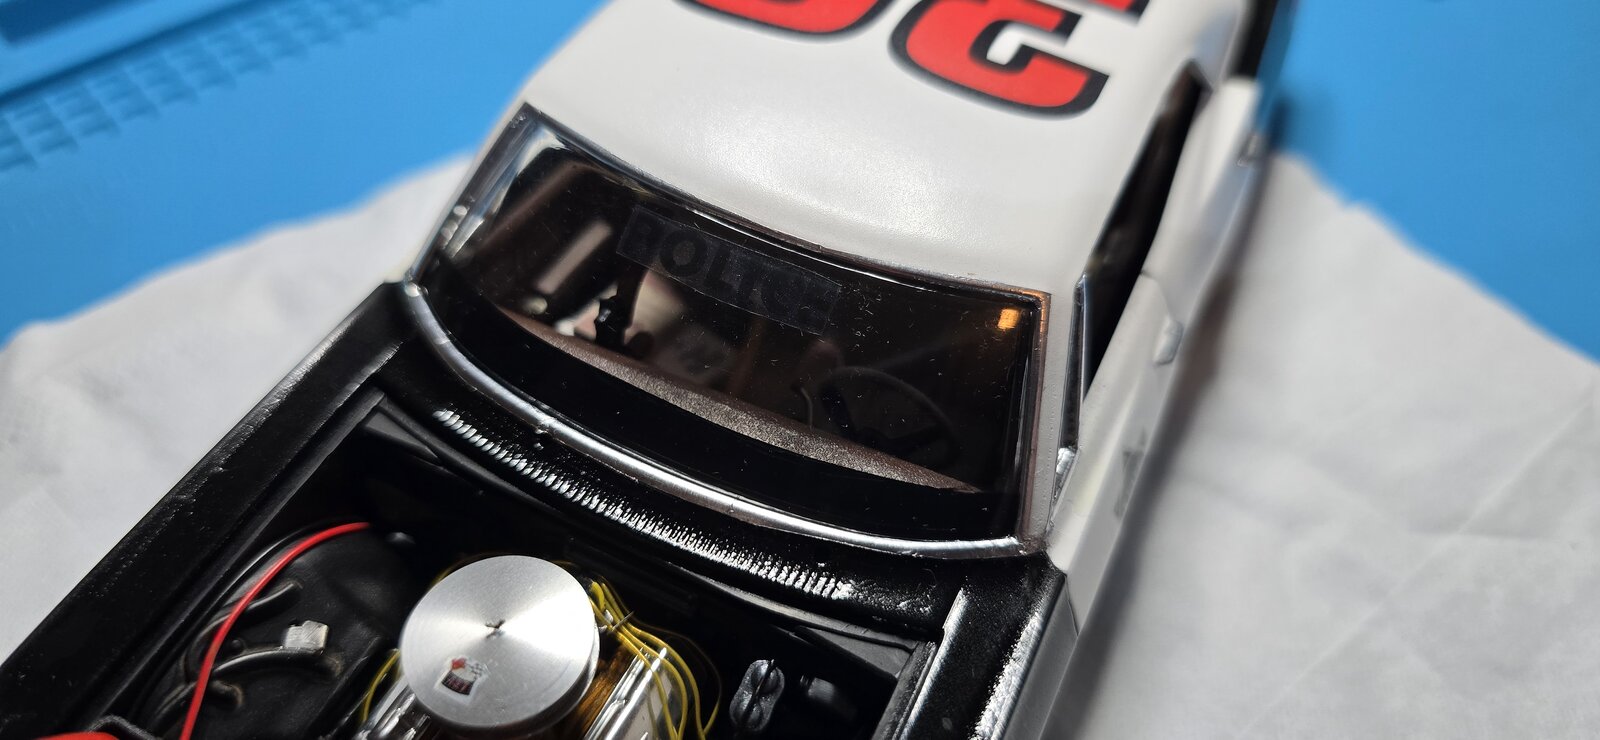
In a nutshell yes, my idea behind this was with the blade angled "down" onto the edge, you'd get a sharper edge. Typically, using an Xacto, I tend to use only the point (holding it at a 80-90 degree angle, when holding it "lower" at say, a 30 degree, more blade is in contact, giving you a straighter, cleaner edge. This seemed to work for me on my latest build (the photo I shared in my previous post) my previous attempts tended to have a more "wobbled" cut, as I was using only the tip of the blade. By hold the blade at the angled picture (see photo below) I was able to get a cleaner, straighter line. Of course this only works on straight lines, but I was able to get a clean curved cut on the top of windshield trim, which is a gentle curve. My latest build was the best BMF application I've ever had, see photo below.

When you say the edges are often non-stick, are you referring to the edges of the main sheet or is that to include any cut edges from pieces you've cut away as well? Also, how far in from the edge is it non-stick?
Ok, this one is easy and I should have been more clear. the edges of a BMF sheet are non-stick, about 5 mm, +/-. This is also pointed out to you in your instructions sheet, included in your BMF packet. So, not really insights, just something I tend to forget when cutting strips from the edge. It's a good reminder.

"I once tried masking to the edge of the BMF, in a hope it would allow removal of the mask to reveal a cleaner line, it didn't work. But it may assist in cutting cleaner edges."
Again, my fault, thinking as a type, LOL. I was referring to laying masking tape along the edge of the intended part I was going to cover with BMF. My thought was, as the tape would be a "straight" line, I could use it like a mask. Tape along the edge, then put the BMF down over the part I was covering (and the masking tape along the edge) so when done, I could remove the tape (and theoretically) the BMF, leaving a clean edge. It didn't really work. It may, if you're able to cut along your edge, then remove the tape, but it's an extra step that you don't really need if you can cut a clean line. Does that make more sense? Maybe using panel line tape, and then panel line cutter, then pull the tape off, leaving a clean BMF egde? This last part is theoretical, and I haven't tried it. If you do, share your results, (both good and/or bad).

I hope this clears things up, I'd like to reiterate, I'm no expert. and still a neophyte modeler, I'm sure there are multiple folks on this forum who have better suggestions and get better results. I think it's one of those things the more you do it, the better you get, but you can still get a crappy edge if you're not careful.

Good luck!! :D
20251204_122836.jpg
20251204_122841.jpg
20251204_122900.jpg

20251201_082745.jpg
 

Latest posts

Back
Top