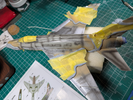
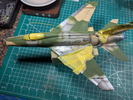
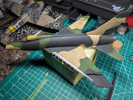
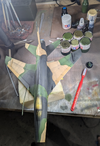
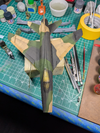
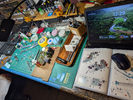
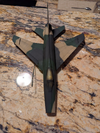
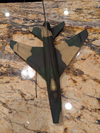
"Century Series" #1 "The Hun" 1/48 from Trumpeter

Partially true. Gauzy Shine Enhancer from AK is the only clear that will not affect the metallic effect that other clears do. The Alclad on my F84 was unaffected. View attachment 149365
Very good to know! There are so many new products it's impossible to keep up with them all. Also good to know that coatings science has finally solved this problem.
 
I was able to put a heavy dose of LP-9 on top of the metal with no issues at all. I'm not planning to polish this, the shine is a bit too much if anything.

Here's a quick before & after of applying the gloss-clear.

1748810356992.png
Before, just the AK Extreme on bare plastic. ^^^^

1748810342509.png
After, one heavy coat of LP-9 with MLT. ^^^^

Plan now is to mask off the white underside with sticky-tack-worms and start on the SEA camo with the tan being 1st.

I think I'll let the lacquer dry for 48 hours before molesting it. Patience is a virtue that can be painful to acquire.
 
Always trying to experiment with new techniques as I learn...

1749924170362.png
1749924200385.png
1749924218792.png

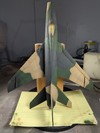
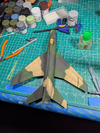
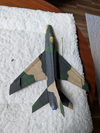
I've had good luck with pre-shading for single-color top coats. But when using two or more colors on the camouflage I tend to lose it a bit, I am starting to put my paint on heavier due to lessons learned the hard way, and that is obliterating the shading to a large degree. This "SEA" camo is no different.

1749923161393.png

This is after 3 or 4 passes of lighter and darker color over each of the three base colors. Several problems are apparent, but nothing too hard to correct. The biggest issue, and I'm calling myself lucky, was a ghost seam coming out on the top of the fuselage. I am placing the blame on myself of course, but I think the heat of my garage (where I paint) caused putty to break loose. Saying it was luck that it showed up early, I filled it with clear CA, sanded it, and continued.

1749923350771.png
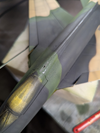
This closeup is after the rough sanding, before I polished it and continued painting. You can see I ran the entire ridge too, just in case.

There was another thread here this week about lighting and the impact of it on apparent colors. So bringing it inside to let the 2 or 3 hours of painting settle down before having another round. You can see different variations under my bench LEDs. The leading edge "slats" are the wrong desert-tan, but that will be an easy fix too.

1749923618992.png

I am using my PS-771 for the post-shading, turning the liquid valve to nearly closed and limiting needle movement to almost nothing. Also using paints/inks that are thinned between 75 and 95% thinner for this, so it might take days to get what I want, but I am enjoying the process. The hardest part is keeping the edges of the colors, where tan meets dark green is most evident, and you can see several spots that need attention.

What makes it a problem is...I cannot correct the delineation with 10% paint, so I have to swap out with my 50-50 mix then back to my hyper-thinned mix. So far I'm keeping it fun, which is why I am taking long breaks. Well, that and the 90 degree heat.
 
Last edited:
太棒了!小号手 1/48 F-100 的涂装和做旧效果看起来非常漂亮。我喜欢它逼真的涂装和对细节的关注,尤其是在驾驶舱和面板的线条上。感谢分享如此鼓舞人心的项目!
 
I noticed something today that I am not happy about. I've known for a long time that light source and type had an impact on the color seen by our eyes. Kind of a duh statement I know, but it jumped out me hard today, here are some visual examples....

1750361619096.png
This is taken on my spray-bench in the garage. Tons of lighting provided by photography-centric lamps.

1750361561122.png
Taken on my build-bench with two very bright LED lamps overhead.

1750361608783.png
Indoor shot, no lights, but a window only a few feet away. This is the lighting condition that really scared me, almost no differentiation in the two greens.

1750361638736.png
Taken in the kitchen with the incandescent sink light on, notice the three bulb reflection.

1750361649728.png
Same spot, just turned on the extra lights so visually much brighter, but not a big difference in the apparent color of the greens.
 
Not sure what to do about it at this point, I fear I am worrying about nothing, but I cannot live with essentially a dual color camo.

Unrealistic to try and darken the dark green, I was already thinking it is almost too dark. Could try to lighten up the light green, but do not want to make it bright or anything like that. I might try to mix a drop of white in with that green, and thin the crap out of it for an effect similar to a filter. Or I could just ignore it and continue.

Any thoughts? Ideas?
 
...so complicated!
In addition to lighting...
Dunno if you saw my thread where we talked about how the background influences both the perception of colour and how a digital camera tries to colour balance the shot to certain parameters which you may or may not be able to control... :(
Don't do anything drastic!

In the end, I think you'd need to paint with a specific display or photo situation in mind. It will always look different if you place it in different environments.
 
As BarleyBop says, look at them and take pictures with a neutral gray background, such as a photo gray card, and under the same light as there will be in the display area. Then evaluate the colors. To me, the dark green looks almost black in these photos. I would lighten it slightlybased on these photos. Evaluate using a neutral gray background.
 
I saw actual Indiana ANG F-100s in Vietnam camo 50 years ago at an air show. The contrast between the two greens on the real planes was exactly like what you are showing. I would not do a thing.
 
Thanks for the feedback fellas!

If anyone else has toughts please speak up, I'm wanting to try and wear off the flat uncoated acrylic covering that clear-coated (with lacquer) burnt metal.

I do have a finished result I am hoping I can pull off (pun intended), I want to make it like this...

1747356550667.png


1747356668149.png


Now that I am looking at my reference materials again I think the color is good, but I need a TON more fading effects first.
 
In those two pictures it looks as if there was paint applied over the tail section. It was burned off, leaving the pattern shown, with heat-treated metal exposed underneath. Note how the most burnt areas are between the internal framing as shown by the rivets. This would be under the portion of the vertical tail, whereas the portion under the rudder is burned clean.

I suggest leaving the metal coloring of the tail area, but masking portions of the surface with a liquid mask where the metal shows through the partially burned away paint. Apply a fatigued paint color, then remove the masks and you should have something very like these photos.
 
@Littlemarten you might recall me saying that I found Tamiya acrylics to be fragile. I have a good example from this morning to illustrate what I mean.

1750520271656.png

That little white looking mark near the middle is a scratch in the paint. Cannot say how I did it, but using my lupe, the plastic is not damaged.
 
you might recall me saying that I found Tamiya acrylics to be fragile. I have a good example from this morning to illustrate what I mean.
Not at all my experience. I have a compound hunting bow, partially painted (to remove the maker's logo) that I've carried through miles of brush of hostile dispositions for years. No scratches. Paint was applied with an airbrush, ~1:1 paint to 90% isopropyl alcohol thinning solvent, no retarder or flow aid. These days, I'd definitely use their retarder, which makes airbrushing their paint much less demanding.

When airbrushing acrylics, a clean surface is a must, even with alcohol solvent paints. Before starting assembly, I wash all the sprues in warm water and detergent, rinse them thoroughly, and use blown air to dry them. That does it for cleaning anything that will be painted on the sprue. Once parts have been assembled, I wipe them down with ethyl alcohol to make sure there is no skin oil or other contaminant before painting. Even my desiccated skin leaves oil on the surface. Tamiya X and XF lines are alcohol soluble, so they are slightly more tolerant of surface contamination, but nowhere near as tolerant as other hydrocarbon solvents.

If I recall correctly, you like to apply the paint in thin coats, and I think I recall you thinning it significantly more than 1:1. Correct me if I'm recalling incorrectly. Building up thinner coats is good technique—but too thin has to be avoided. This is because the paint has to be dense enough on the surface for the individual spray particles to touch, coalesce, and begin polymerization. Too thin a coat results in "dusting," which can be too fine to see even with low power magnification. This results in a weak paint layer, and the only cure is to remove it and try again. Applying more layers over it will not improve the situation.

I always found Tamiya paints more difficult to airbrush than aqueous paints, especially in conditions of varying temperature and humidity, which affect them more than aqueous systems. I find Tamiya retarder really helps regardless of application method, as does having air conditioning and a more controlled environment.

Do you use a primer coat? For decades I used Tamiya XF-19 Sky Gray as my primer coat. Adhesion was never a problem.

Now, all that said, it is entirely possible that Tamiya has changed their formulation since I last bought a bottle, some time in the 1990s. If that's the case, your best bet is to use a good quality acrylic primer. Once you have a good primer coat on the surface, you can spray paint at "filter" consistency and it will bond to the primer.
 
If I recall correctly, you like to apply the paint in thin coats, and I think I recall you thinning it significantly more than 1:1. Correct me if I'm recalling incorrectly. Building up thinner coats is good technique—but too thin has to be avoided.
That is me yes, I have found that there's a need for a clear coat as soon as it dries enough. I can try to spray thicker base coats, but there are 10-15 layers of paint sprayed extremely thin as if what they call a "filter" that I do as post-shading. I found pre-shading harder to control by the time I came to the end. I'm really afraid of filling in surface detail with primer-color-clear-weathering-clear. Guess the last one wont matter but the color layer is always more than one, often more than 10 layers.

Do you use a primer coat? For decades I used Tamiya XF-19 Sky Gray as my primer coat. Adhesion was never a problem.
Depends. If I am making a higher effort on a kit in general (because it was expensive) or one with very well defined features (lines and rivets and panels), but if I note the surface details are thin or poorly defined I might skip that. If I use actual primer it is Mr. Surfacer 1,000 or 1,500 always with MLT. If I do not prime it I will definitely wash it down with alcohol and blow large surfaces clean with compressed air.

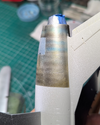
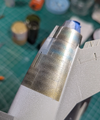
On this kit I did not prime it, but the colors you see are on top of a base of "AK Extreme Metal" which I had intended on having at the end. Silver Super-Sabers look awesome! But I found the kit has surface irregularities after I molested it by soaking in super-clean to remove the "Vallejo Metal Color" that puddled up initially. That saga is covered on page 1 :-(

What I've resolved myself to is clear coating my paint work as soon as I can, a nice coat of X-22 which I've taken to thinning with MLT, the color is bulletproof. However in the case of this F-100 I'm wanting to get creative with the paint-erosion on the engine's sides. I have begun that process.

Using water to soak the Tamiya paint, I found it to be pretty strong (irony anyone?), I had to scratch my way through with toothpicks. I added about 10% alcohol (the 91% stuff from the local grocery store) and it made a big difference, meaning a fiberglass pen/brush was too aggressive. I wanted a smoother effect so I switched to relatively stiff but not short bristled brushes, I think that about 25% alcohol to 75% water is kind of a sweet spot for the brush work. So far that is, give me time to mess it up, I've just begun.


Write your reply...

Latest posts

Back
Top