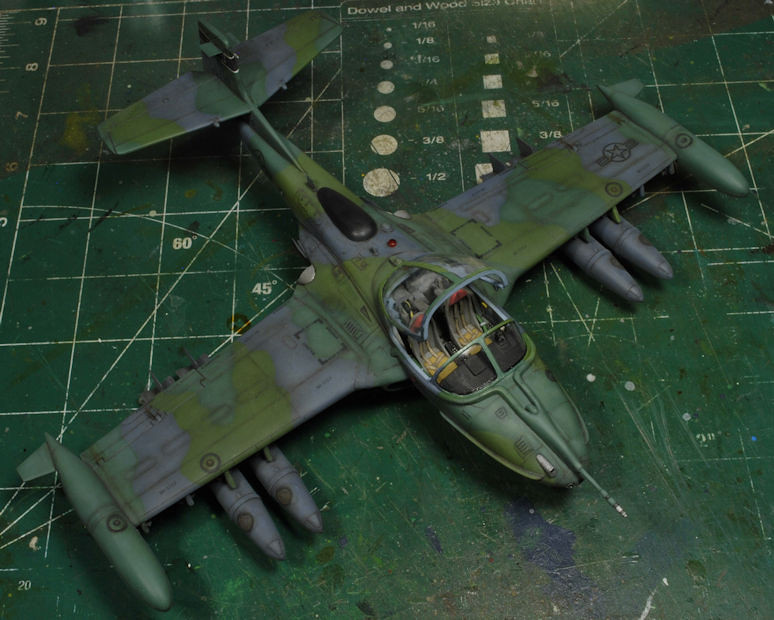
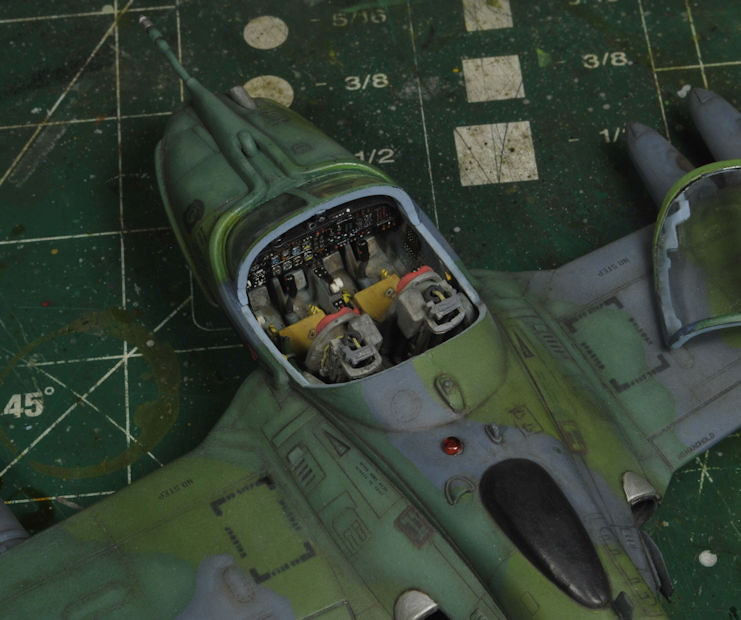
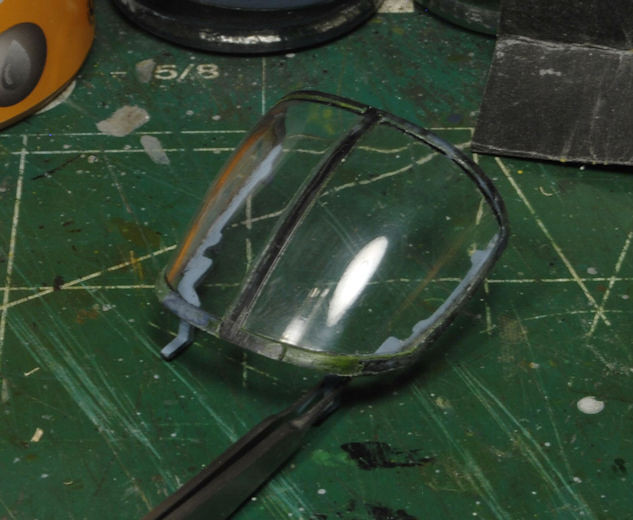
Trumpeter 1/48 Cessna A-37B Dragonfly

Scale Model Addict - Model Tips, Guides, Tools & Tech, Tutorials, and Community

Help Support Scale Model Addict:

Steve Ski

Well-Known Member
Joined
Oct 9, 2012
Messages
943
City & State/Province
N.E. WA USA
24th​ CAMS, Howard AFB, Panama, Call sign, Tweety.

It's been quite some time since I've worked an AC build, quit some time. After looking at what some folks are doing to their kits, I already know this kit is not up to snuff in detail, but I'll work it as best as I can. Most of you already know this is a bit out of my norm, there ain't no figures, sheesh! Lol. In 1/48th​ scale, I wouldn't be wanting to work em anyway. Honestly, I would have preferred a 1/32 scale build, especially on this little rocket, but to no avail. I highly doubt we'll ever see Tweety in anything bigger than 1/48 scale, no call for it.

Regardless, this was a requested build from my former Weapons Shop Chief in Panama. So, here's to ya, Brother Richie, off we go! Funny, he said I was the fastest, but not necessarily the safest, load-crew chief. I don't get it,…… lol.

Ya, you guessed it,……that was long ago, back in 85-87. Good times, I remember. It was a two-year beach party, but somebody had ta do it, right? This was also a great little bird to work on, until you had to work the bomb racks. Yes, keep the Preparation-H close by, especially at 6'-1" tall. I will tell you, from personal experience, that when one of our Tweety's was attacked by the Panamanian Air Force, it was a messy job to clean up. If I remember the season correctly, bird strikes by vultures were not uncommon during the dry season. It was always amazed at the number of vultures that would fill the sky, and the clean-up reeked something fierce!
_DSC0927b-vi.jpg


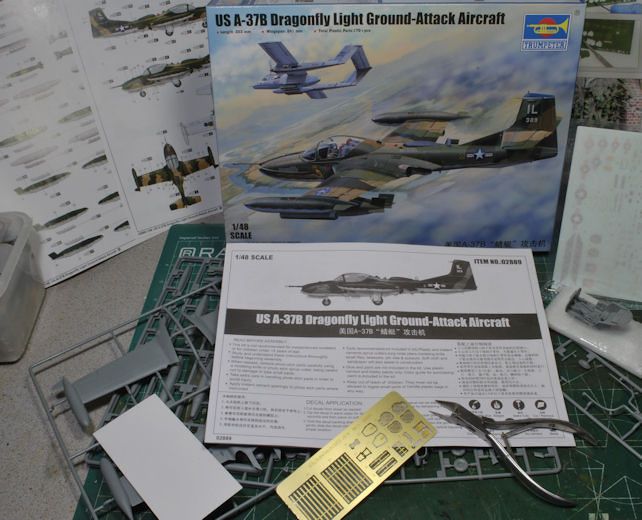
Ok, enough background, let's check out this Trumpeter kit. First off, the kit did get decent reviews, but I have seen prior kits like Encore (Monogram/Revell) with much better detail. Sadly, the Encore kit from 2012 included the decals specifically for Howard AFB, Panama, but is no longer available. I really do need those decals, huh, hummmm! That kit, I understand, even had resin parts, but I could be mistaken, and the actual rocket pods we loaded, the LAU-???. Like I'm supposed to remember that? Yes, I loaded those rocket pods, but were they the LAU-68, 48? I don't remember. I've had two incentive rides in this little Tweety, but I don't recall every aspect of that cockpit either, HA! This was a fun bird to fly, btw, leme tell ya.

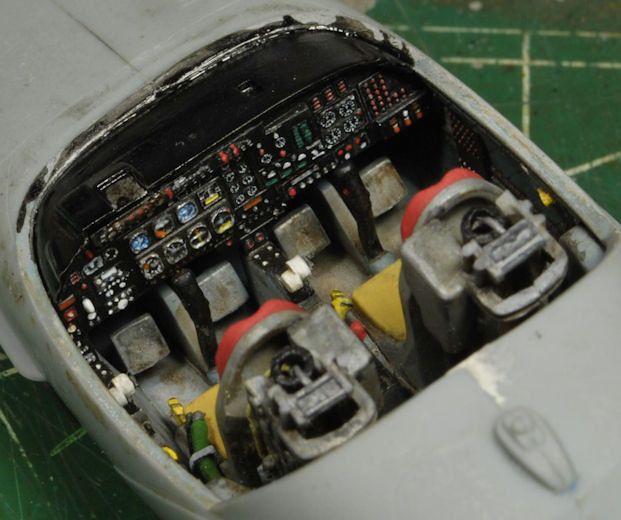
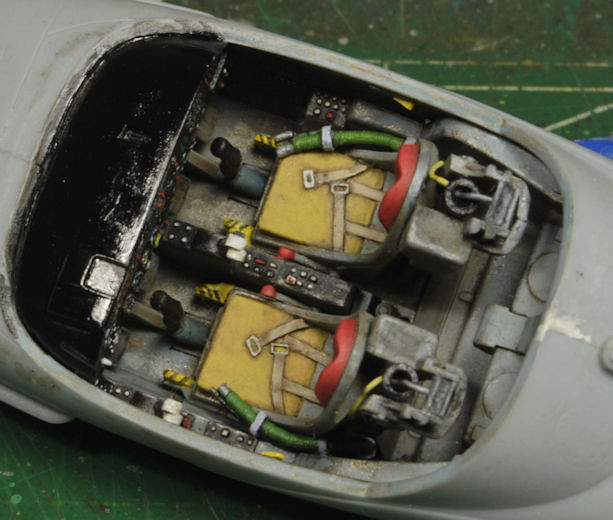
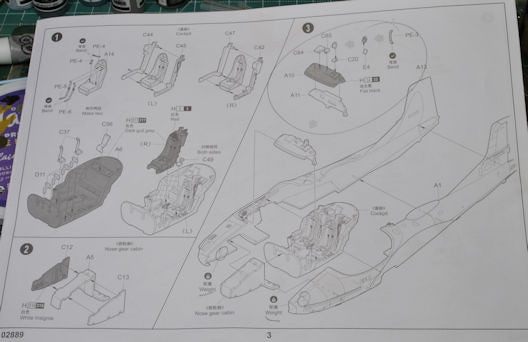
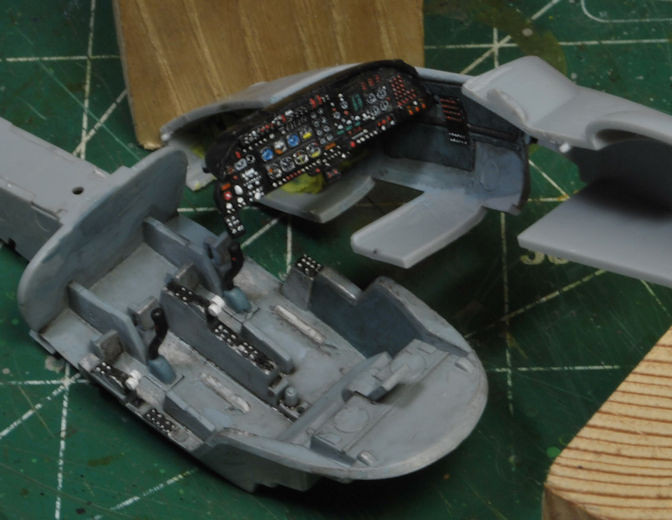
The Trumpeter cockpit is pretty weak on detail, so I am adding what I can. It's not a show stopper, just a bit more work to get decent results. After all, who hasn't had to refab, convert, or scratch build parts or details? It's part of the fun, IMHO, so it's not really a big deal for me.
_DSC0951b-vi.jpg


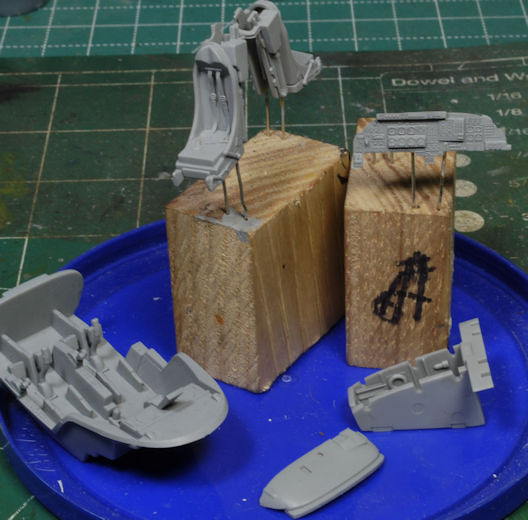
The instructions for this kit are very basic, very simple, because, well,……..this is a very simple kit. I found the mold work is very good and the fuselage fits together cleanly, no hassles. Everything fits as it should, one for Trumpeter, and nothing was a headache at all, so far. My biggest concern is getting parts pre-painted in the proper sequence. I'm keeping close tabs on the assembly order to avoid any redoes.
_DSC0929b-vi.jpg
_DSC0933b-vi.jpg


Not clearly seen is the putty I crammed into the nose, above the wheel well, which is the ballast for the down gear position. Very kind of them to remind a non-standard bird builder. That's two for Trumpeter! Only thing, I hope it's enough weight, HA!
_DSC0940b-vi.jpg
_DSC0941b-vi.jpg


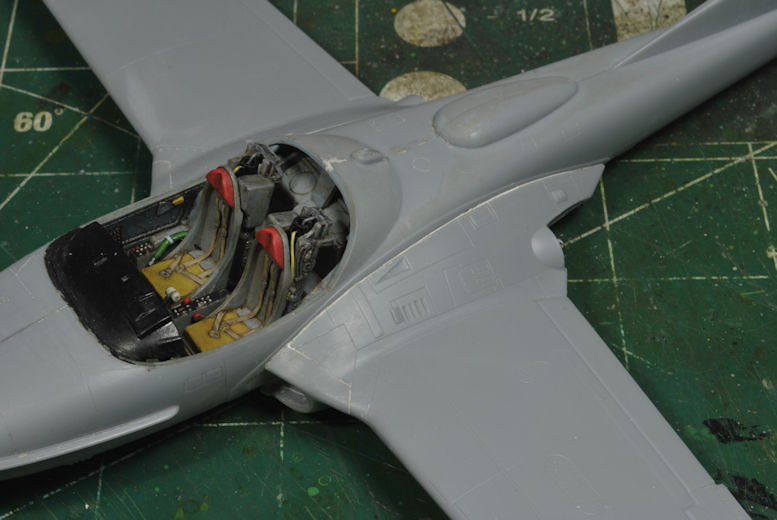
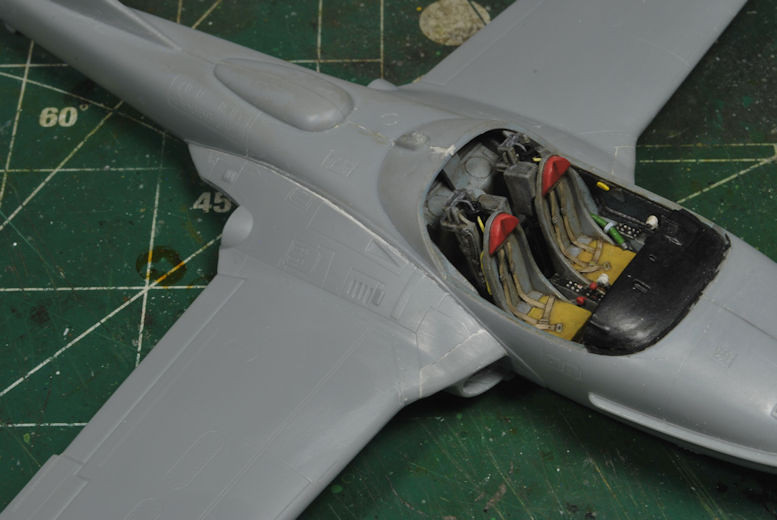
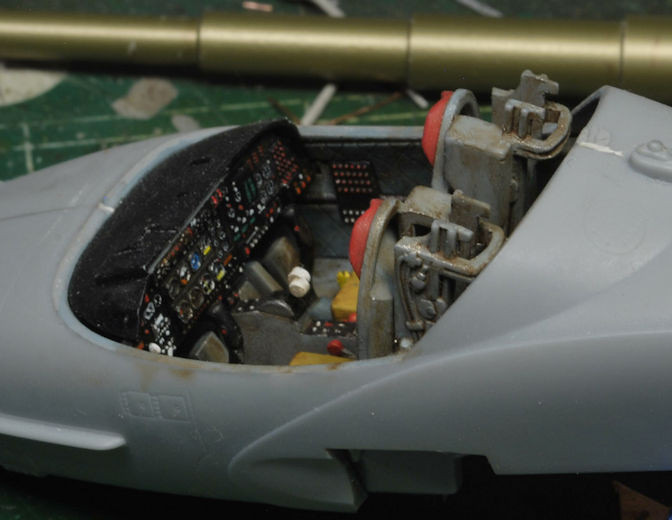
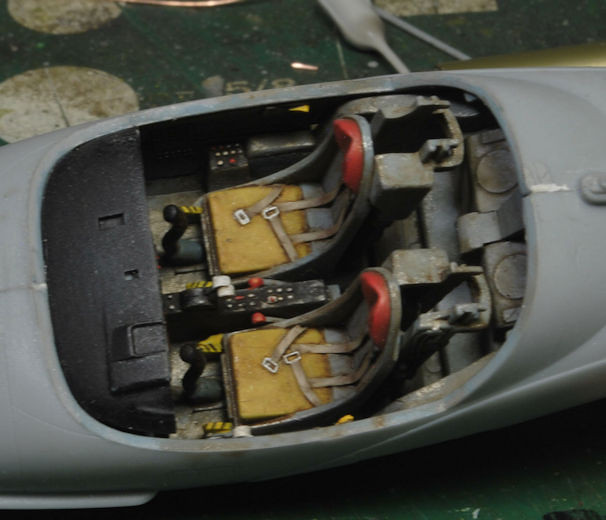
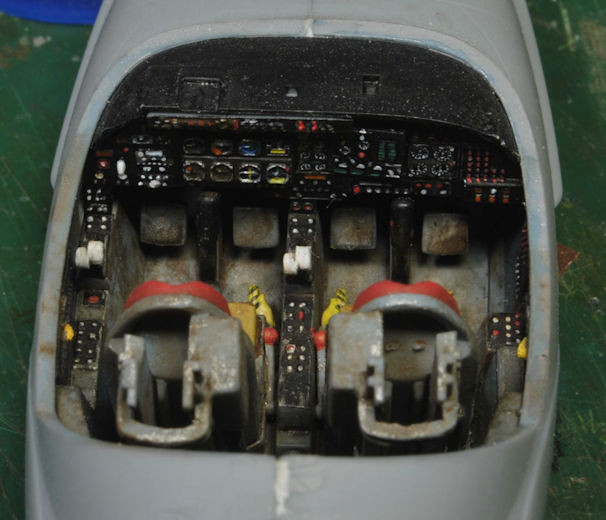
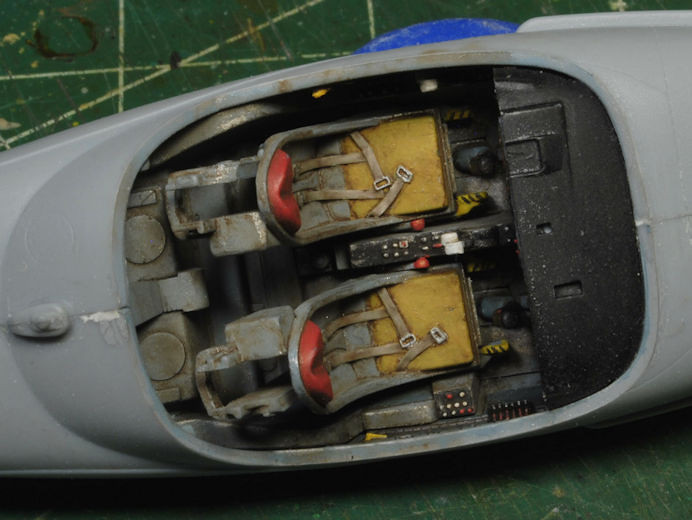
I was getting antsy to get the cockpit enclosed so I could add minor details where they would be visible. There's a lot of working space behind the ejection seats, which helps a bit. The instrument panel has some decent raised details, but why would you use decals for a raised detailed instrument panel? I had to use more than a bit of Micro Sol to get some of them to indent, and somehow my fingers must have touched the main flight instrument decal, because when I went to dap some MS on it, it was gone, woof! Aaaah, I couldn't stop laughing, how much of a bozo does one need to be when working such tiny details? Don't answer that. No worries, I broke out my "Tartan" brushes, that's a 0000 Windsor & Newton fine point, btw, and got to work using some excellent reference photos. I think I did the panel justice for being so dang tiny.
_DSC0943b-vi.jpg
_DSC0944b-vi.jpg


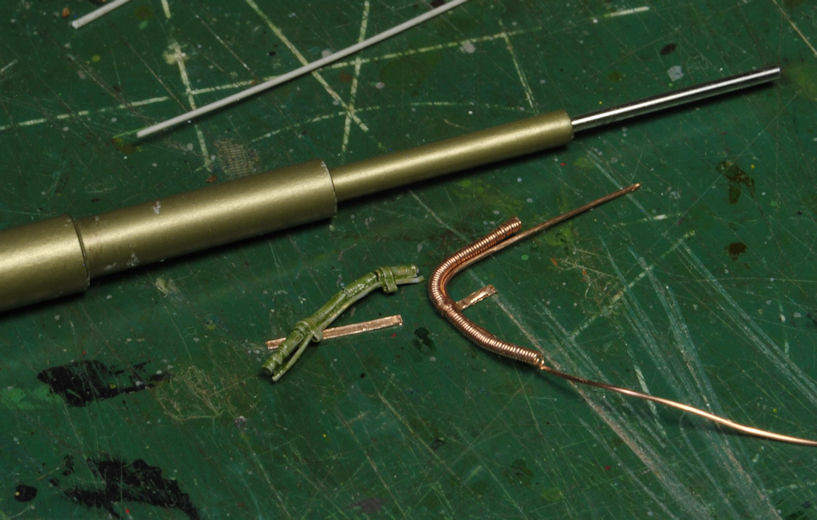
This will end up being in the open cockpit configuration, so I will be adding pins and "Remove Before Flight" flagging where appropriate. Any detail I can glean from my reference photos and be able to fabricate, I will. The oxygen hoses are seen below, one installed, the other in process. I used some very thin copper wire coiled around a sewing pin, then I slipped stretched sprue through and lightly heated it to form it. There's also a few cables and connection hoses in some of the photos, but one will get the point across well enough as that portion is tight on space. Also, the throttle side switch will be added. I can't remember if that was the trim tab button, not sure.
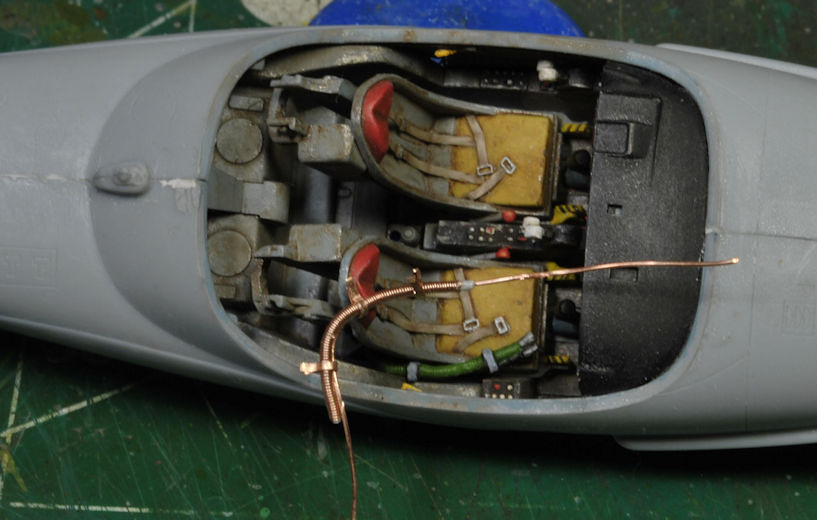
_DSC0946b-vi.jpg
_DSC0949b-vi.jpg


After the oxygen hoses are completed, I will work the ejection seat piston dead center rear, another detail missing by Trumpeter. It has a brass-colored shaft, black top portion with small cables. I will work in whatever I can with the limited space available. I think Trumpeter could have done a more thorough job of replicating these ejection seats, though. That's one demerit for Trumpeter!

So, we're up and running, more to follow soon. Please holler, you bird builders especially, if you see anything needing attention, I'm all ears.

Thanks for watchin. Cheers, Ski.
 

Attachments

  • _DSC0946b-vi.jpg
    _DSC0946b-vi.jpg
    90.2 KB
  • _DSC0943b-vi.jpg
    _DSC0943b-vi.jpg
    63.1 KB
  • _DSC0940b-vi.jpg
    _DSC0940b-vi.jpg
    50.4 KB
  • _DSC0929b-vi.jpg
    _DSC0929b-vi.jpg
    61.6 KB
A little sarcasm goes a long way, Brother? :p;) If you only knew, if you only knew,............ I'm surprised Jakko hasn't stopped by, cause there's a few boofs in there. I want to see if he's on his toes today, HA!
 
As an Amazon Associate we earn from qualifying purchases. Product prices and availability are accurate as of the date/time indicated and are subject to change.
Oh, I had certainly heard of it — I used to have a big interest in the Vietnam War, and it's kind of hard to miss there :) But I only know the basics of it, and never looked at it in any detail.
 
Cleaning up the Cockpit

I wanted to get an update in earlier, but yall know how outside work takes precedence this time of year. Hopefully, once the summer routine gets established, bunker time will be more frequent.

_DSC0954b-vi.jpg
_DSC0955b-vi.jpg


After reviewing what I posted earlier there were several issues that were bothering me, so I went back and cleaned up the cockpit wash, touched up a few features on the instrument panel, and finished the oxygen hoses, plus I added some details to the ejection seats. I'm calling this done for now, but after the camo pattern has been applied, I will finish the HUD and dull down the dash to get rid of that glare.

So, just for the record, the central 6-dial panel is a decal, so is the 4-dial set right center, and the far-left white buttons, lower quadrant. The rest had to be hand painted because, as mentioned before, the decals flew the coop. Those 0000 W&N brushes are mighty handy.

More to follow as time allows and thanks for watchin. Cheers, Ski.
 

Attachments

  • _DSC0954b-vi.jpg
    _DSC0954b-vi.jpg
    70 KB
Wings to Fuselage

As often happens, I thought I had taken photos of the difficult areas when fitting the wings to this fuselage, but nope, sorry. I believe it was a case of the memory card not registering and I was snapping away, unawares, oops. I know there are a few who have this kit, so I wanted to show what difficulties I ran into, but I'll mention them now.

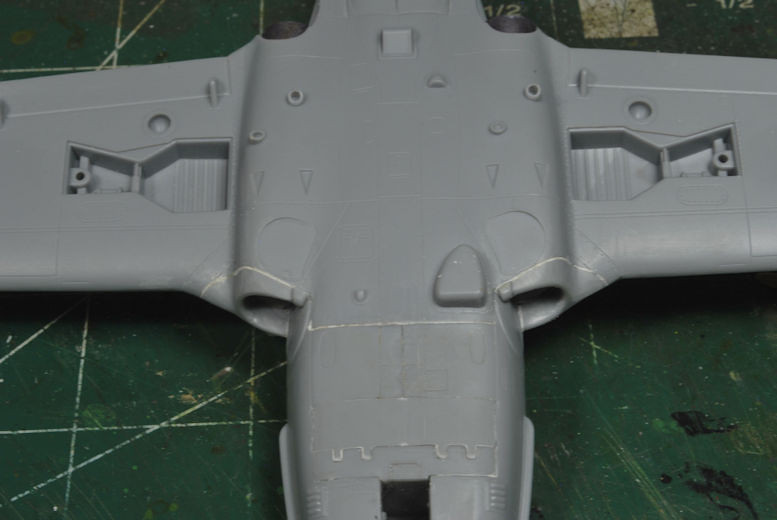
The engine intakes, according to the instructions, are secured in place as well as the exhaust nozzle, just before the fuselage goes on, but be prepared to sand the sides of the intakes. I spent quite a bit of time sanding down the inner portions of each intake, plus I sanded the bottom of the cockpit tub, and trimmed the fuselage sides not visible once the wings are attached. When attaching the wings you will notice a gap up front, or in back, whichever end gets placed first. Using a bright light, you will see inside how the intakes and sides of the fuselage interfere with the assembly, then get to work sanding. I stopped numerous times to check the fit, but back to sanding I went. Plan on a lot, it was several sessions worth, btw.

_DSC0973b-vi.jpg


Once I felt I was close enough and ran 500 test fits, seems like it, I ran a bead of super Glue and put it together. Naturally, when you've got wet glue it wigs out on you and the fit jacks all ta heck, then you fight it before it's permanent. There will be a gap up top along the wing root, but none to speak of below. After dropping some glue into the gap and compressing the pieces together for a minute or so, I ran a small bead of Testors tube putty and pressed it in and cleaned up the mess. There is some touch up to do, but not much.

_DSC0975b-vi.jpg


The intake trim was not exactly sized correctly, so plan on clean-up there as well. Once you've got them where you can work them over it's just a matter of careful sanding to avoid wiping out the panel details.

_DSC0977b-vi.jpg


There is one more final issue I was consistently running into, and completely avoidable, and that was the cockpit dashboard kept getting popped off because of where I was gripping the fuselage when working on the underside. It's in an odd spot for holding the fuselage when you're working on it, so be aware of that.

More to follow soon and thanks for watchin. Cheers, Ski.
 
Prep for Painting

All of you AC builders will recognize my shortcomings right off the bat, so no sense in trying to hide em, onward.

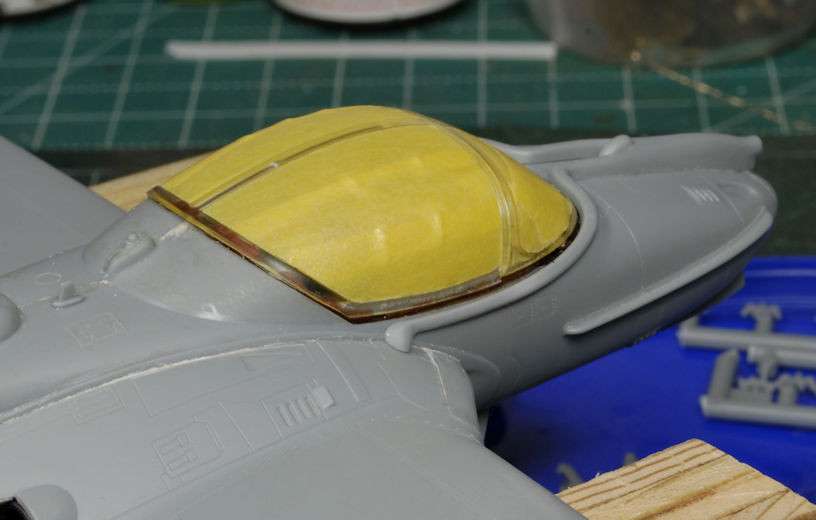
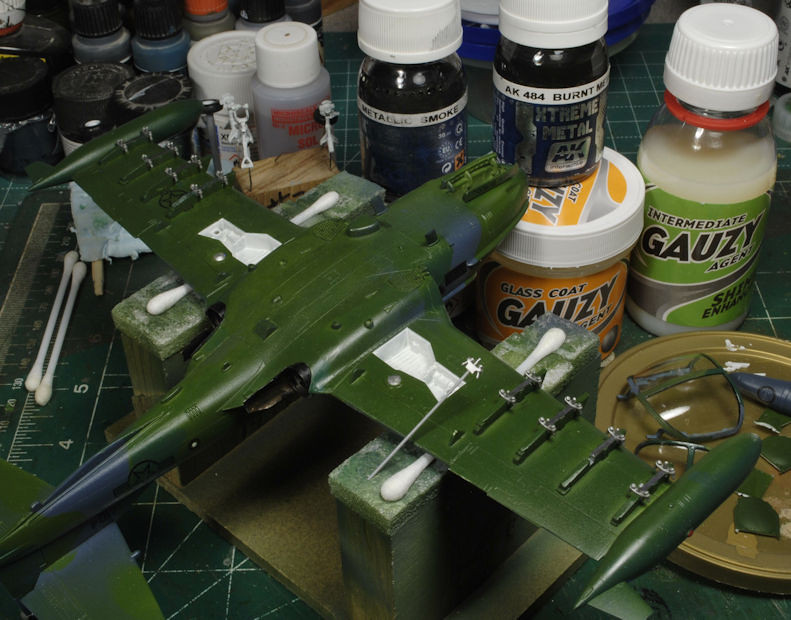
In an effort to keep this build moving along I stepped right into paint prep, and probably wasn't exactly ready for it. Oh, I did get the canopy taped good and bomb racks installed ahead of the instructions, for good reason, but I didn't fiddle with my airbrush enough. I'll explain shortly.

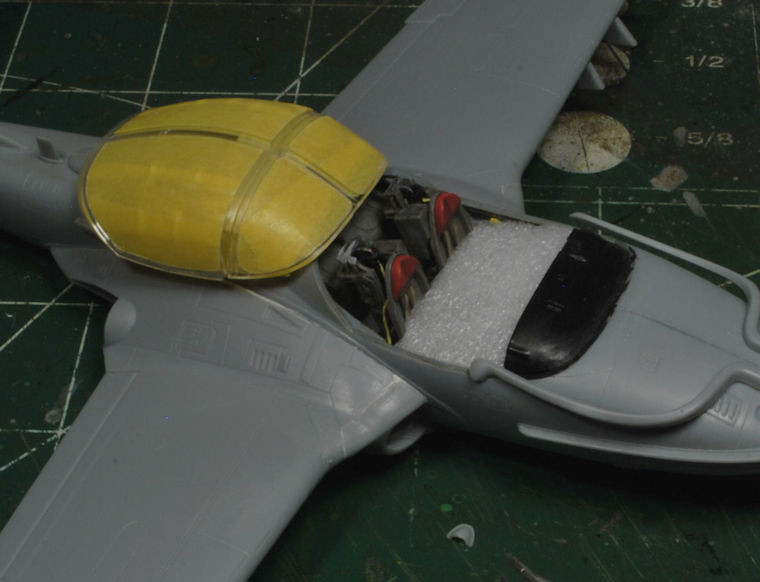
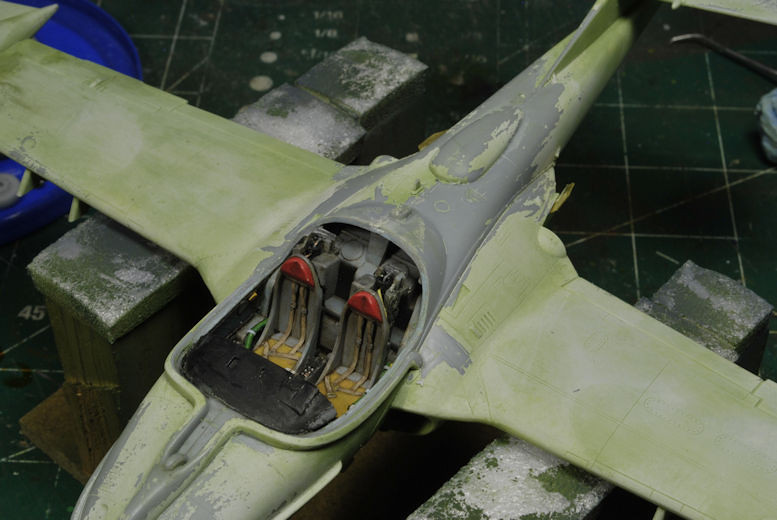
I added some foam into the cockpit to help alleviate overspray mess. I'll soon find out how well that worked, but I think it's fine. I had to sand off some edges of the ejection seats to get the canopy to even come close to sitting in a fully closed position. Normally this would be from the seats not completely set in the cockpit tub, but not here. Not sure what that's all about, but I got enough taken off the top to work the paint session.

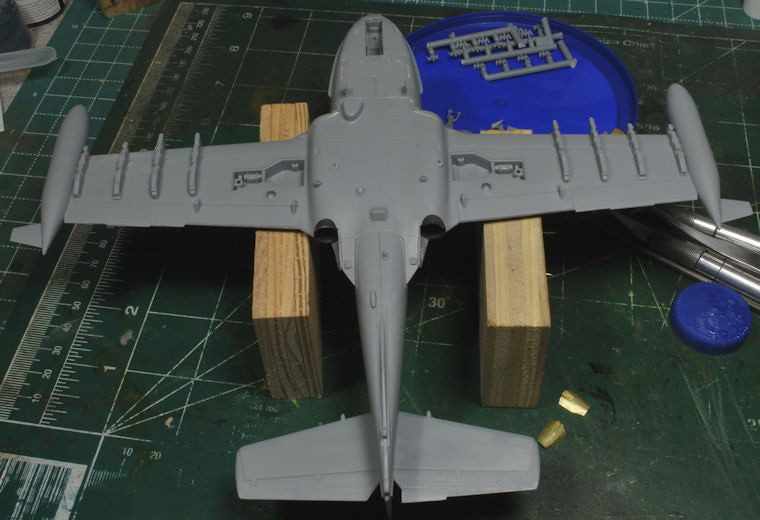
As you can see below, the racks are installed early, minus the bomb sway bolts. If you wait until the recommended step you'll easily lose many of the small fuselage antenna parts that will get knocked off during handling as the bomb racks can be testy to install.

_DSC0109b-vi.jpg
_DSC0112b-vi.jpg


Why I'm feeling confident right now about no overspray in the cockpit is that I used very thin pieces of silly putty along the canopy sill since this canopy would not close completely. I made sure any oozing was cleaned off before the paint was applied. So far, so good, right?

_DSC0983b-vi.jpg
_DSC0114b-vi.jpg


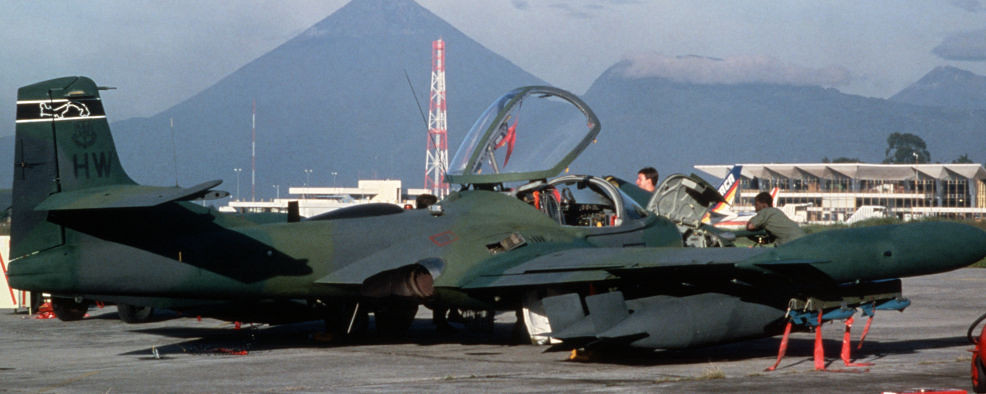
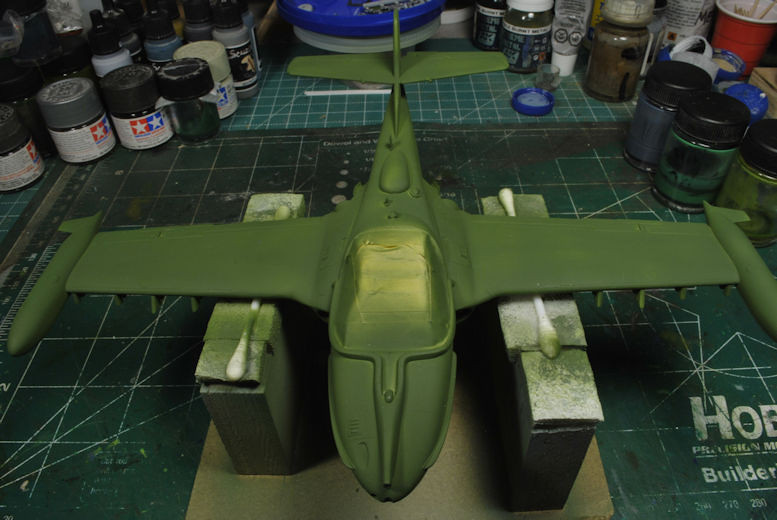
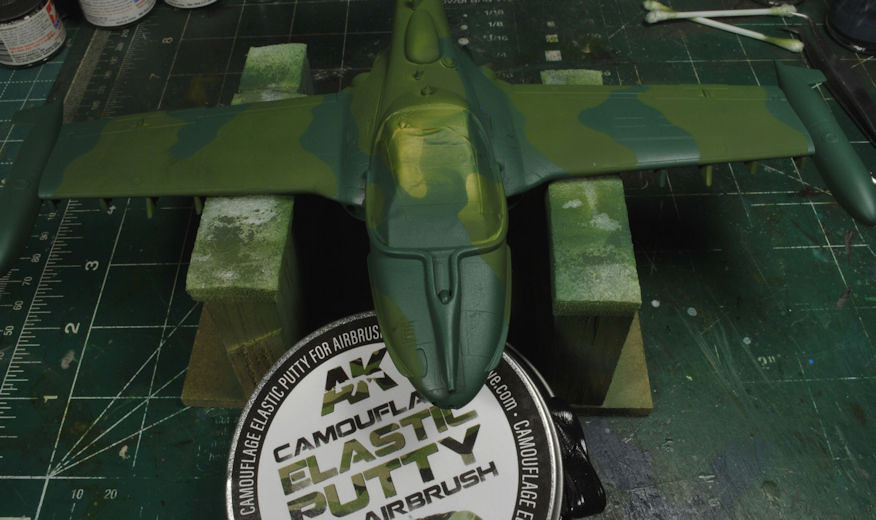
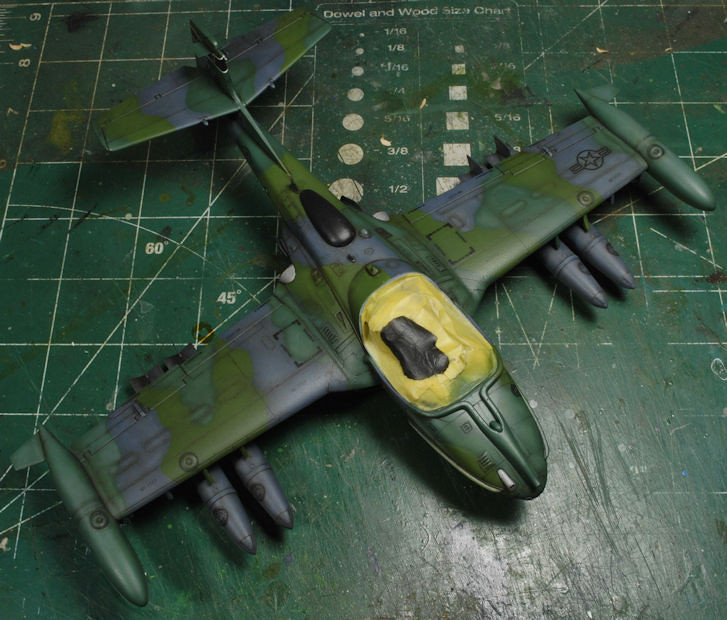
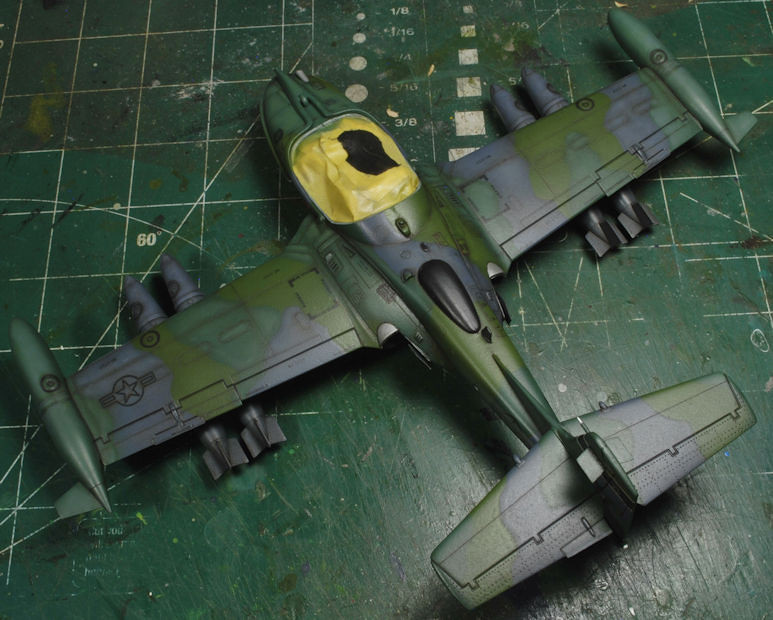
Then came the primer coat, no biggy, using Vallejo's light grey, as I didn't have any black primer on hand. The step I neglected was the panel line definitions after the primer, which is probably a good thing since my airbrush was spitting water. Yes, there is a condensation cup, water separator, but that was not making any difference. I switched to a smaller AB and didn't have any issues once I began the camo pattern. Using AK's elastic camo putty, I was able to get a decent rendition of the actual pattern we would have seen on the flight line in Panama, back in '85-'87. I don't have a ton of photos, but enough to get a fairly accurate idea of what colors went where.

_DSC0117b-vi.jpg
1745705066045b-vi.jpg


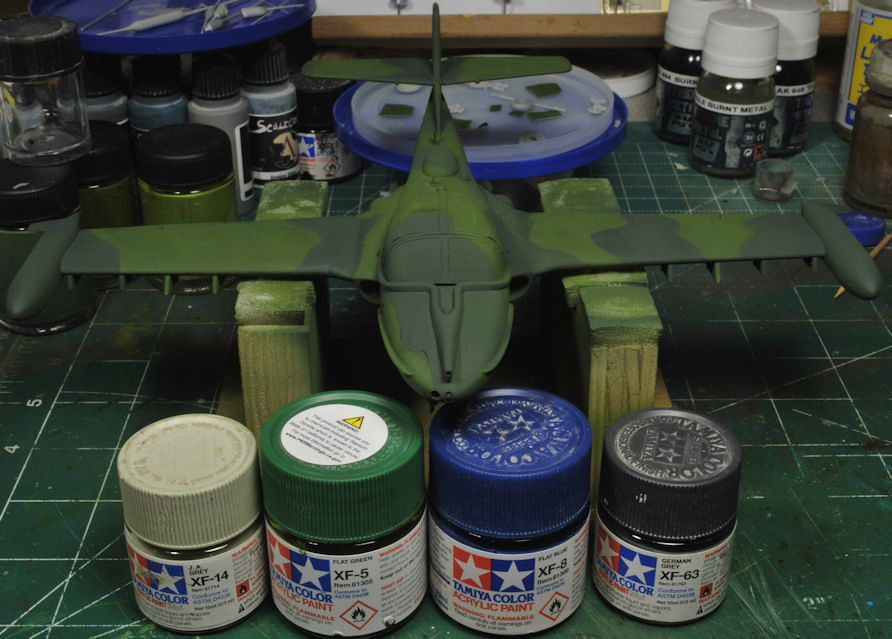
Using Tamiya paint and thinner I was able to get a decent layer placed on Tweety. I used XF-5 and XF-14 for the lighter green tone, XF-5 and XF-8 for the darker green, and I will be using XF-63 with a little touch of black for the grey tone.

Now, having been 40yrs since I had access to the paint barn on Howard AFB, I had to mix my own tones. Some are thinking these are a little dark, but those birds all wore dark camo tones. The O-2A, UH-1N, and the A-37B all had the same paint colors and basically the same style of pattern, and they were all dark. The jungle down there is dark, so went the birds. BTW, there is some room for some very light color modulation on the wings and fuselage, but only if my airbrush cooperates. I will be making some test runs beforehand.

Oh wow, did I say 40yrs earlier? Yep, wow! I built a Revell Heuy while I was stationed there and had my airbrush with me, too, so the paint shop was more than happy to get me small quantities of paint for my project. Looking at that same Huey that is on the shelf today, I'm pretty close.

The grey tone will be tomorrow with modulation following. I'm no pro AB guy, still learning. Hopefully I will remember the final painting sequences so I'm not having to repeat any steps unnecessarily, and get to the landing gear, canopy install, and weathering phase soon.

Thanks for watchin. Cheers, Ski.
 

Attachments

  • _DSC0117b-vi.jpg
    _DSC0117b-vi.jpg
    122.5 KB
  • _DSC0109b-vi.jpg
    _DSC0109b-vi.jpg
    54.5 KB
  • _DSC0983b-vi.jpg
    _DSC0983b-vi.jpg
    62.2 KB
Last edited:
Why I'm feeling confident right now about no overspray in the cockpit is that I used very thin pieces of silly putty along the canopy sill since this canopy would not close completely.


Some are thinking these are a little dark, but those birds all wore dark camo tones.
I see nothing to make me think "that figure painter and dioramist is not up to building aircraft". In fact far the opposite as I said early in this thread!

I typically put the canopy on as a mask with white glue, to seal against overspray (I do see larger than normal gaps there, so silly putty might be a better choice) and be easily removed later. but as long as you keep the spray out you're good to go. But also the white glue idea allows post-paint cleaning as they can be removed.

As far as the darkness, I think you nailed it. The original color coat typically darkens up with clear coats and weathering, and you are only one level maybe two too light, which means perfect. IMO
 
Last edited:
I'd say its looking fantastic so far!
Thank you, Tommer!
I see nothing to make me think "that figure painter and dioramist is not up to building aircraft". In fact far the opposite as I said early in this thread!

I typically put the canopy on as a mask with white glue, to seal against overspray (I do see larger than normal gaps there, so silly putty might be a better choice) and be easily removed later. but as long as you keep the spray out you're good to go. But also the white glue idea allows post-paint cleaning as they can be removed.

As far as the darkness, I think you nailed it. The original color coat typically darkens up with clear coats and weathering, and you are only one level maybe two too light, which means perfect. IMO
Thanks, Edbert! Ya know, I was wondering about using regular old white glue, but not here as you said, the gap being the issue. It should give a decent seal, though, enough to keep the lid on until ready for clean-up. Not working wingy dingy kits very often, as in, well a long time, it's taking some time to catch up. And I think you are right, these color tones should pan out, cause if they don't, they stay anyway, HA! I'm gonna run out of surface detail if I keep adding paint, HA!
 
Redoing the Camo

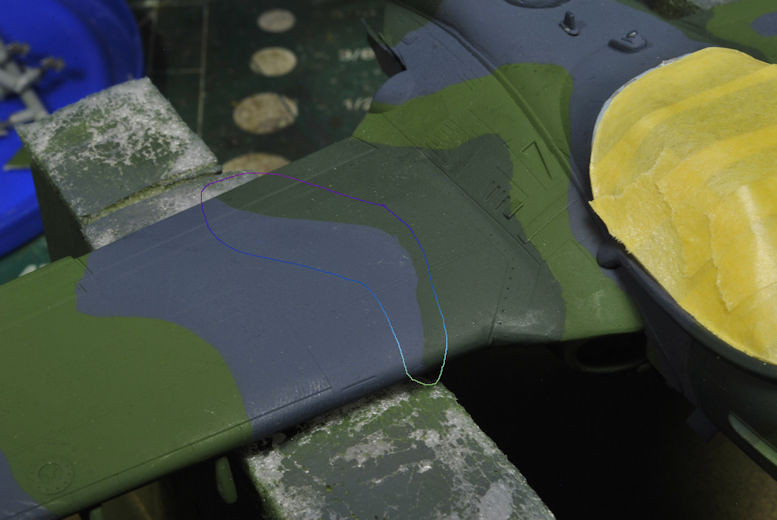
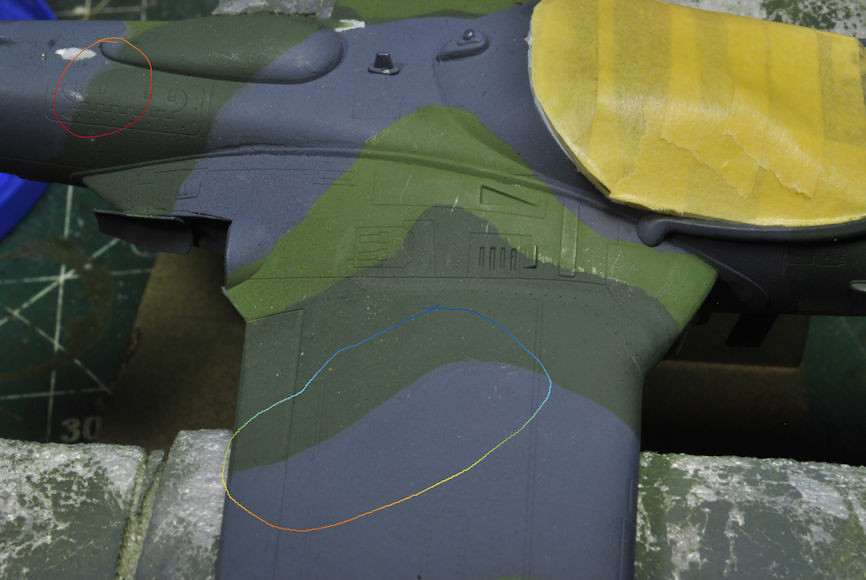
These colors I had chosen and sprayed for the camo pattern were beginning to bother me, so after some further intense photo reviews I decided to strip the bird and do it again. And that's a good thing, because upon closer inspection the overlap spray marks were beginning to look more intense the more I looked at them, HA! Not being a pro at Paint Shop Pro I used a marker tool to outline the problem areas on the wings, but there were other locations of concern as well.

_DSC0120b-vi.jpg


Stripping the camo paint and primer was not as difficult as I was expecting. I used oven cleaner and an old tooth brush. I taped over the cockpit and kept the spray away from it, water too. I had to get down to the bare plastic, then use a tooth pick and dental tool to clean-up some of the panel details, taking about an hour and a half.

_DSC0124b-vi.jpg


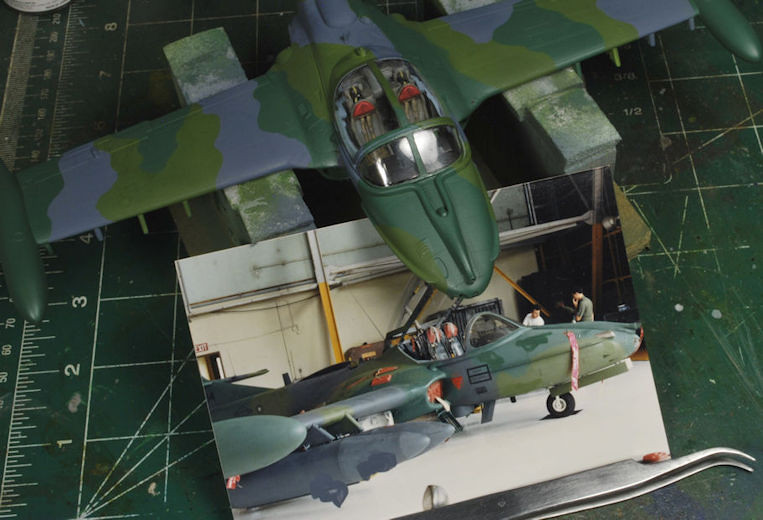
After making several attempts at the true colors, as far as I can tell, I believe I've got it. I dabbed a blob of each tone on a hanger photo and was satisfied with what I had. Now, obviously indoor pics will show much differently than outdoor, but this photo gave a more neutral appearance, in betwixt, so that was my standard for colors.

_DSC0126b-vi.jpg
_DSC0128b-vi.jpg


The dark green tone does look a bit dark, but numerus other photos allowed me artistic license to compromise on the final choice, so there we have it. Look closely at the closest fuel tank, almost an exact match, same for the light green portion of the nose looking at the lower portion just above where the white floor meets. The green is a toss-up in that photo, but I think ti will work just fine.

_DSC0131b-vi.jpg


Since the spray booth session, I've touched up areas around the canopy and begun working the tires, landing gear, and prepping all the other smaller parts for the cockpit dash and mirrors for the canopy.

More to follow soon and thanks for watchin. Cheers, Ski.
 
Redoing the Camo

These colors I had chosen and sprayed for the camo pattern were beginning to bother me, so after some further intense photo reviews I decided to strip the bird and do it again. And that's a good thing, because upon closer inspection the overlap spray marks were beginning to look more intense the more I looked at them, HA! Not being a pro at Paint Shop Pro I used a marker tool to outline the problem areas on the wings, but there were other locations of concern as well.

_DSC0119b-vi.jpg

_DSC0120b-vi.jpg


Stripping the camo paint and primer was not as difficult as I was expecting. I used oven cleaner and an old tooth brush. I taped over the cockpit and kept the spray away from it, water too. I had to get down to the bare plastic, then use a tooth pick and dental tool to clean-up some of the panel details, taking about an hour and a half.

_DSC0124b-vi.jpg


After making several attempts at the true colors, as far as I can tell, I believe I've got it. I dabbed a blob of each tone on a hanger photo and was satisfied with what I had. Now, obviously indoor pics will show much differently than outdoor, but this photo gave a more neutral appearance, in betwixt, so that was my standard for colors.

_DSC0126b-vi.jpg
_DSC0128b-vi.jpg


The dark green tone does look a bit dark, but numerus other photos allowed me artistic license to compromise on the final choice, so there we have it. Look closely at the closest fuel tank, almost an exact match, same for the light green portion of the nose looking at the lower portion just above where the white floor meets. The dark green is a toss-up in that photo, but I think it will work just fine.

_DSC0131b-vi.jpg


Since the spray booth session, I've touched up areas around the canopy and begun working the tires, landing gear, and prepping all the other smaller parts for the cockpit dash and mirrors for the canopy.

More to follow soon and thanks for watchin. Cheers, Ski.
 

Attachments

  • _DSC0126b-vi.jpg
    _DSC0126b-vi.jpg
    81.3 KB
Last edited:
Camo Fade, Decals, Glass Work, and Re-fab Parts

I think I've broken my own record for refabricating a lost part, as in, it grew wings and flew twice. The bomb rack sway braces were being installed when one of them slipped from my tweezers to the floor. I spent over 30mins looking for this tiny part to no avail. So, seeing that this part will certainly be visible I started to fabricate one. I was pretty happy with my scratch work, got it painted, and was just about the hit it with the hair dryer on low and behold, when all of the sudden, it sprung from my spring tension needle tipped tweezers and into the bench abyss. Ya, that bloomin quick, too. Not on the floor this time, but in somewhere among all the tools, paints, etc. I spent another half hour moving things and nope, never found it. So, I started a second scratch build, got halfway through it and again, this time directly forward on the bench, but I never found it either. Ok, now I'm laughing cause crying isn't a good look on me, and started scratch build #3. It has been completed and installed, done! Shall we add up all the time involved? Na, forget about it, HA!

In the first photo you can see I left the stretched sprue in the center hole for stability when painting and handling. Third time's a charm, right? Sheeeesh! I know yall know what I'm talkin about, but onward and forward, right?

_DSC0135b-vi.jpg
_DSC0137b-vi.jpg


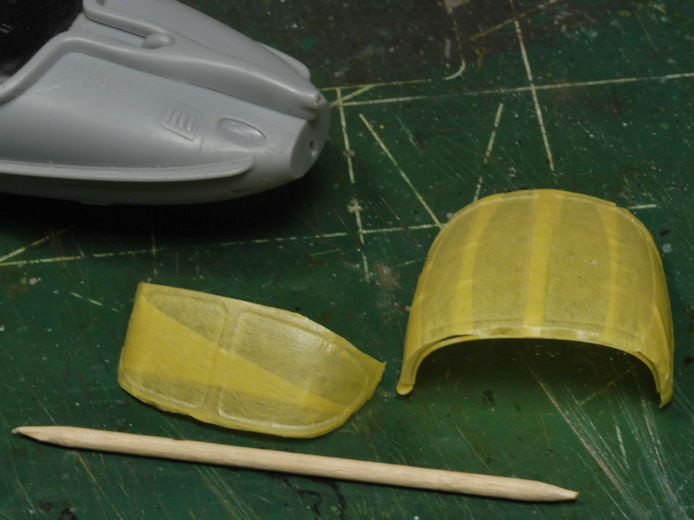
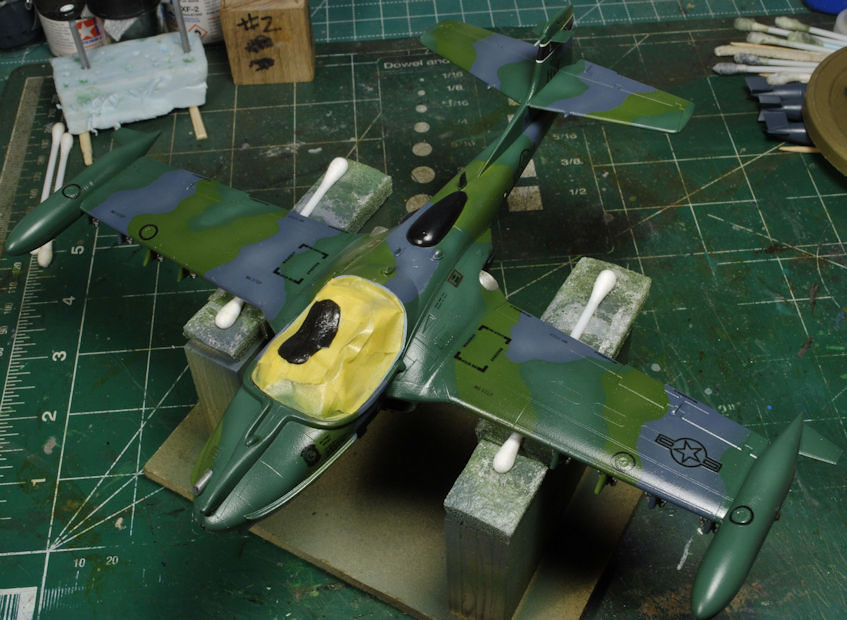
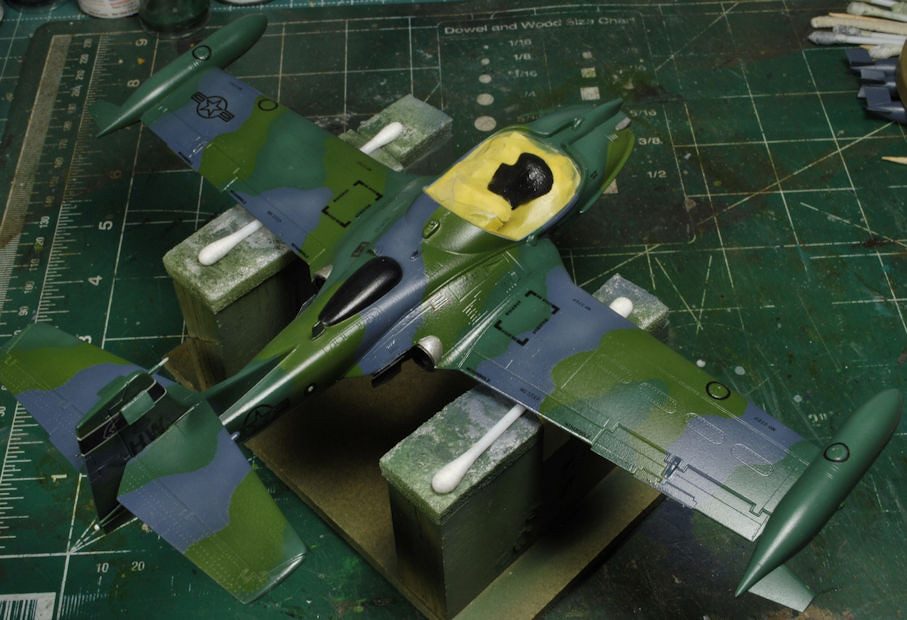
The camo was given a highlighting in the center portions, not paying much attention to specific panels, but in general. I know that is probably not the way to do it, but my airbrush was going wonky, so I did what I could. After that I ran a Tamiya, X-22 Clear coat before working the decals. I also dipped the canopy and windscreen in the AK Gauzy. I've seen vids on how well this works, but mine didn't turn out as clean as I was hoping for. This is not a dis on this product, I just wasn't prepared to lose much more definition in railing detail. It worked satisfactorily, but I was hoping for better.

_DSC0140b-vi.jpg
_DSC0142b-vi.jpg


I'm pretty happy with the color tones, and the overall appearance. After I prep several of the smaller parts I will begin the panel definition process and get some weathering done. I remember these birds were kept pretty clean. so I will try to keep from going overboard on weathering.

I will say this, I'm learning through the "school of hard knocks" all the little tricks and just how you bird guys work. Trial and error can have a steep learning curve. Well, it ain't like painting faces, so we're good, ya?

More to follow soon and thanks for watchin. Cheers, Ski.
 

Attachments

  • _DSC0140b-vi.jpg
    _DSC0140b-vi.jpg
    123.3 KB
  • _DSC0135b-vi.jpg
    _DSC0135b-vi.jpg
    114.6 KB
Stripping the camo paint and primer was not as difficult as I was expecting. I used oven cleaner and an old tooth brush.
Tamiya X and XF paints are easily stripped with 90% isopropyl alcohol. Much easier to use than oven cleaner.

This build is inspiring! I want to get my kits out and start, but I'll finish what I have on the bench, first. I cannot do what Edbert and others do, working on more than one kit at a time.
 
Last edited:
Let me rephrase that:
Experimentation and learning lead to knowledge and success. ;)
I recon if I had a string of bird builds I'd get it figured out, eventually:rolleyes:
Tamiya X and XF paints are easily stripped with 90% isopropyl alcohol. Much easier to use than oven cleaner.

This build is inspiring! I want to get my kits out and start, but I'll finish what I have on the bench, first. I cannot do what Edbert and others do, working on more than one kit at a time.
Now see, that's an excellent tip, Martin. Why didn't ya tell me that when I stripped it the last time? Bahahahaaaaaaaa!:D

If ya think about it, everything we do in this hobby is challenge in one way or another, otherwise it would be boring, ya?
 
Weathering, Canopy work, Finishing Up

In an attempt to keep consistent, I've been trying to get into the model bunker as much as possible. However, this summer has proven busy and bunker time is at a premium. Recently I was able to get a few washes on and work the belly area.

_DSC0145b-vi.jpg
_DSC0148b-vi.jpg


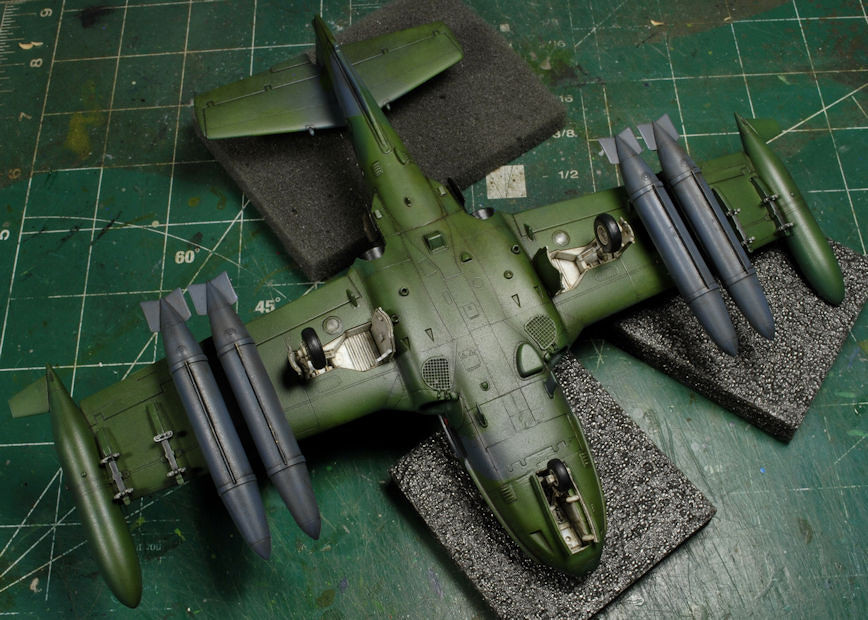
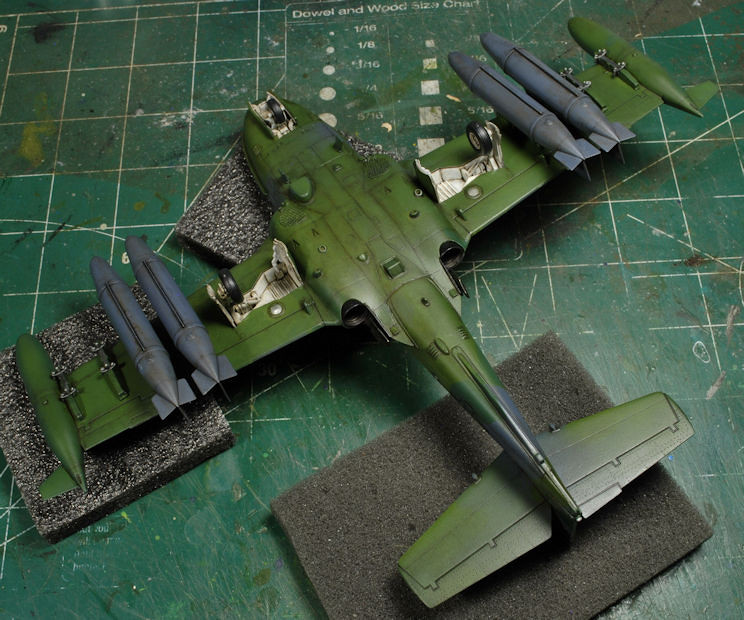
After a "Track Wash," yes, that is correct, "track wash," and clear coat, I ran a very minor black oil wash for panel definition. After the wash was done and sealed, I went back over the entire bird with a very light oil feathering to highlight the separate panels and areas that would show sun fading. I mixed tones for each camo color and worked small sections at a time.

_DSC0153b-vi.jpg
_DSC0155b-vi.jpg


Once the fading with oils had been completed, I gave the entire bird a final dull clear coat using Tamiya XF-86. My Mr. Color GX 113 lacquer was still a week out, so I decided not to wait, and I'm glad I didn't wait. I'm impressed with the Tamiya dull finish; it worked exactly as advertised. I know many of you bird guys like a semi-gloss finish, but most of the photos of the A-37 that I have from my personal collection show this bird has a very dull finish, not much of a glimmer or sheen at all. Plus, I personally like how it looks, so the finish stays.

I also went over the entire instrument panel and glossed every glass instrument one last time for a little more definition. I know, that sounds odd, but it helps with the final appearance, makes each specific instrument appear sharper in contrast to the entire panel. In fact I may need to do it one more time as I don't have any UV resin which would work even better.

_DSC0158b-vi.jpg
_DSC0160b-vi.jpg


Now let's talk canopy. This thing has been nothing but a pain in the tuckus and not much fun. My "clear" dunk work hasn't been worth a hoot, either. I am fast becoming "not" impressed with AK's Gauzy Glass Coat, AK893. I have used lint-free cloth, Q-tips, clean water washes, you name it, to clear any specks, then dunk. Without fail the main is clear, but the periphery always has specs of WHAT? (Yes, I did wick away the excess from the dunk) I have no clue, but it looks like you know what, and I've had to remove the coat numerous times with a tooth pick edge or pointed hard rubber tools. Am I doing something wrong? I don't think so, as I followed the protocol for this to the "T". AK's Intermediate does the same thing. So maybe the guys were right, ditch the expensive garbage and just use Future, and save a bit of cash, too.

So, the canopy is being cleaned, scraped clear of any paint, and the glass portion will be buffed again, and I may just airbrush the entire set up with Tamiya X-22 Clear. At least I know that stuff is reliable. So much for trying out the new stuff, stick with what I know works.

_DSC0163b-vi.jpg


After the canopy is done, I will install it and the piston, as well as a few antennas, then time for some "Remove Before Flight" flagging. I have some LAU-68 rocket launchers ordered, should be in soon, from Flying Leathernecks.

https://www.flyingleathernecksdecals.com/ The kit looks pretty good, so we'll see how they work. These guys are out of Temple, Georgia. I was actually working on a few scratch builds when I decided to check for availability of any launchers, and bingo, they've been ordered.

I will have my final update as soon as possible, but can't say when exactly, too much going on outside to give a reasonable time frame. It's that time of year, so we do what we can, when we can.

Thanks for watchin. Cheers, Ski.
 

Attachments

  • _DSC0145b-vi.jpg
    _DSC0145b-vi.jpg
    110.6 KB
  • _DSC0153b-vi.jpg
    _DSC0153b-vi.jpg
    149.5 KB
  • _DSC0158b-vi.jpg
    _DSC0158b-vi.jpg
    105.8 KB
Track Wash, black oil wash, light oil feathering, dull clear coat, glossed, UV resin, Gauzy Glass Coat, clear" dunk work, clean water washes, looks like you know what...

... reminds me of the first time I sat in on a meeting about 'telecommunications optical equipment switching' with 'wavelength division multiplexing '...
..."Say what?"
I think we're gonna need a modeler's glossary that covers more than 'doohickee thingamabob'!
 
I think we're gonna need a modeler's glossary that covers more than 'doohickee thingamabob'!
I'm betting there's one out there, I just haven't seen it yet.

Stunning so far. You are a Master, Sir.
Thank you for those kind words, Tommer, but I'm no master, that's for sure. Just watch enough YT and read the SBS logs to get the jist of it.
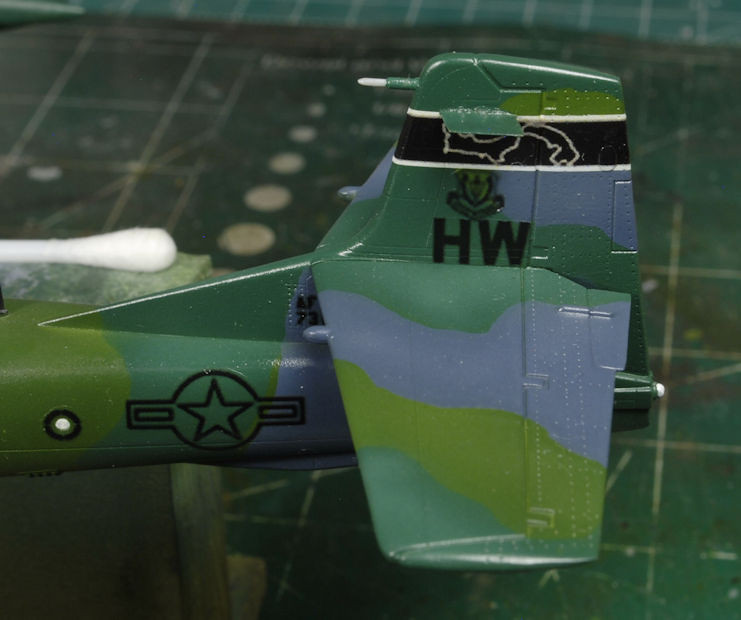
That's a sweet Tweet!
Youwza, Baby, Tweety is coming along in an acceptable fashion, I reckon.;)
 
Back
Top