

Thanks. PMLooking good
Good choice for the armor

Thanks. PMLooking good
Good choice for the armor
So I have finished the Mandalorian although now looking through the photos there are a few bits that need finishing I think. The instructions say it's done....... but. PanthermanSo I have manged to do a bit more on Din. Please excuse the not so tidy workbench on the bed, it's low on the PM scale but works.
Pantherman View attachment 121700View attachment 121701View attachment 121702
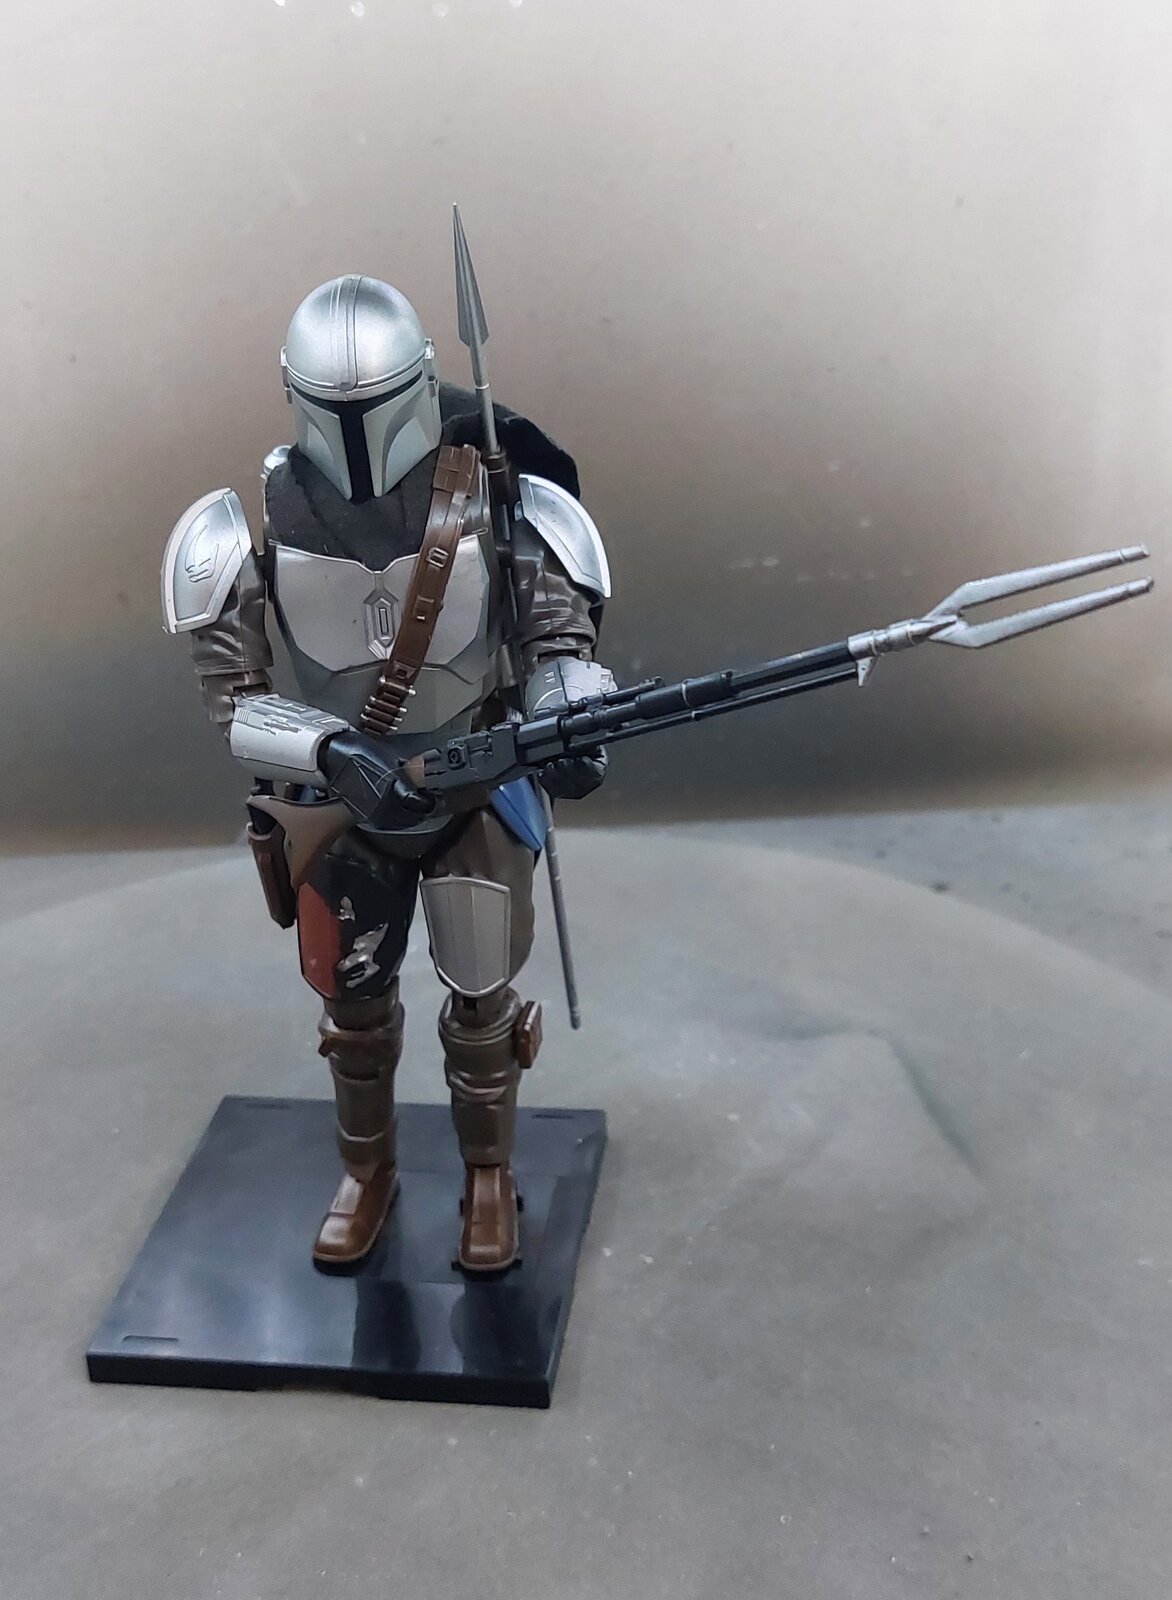
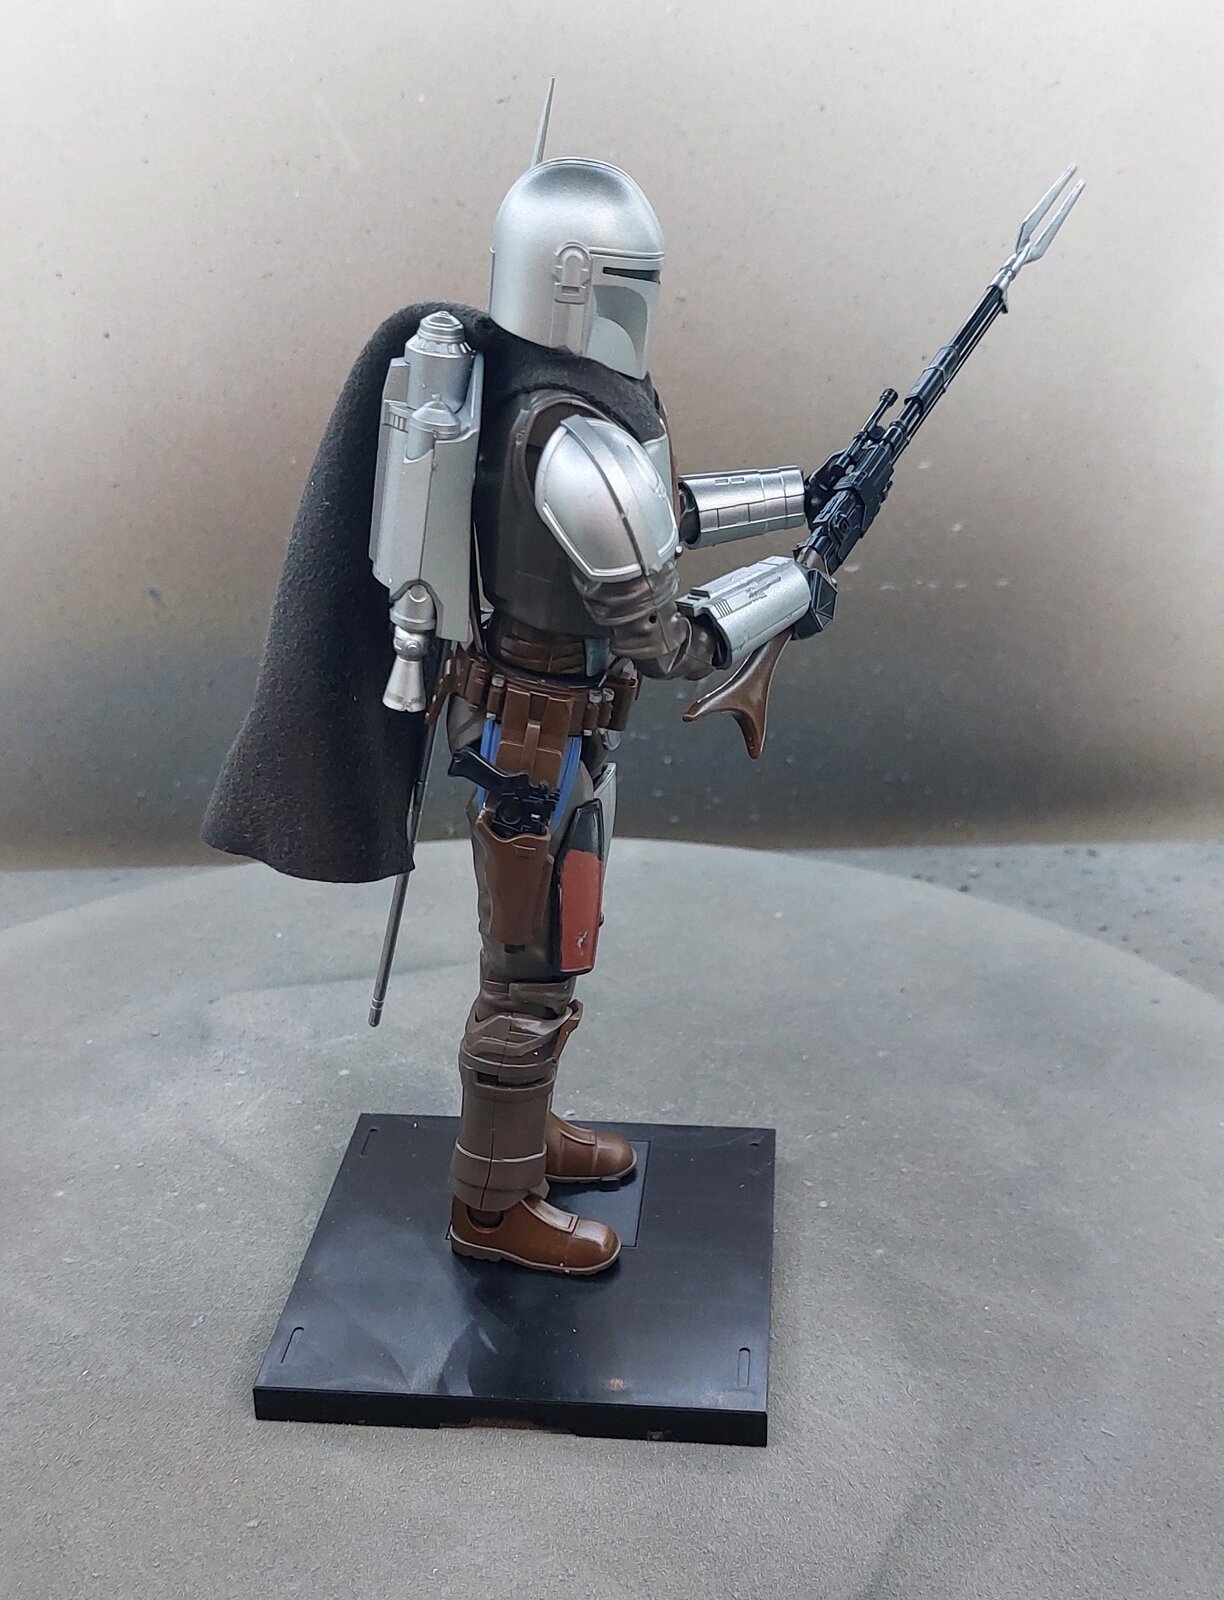
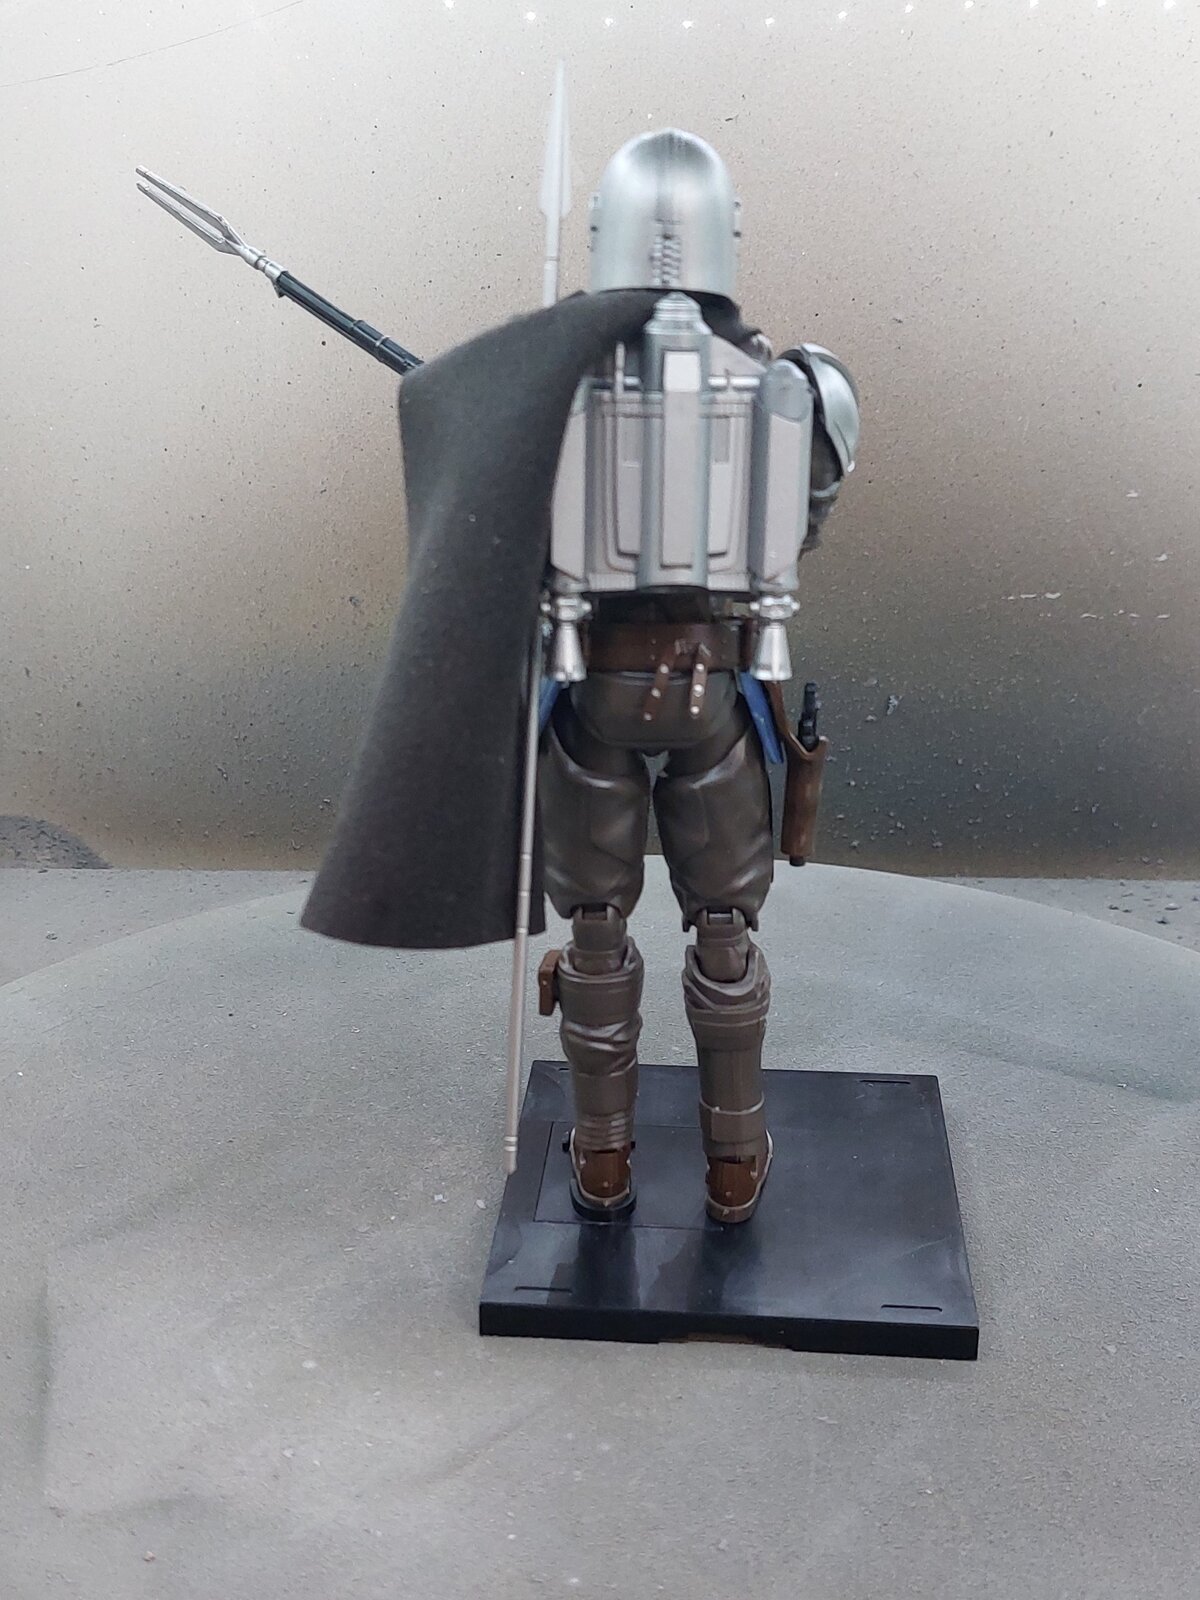
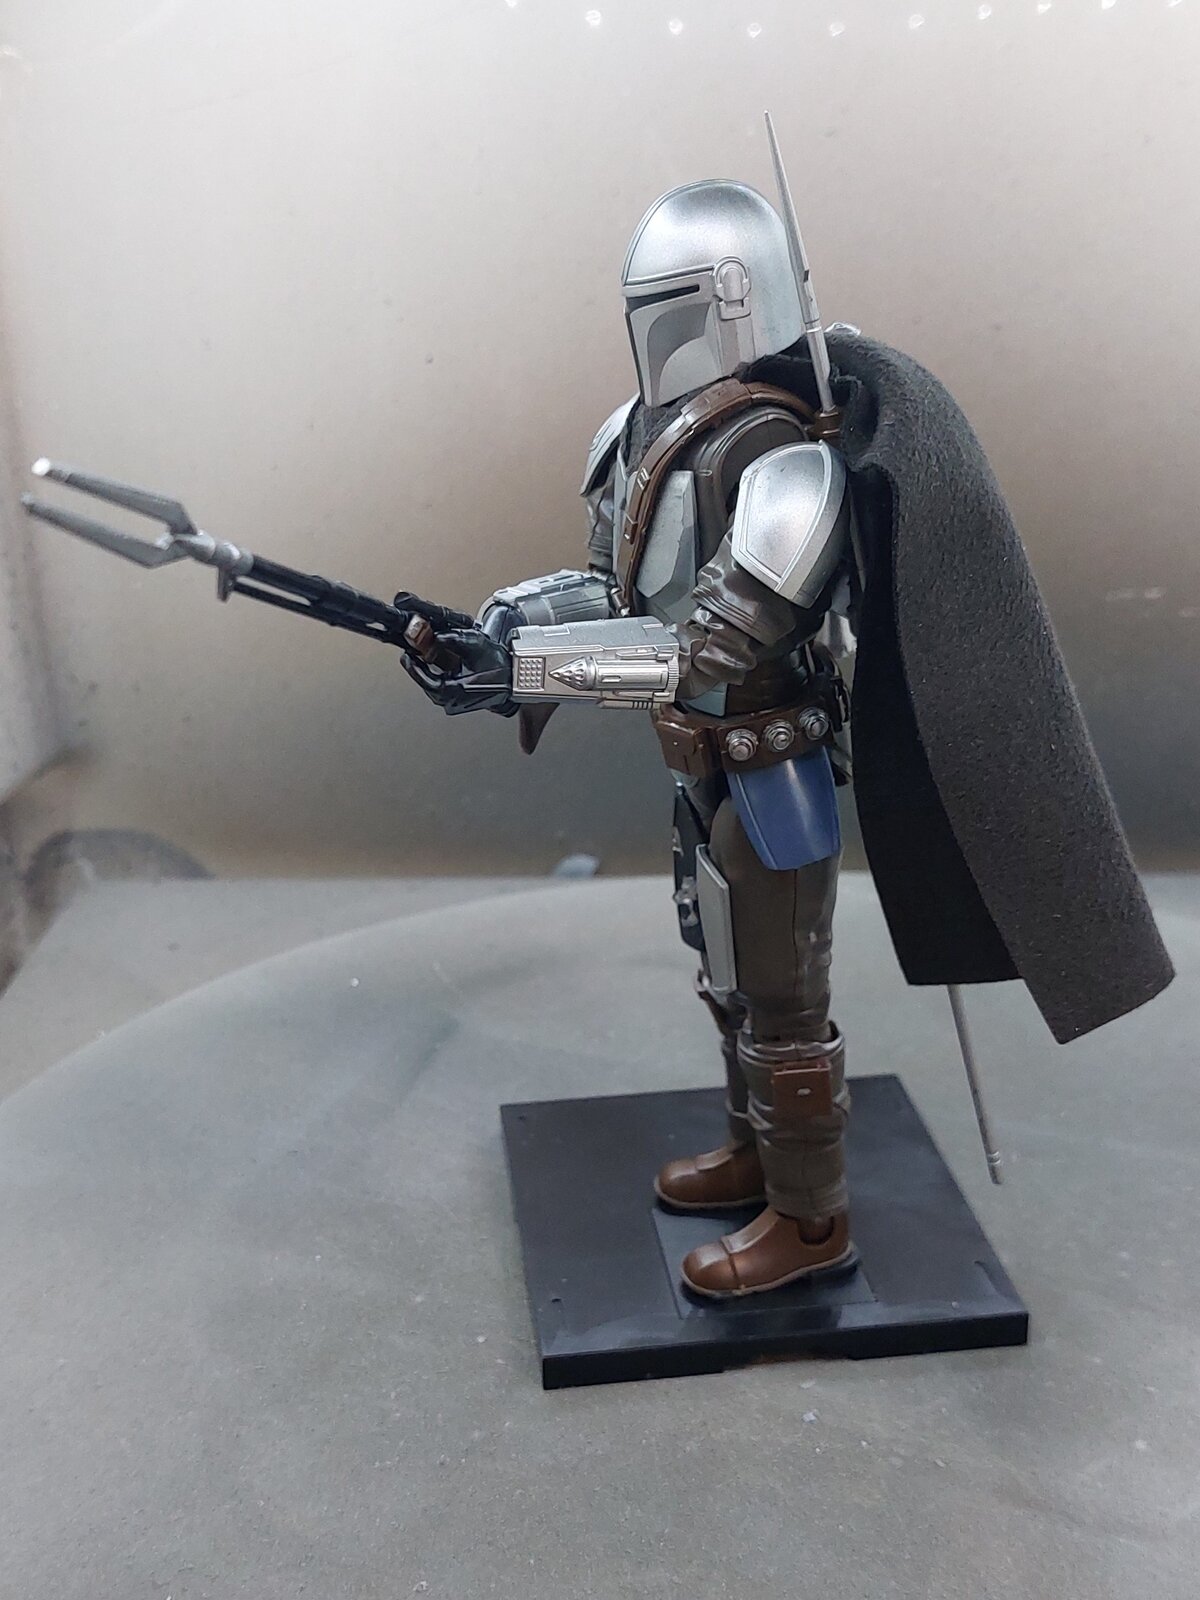
Very cool. You did a great job!So I have finished the Mandalorian although now looking through the photos there are a few bits that need finishing I think. The instructions say it's done....... but. Pantherman
View attachment 121758View attachment 121759View attachment 121760View attachment 121761

Looks great. Nice diorama!Nice work Pantherman.
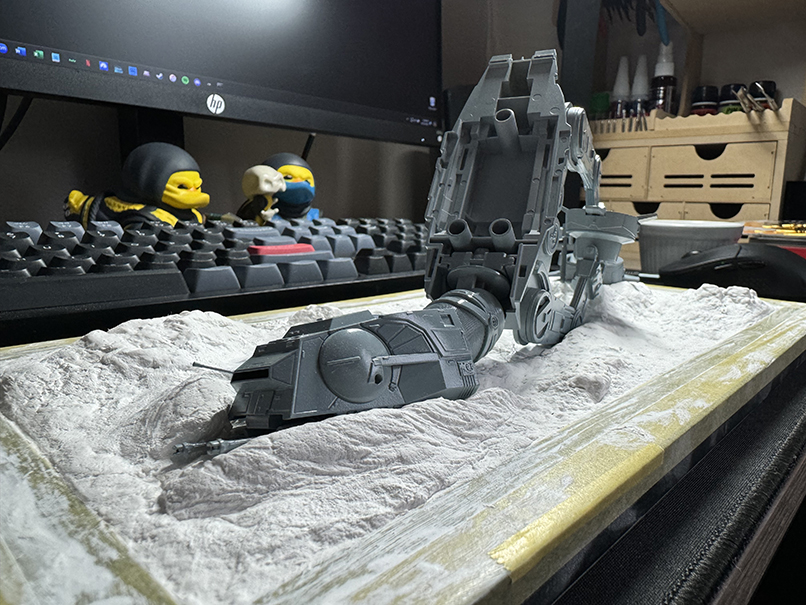
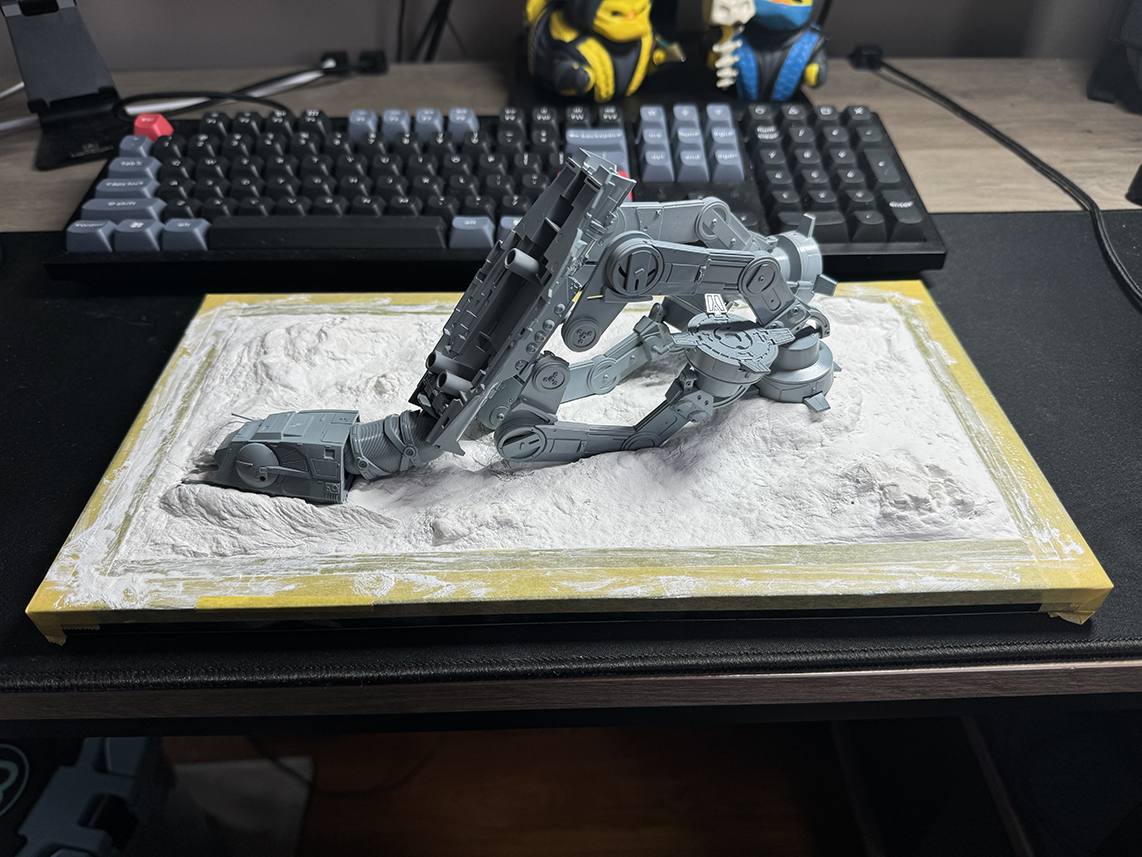
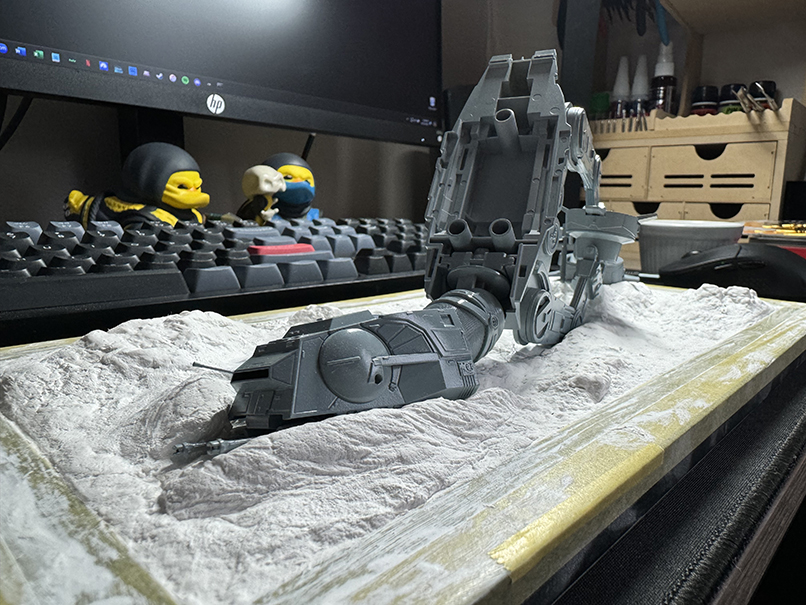
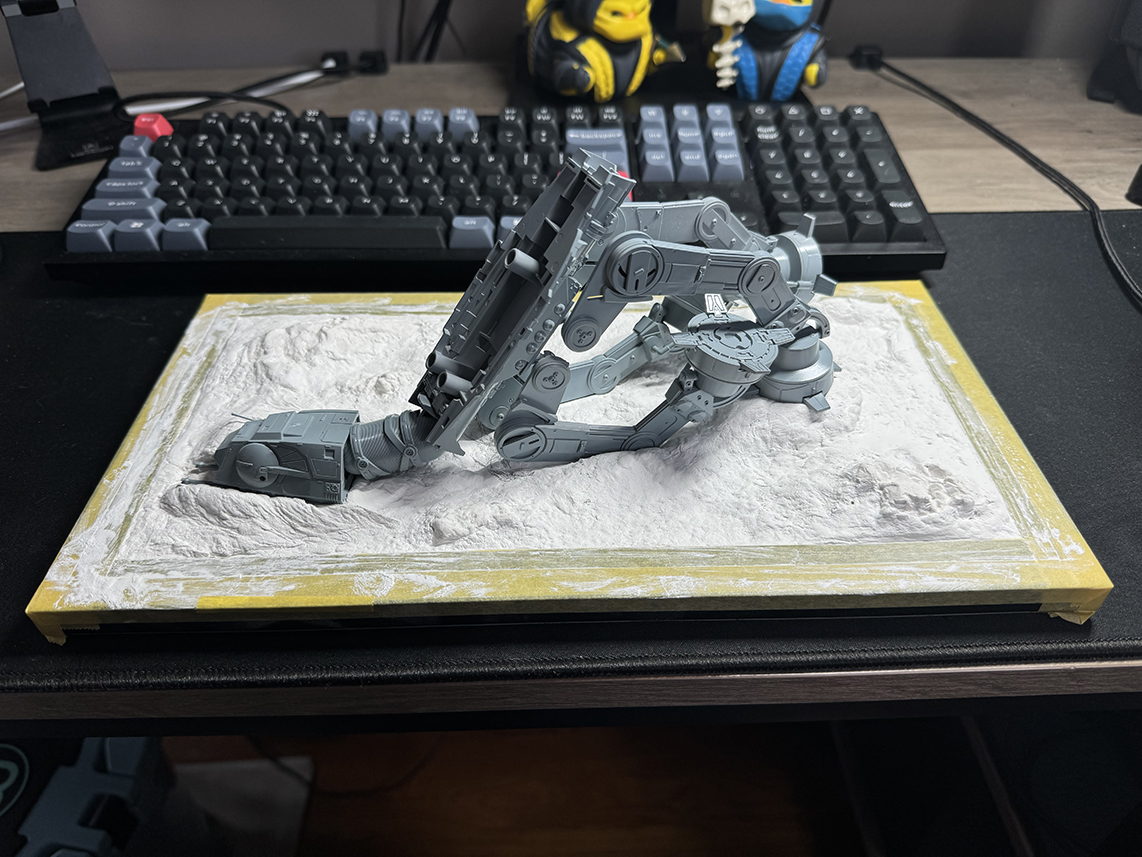
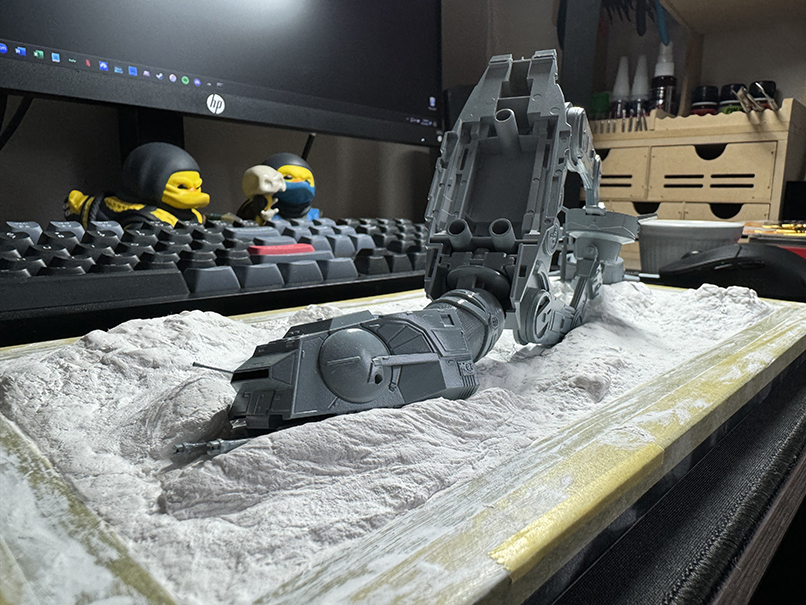
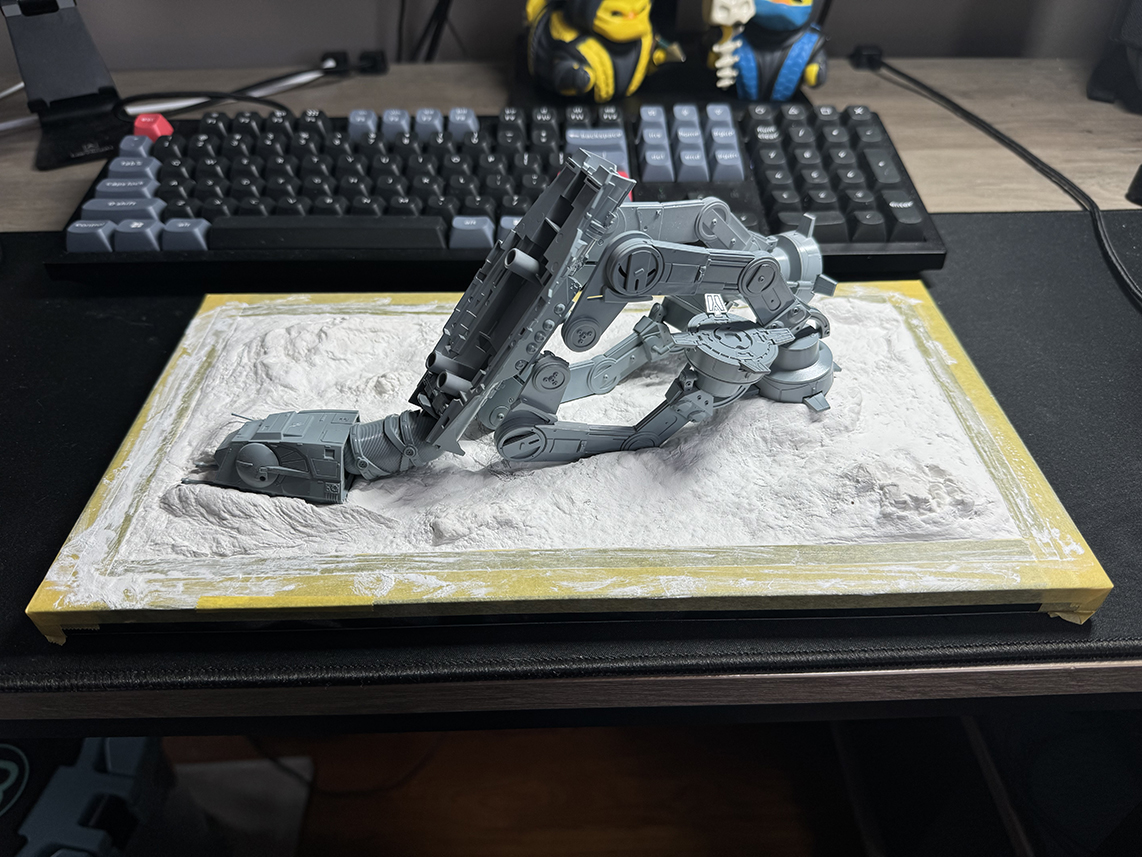
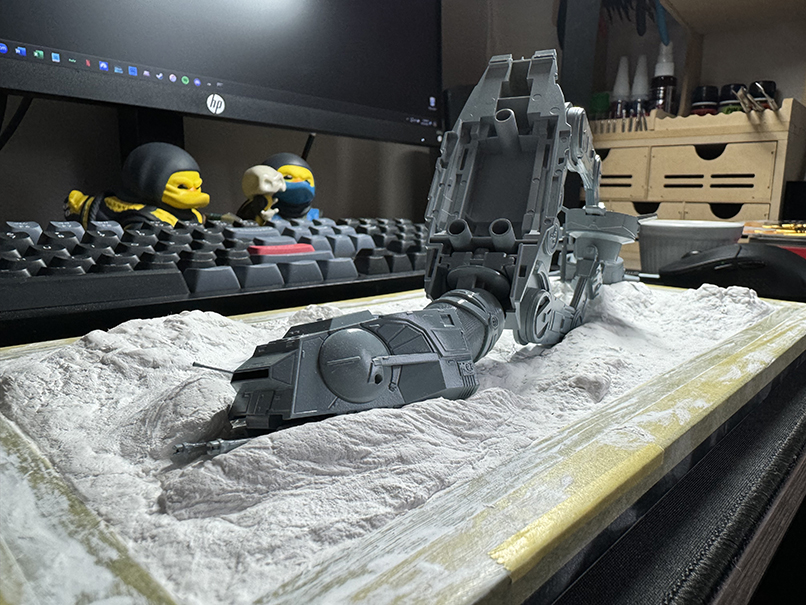
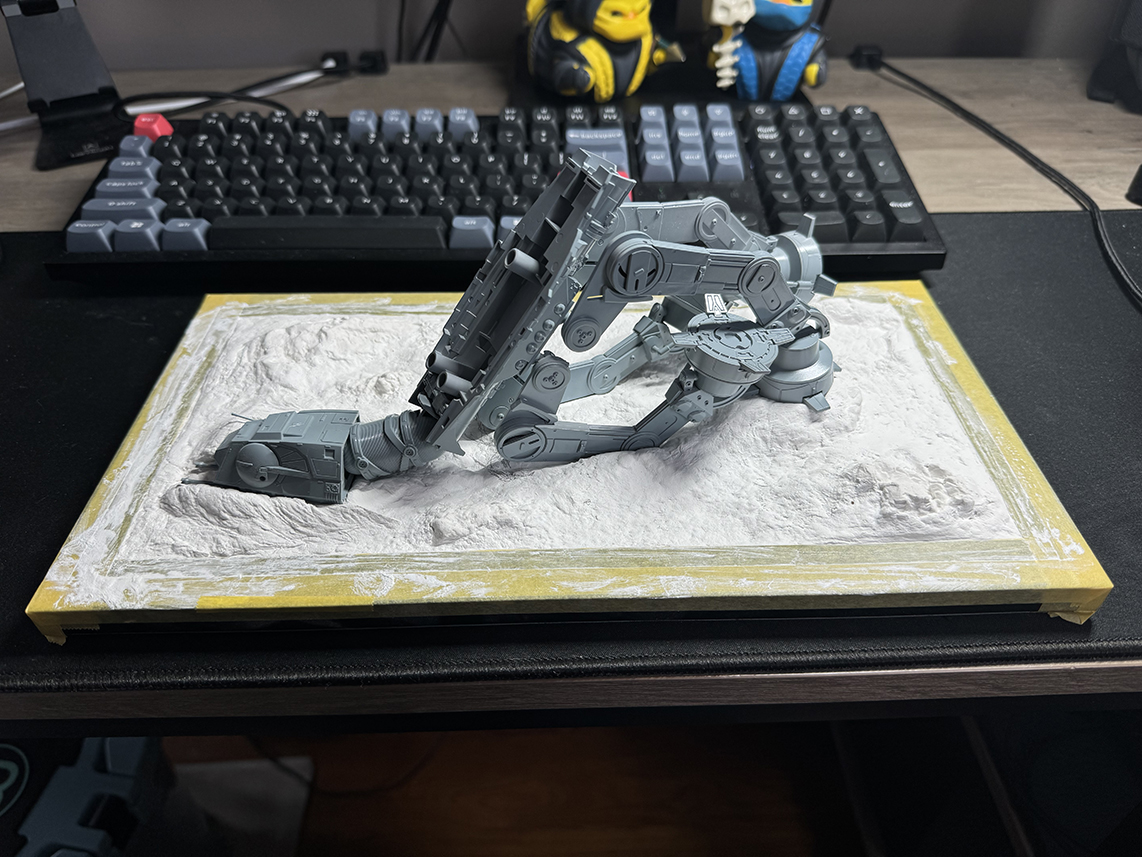
Made some more progress this weekend. I was a dum-dum and forgot to put the guns and head shell on the first time, so the impression was too shallow and there was no relief for the guns. Had to break out the Dremel to make a pit that I could refill and make an impression. I do have to say that Sculptamold is pretty tough. Nice stuff. I also primed, based coated, and gloss coated the model. I ended up using Light Ghost Gray Tamiya Spray.
Thanks Gary, just got to add those little bits to really call this one finished. PMVery cool. You did a great job!
You really have so many great ideas for your builds. I really enjoy watching you and my brothers builds from start to finish.Thanks Gary, just got to add those little bits to really call this one finished. PM

Great job. I'm really liking this one.So I have finished the Mandalorian although now looking through the photos there are a few bits that need finishing I think. The instructions say it's done....... but. Pantherman
View attachment 121758View attachment 121759View attachment 121760View attachment 121761
Thanks, this was a perfect build for me at this time as no glue and very little painting to do.You really have so many great ideas for your builds. I really enjoy watching you and my brothers builds from start to finish.

The snowfield looks fantastic. It looks like it's jumped straight off the screen.Nice work Pantherman.
Made some more progress this weekend. I was a dum-dum and forgot to put the guns and head shell on the first time, so the impression was too shallow and there was no relief for the guns. Had to break out the Dremel to make a pit that I could refill and make an impression. I do have to say that Sculptamold is pretty tough. Nice stuff. I also primed, based coated, and gloss coated the model. I ended up using Light Ghost Gray Tamiya Spray.
The detailing on this is utterly gorgeous. I'm loving every image I see from this one.Progress has slowed down, but at least still progress
Got some more of the decals on and refined weathering here and there
Did not realize just how any little decals there are. close to 200 not counting the panel decals (I painted instead of using those)
Although did take a big step ahead by actually putting the two saucer halves together. No more interior access except from the battery area and gun turret wells. A kind of scary step because if I forgot something lighting wise there is no going back. No longer can change my mind mind about doing an interior for the cockpit tube and opening the door. Frankly, I never would have finished I went that route
This finally allowed me to get on many of the missing surface greeblies as well
View attachment 121646View attachment 121645View attachment 121648View attachment 121647
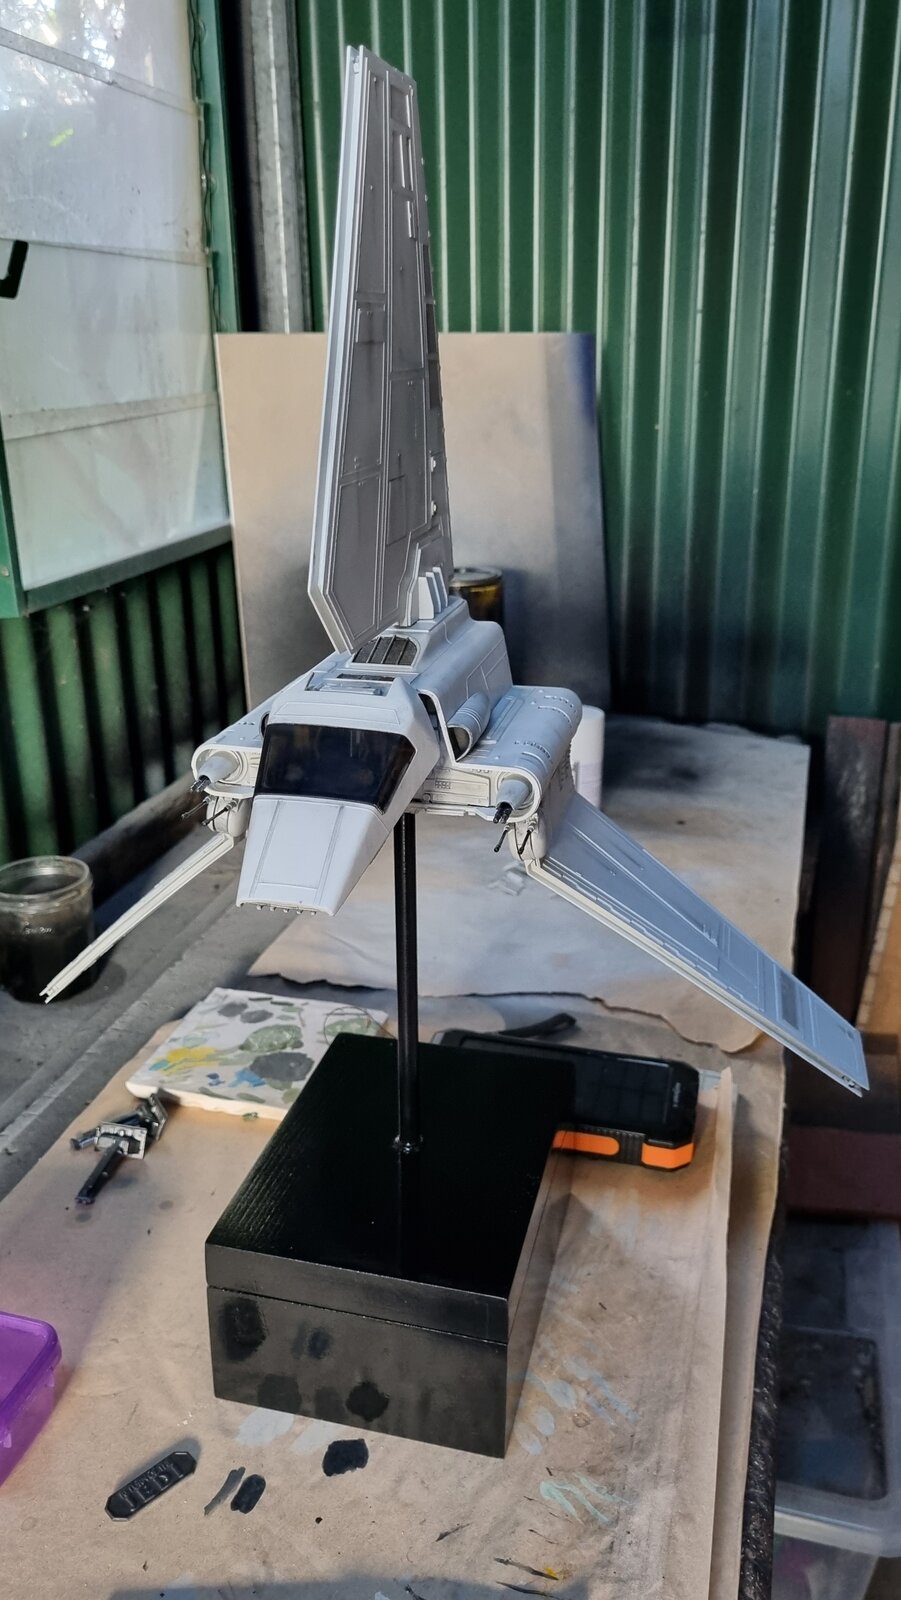
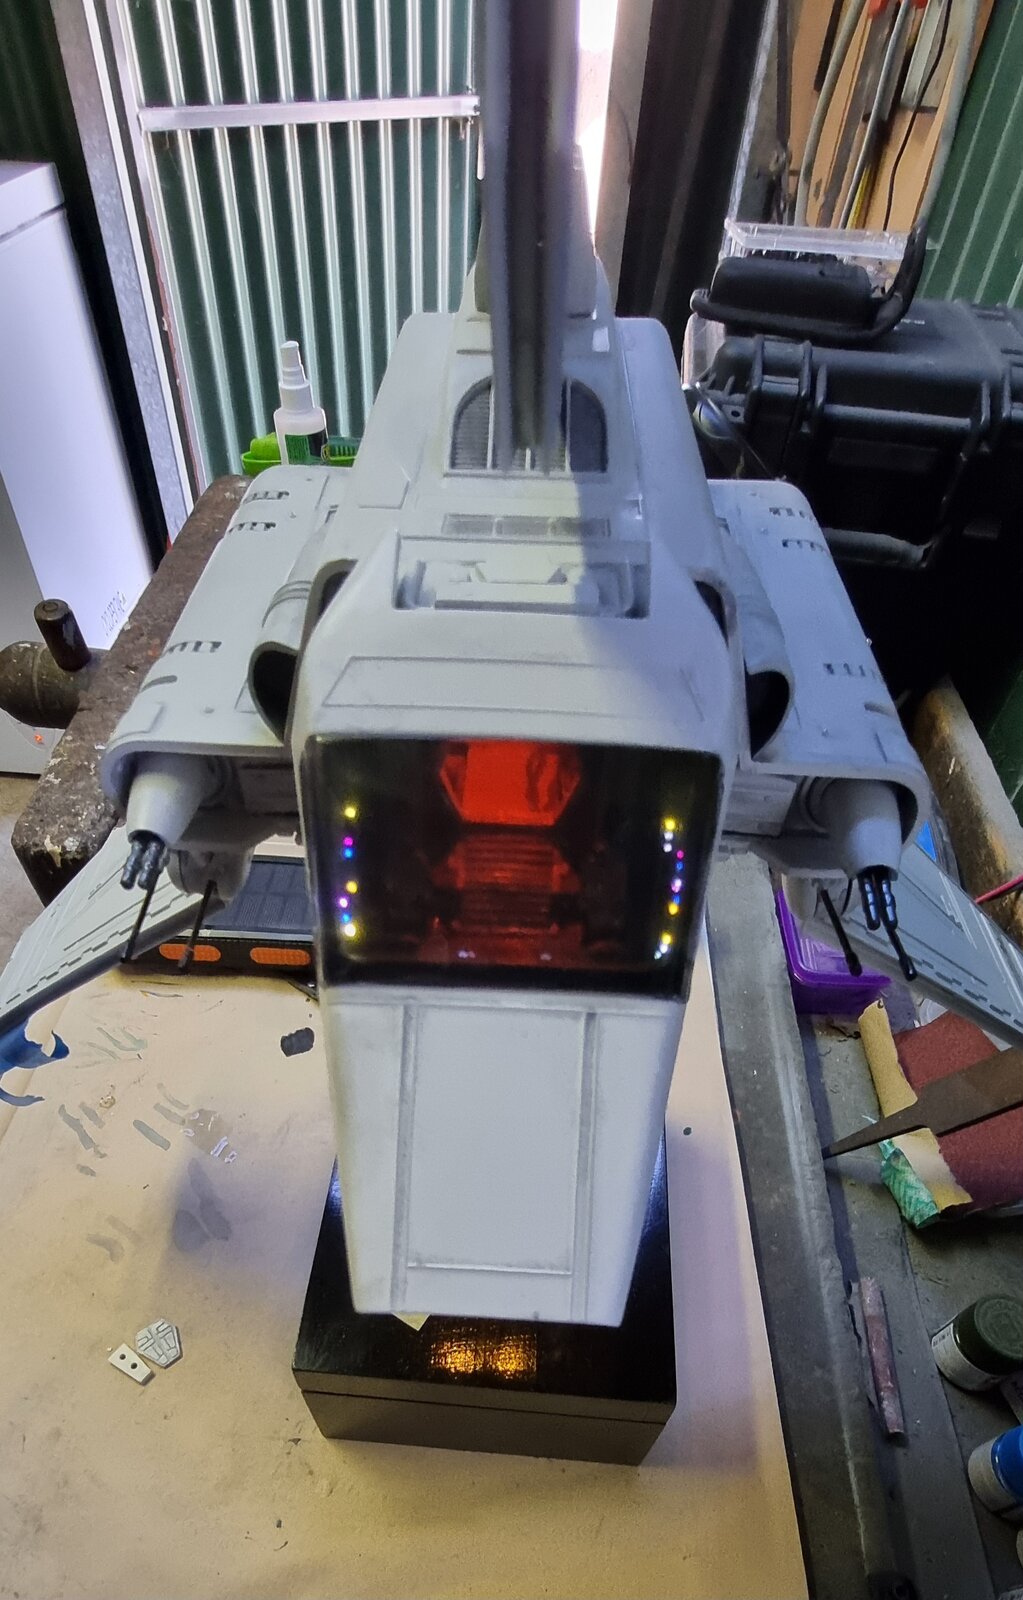
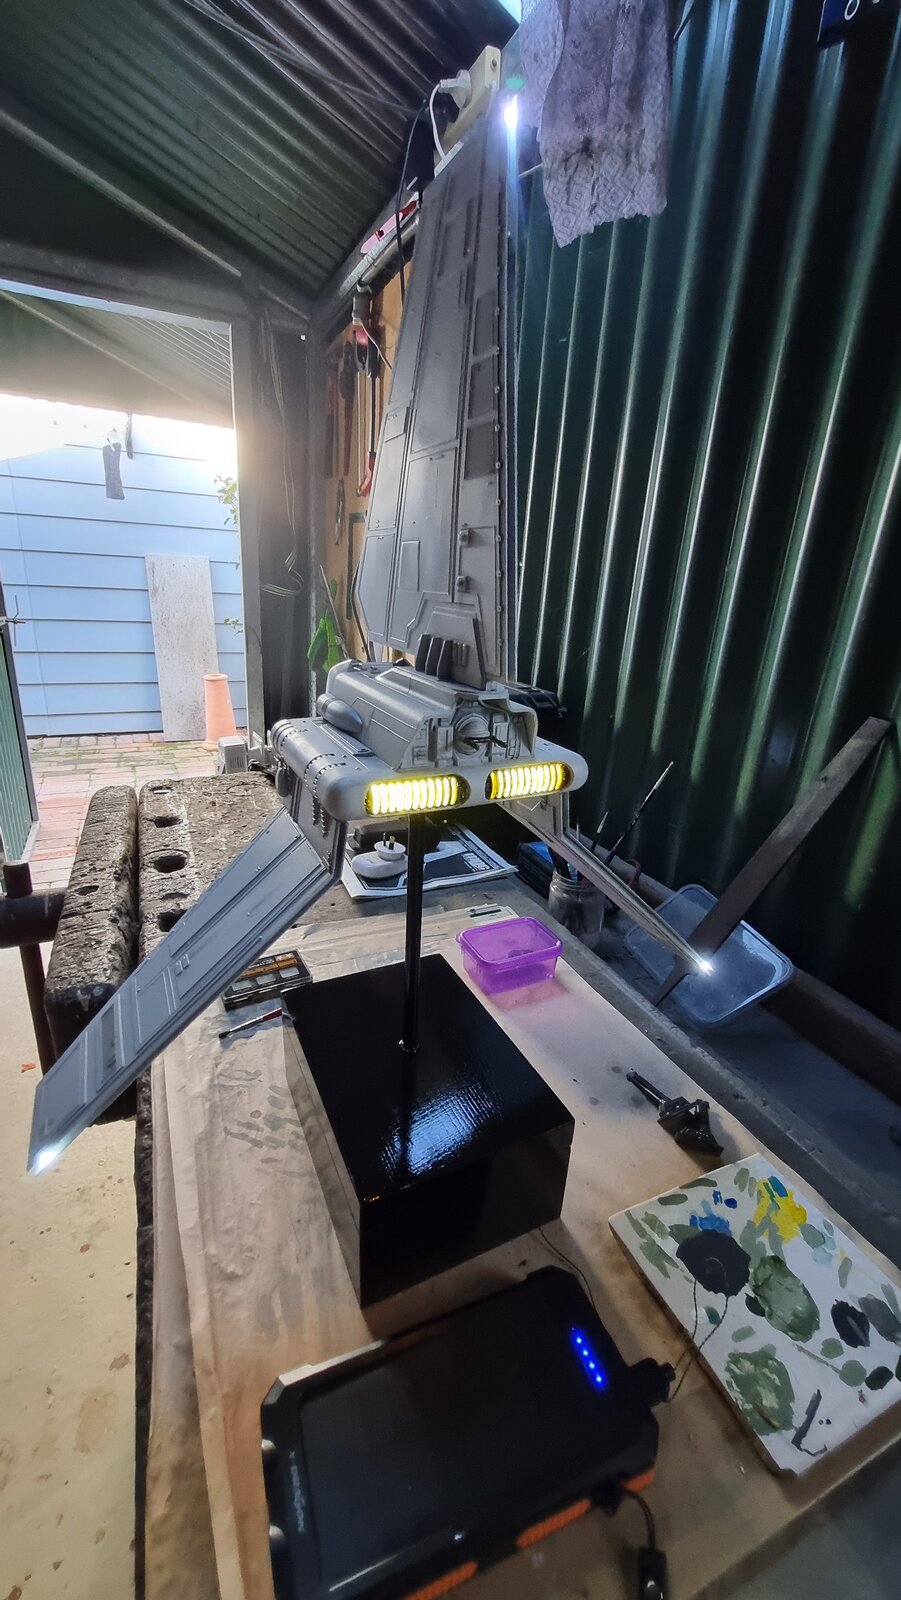
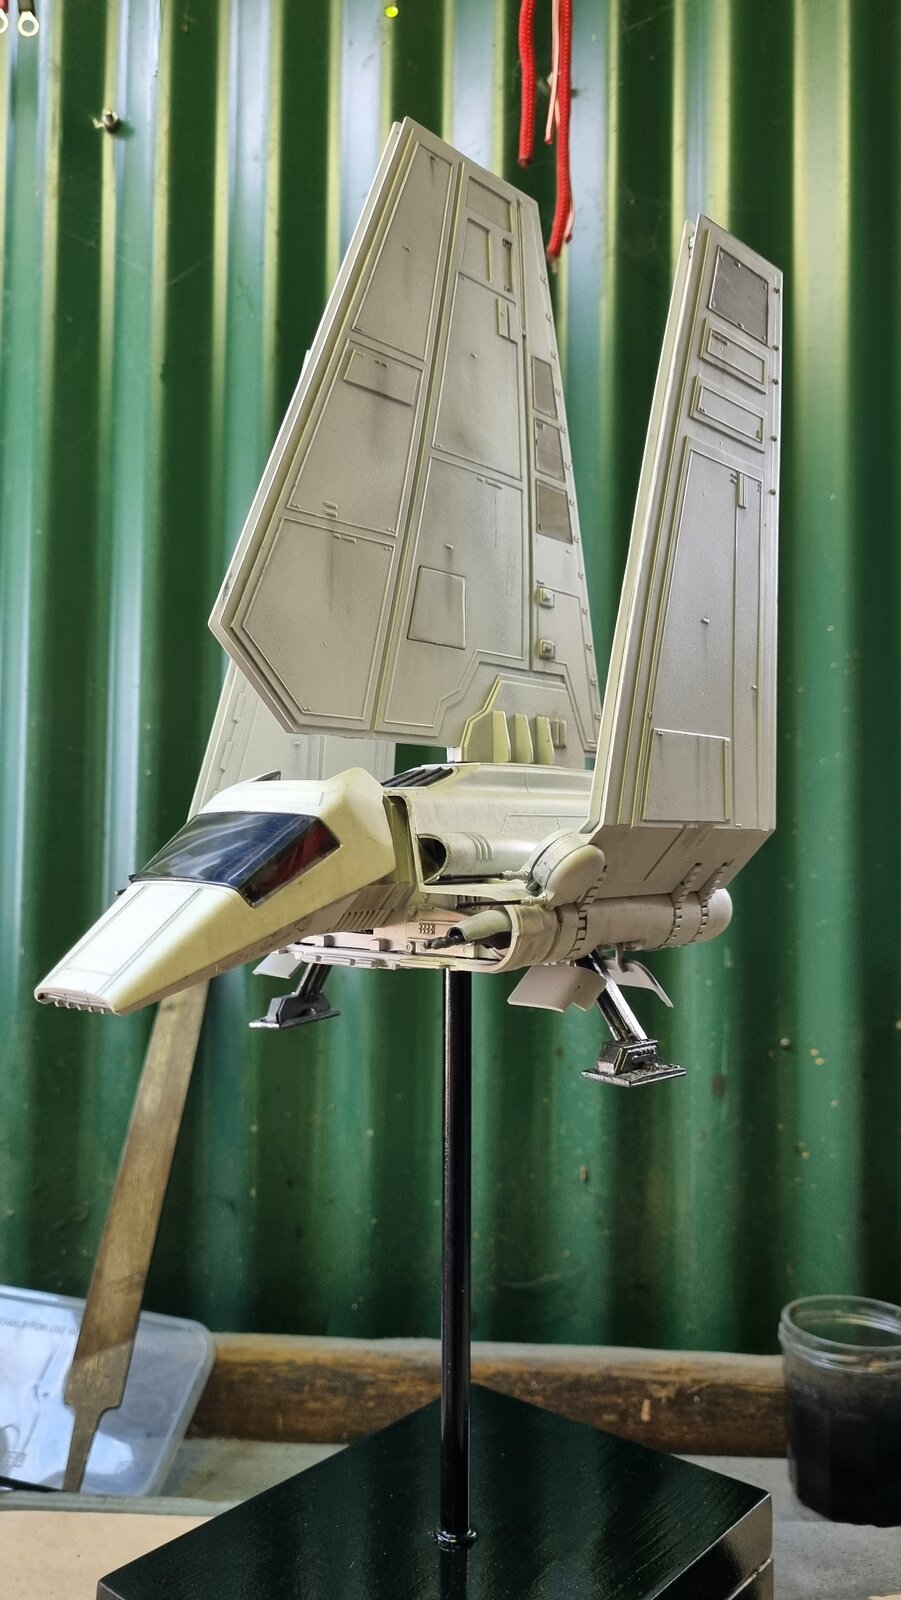
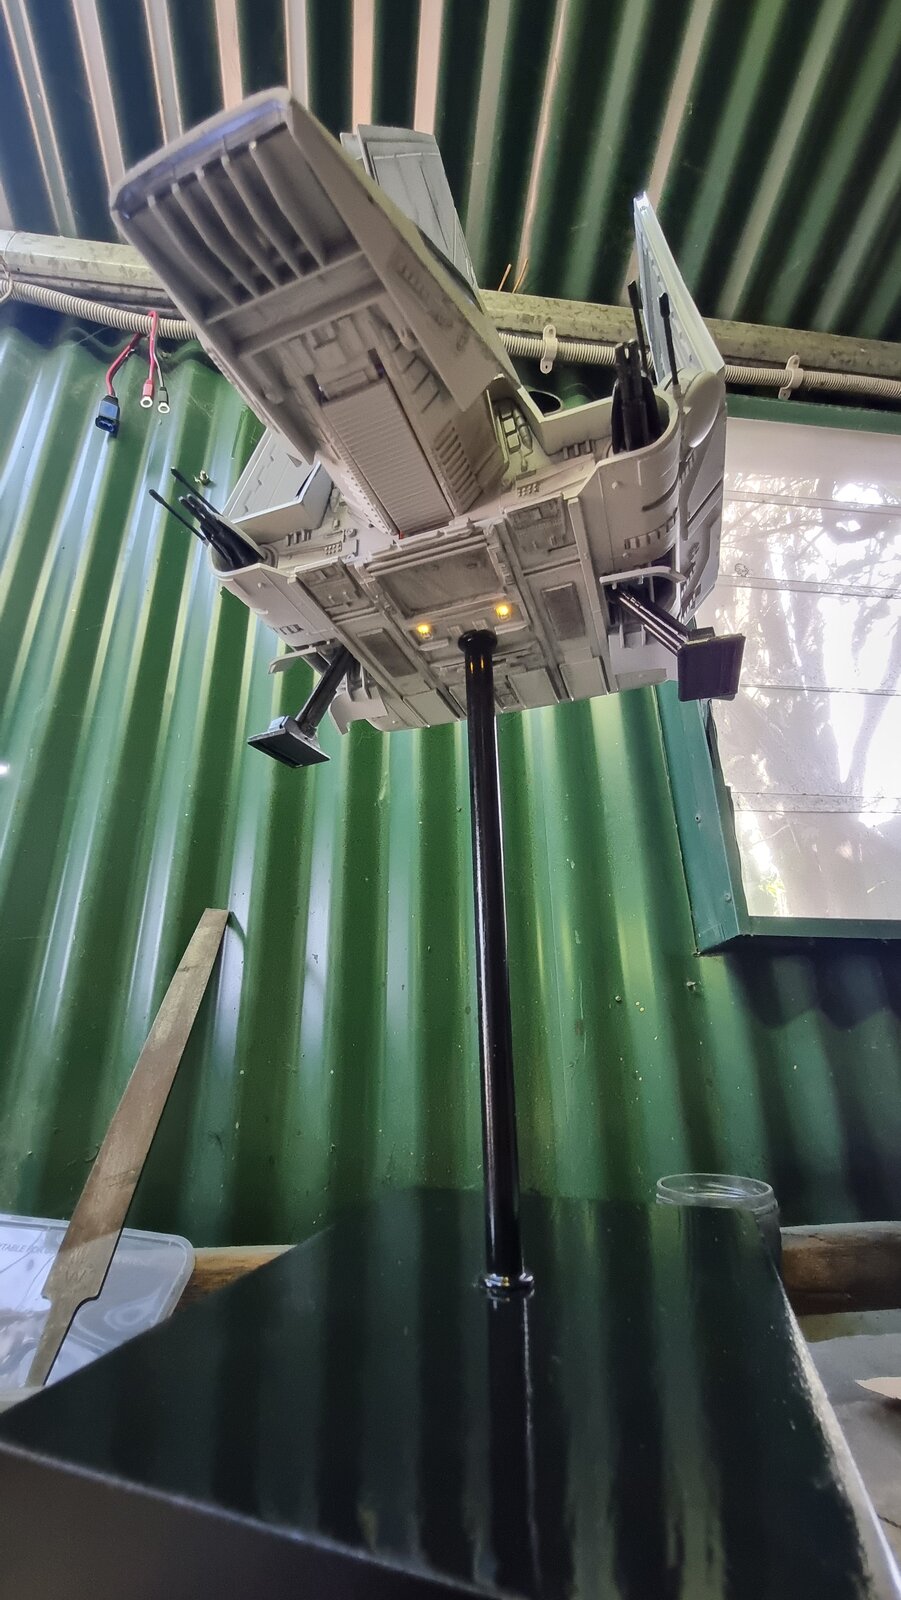
That build is just way above really cool, I've loved every step of the way and thank you for sharing. If they do any competitions near you that's got to go in for sure. Awesome. PMI think I'm almost done here myself. I'm just doing some final weathering and detailing here and there. I found a Return Of The Jedi plaque from my old MPC Falcon and I'm painting it up in a chrome silver and I'll seat it on the top of the box.
That box is a $10 wooden box from Officeworks here in Australia which I've primed and coated in 10 layers of a gloss black. The stem is from a $10 K-Mart desk lamp which I butchered for the the stem itself.
I haven't done anything special with the landing gear shots other than to adhere the peices with pieces of Blu Tac. I'll probably display it in flight mode for much of the time.
Going forward, I'd like to include some greeblies for the wing channels and do some more detailing on the undercarriage.
This is the dream build I wanted to achieve. It tested me for sure but I'm so glad I stuck with it.
Thank you for your encouragement. It meant a lot to me.
View attachment 121780View attachment 121781
View attachment 121782View attachment 121784View attachment 121785
You're a gentleman Pantherman. Thank you so much.That build is just way above really cool, I've loved every step of the way and thank you for sharing. If they do any competitions near you that's got to go in for sure. Awesome. PM

Feel free to join in. The build will continue as long as people are building. You can continue to add to this thread. There isn't any set closure date.Hey all! Been a hot minute since I've been on here. Saw this group build in an email newsletter and thought, "Wow, this could be the motivation I need to actually put one of my kits together!"
But... I wonder how much longer the group build is going to continue? Thanks in advance!

Nice work Pantherman.
Made some more progress this weekend. I was a dum-dum and forgot to put the guns and head shell on the first time, so the impression was too shallow and there was no relief for the guns. Had to break out the Dremel to make a pit that I could refill and make an impression. I do have to say that Sculptamold is pretty tough. Nice stuff. I also primed, based coated, and gloss coated the model. I ended up using Light Ghost Gray Tamiya Spray.
I think I'm almost done here myself. I'm just doing some final weathering and detailing here and there. I found a Return Of The Jedi plaque from my old MPC Falcon and I'm painting it up in a chrome silver and I'll seat it on the top of the box.
That box is a $10 wooden box from Officeworks here in Australia which I've primed and coated in 10 layers of a gloss black. The stem is from a $10 K-Mart desk lamp which I butchered for the the stem itself.
I haven't done anything special with the landing gear shots other than to adhere the peices with pieces of Blu Tac. I'll probably display it in flight mode for much of the time.
Going forward, I'd like to include some greeblies for the wing channels and do some more detailing on the undercarriage.
This is the dream build I wanted to achieve. It tested me for sure but I'm so glad I stuck with it.
Thank you for your encouragement. It meant a lot to me.
View attachment 121780View attachment 121781
View attachment 121782View attachment 121784View attachment 121785
Grab a kit and start sticking, you're more than welcome. We don't really have time line's, just a general start date. Post plenty of photos please as like to see how it's going. PanthermanHey all! Been a hot minute since I've been on here. Saw this group build in an email newsletter and thought, "Wow, this could be the motivation I need to actually put one of my kits together!"
But... I wonder how much longer the group build is going to continue? Thanks in advance!
Can do! I enjoy documenting my progress, so you'll get plenty of pics and info. I just need to decide if I use this as my motivator for a large project (1/144 Bandai Falcon with lighting, photoetch, and custom stand) which will be a gift to a friend, or if I just finish up my A-Wing that's been languishing for a couple years.Grab a kit and start sticking, you're more than welcome. We don't really have time line's, just a general start date. Post plenty of photos please as like to see how it's going. Pantherman
Falcon........doooooooo it. You know that you want too. PanthermanCan do! I enjoy documenting my progress, so you'll get plenty of pics and info. I just need to decide if I use this as my motivator for a large project (1/144 Bandai Falcon with lighting, photoetch, and custom stand) which will be a gift to a friend, or if I just finish up my A-Wing that's been languishing for a couple years.
Appreciate you and Tim's encouragement to join!

It is looking amazing, I would say it was more than worth sticking with this build. You did a great job with this build, just enough weathering and the lighting is perfect.I think I'm almost done here myself. I'm just doing some final weathering and detailing here and there. I found a Return Of The Jedi plaque from my old MPC Falcon and I'm painting it up in a chrome silver and I'll seat it on the top of the box.
That box is a $10 wooden box from Officeworks here in Australia which I've primed and coated in 10 layers of a gloss black. The stem is from a $10 K-Mart desk lamp which I butchered for the the stem itself.
I haven't done anything special with the landing gear shots other than to adhere the peices with pieces of Blu Tac. I'll probably display it in flight mode for much of the time.
Going forward, I'd like to include some greeblies for the wing channels and do some more detailing on the undercarriage.
This is the dream build I wanted to achieve. It tested me for sure but I'm so glad I stuck with it.
Thank you for your encouragement. It meant a lot to me.
View attachment 121780View attachment 121781
View attachment 121782View attachment 121784View attachment 121785
I have been looking over the instructions again as something was bugging me and I have found that I had missed a few parts. I will add them tomorrow and just do some paintwork touching in then will post "the finished" photos. PanthermanSo I have finished the Mandalorian although now looking through the photos there are a few bits that need finishing I think. The instructions say it's done....... but. Pantherman
View attachment 121758View attachment 121759View attachment 121760View attachment 121761

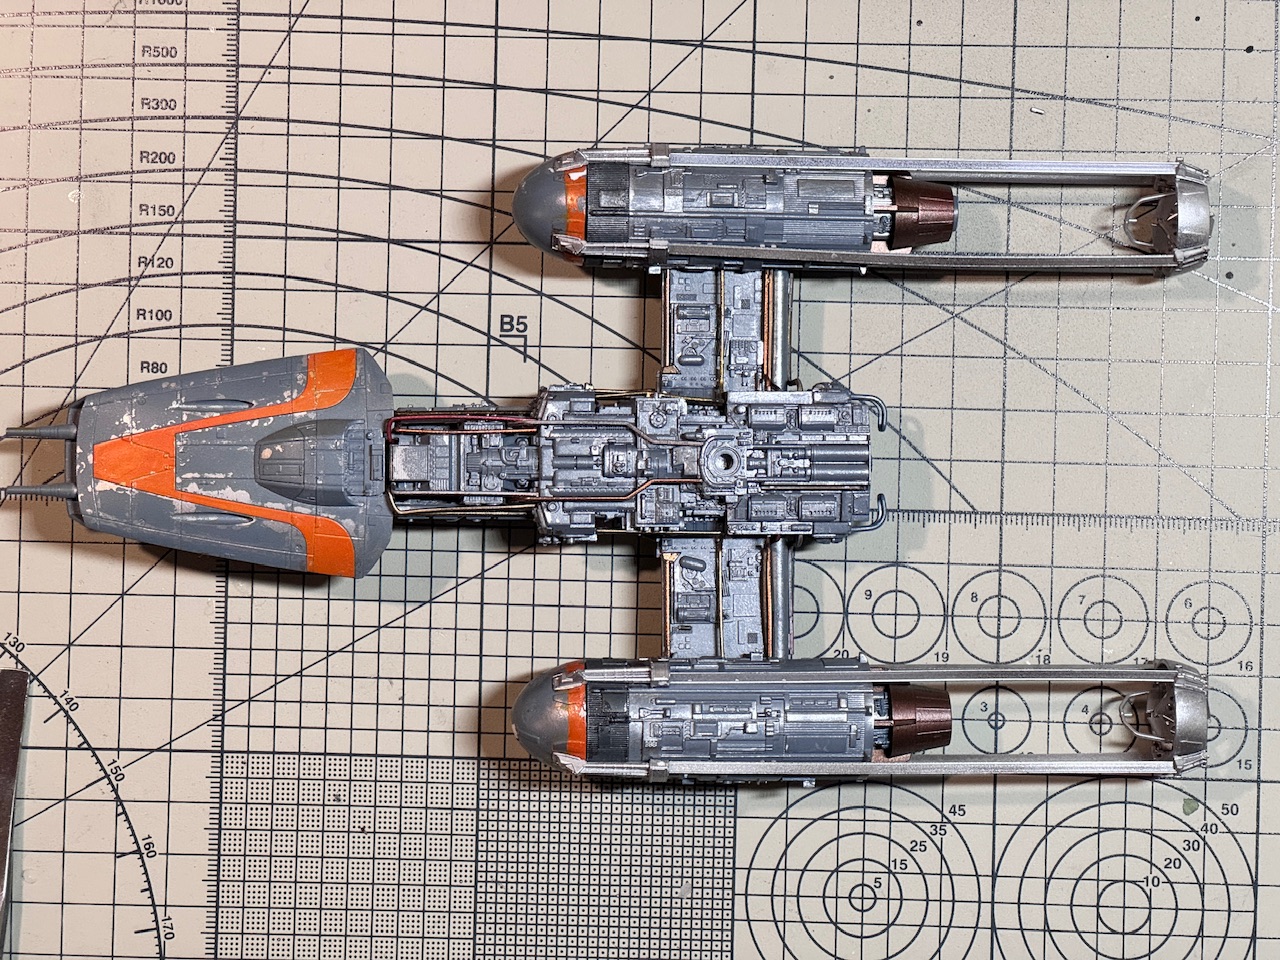
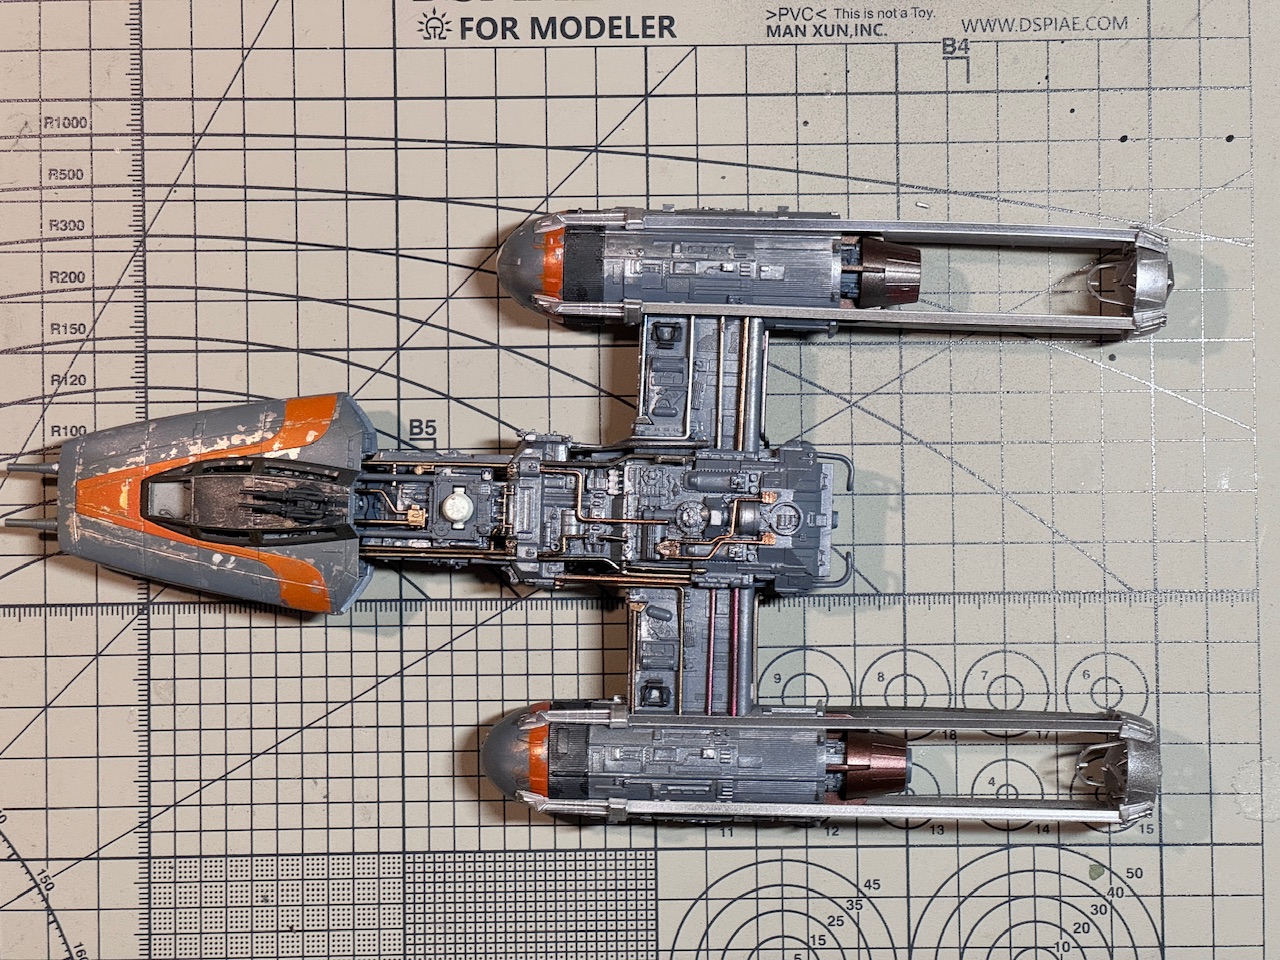
That's a cool color scheme!I finally put all *38* individual pieces of piping on this damn thing. Good thing they don't put the designer's contact info on the box or I would fly to Japan and punch them right in the whooo-hah
View attachment 121957
View attachment 121958
Some touch up paint and I think a little clay-based wash to finish it up.
thank you! I am pretty happy with it. I wish the main Ocean Gray were darker, but I chickened out.That's a cool color scheme!
perfect amount of weathering for an Imperial ship. looks really nice.I think I'm almost done here myself. I'm just doing some final weathering and detailing here and there. I found a Return Of The Jedi plaque from my old MPC Falcon and I'm painting it up in a chrome silver and I'll seat it on the top of the box.
That box is a $10 wooden box from Officeworks here in Australia which I've primed and coated in 10 layers of a gloss black. The stem is from a $10 K-Mart desk lamp which I butchered for the the stem itself.
I haven't done anything special with the landing gear shots other than to adhere the peices with pieces of Blu Tac. I'll probably display it in flight mode for much of the time.
Going forward, I'd like to include some greeblies for the wing channels and do some more detailing on the undercarriage.
This is the dream build I wanted to achieve. It tested me for sure but I'm so glad I stuck with it.
Thank you for your encouragement. It meant a lot to me.
View attachment 121780View attachment 121781
View attachment 121782View attachment 121784View attachment 121785
Well worth it the effort though as it looks great. PanthermanI finally put all *38* individual pieces of piping on this damn thing. Good thing they don't put the designer's contact info on the box or I would fly to Japan and punch them right in the whooo-hah
View attachment 121957
View attachment 121958
Some touch up paint and I think a little clay-based wash to finish it up.
Thank youWell worth it the effort though as it looks great. Pantherman
This looks excellent! The chef's kiss! Well done!!I finally put all *38* individual pieces of piping on this damn thing. Good thing they don't put the designer's contact info on the box or I would fly to Japan and punch them right in the whooo-hah
View attachment 121957
View attachment 121958
Some touch up paint and I think a little clay-based wash to finish it up.


