
You are using an out of date browser. It may not display this or other websites correctly.
You should upgrade or use an alternative browser.
You should upgrade or use an alternative browser.
Zoukei Mura 1/32 Ki 45Toryu (Nick)
- Thread starter BarryW
- Start date


Edbert
Well-Known Member
- Joined
- May 16, 2024
- Messages
- 3,121
Love it!
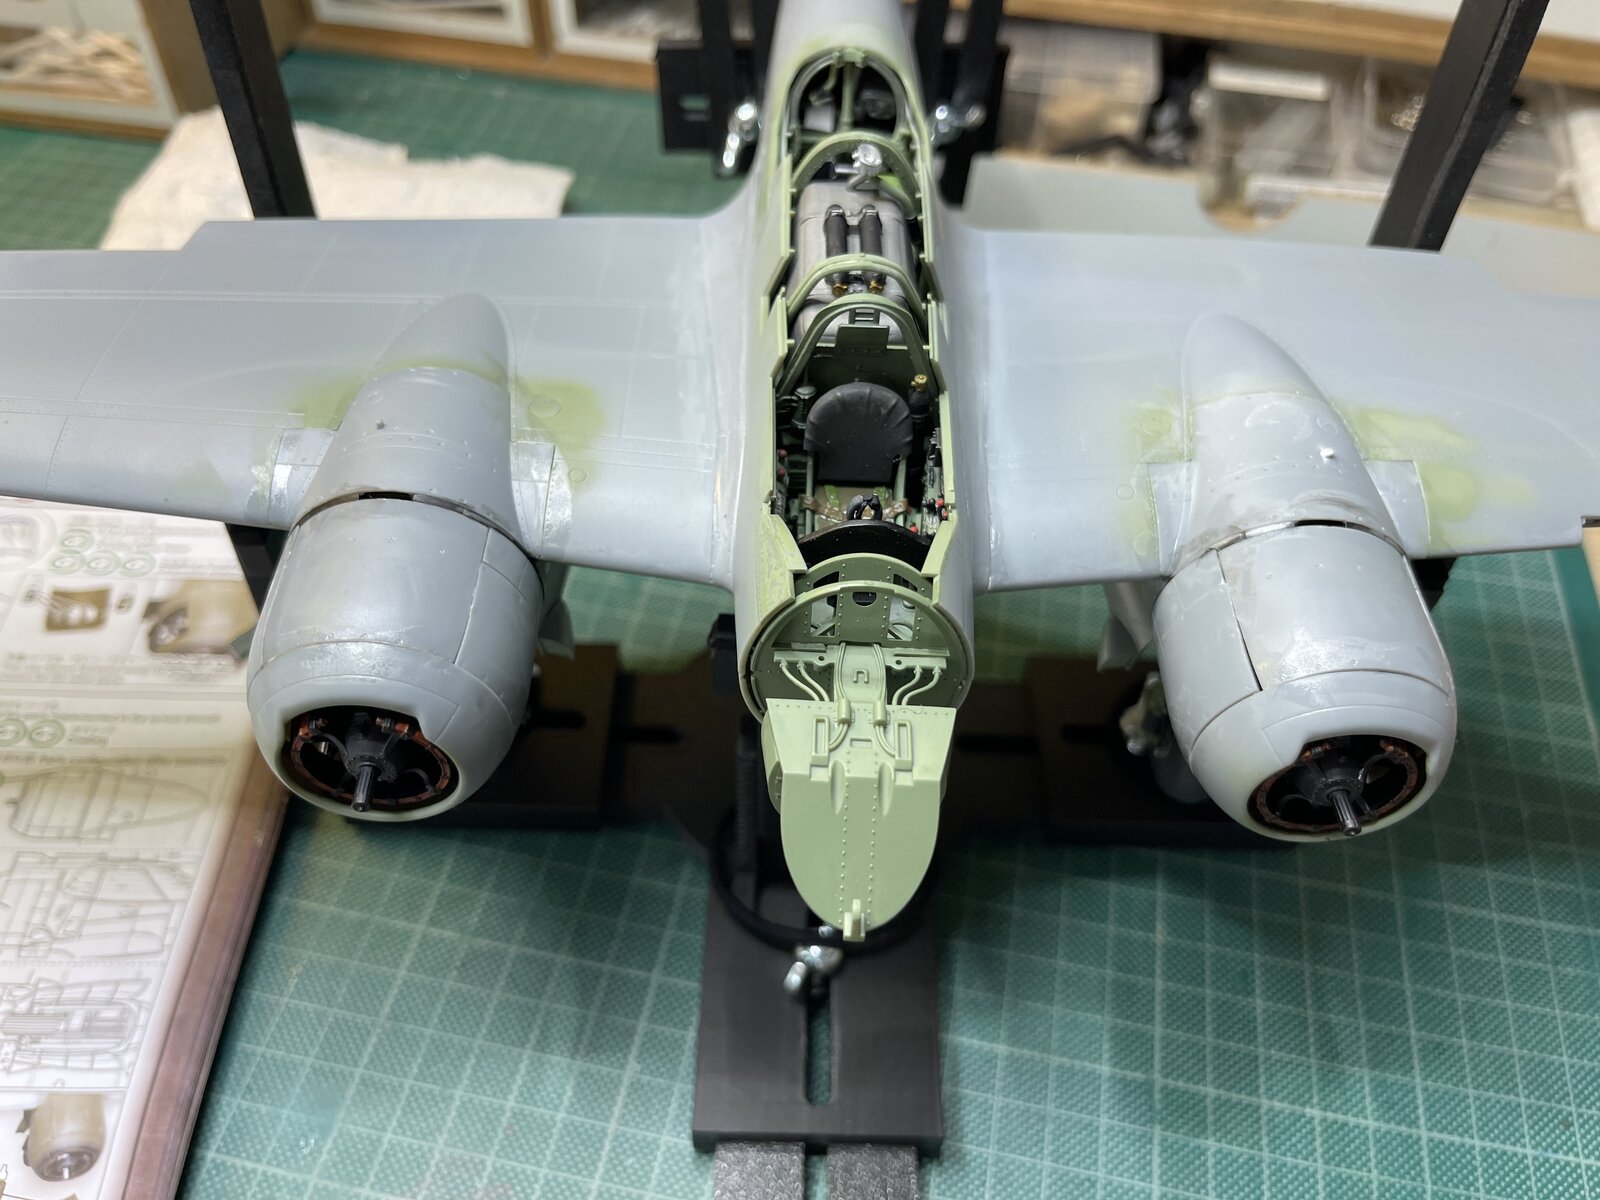
I do not want to read too much into your pics Barry, but I think your last two posts illustrate what I think (I've only built 2 kits from ZM so not enough data) is a major flaw with their designs.
In the earlier pic you have fitted the engines, and used rather beefy clamps to hold them in place. Only to find that when applying the cowls they do not mate up with other sheet-metal parts. On my only ZM radial build I had that problem. I surmises that my engine was not mounted exactly correctly, or that the braces the engine bolts to was not exactly right. But in those stages there's no way to know, until you try to fit the covers, which cannot be done via dry-fitting if you are holding 8-10 bits by hand.
Similar but different issue with my inline water-cooled build but this time it was the wing-roots and their covers that did not mate up exactly. Nothing that cannot be fixed as you said, but took a little of the shine off the kit for me. Not sure what I'd say they should do to fix it, maybe offer some blueprints with double-decimal measurements so the builder can be sure not to encounter problems later?
I do not want to read too much into your pics Barry, but I think your last two posts illustrate what I think (I've only built 2 kits from ZM so not enough data) is a major flaw with their designs.
In the earlier pic you have fitted the engines, and used rather beefy clamps to hold them in place. Only to find that when applying the cowls they do not mate up with other sheet-metal parts. On my only ZM radial build I had that problem. I surmises that my engine was not mounted exactly correctly, or that the braces the engine bolts to was not exactly right. But in those stages there's no way to know, until you try to fit the covers, which cannot be done via dry-fitting if you are holding 8-10 bits by hand.
Similar but different issue with my inline water-cooled build but this time it was the wing-roots and their covers that did not mate up exactly. Nothing that cannot be fixed as you said, but took a little of the shine off the kit for me. Not sure what I'd say they should do to fix it, maybe offer some blueprints with double-decimal measurements so the builder can be sure not to encounter problems later?

BarryW
Well-Known Member
- Joined
- Apr 17, 2025
- Messages
- 263
ZM have very tight tolerances and it takes very little to have something not quite in the right position to give this problem. It could be as little as the thickness of the paint.Love it!
I do not want to read too much into your pics Barry, but I think your last two posts illustrate what I think (I've only built 2 kits from ZM so not enough data) is a major flaw with their designs.
In the earlier pic you have fitted the engines, and used rather beefy clamps to hold them in place. Only to find that when applying the cowls they do not mate up with other sheet-metal parts. On my only ZM radial build I had that problem. I surmises that my engine was not mounted exactly correctly, or that the braces the engine bolts to was not exactly right. But in those stages there's no way to know, until you try to fit the covers, which cannot be done via dry-fitting if you are holding 8-10 bits by hand.
Similar but different issue with my inline water-cooled build but this time it was the wing-roots and their covers that did not mate up exactly. Nothing that cannot be fixed as you said, but took a little of the shine off the kit for me. Not sure what I'd say they should do to fix it, maybe offer some blueprints with double-decimal measurements so the builder can be sure not to encounter problems later?
I am pleased that I got this far without any kind of significant issue.
BarryW
Well-Known Member
- Joined
- Apr 17, 2025
- Messages
- 263
Slow gong at the moment. Doing various 'odd jobs'. Some pictures of a few
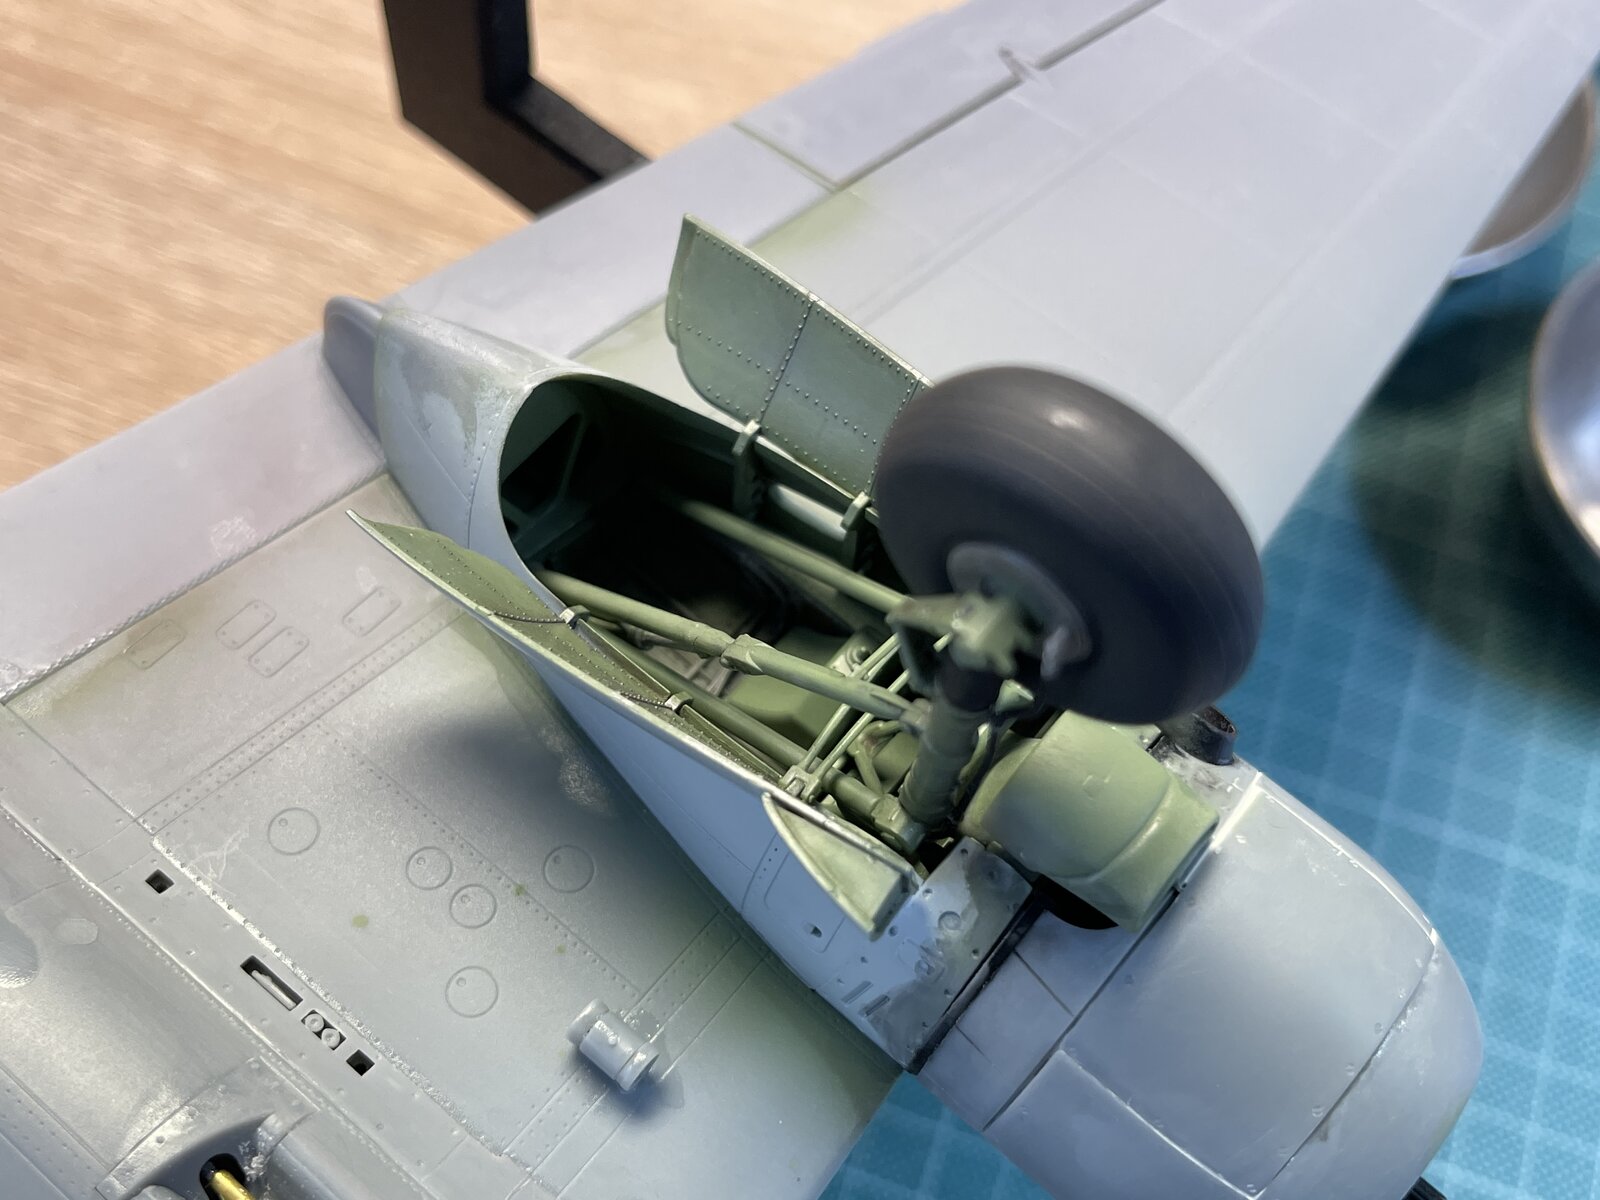
Some more work to the u/c
The nose guns and landing light fixed into place.
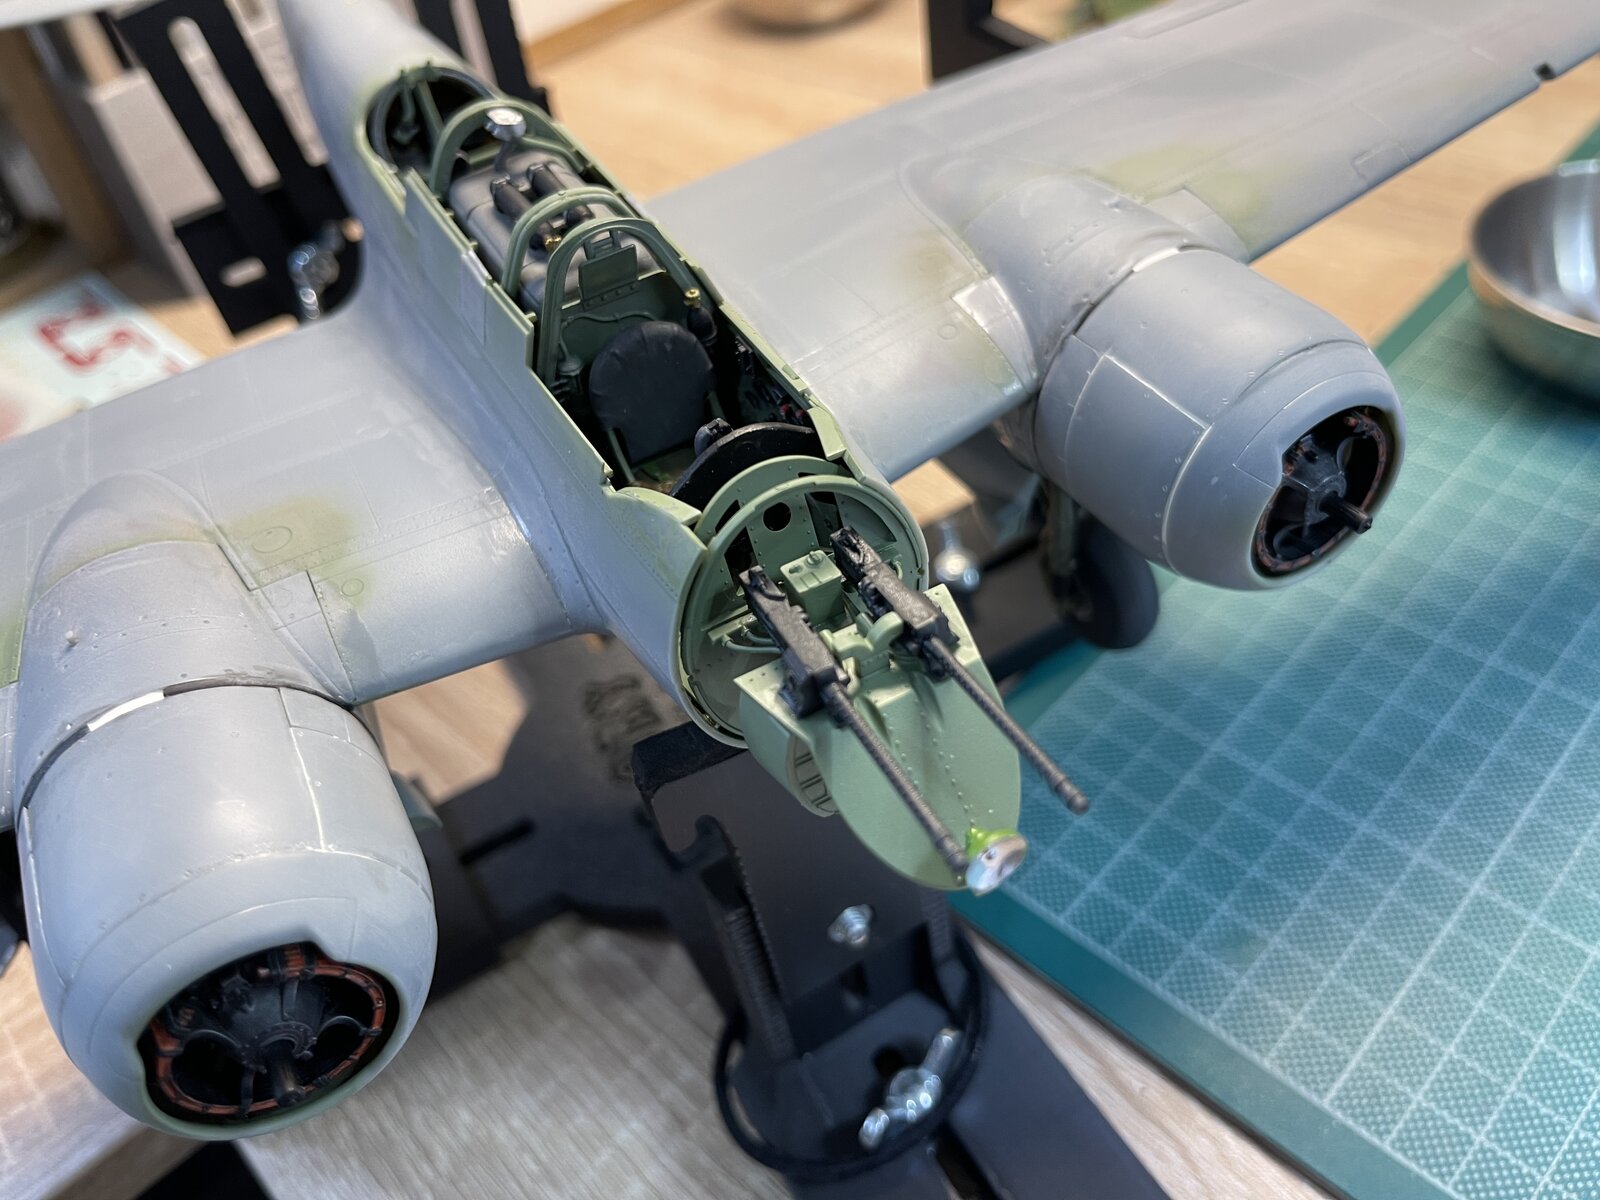
I used AK metallic pens for the chrome.
I used a brass rod to replace the broken gin barrel.
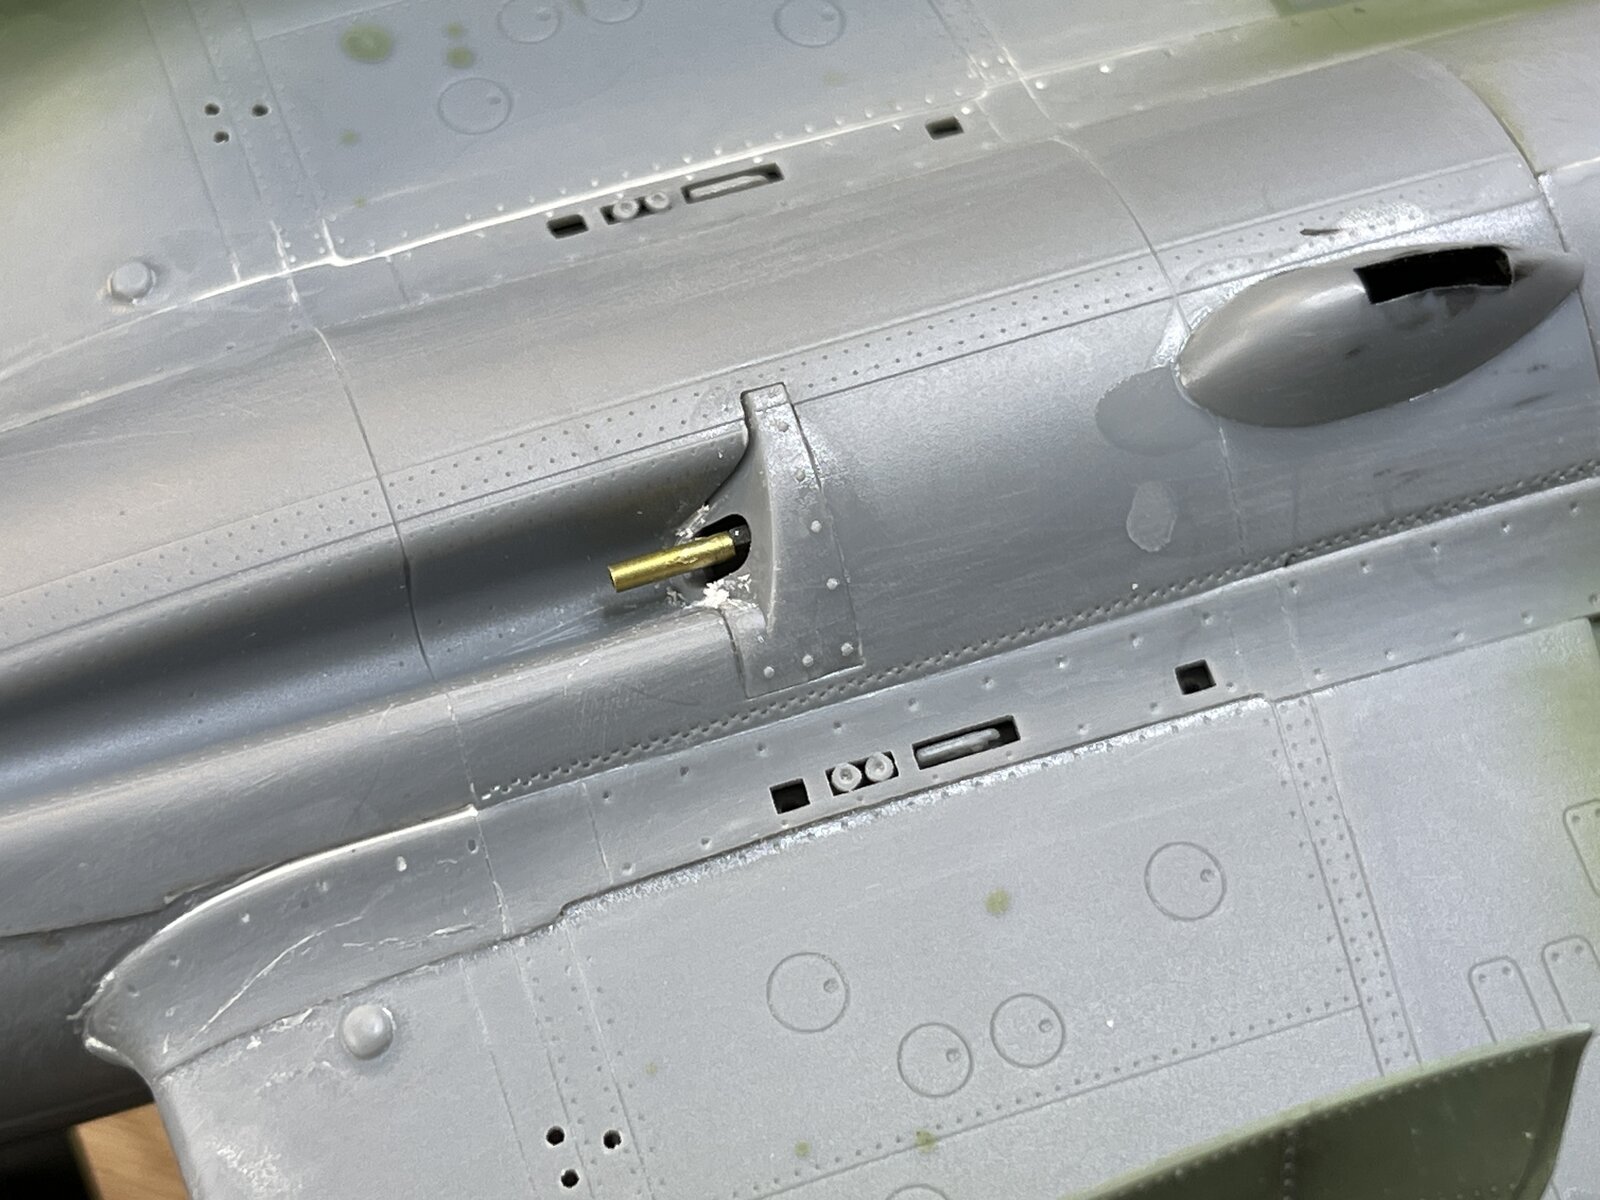
It won't be long before I start the painting. It's going to be a challenge.
Some more work to the u/c
The nose guns and landing light fixed into place.
I used AK metallic pens for the chrome.
I used a brass rod to replace the broken gin barrel.
It won't be long before I start the painting. It's going to be a challenge.

'Tis the season, on and off the bench. Glad you found some time to post progress. Looking forward to your paint treatment!Doing various 'odd jobs


![Pampers Sensitive Baby Wipes, Clinically Proven, Fragrance Free, Unscented, Water Based, Hypoallergenic, Multi-Use, Hand Wipes 336 Wipes Total (6X Flip-Top Packs) [Packaging May Vary]](https://m.media-amazon.com/images/I/41KLBHu9CAL._SL500_.jpg)





As an Amazon Associate we earn from qualifying purchases. Product prices and availability are accurate as of the date/time indicated and are subject to change.

BOATMAN
Well-Known Member
- Joined
- Oct 7, 2024
- Messages
- 2,175
HI Barry love your work on this plane an that gun barrel will look real very well done sir an ive been followin along on your buildSlow gong at the moment. Doing various 'odd jobs'. Some pictures of a few
Some more work to the u/c View attachment 151458
The nose guns and landing light fixed into place. View attachment 151459
I used AK metallic pens for the chrome.
I used a brass rod to replace the broken gin barrel.
View attachment 151460
It won't be long before I start the painting. It's going to be a challenge.
chrisb
Edbert
Well-Known Member
- Joined
- May 16, 2024
- Messages
- 3,121
Oh no, don't break the Gin barrel!!
Just giving you crap, I hate Gin anyway, love the work you're doing.
I suspect ZM's instructions tell you, what is the small gadget on the under-wing near the starboard engine nacelle? I'm working on a Ki-61 and it has one of those doomahickeys too.
Just giving you crap, I hate Gin anyway, love the work you're doing.
I suspect ZM's instructions tell you, what is the small gadget on the under-wing near the starboard engine nacelle? I'm working on a Ki-61 and it has one of those doomahickeys too.

plastickjunkie
Well-Known Member
- Joined
- May 27, 2010
- Messages
- 139
Good call using Evergreen on the knob detailing. I would have done the same. For all round ones thick wood glue works great too.For things like throttle levers there's a catch-22 though. The PE is too thin to have a "knob" on the end, I have seen it where the manufacturer wants a triple thick (double folded to sandwich the center) bit on the end but there's alignment issues and seams created by this method. Similar but different with the plastic ones, they nail the knob part, but the shaft of the lever is never thin enough, even in 1/32. What I do to get around these problems is use the PE for the lever and make by own knobs from evergreen.
View attachment 149226
You are doing a fantastic job with this great looking kit. I have the old Nichimo 1/48 kit in the stash that requires a TON of work.
BarryW
Well-Known Member
- Joined
- Apr 17, 2025
- Messages
- 263
They describe it as a 'fuel cooler' Edbert.Oh no, don't break the Gin barrel!!
Just giving you crap, I hate Gin anyway, love the work you're doing.
I suspect ZM's instructions tell you, what is the small gadget on the under-wing near the starboard engine nacelle? I'm working on a Ki-61 and it has one of those doomahickeys too.
Edbert
Well-Known Member
- Joined
- May 16, 2024
- Messages
- 3,121
Thanks!They describe it as a 'fuel cooler' Edbert.
Just one more thing to love about ZM kits, those instructions are very detailed and educational.

Jakko
Well-Known Member
The warmer the fuel is, the fewer molecules of it will go into a cylinder for a given volume of fuel being let into it. That means there's less fuel to actually burn compared to cooler fuel, leading to reduced performance. It's the same reason for air coolers on high-performance engines, though I suspect less useful overall.'fuel cooler'
BarryW
Well-Known Member
- Joined
- Apr 17, 2025
- Messages
- 263
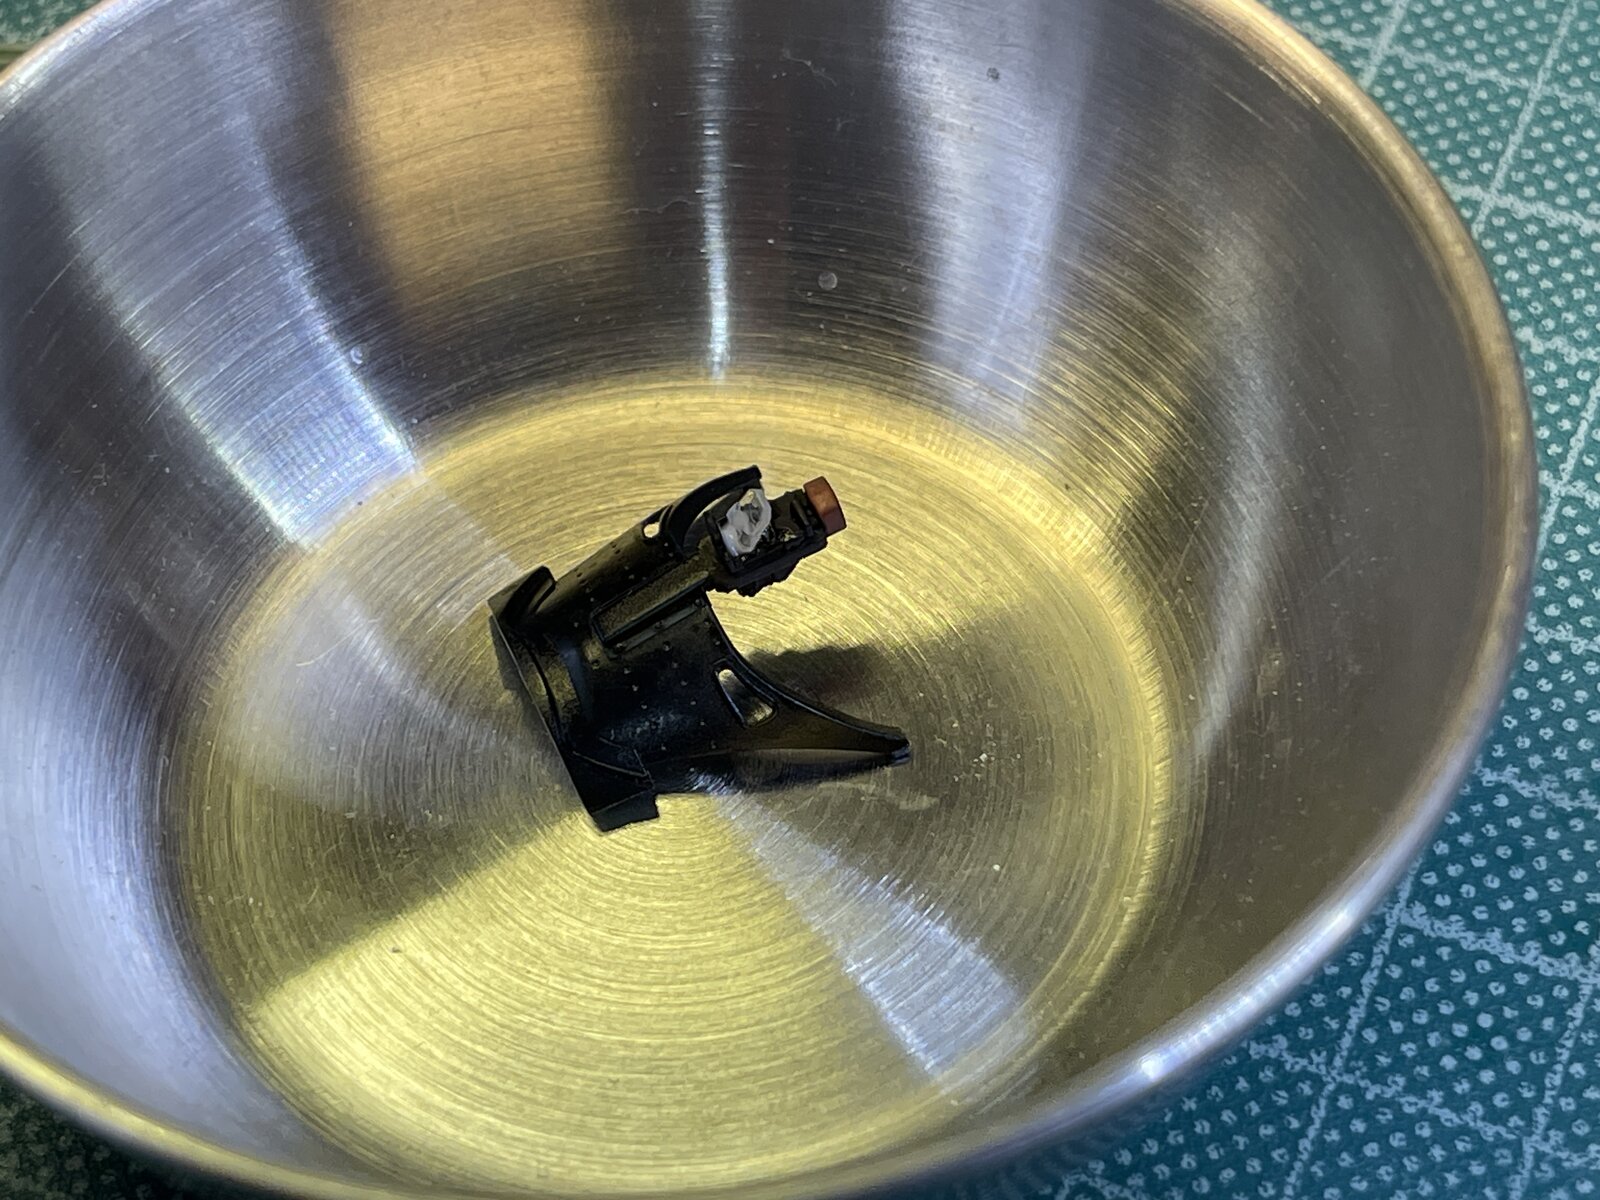
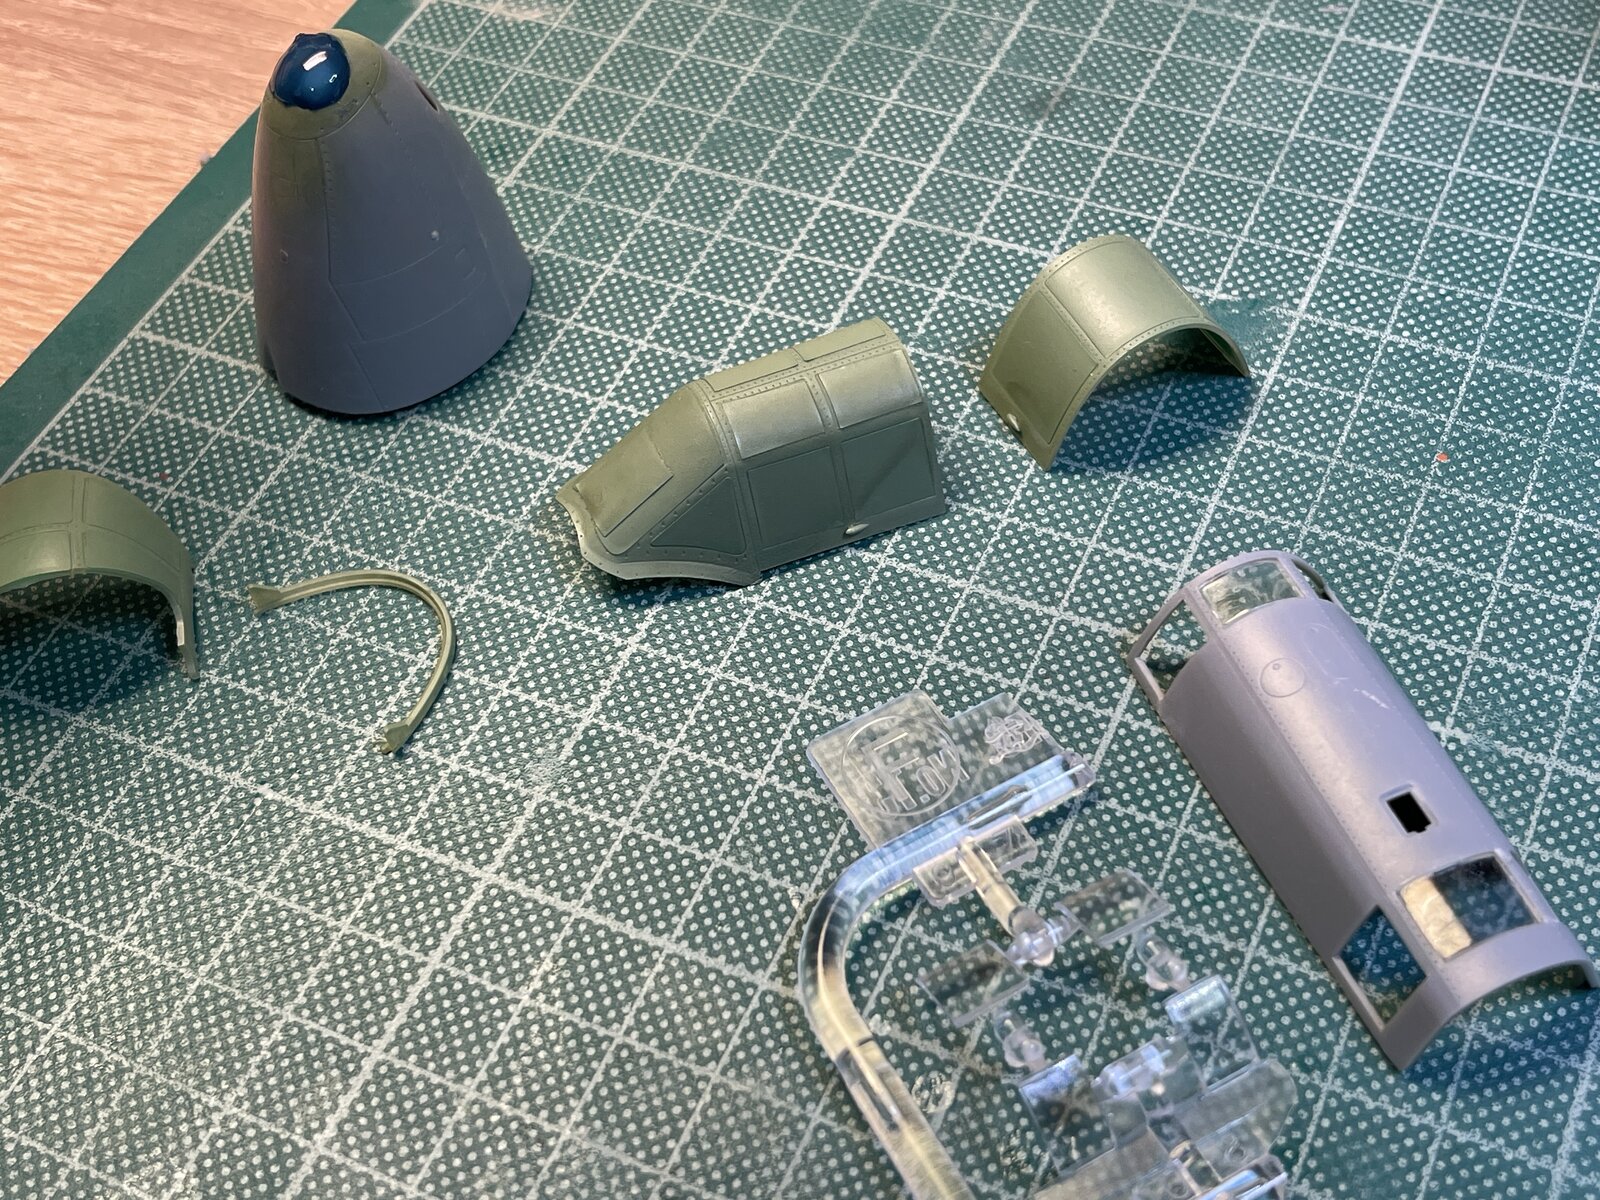
I am now ready to mask up and surface prep ready to paint, it will be a primer first of course, a grey one as the camo won't lend itself to black basing, the topside anyway.
Once the cement has fully hardened I will mask up and sand the whole model with 1500 grit and 2500 grit sanding sponges after wiping it all down with degreaser.
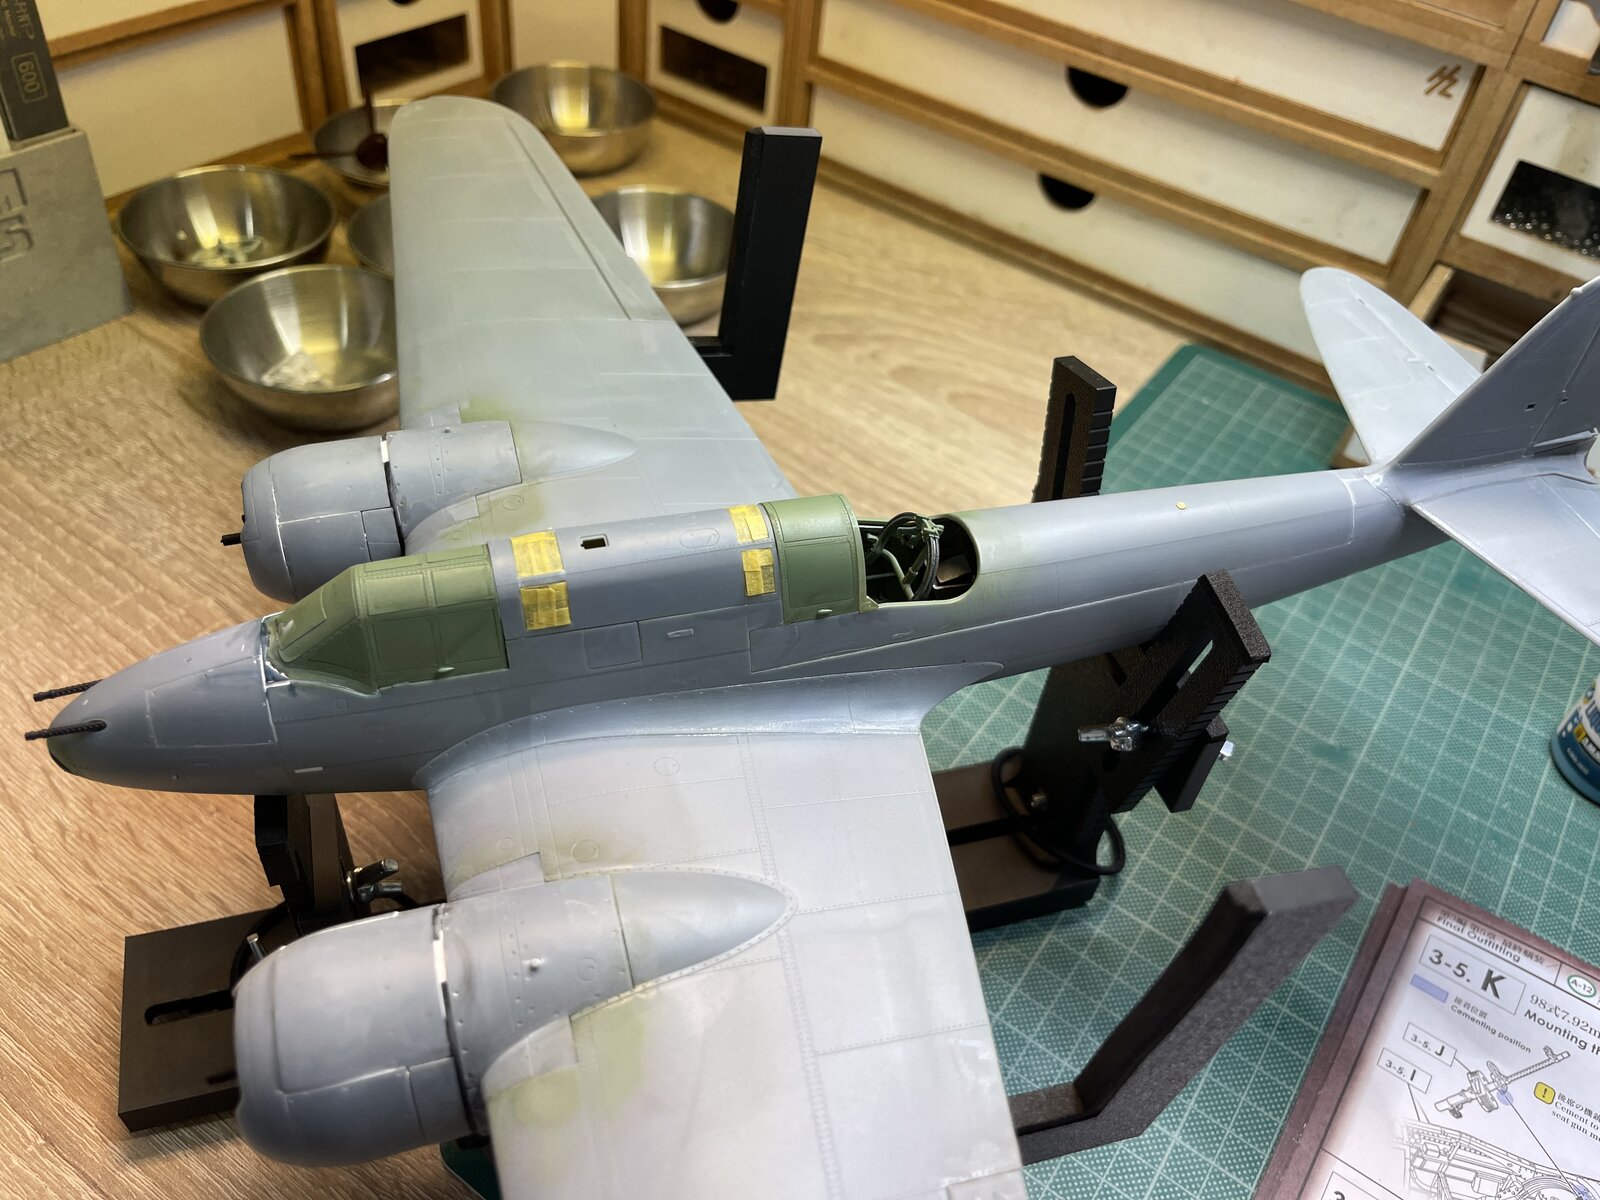
Now why is it that we often find that transparencies don't fit well. You can have a perfectly fitting kit until you get to transparencies!! These are not disaster on this kit but are certainly a disappointment. A bit of filler is helping.
Once the cement has fully hardened I will mask up and sand the whole model with 1500 grit and 2500 grit sanding sponges after wiping it all down with degreaser.
Now why is it that we often find that transparencies don't fit well. You can have a perfectly fitting kit until you get to transparencies!! These are not disaster on this kit but are certainly a disappointment. A bit of filler is helping.
BarryW
Well-Known Member
- Joined
- Apr 17, 2025
- Messages
- 263
After masking I cleaned the plastic with ipa then lightly sanded with a 2500 grit sanding sponge.
I used a grey primer and after than once again went over it with a 2500 grit sponge. Thanks to the engineering I found my joins all OK as most are along panel lines.
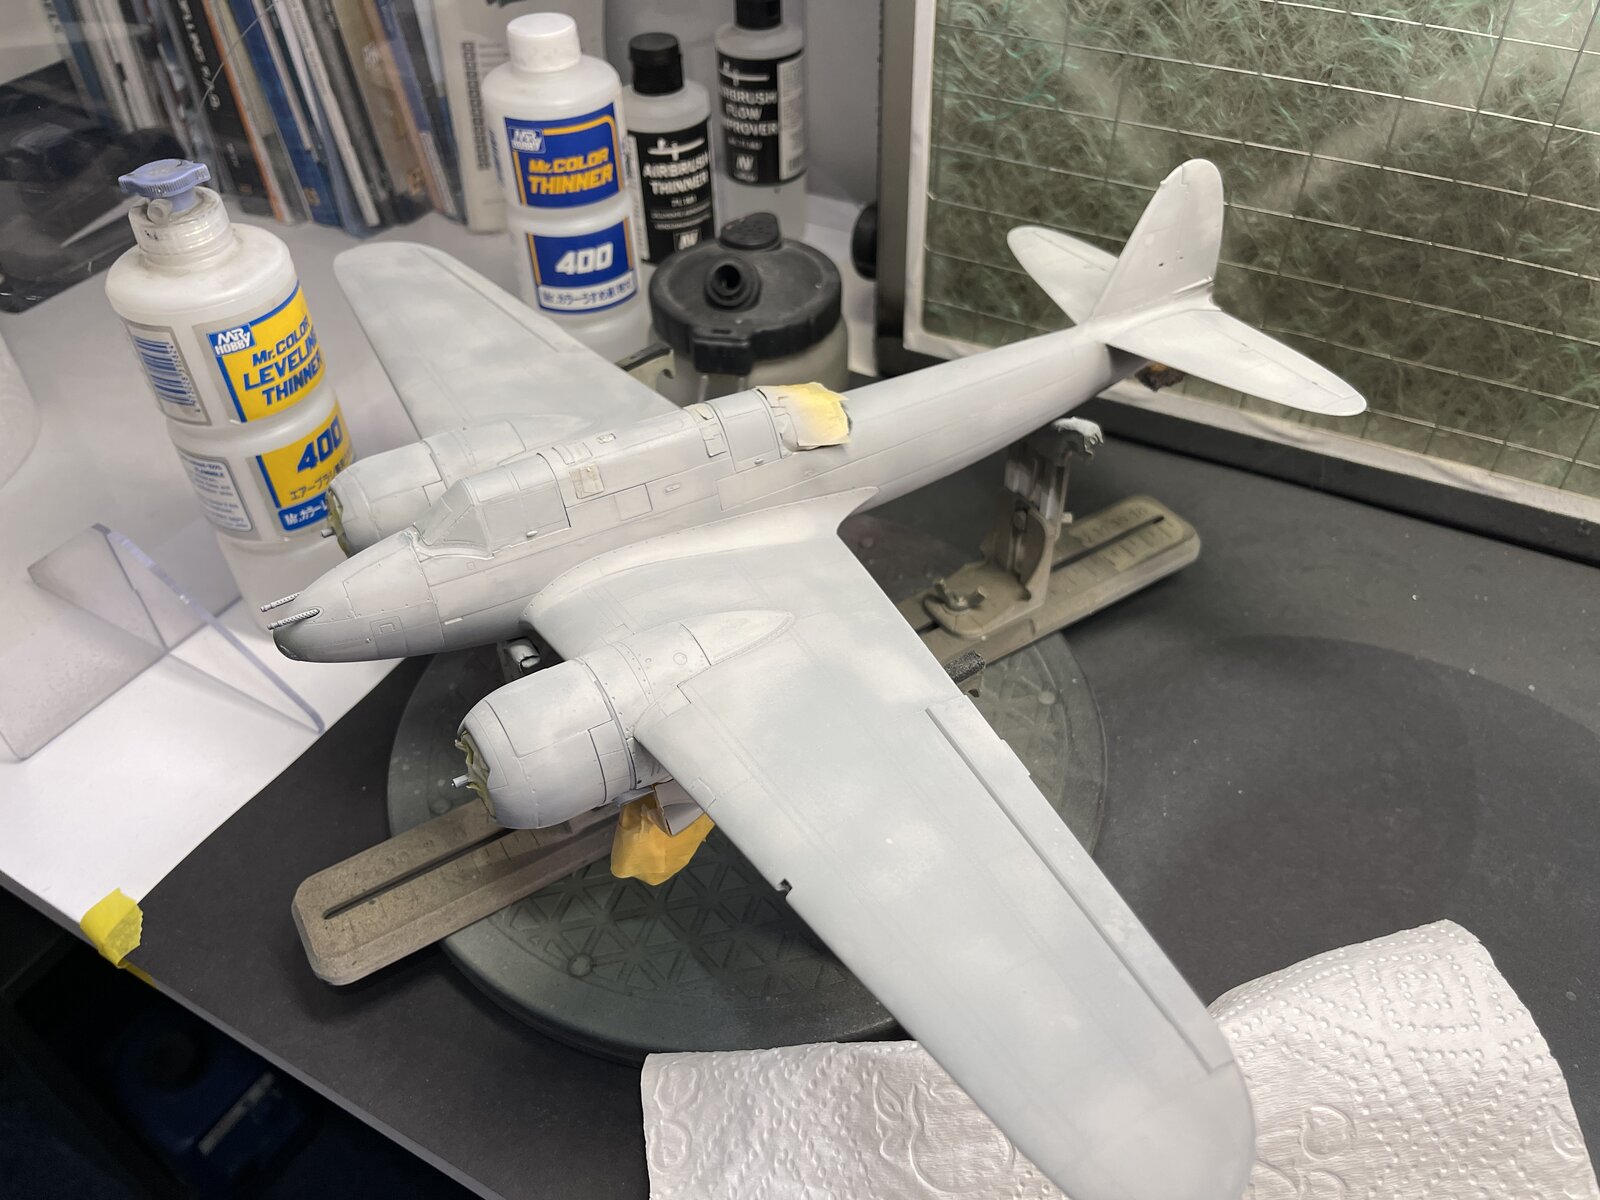
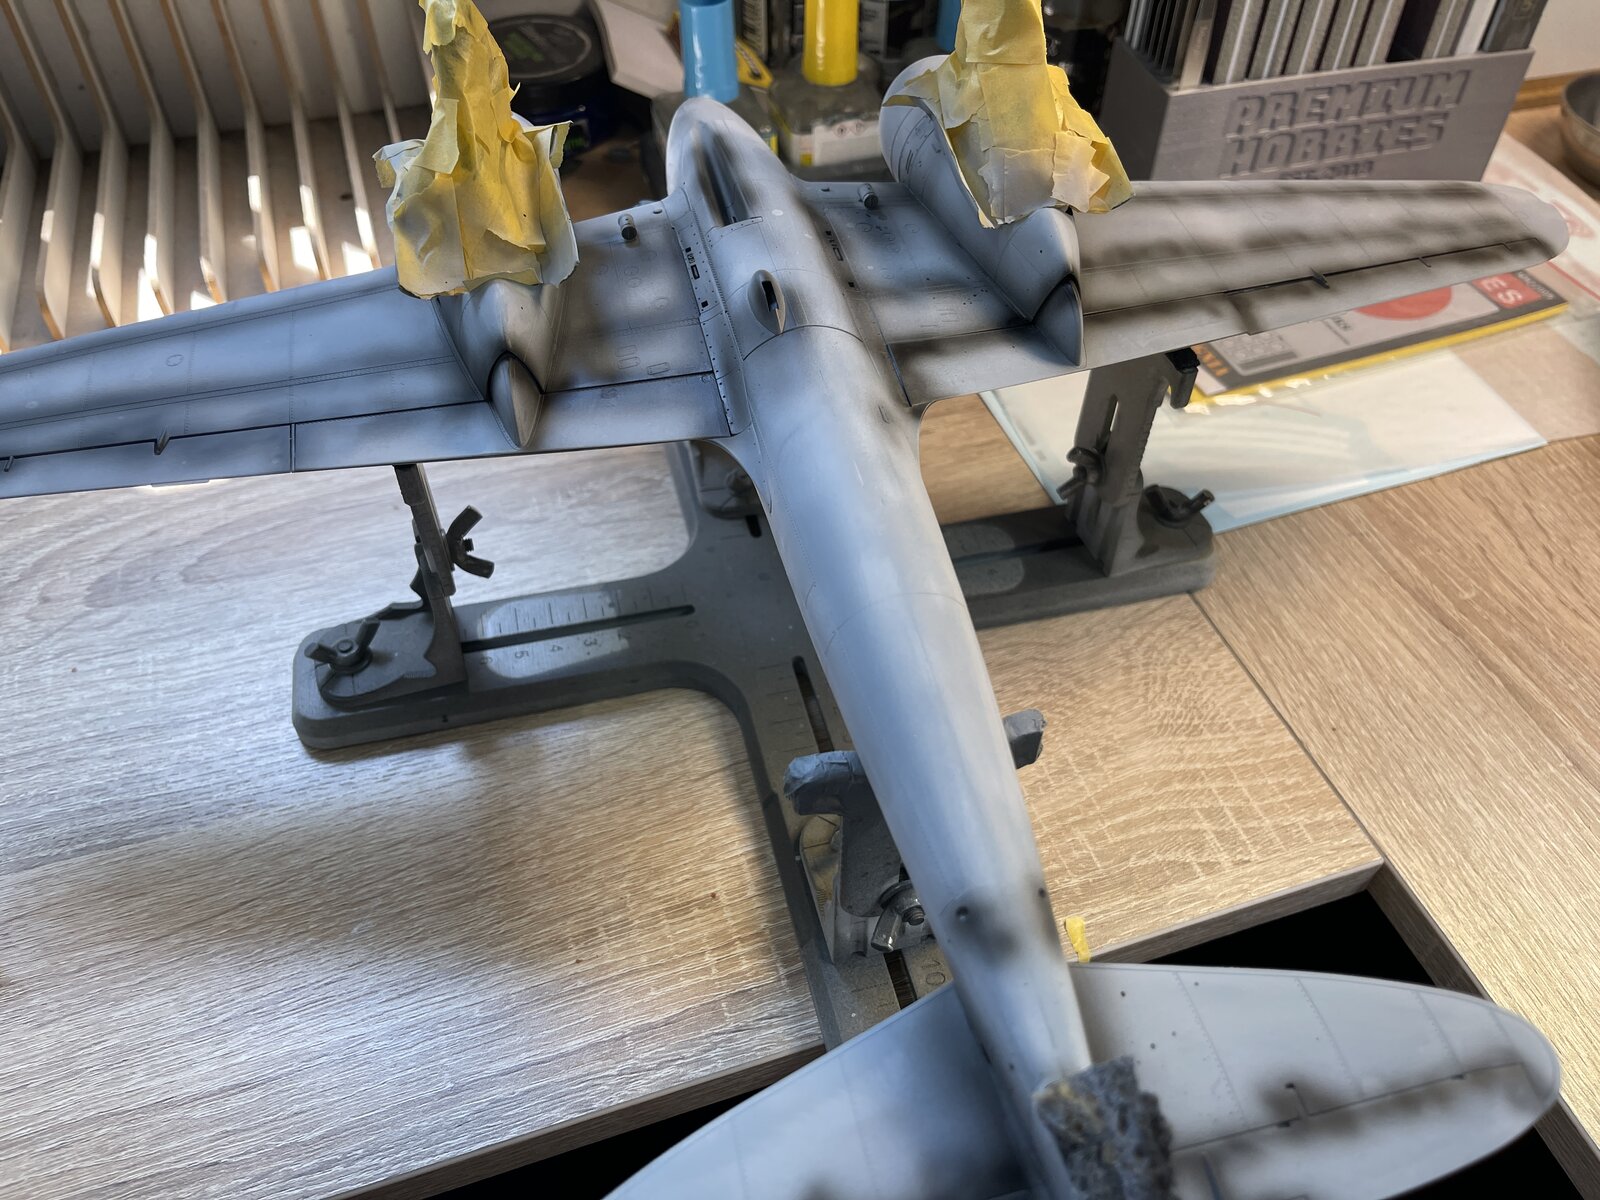
On the underside I did some preshading.
These are the MRP paints used in this build.
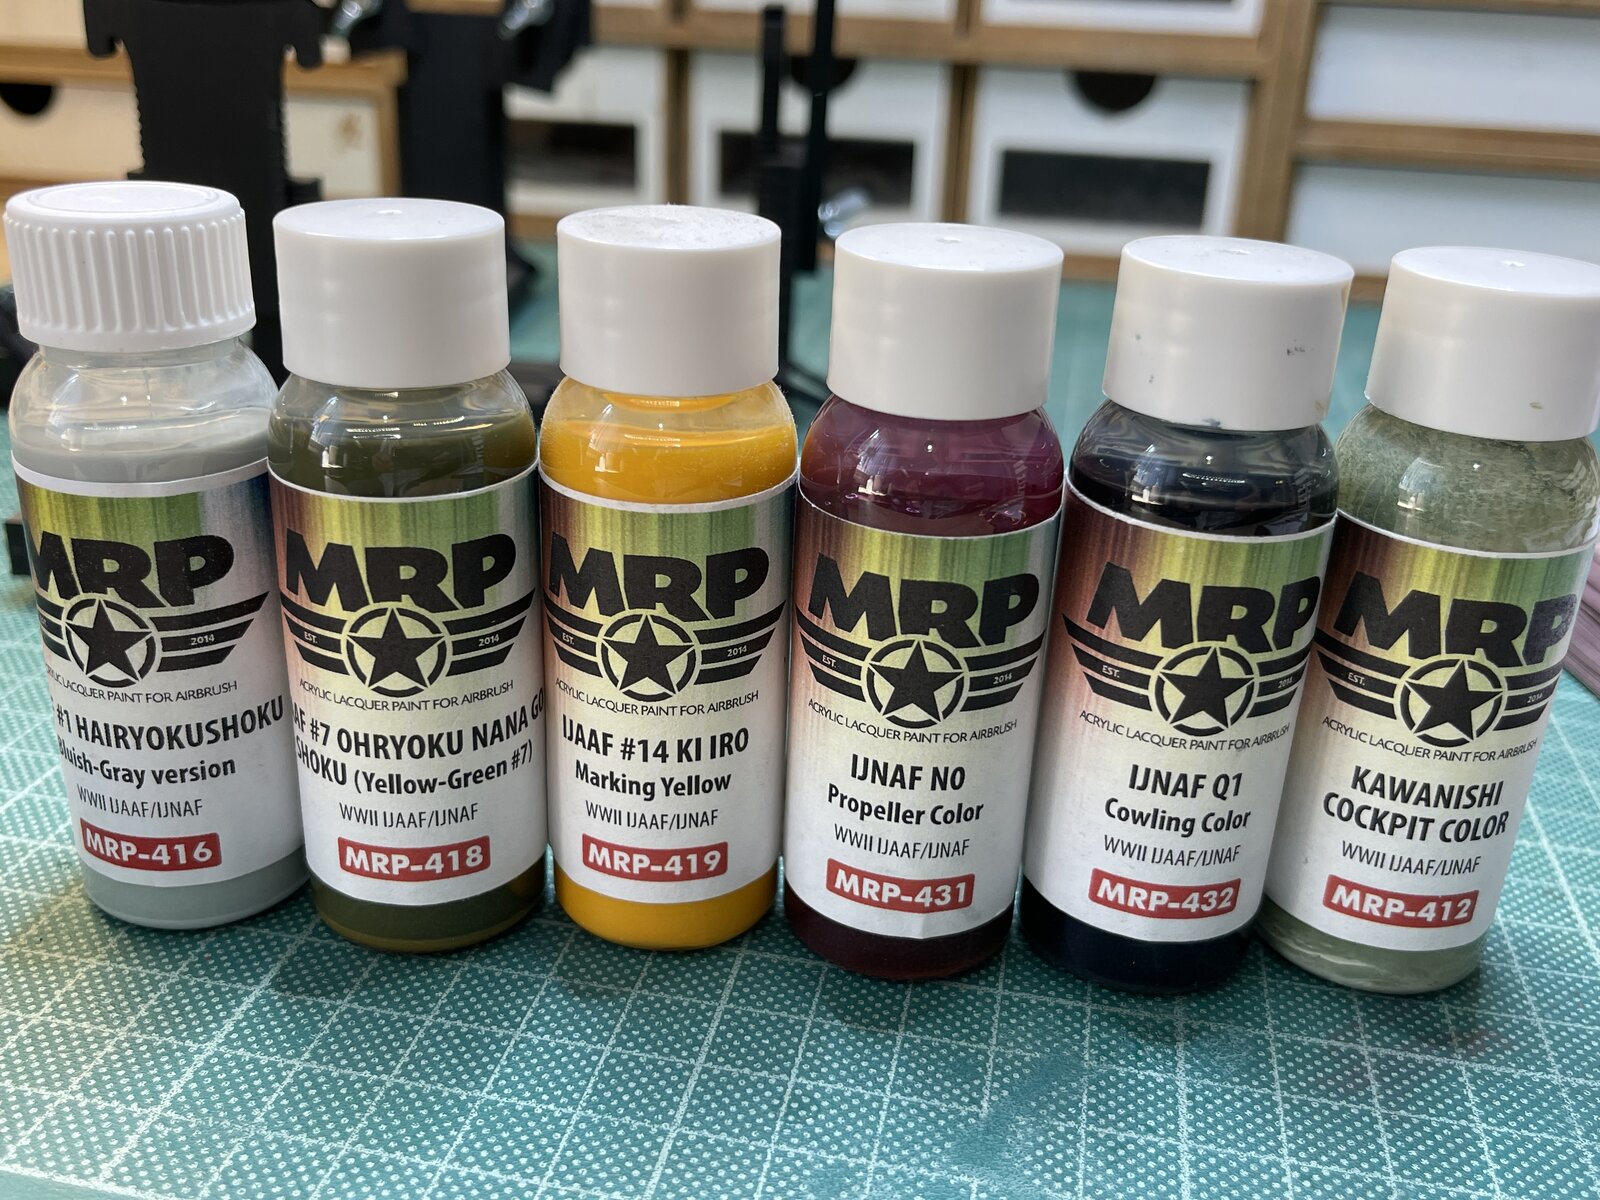
The two on the left being the ones selected for the camp scheme.
I used a grey primer and after than once again went over it with a 2500 grit sponge. Thanks to the engineering I found my joins all OK as most are along panel lines.
On the underside I did some preshading.
These are the MRP paints used in this build.
The two on the left being the ones selected for the camp scheme.
BarryW
Well-Known Member
- Joined
- Apr 17, 2025
- Messages
- 263
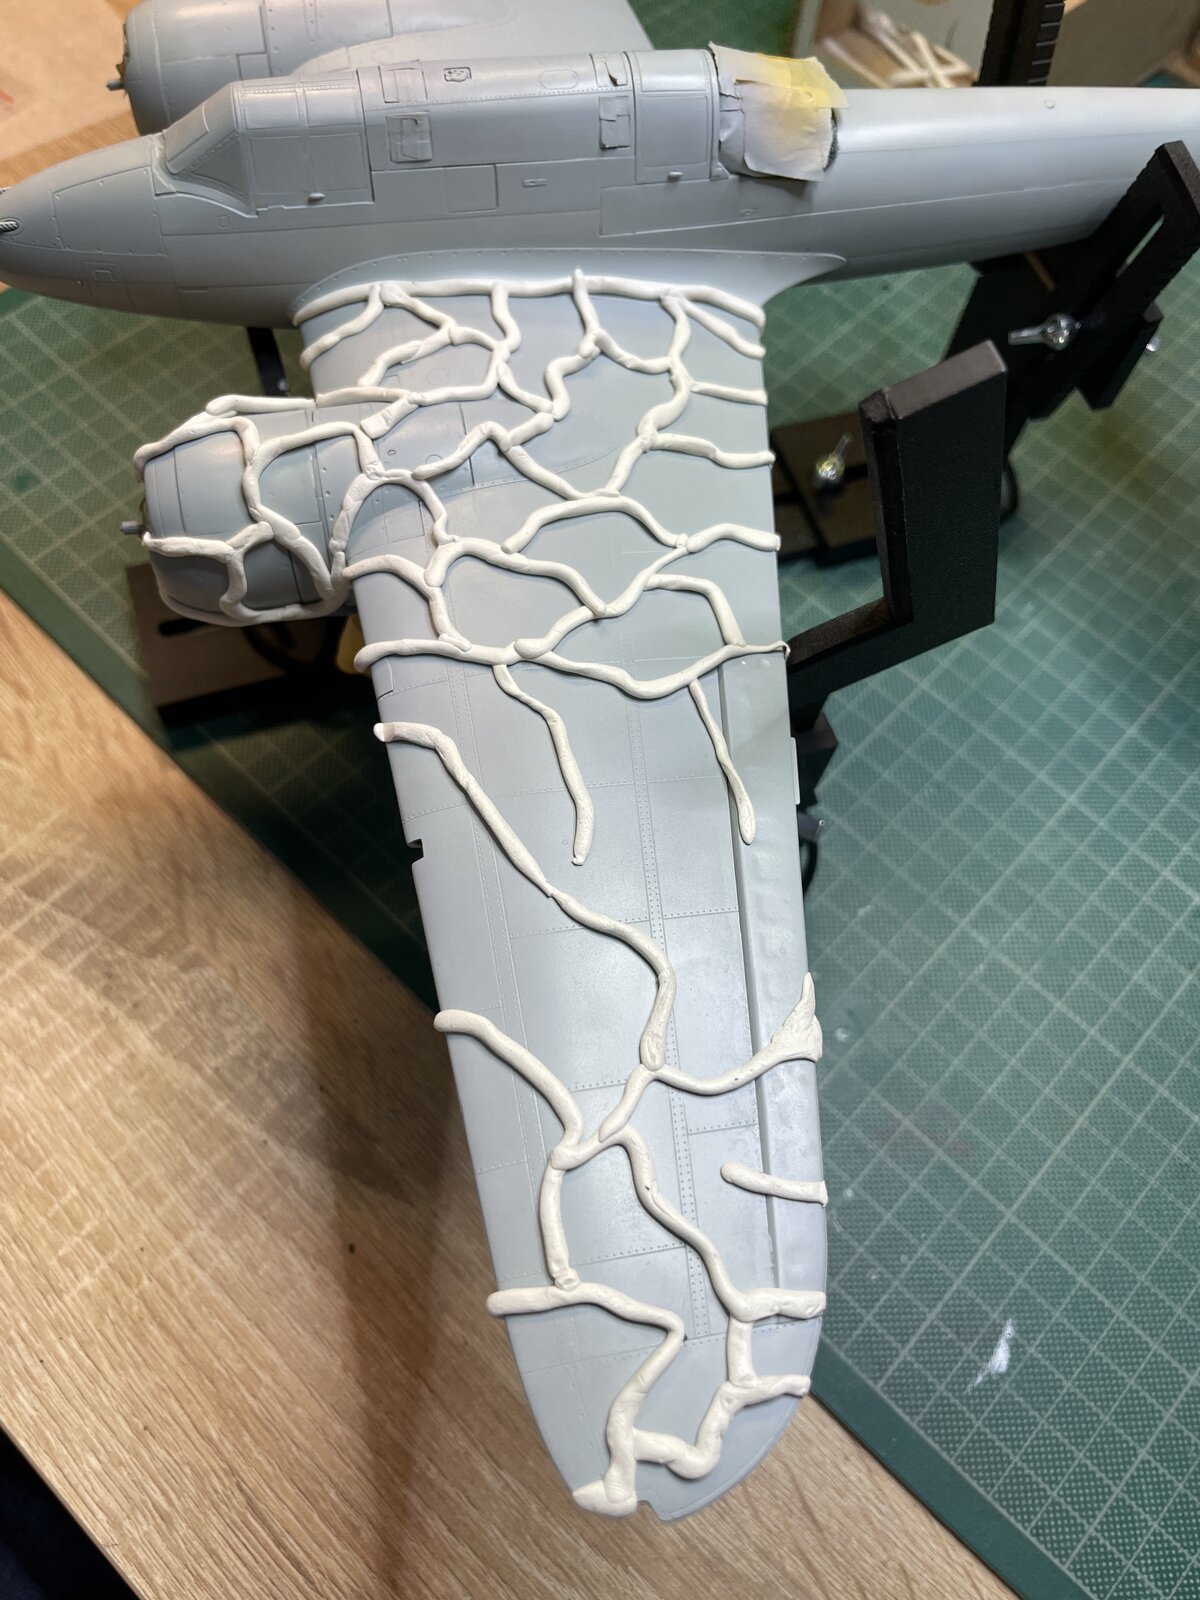
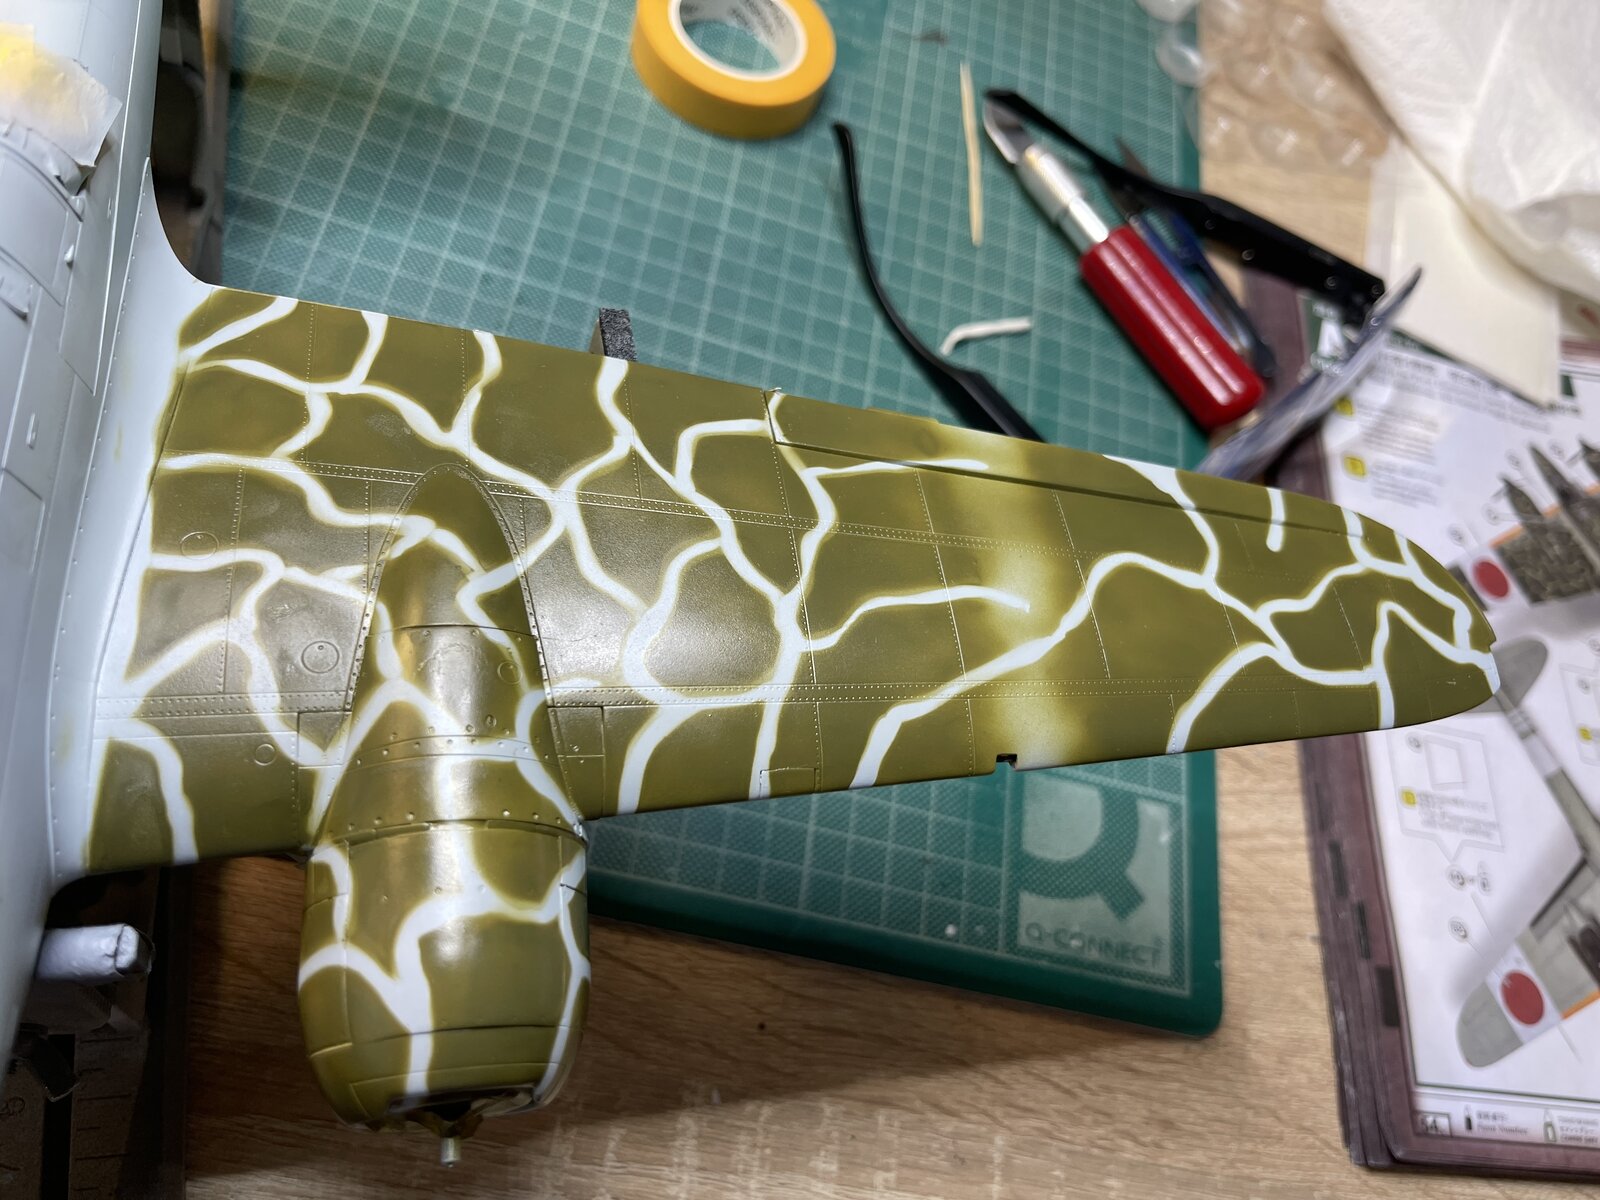
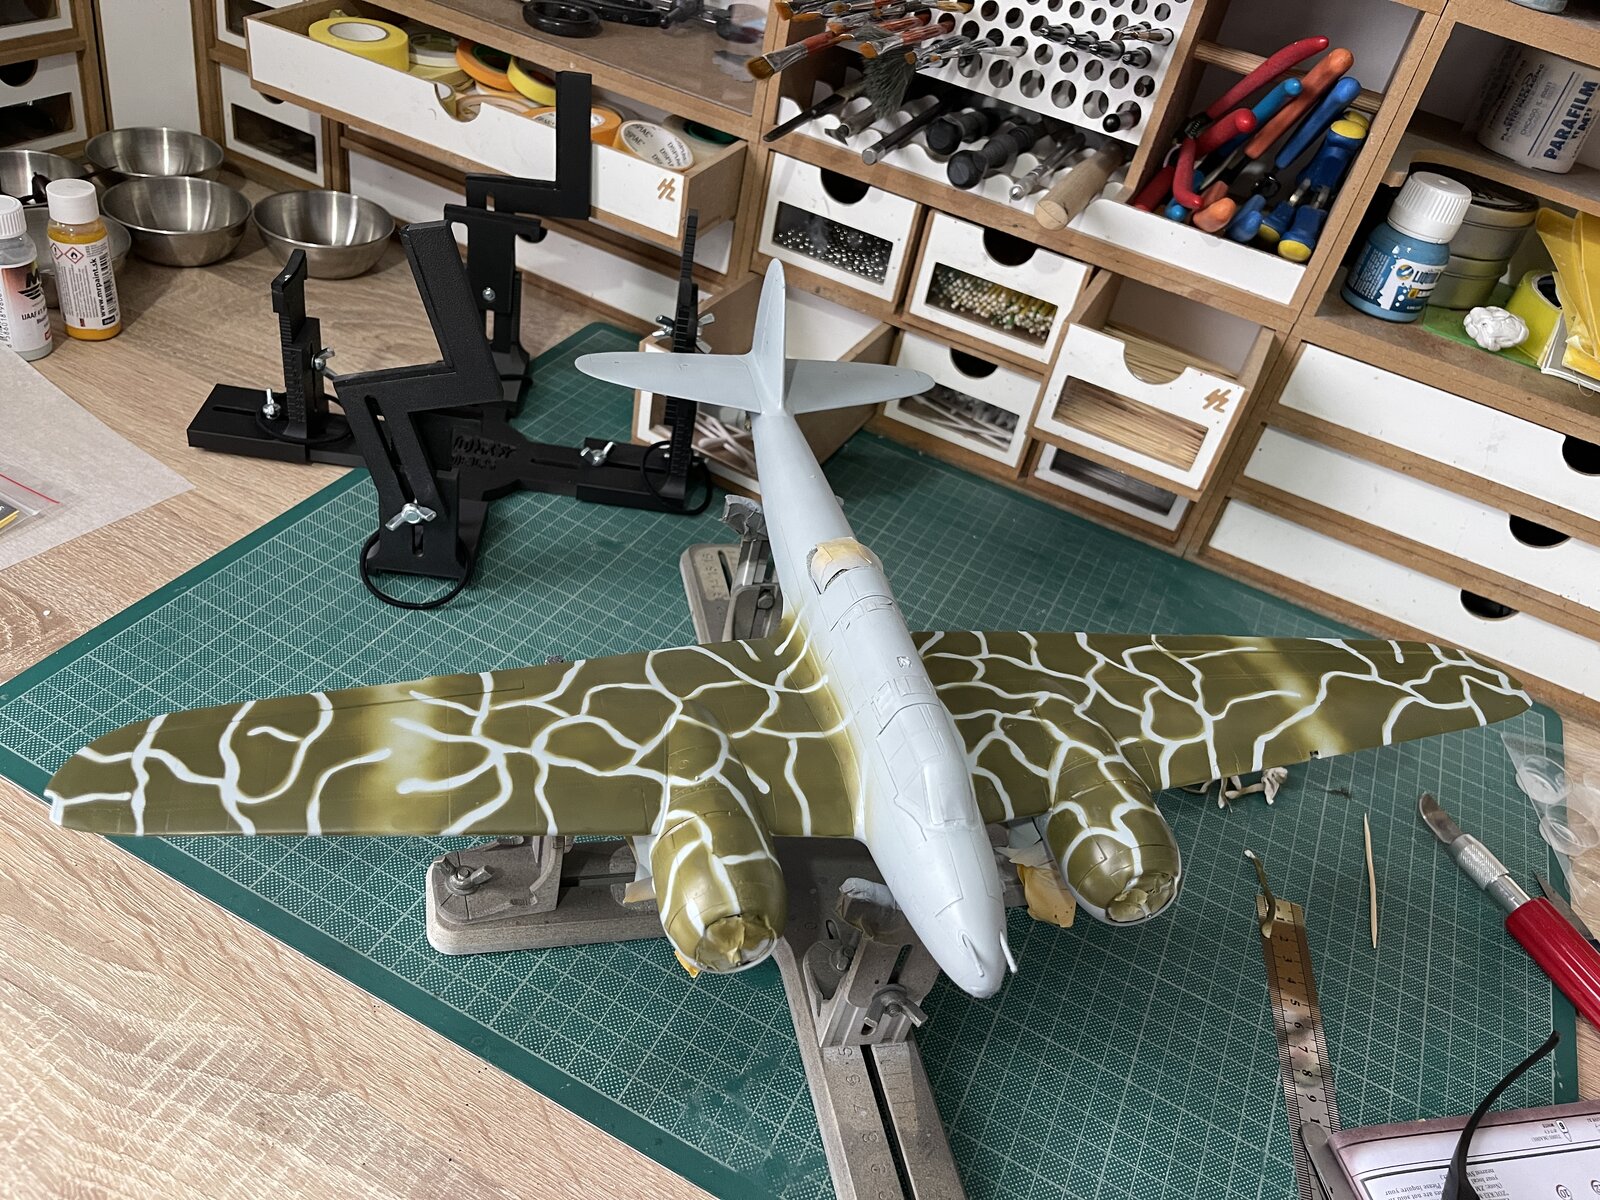
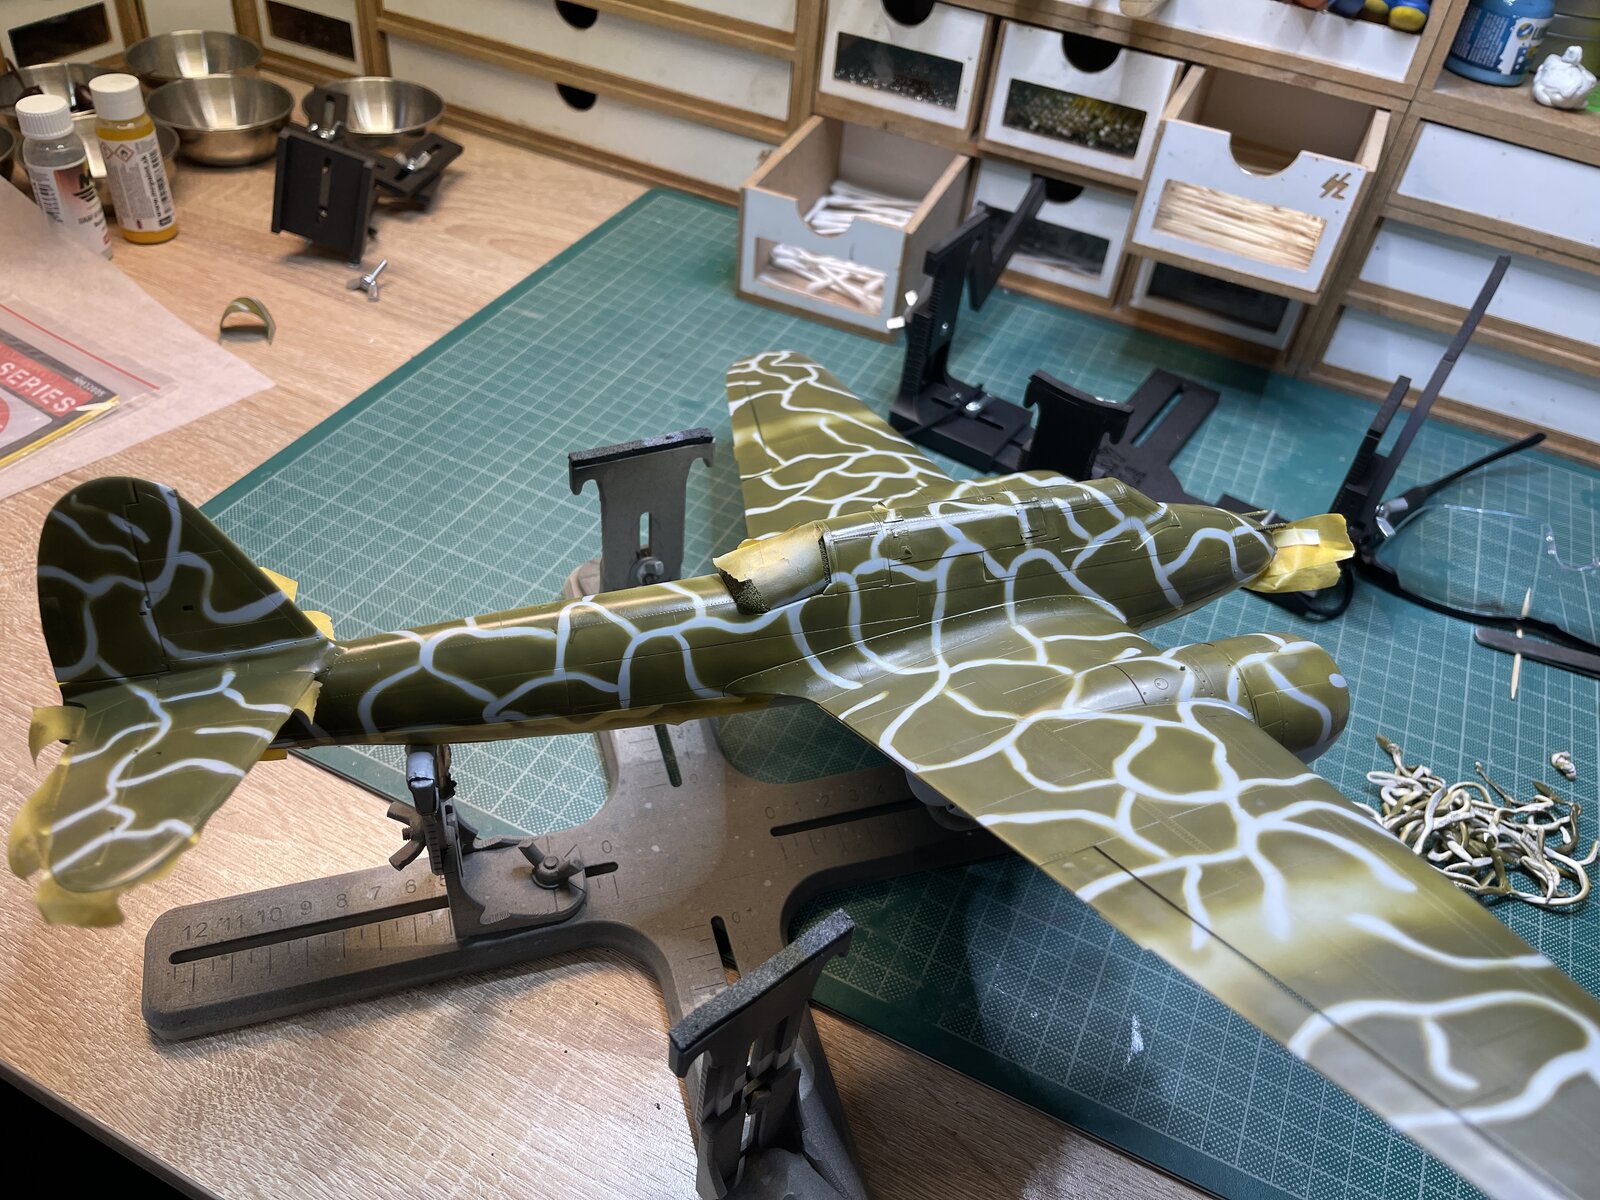
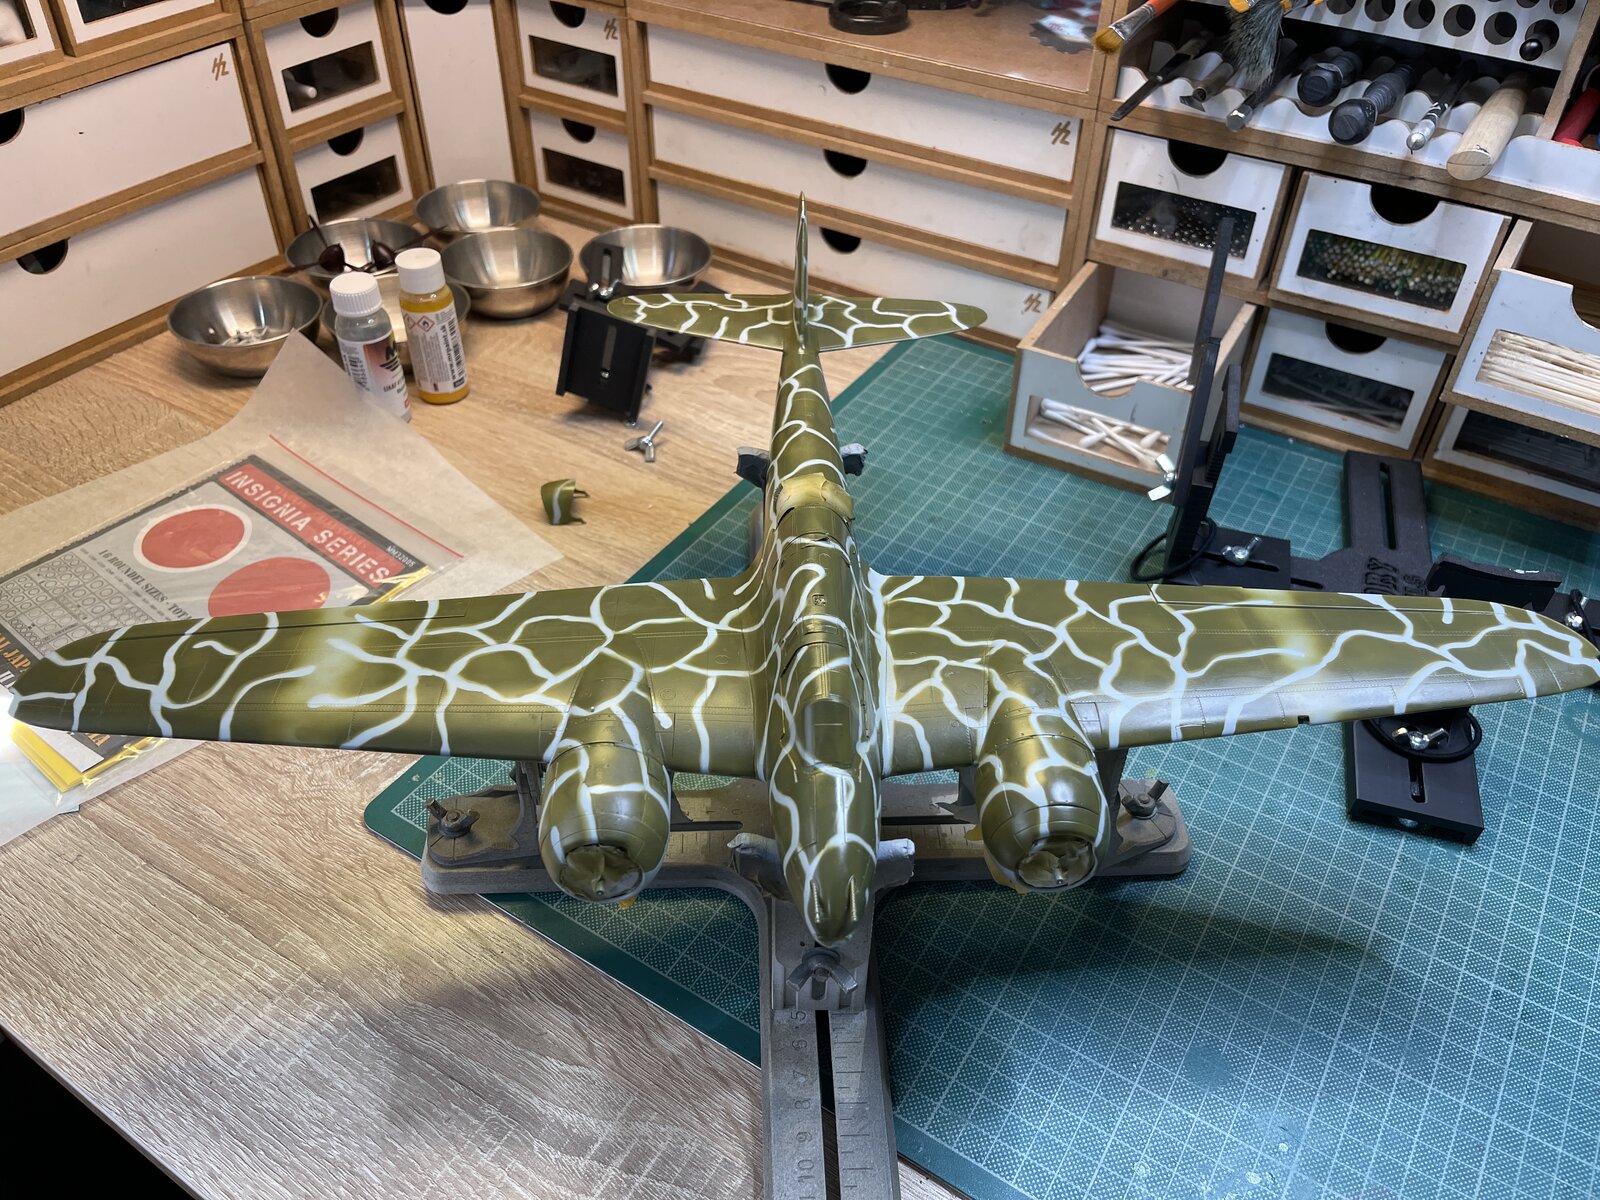
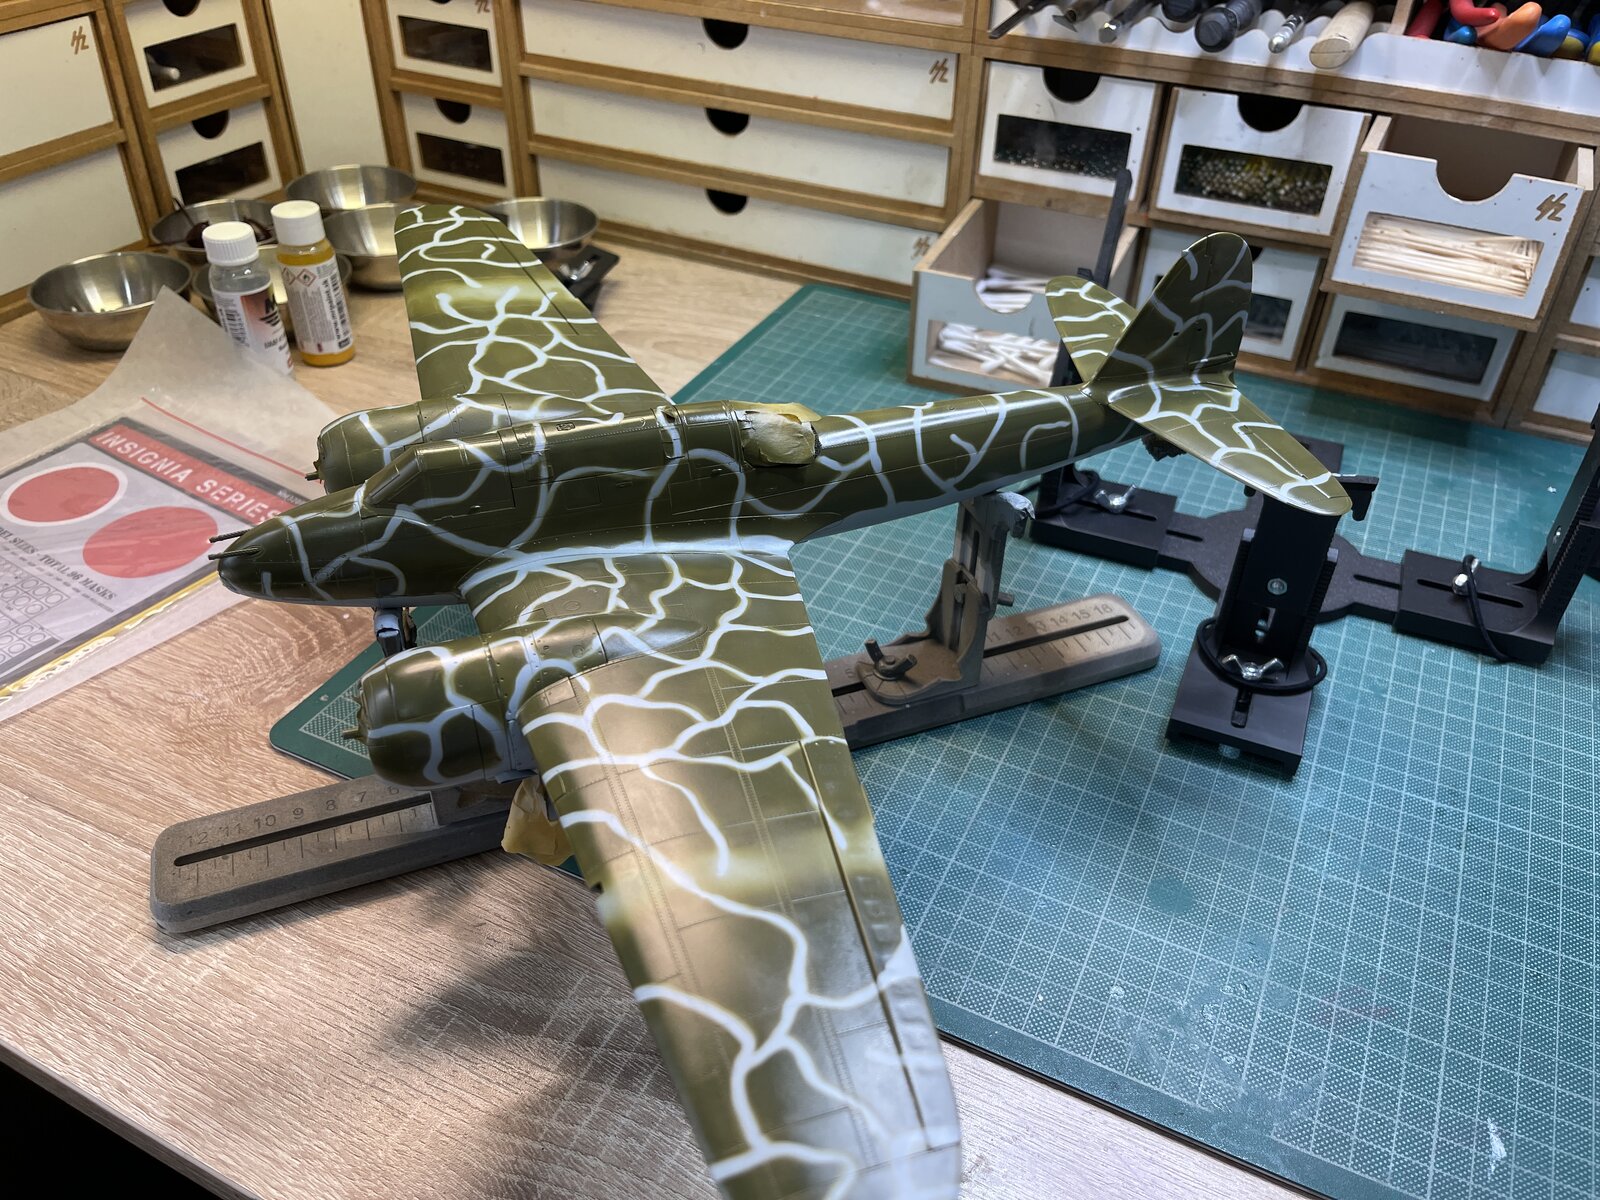
I have airbrushed the lightest camo colour which is applied overall. On top I sprayed at a low psi, up close to get a very subtle marbling over the grey primer. On the underside I had preshaded to get a more modulated effect.
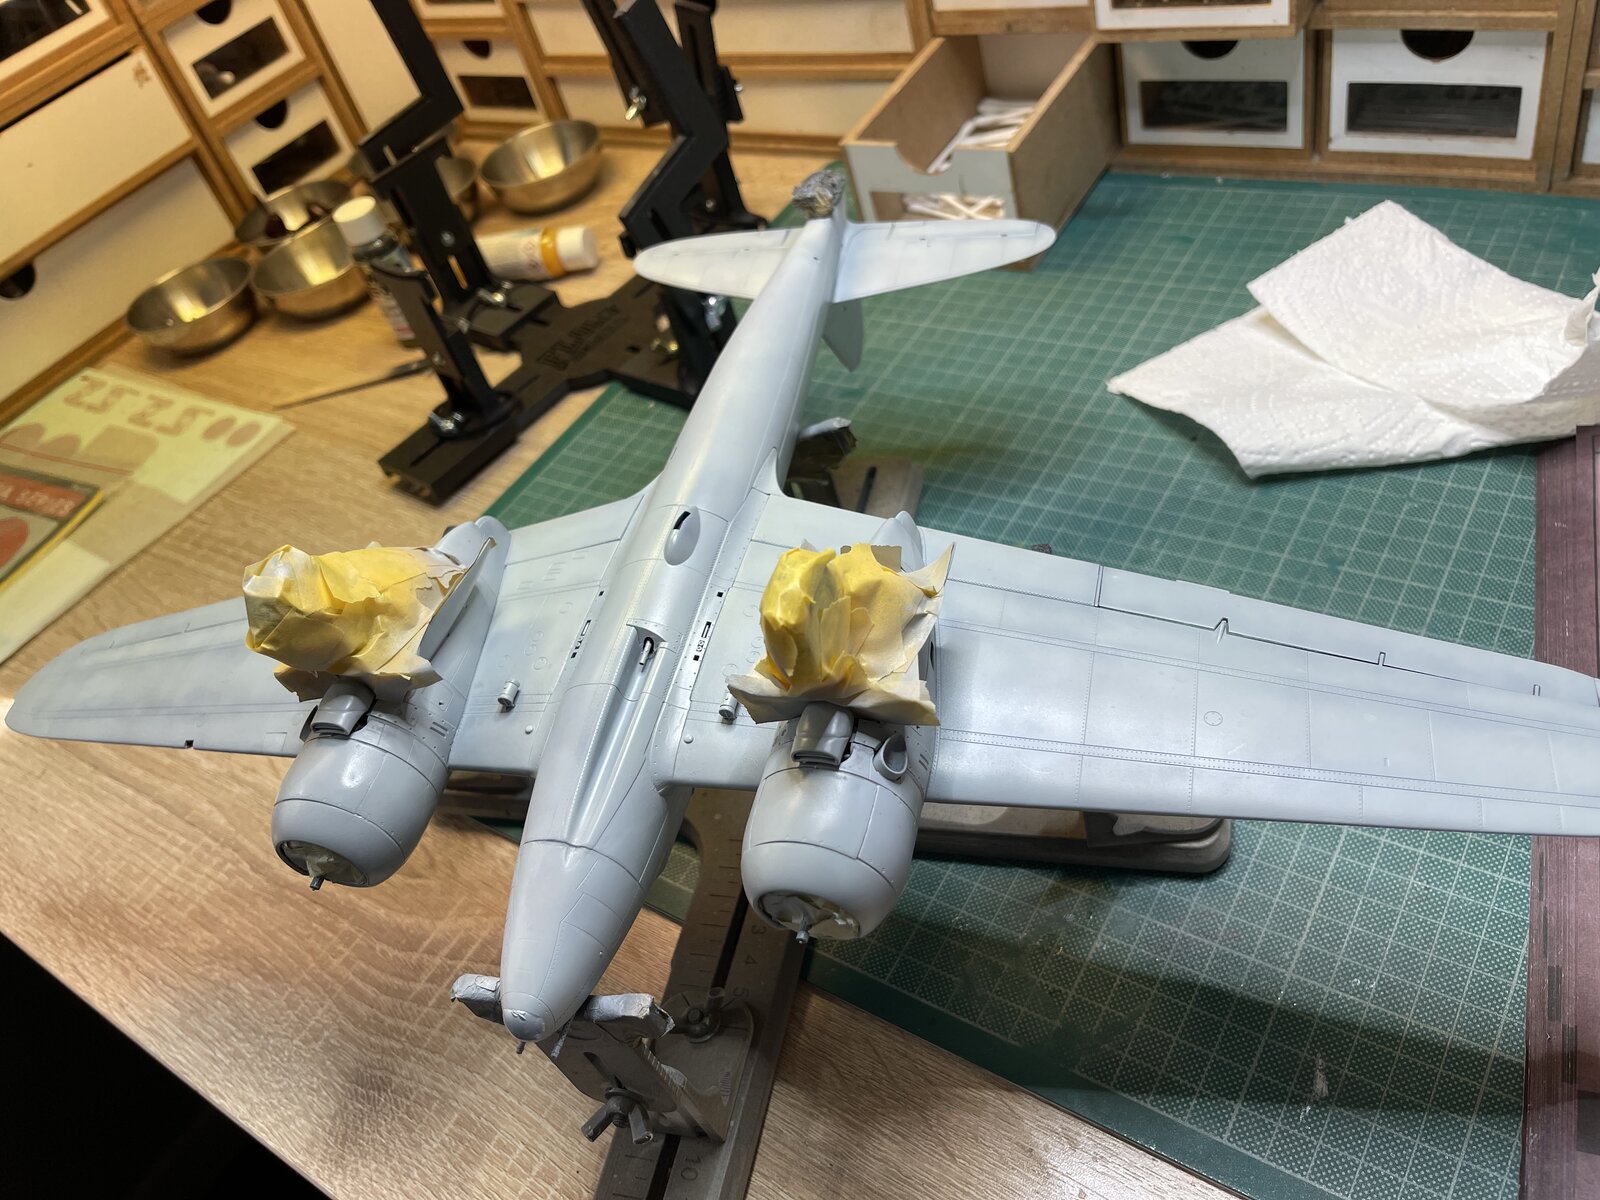
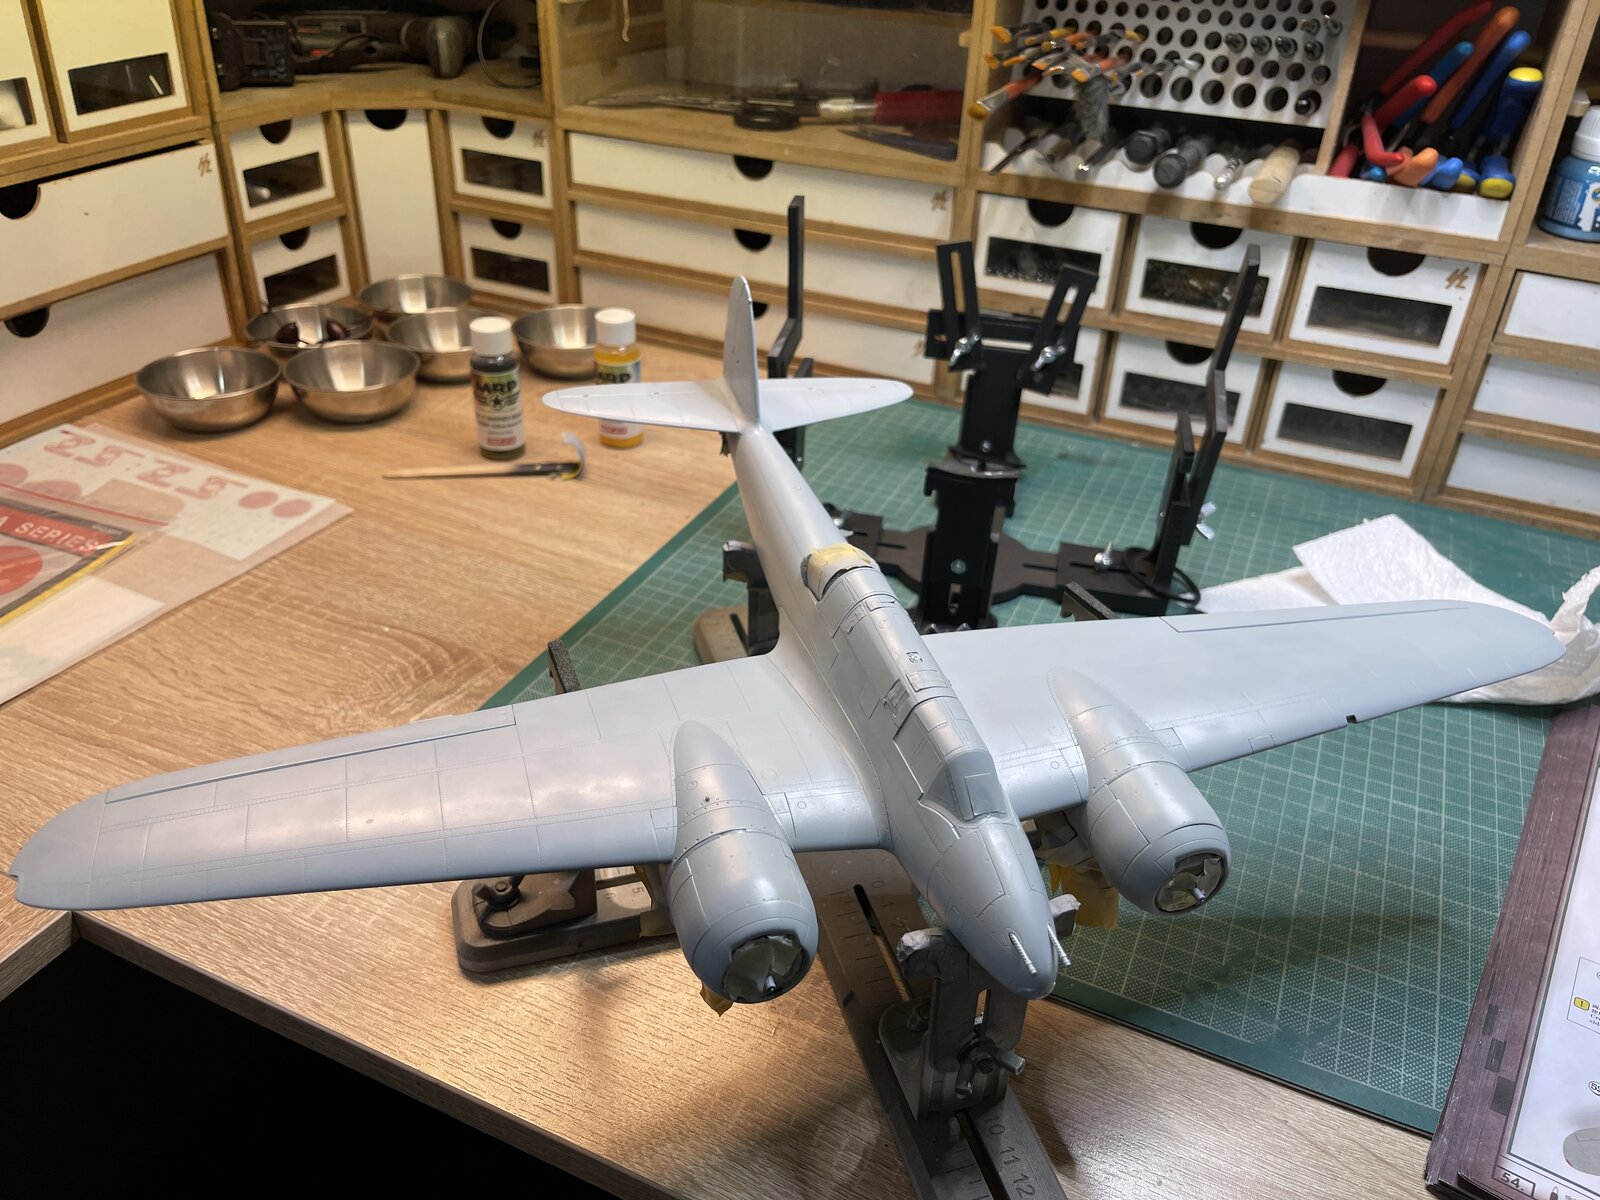
This is the scheme which offers some real challenges. I will use white tac snakes.
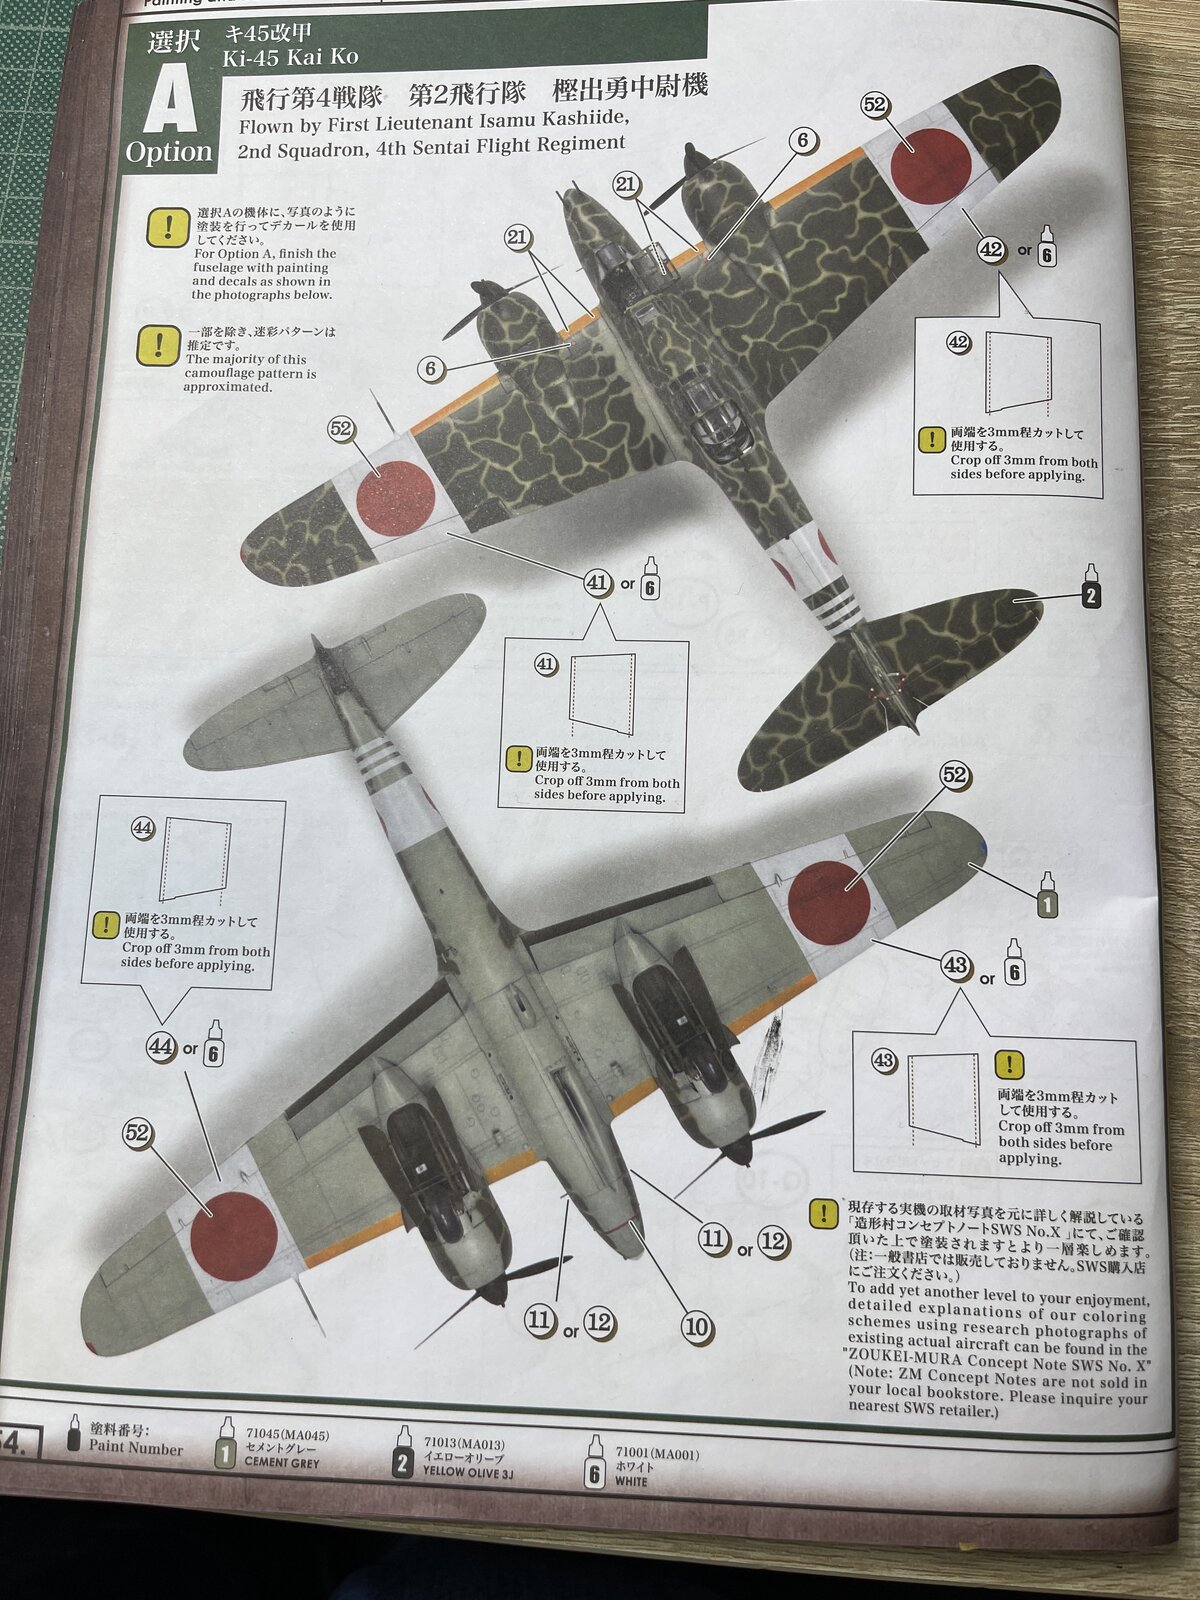
So far so good.
This is the scheme which offers some real challenges. I will use white tac snakes.
So far so good.
BarryW
Well-Known Member
- Joined
- Apr 17, 2025
- Messages
- 263
Not too long to go hard but you need to leave it longer to cure, at least 24 hours but it depends on humidity.AN HI Again Barry could you tell me how long that vallejo plastic putty take to go hard please
chrisb
BOATMAN
Well-Known Member
- Joined
- Oct 7, 2024
- Messages
- 2,175
OK Barry many thanks for your replyNot too long to go hard but you need to leave it longer to cure, at least 24 hours but it depends on humidity.
chrisb
BarryW
Well-Known Member
- Joined
- Apr 17, 2025
- Messages
- 263
I masked up for the white bands checking the spacing with the decals.
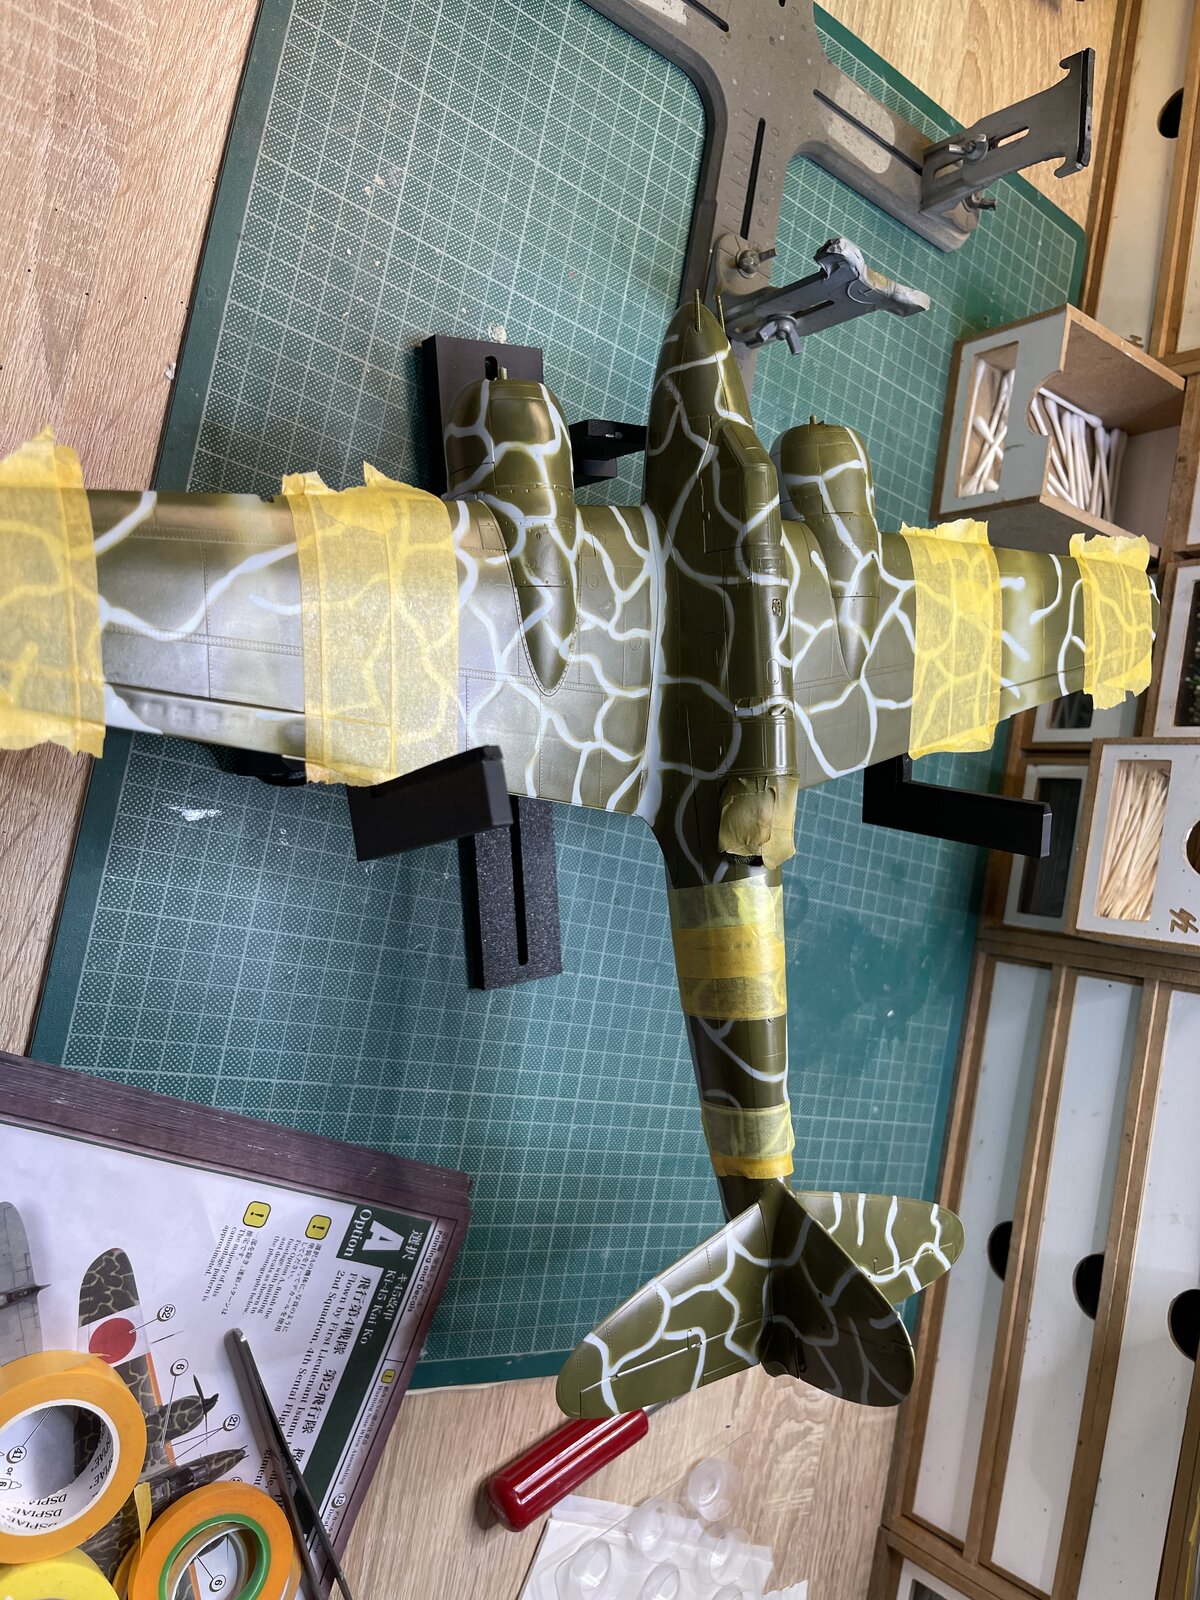
The wing were easy enough as I had panel lines in convenient places. For the fuselage I had to get a good base line with some thin tape before measuring the width and using masking tape as spacers and it was then just a matter of lay down another thin masking tape against the spacers, then removing them. Easy peasy.
Below the white band painted
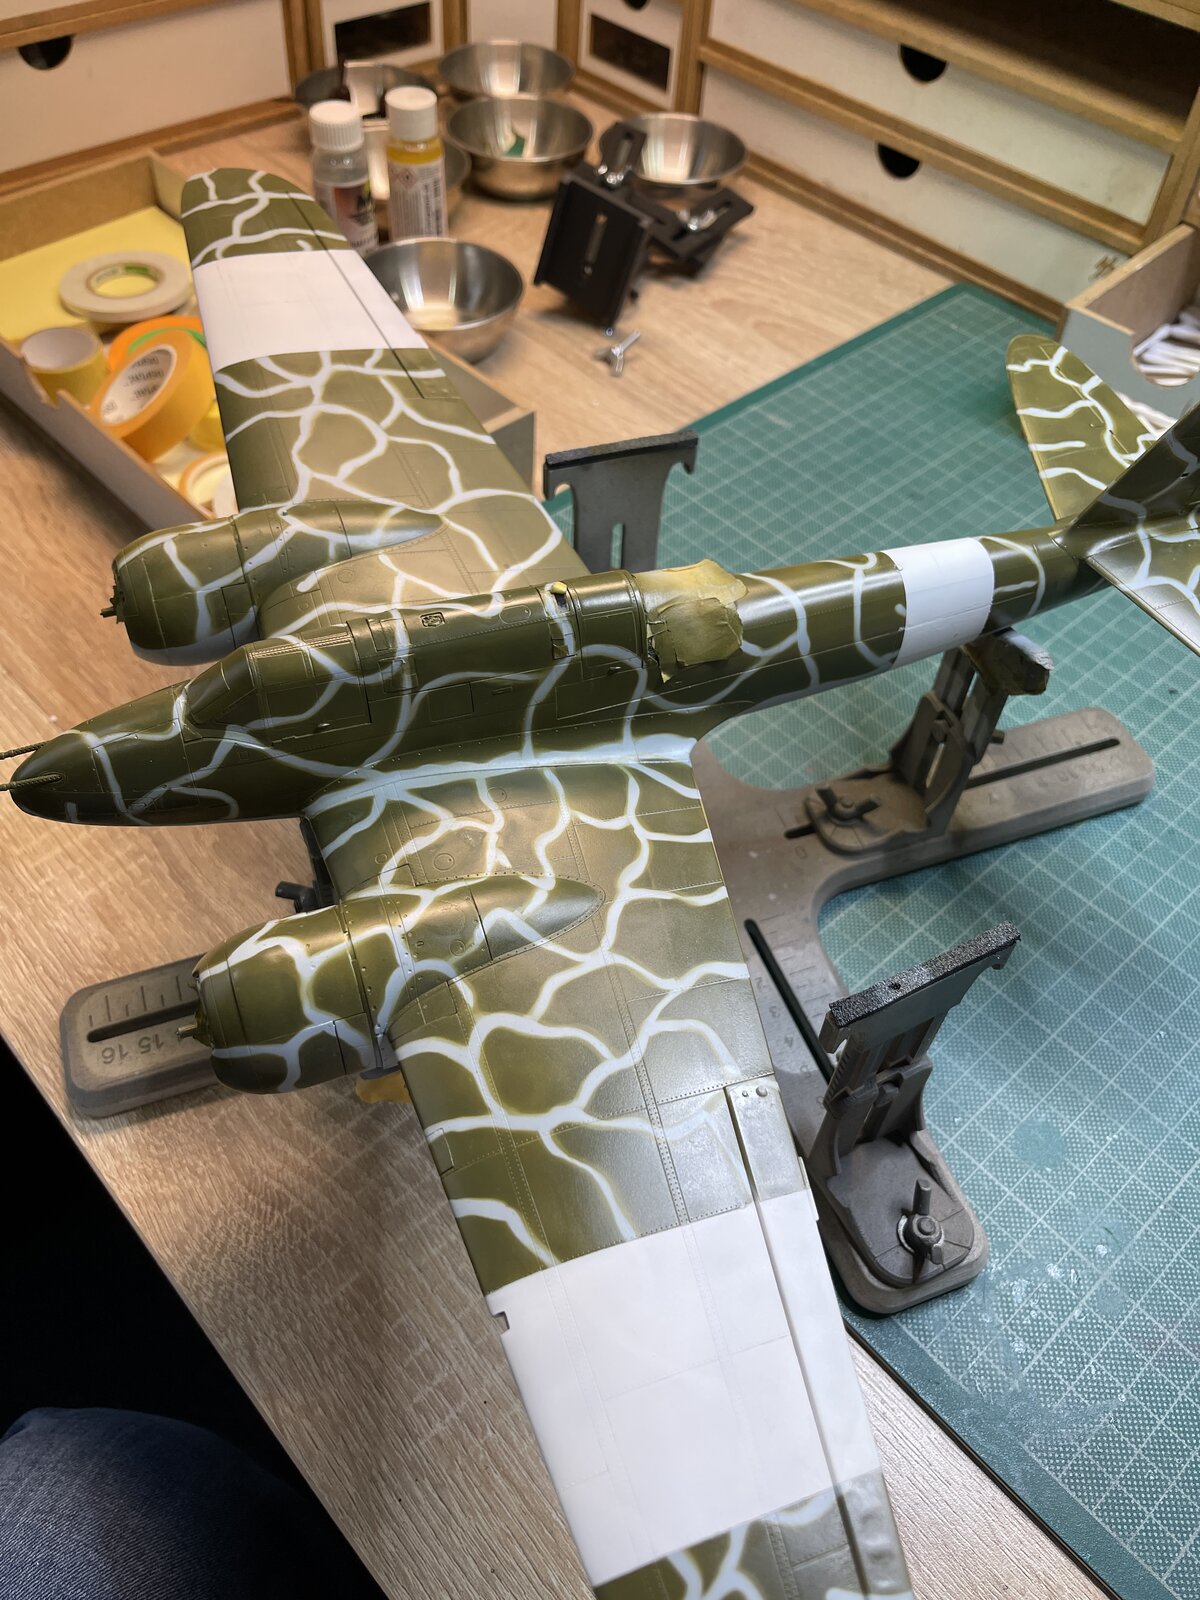
Then it's the turn of the yellow i d bands for which there are no panel lines to use so it had to be done by eye.
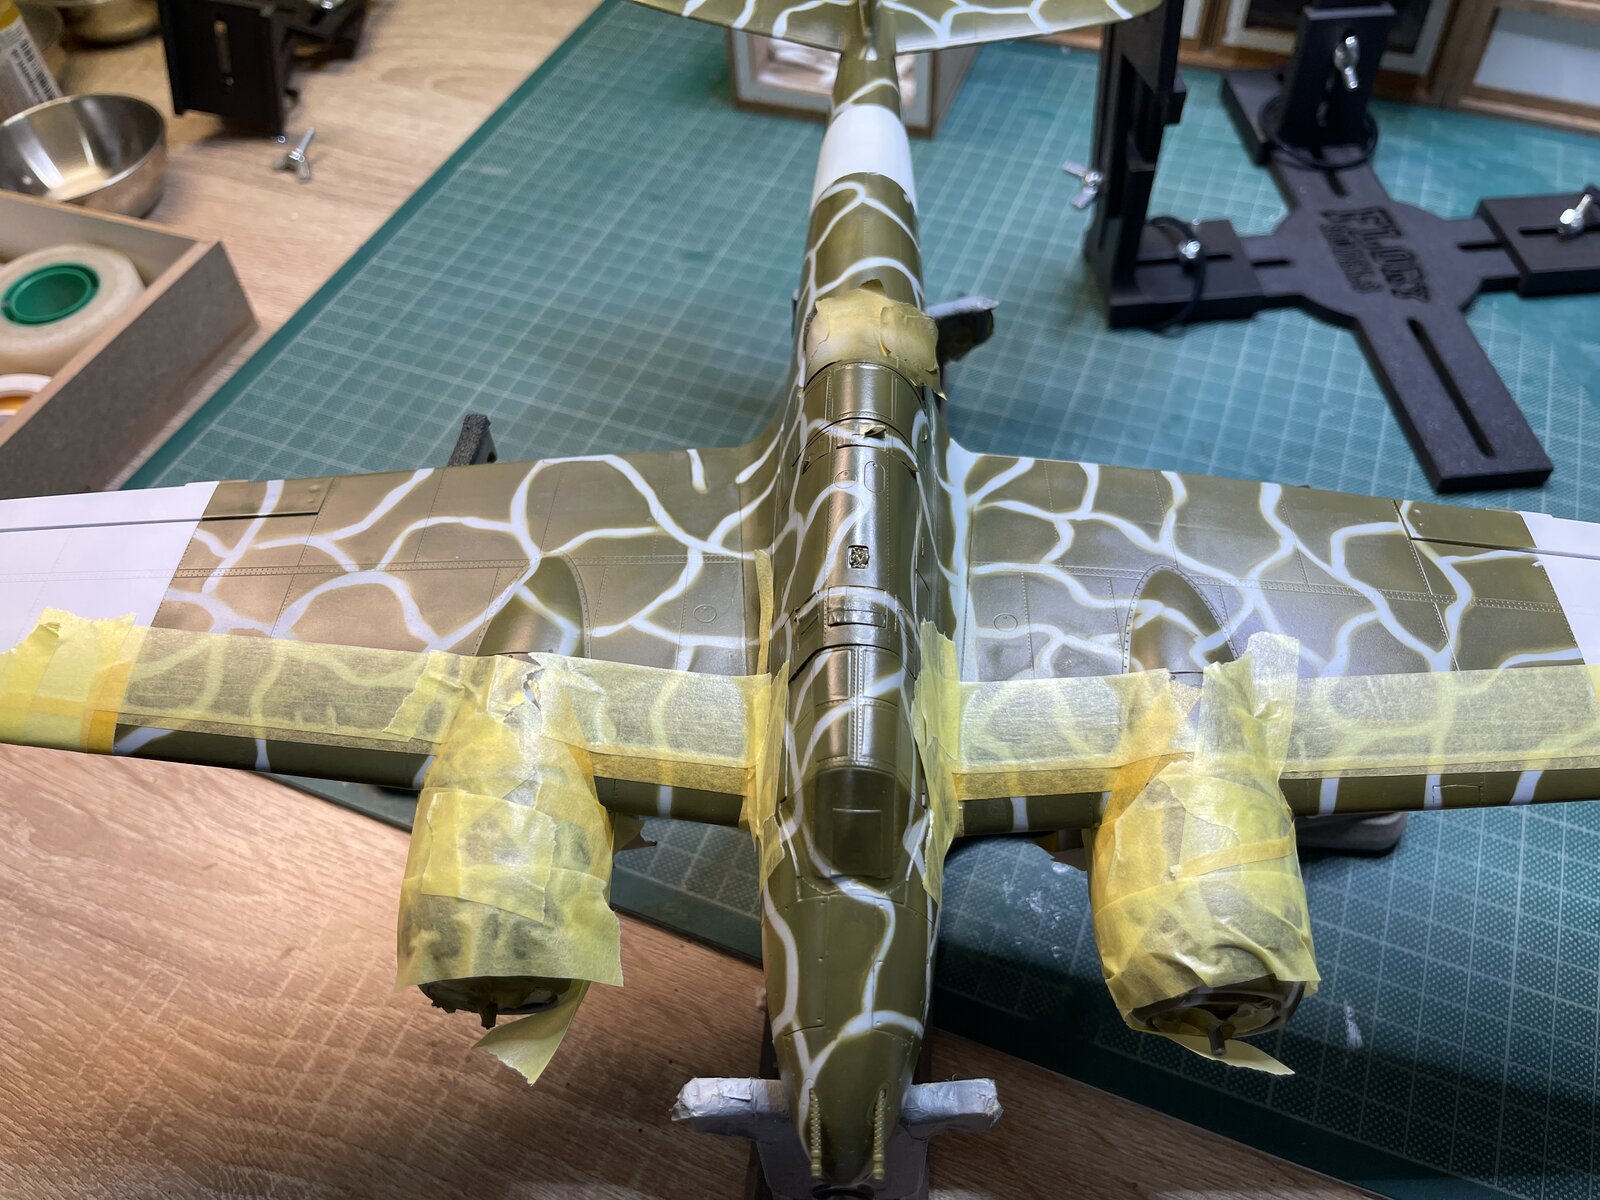
I cannot spray today due to high winds so cannot open the window. I will started a sand primer which will form a good base for the yellow.
The wing were easy enough as I had panel lines in convenient places. For the fuselage I had to get a good base line with some thin tape before measuring the width and using masking tape as spacers and it was then just a matter of lay down another thin masking tape against the spacers, then removing them. Easy peasy.
Below the white band painted
Then it's the turn of the yellow i d bands for which there are no panel lines to use so it had to be done by eye.
I cannot spray today due to high winds so cannot open the window. I will started a sand primer which will form a good base for the yellow.
Edbert
Well-Known Member
- Joined
- May 16, 2024
- Messages
- 3,121
One of few advantages of my garage-spraying I guess. The heat makes early mornings my best chance during July/August, unless I'm in for a short session at least.I cannot spray today due to high winds so cannot open the window.
However, we have been experiencing crazy rainfall in Central Texas the last few days, many fatalities even. So the humidity is making me find other things to do other than paint.
BOATMAN
Well-Known Member
- Joined
- Oct 7, 2024
- Messages
- 2,175
BRILLIANT modeling Barry how that has turned out it would give me a pause for a deciseion wheather to attempt that but you sir have done it i doff my cap to you sirI masked up for the white bands checking the spacing with the decals.
View attachment 152434
The wing were easy enough as I had panel lines in convenient places. For the fuselage I had to get a good base line with some thin tape before measuring the width and using masking tape as spacers and it was then just a matter of lay down another thin masking tape against the spacers, then removing them. Easy peasy.
Below the white band painted
View attachment 152435
Then it's the turn of the yellow i d bands for which there are no panel lines to use so it had to be done by eye.
View attachment 152436
I cannot spray today due to high winds so cannot open the window. I will started a sand primer which will form a good base for the yellow.
chrisb


