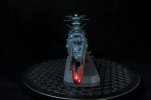
Yamato 2199 1/1000

Ravhin

New Member
Joined
Aug 21, 2012
Messages
332
For certain reasons the Shadow Fox will have to be put on hold for a while, but I'm not keeping still. I have a little 1/24 car on the works and now I'm starting this little beauty, Bandai's 1/1000th Space Battleship Yamato 2199
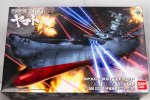
20130211_yamato-2199_0001.jpg

Not a big box but packed. After I took the pieces out to check em I can no longer close it heh.
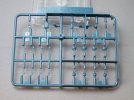
20130411__0002.jpg

The minuscule anti fighter/flak guns, are quite impressive considering the size. I just hope I don't break or loose any.
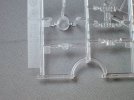
20130411__0003.jpg

Some Transparent pieces if someone wants to light it up.
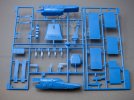
20130411__0004.jpg

This sprue doesn't look like the Yamato and indeed it isn't. It's a Gamillas carrier that is included as a bonus.
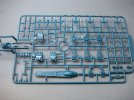
20130411__0005.jpg

The main weapons. They look really sharp and detailed and the larger gun barrels are hollowed out. Really nice stuff.
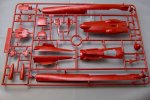
20130411__0006.jpg

The underside of the ship. Sharp details should give it a really good look after a wash or two.
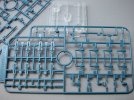
20130411__0007.jpg

Fighters. Really intimidating. With this size I don't know how I will paint them ... They do look really good.
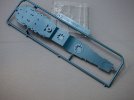
20130411__0008.jpg

The rear of the deck and the base for the bridge superstructure.
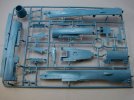
20130411__0009.jpg

The main sections of the hull, again with some very nice detailing and besides some tide marks (which will disappear after painting) there is no problem with the plastic.
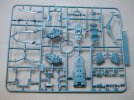
20130411__0010.jpg

Antennae, the bridge and assorted pieces that go around with the same consistent quality as previous parts.
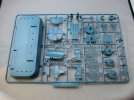
20130411__0011.jpg

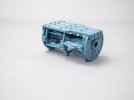
And to finish it off we have the display pieces with the stand, the fighter hangar and engine, both of which can be shown with the removal of a couple of pieces from the hull.

All in all an excellent looking kit. Can't wait to get started.
 
Looks even better engineered than the one I did at the same scale for the BSC a couple of years ago
 
Slow and steady she goes ;D. I've been working on the hull, cleaning up and filling gaps, and I can tell you that his is allot more work than I was expecting.

20130501_yamato-2199_0004.jpg

There are two main problems here. One is that in order to have the colour separation there are allot more parts than would be needed otherwise. The second is that, to make it a snap fit, the actual fit of the parts gets affected in various ways.

20130501_yamato-2199_0001.jpg

The underside had a considerably large seam that needed filling. Them seam was over 1mm it the furthest. Not terrible to fix.

20130501_yamato-2199_0002.jpg

This one was much worse, specially since that section is loose without any support, which means that a slight mishandle would ruin all the work. It did happen a couple of times.

20130501_yamato-2199_0003.jpg

With that out of the way I started on the hangar, which fits nicely in it's slot. The problem is that the section of the hull that goes over this, needs to be puttied on the upside to cover a seam, but if that is done it will be impossible to uncover this part of the ship closing off the engine and hangar.

20130501_yamato-2199_0005.jpg

It's somewhat of a pity but I'll just display the hangar outside and close the ship to have every seam fixed.

20130501_yamato-2199_0006.jpg

Still quite a lot of work ahead. I thought this would be a quicker build but that just means that I will squeeze more hours out of it ;)
 
Cool kit. Did you see the plamo episode on this one? IIRC he replaced the barrels with brass tube.
 
sunsanvil said:
Cool kit. Did you see the plamo episode on this one? IIRC he replaced the barrels with brass tube.

Yep I did see that one though I may go back to re watch it. I don't see anything wrong with the barrels tbh, so I don't think I will be messing with them, but since it's the last part fo the build I may change my mind until then :)
 
I have been eyeing this kit kit on and off for a while so will be watching this one.
Quality info so far.
 
man now I really can't wait for mine to arrive in the mail it looks so cool and I didn't even know about the bonus ship
 
Nice work so far. Aboiut the hangar/engine bay. If you have epoxy putty you could try filling the cover seam with that so you could mount the hangar bay inside the model. I've seen where applying Vaseline to one side of the seam would work well. Just fill the seam like you normally would and you can get a perfect seam but the Vaseline will prevent the putty from sticking to the other side so you can still remove the hull cover.
 
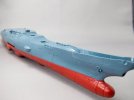
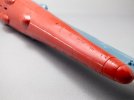
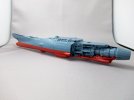
It saddens me that I have been away from the forum for quite a while :'( but I have not completely dropped my modelling projects and the Yamato is done.

Not the best kit from Bandai but it's still a very high quality one and no fault at all on the looks. The last big flaw to mention is the fit on the tower as you can easily see with the big gap. Had I tested it before painting and final assembly it would have been an easy fix. besides that for anyone thinking on building one, I recommend that you assemble the whole hull as well as the decks, because when you snap those in place you need to apply quite a bit of pressure that can damage the work on the seems.

The colours I used :

Lower hull: eye balled mix of Mr Color Red (several tones), dark yellow and a dash of black.

Upper hull: eye balled mix of Mr Color Neutral Grey, Intermediate Blue and a dash of red and black.

Observation decks, windows and whatnot: Vallejo Model Air Chrome with Vallejo Model Color Transparent Green on top.

To finish it up I applied some washes with a couple of AK Interactive products.

Tell me what you think :)

20130630_yamato-2199_0001.jpg

20130630_yamato-2199_0002.jpg

20130630_yamato-2199_0003.jpg

20130630_yamato-2199_0004.jpg

20130630_yamato-2199_0005.jpg

20130630_yamato-2199_0006.jpg

20130630_yamato-2199_0007.jpg

20130630_yamato-2199_0008.jpg
 
I think she looks really good....
Did you do any "pre-shading"? Cuz it likes you might have, but it's really subtle.
Yeah, that's a bummer about that gap, but Like I said, she looks great!
;D :D ;D :D ;D
 
ModelMakerMike said:
I think she looks really good....
Did you do any "pre-shading"? Cuz it likes you might have, but it's really subtle.
Yeah, that's a bummer about that gap, but Like I said, she looks great!
;D :D ;D :D ;D

No pre-shading, but I smudged some oils on the panels as I was lining her, which is probably what you are seeing.
 

Latest posts

Back
Top