WW II Diorama

cobraleader

Active Member
Joined
Nov 6, 2010
Messages
399
G'Day All,

Kinda in a modelling dead-end at present.
So to break out of it, thought I'd try something out of my comfort zone.

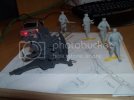
I'm working with a Tamiya 20mm Flakvierling and Dragon 2nd Armoured figure set to combine into a diorama.
Everything is OOB, but looking for a wow factor, as my plan at present is to have the troops walking past the inactive Flak gun.
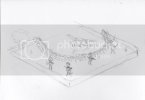
dio_idea_med.jpg

This is meant to be a diorama set just after D-Day. The German troops have left in a hurry, the US troops are just walking through. Some abandoned weapons and food has been left lying around.
I would think that the Flak gun would have been there for awhile, so either have it slightly dug in with some sandbags around the edge of the gun area or dug in a fair bit with wattle fencing against and earth wall with sandbags ontop.
A bit of vegetation around one side.
Entire Diorama is about 30cm (12inches) * 30cm (12inches).

Haven't gone any further, just seems missing something - anyone got suggestions ??

Thanks

cheers
Cobraleader
 
I like the concept man
perhaps you could have the soldiers posing for a photo around the captured gun?


Alternatively you could have the gun with battle damage and starting to rust a bit?

Or maybe there may be some surrendering germans there?

Ill be watching you progress this one, sounds cool
 
In my opinion the 'it' that seems to be missing isn't that anything's missing at all. It's just too big, with too much empty space. The focal point of the scene is unclear because of how everything is spread out and there is no defined one object to draw in the viewer.

Often times we try to mimic life exactly in dioramas, which you have done here but it doesn't always play off correctly in a static scene. You will have much more of a dramatic look if things are condensed into a smaller space. Dead space is the biggest killer in scenes like this.

If it were mine, I would try to fit it onto something smaller, maybe even 6 x 6. Place the gun in one corner and only model a section of the sandbag wall cutting it off at each end, the 'minds eye' will see the rest, tighten up the figures in the scene a bit to fill in the remaining space.

I would leave stuff behind like you mention but not personal weapons, that is the one item that even a retreating soldier would grab.

HTH
 
wow - thanks guys - great points.
Think I'll get some paper out and plan a bit more ....
6 inches looks a bit cosy .... might try 8. The Flak gun and bunker still takes up 1/2 the diorama - might be bigger yet, by the time I add items that have been left behind.

I was trying to do something similar to one of the Japanese Plamo Tutorials

Dragon 352nd Volksgrenadier Division Tutorial 6/6 S2 ep10

I'm planning to add a dead German or 2 ... this could justify some weaponry laying around ....
 
cobraleader said:
I was trying to do something similar to one of the Japanese Plamo Tutorials

Your idea is sound, no doubt and could make a great scene. I think the reason his diorama works so well is because it has another element, height.

If you look at the picture below you can see that the building is about as tall as the diorama/vignette is wide. The building takes up a great deal of space, (as does the Kubelwagen, debris and lamp post, all working together) and really serves as a huge focal point. Also, if you look at the figures they are very close to one another, two are almost bumping elbows. He has filled every bit of space he could to create a very dramatic look, there is really no empty space at all aside from the path the soldiers are walking.


DIO.jpg
 
okay ... 2nd design... top view .....

dio_idea_02_med.jpg

this is about 8 * 8 inches in size. the Flak gun and bunker is taking up about 1/2 the space. I think 7 * 7 would be the smallest I would go....
Since this is set in the country, I can't see anything that could give it any height, except for a small to medium tree in the back ground.

What do you guys think - build all the figures and battlefield items then build the diorama around it ? or just build the dio to the size I want and then fill in the spaces ??

Thanks

cheers
Cobraleader
 
cobraleader said:
What do you guys think - build all the figures and battlefield items then build the diorama around it ? or just build the dio to the size I want and then fill in the spaces ??

In my opinion, build all the items first and before painting you can use them to create your layout. It's easier to fit the setting around the pieces than it is to fit the pieces around the setting.
 
I think it will look great if its a bit crowded, as that really does seem to make things more interesting and engage the viewer better than scenes with lots of empty space. This is a big issue with model rail-roads too, think of the track going through the desert. Its pretty much empty space, nuthing but sand, but to make things interesting modellers crowd the empty space by using all sorts of props-if you can find it in a desert you can put it on the model.

As i understand your soldiers are advancing on abandoned German AA position. I would imagine the Germans scrapping the AA gun by blowing it up with explosives, damaging it beyond repair and destroying the ammo stash in the process as well. Even dead soldiers would be stripped of all weapons. What they might leave behind is empty crates and spent fuel cans or some other kind of ''rubbish''. That would make it all together more believable.
You could also add an impact crater or two from the allied artillery fire support that shelled the position days ago while the position was still occupied by German forces... this opens up the possibility to have some body parts laying around :p that might be a bit much though :)

Cant wait to see what you come up with!

Cheers!
 
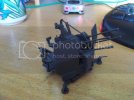
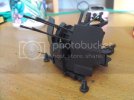
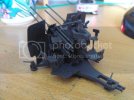
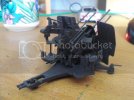
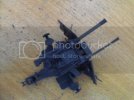
i don't believe this.... finished the flak gun in a few hours :eek: ....
No weathering yet, but primer and paint applied.

I'm usually building Sci Fi and Aircraft. This was a pleasure to build.

Anyway, here's some pics - next the figures.

flak_01_med.jpg

flak_02_med.jpg

flak_03_med.jpg

flak_04_med.jpg

flak_05_med.jpg
 
Great thread!!
You're right about the crowding.
I'm building a diorama now (about 12" X 10") with a t-34/85 and a gaz vehicle.........and NINETEEN figures..
I thought that this should fill things up, but no..........I'm scrounging my old kits for stuff to scatter about.....
 
Oh yeah, size does matter .... sorry Yoda ....

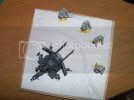
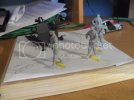
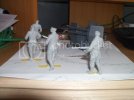
I've built all the figures and quickly posed everything on the drawing to make sure the size is right.
I've reduced the size down to 7 inches (200mm) and it looks like the size is right - so off to make the base.

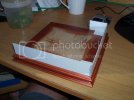
1 hr later and I've got the base done.

dio_base_01_med.jpg

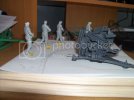
Before Painting on the wood Stain, I've test fitted everything again.

dio_01_med.jpg

dio_02_med.jpg

dio_03_med.jpg

dio_04_med.jpg

dio_05_med.jpg

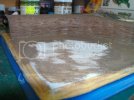
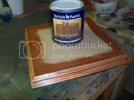
Now, looking for the right colour Wood Stain wood be simple right ..... nope .... Finally settled on Jarrah Wood Stain.
Here is the first coat applied.

dio_base_02_med.jpg

It looks like the figures need the hands fixed up, as the hands don't hold the weapons too well. Bit more stuff to glue on the figures, putty, prime and paint.
From the research, it appears not all 2nd Armored Troops had camouflage uniforms, so to ease the paint of painting, I'll mix the uniform colour styles.
Have to figure out how to do the Thatch for the bunker reinforcement and then design the terrain.

More to come.
 
Looking good so far Mark,

I like this smaller size and think it will give you a much more dynamic scene in the end.

cobraleader said:
From the research, it appears not all 2nd Armored Troops had camouflage uniforms, so to ease the paint of painting, I'll mix the uniform colour styles.

The camouflage used by the 2nd AD has been long said to have been found to be far too close to that of the Germans (and often associated with SS troops more specifically) and friendly fire became a serious issue. Others claim with no official reports citing this, it was more a logistics issue of having too many uniforms to issue to the troops on the ground.

While there are enough period photos to show some did use it in Europe, these are mostly dated very early in the campaign (many from July and August - about the time of Operation Cobra) as it was quickly phased out/replaced. Camouflage uniforms were issued mainly to the USMC, which reinforces both ideas, logistics as well as the fact that there was no confusion with the Japanese soldier in the Pacific.

The only thing about Dragons figure set that makes it 2nd AD, is the camo pattern. Aside from that, it could be painted in olive drab and represent many other troops in Normandie. Your call.
 
Agree Ken, looks like we found the same info ....

The other thing I'm keeping in mind is some other information I found out about Paratrooper uniforms - the D-Day Paratrooper uniforms were replaced to make issuing easier and standard across the army, however many Paratroopers kept the old style and still wore them later in the ETO conflict.
I think that this practice would have happened in other units - maybe except Patton's Troops.

I'll try for at least one camou uniform, it'll be a challenge ....
 
G'Day All,

Moving along nicely with this project.

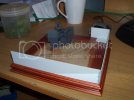
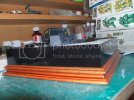
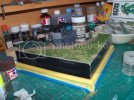
Built up a wall for the raised terrain from Evergreen. Filled in the joins with putty, sanded, primed and painted Gloss Black

dio_base_03_med.jpg

dio_base_04_med.jpg

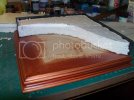
Glued in some expanded foam which I had test fitted and cut to shape. I photocopied my top view plan and cut out the required area to use as a template.

dio_base_06_med.jpg

dio_base_08_med.jpg

dio_base_09_med.jpg

dio_base_10_med.jpg

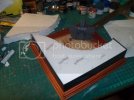
Now the fun part - the sides of the Flak Bunker.
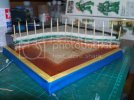
I had to reduce the size of the foam, to allow me to build the thatch walls that the Germans used on some bunkers.
The thatch was constructed by drilling small holes in the base and gluing in toothpicks (cocktail sticks).
I then wove the wires from a length of network cable. I also made a few runs that ended in the middle.

dio_base_11_med.jpg

The ends were super-glued in place and trimmed off.

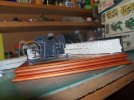
I figured that the Germans may have laid wood on the ground for the flak gun to sit on. I took some Evergreen plastic and scratched it with a heavy grade sand paper (80 grit I think it was).
This was cut to size and various lengths and glued on the base.

dio_base_12_med.jpg

Thanks

cheers
Cobraleader
 
Diorama is moving along nicely.

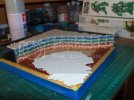
I used a papier mache type material to cover the foam base and fill in the area behind the thatch. This stuff is fun to work with. I used a paintbrush to force it into the spaces and to all so remove any of the material that oozed out of the thatch work.

This stuff took a while to dry and also shrunk, but it gave me some space around the edges to allow more scenery to be added without flow over the height of the base.

I mixed up Tamiya X-9 Brown and XF-59 Desert Yellow with Tamiya Diorama Texture Paint Dark Earth and covered the entire area where dirt would be.

I deliberately went over the "wood base" area, as this would have had dirt trampled on it over time.

dio_base_13_med.jpg

dio_base_14_med.jpg

I went over the thatch area with a different ratio mix of colours.

I then used Tamiya Diorama Texture Paint Grass Effect and created a random effect where there grass would be. While this was still wet, I used Woodland Scenics Earth Blend randomly over the same area followed by Static Grass.

After blowing off all the loose material, there wasn't enough Static Grass left on the diorama, so out comes the Woodland Scenic glue and lightly sprayed the glue over the area and recovered with Static Grass.

dio_base_15_med.jpg

With all the earth works drying, I sanded the sides of the base to remove any unwanted material - now have to repaint the entire base again - oh well.

Some slight surgery was needed to fix up some thatch that was leaning outside of the diorama boundary. I used a Motor Tool (like a Dremel) to cut away the excess - word of warning wear goggles and a mask when cutting through wire and superglue .....

Searched Google for some ideas on how to make sandbags - in the end, I just mixed up some Milliput and roughly shaped a few sandbags. It kinda looks right - won't know for certain until after I've made them all .....

Thanks

cheers
Cobraleader
 

Latest posts

Back
Top