What glue and body filler to use?

Scale Model Addict - Model Tips, Guides, Tools & Tech, Tutorials, and Community

Help Support Scale Model Addict:

stevieb54

Well-Known Member
Joined
Nov 20, 2023
Messages
74
As I get back into the hobby I have some questions. Whats a good glue to use on styrene auto models? I bought Testors but that seems to be too gooey and hairy, is there anything better? I saw Tamyia that looks liquid in a bottle with a drip tip, would be cleaner to work with? The other thing is what to use ase a body filler for dimples and gaps? I have seen auto bondo, bit know if it cures hard, it will be harder than the plastic surface and surely be a nightmare to fix. TIA.
 
As I get back into the hobby I have some questions. Whats a good glue to use on styrene auto models? I bought Testors but that seems to be too gooey and hairy, is there anything better? I saw Tamyia that looks liquid in a bottle with a drip tip, would be cleaner to work with? The other thing is what to use ase a body filler for dimples and gaps? I have seen auto bondo, bit know if it cures hard, it will be harder than the plastic surface and surely be a nightmare to fix. TIA.
With styrene parts, and styrene-to-styrene bonds, I use styrene cement. I want the weld bond that styrene cement creates; it melts the parts along the seam and creates a kind of a weld between the parts.

When you say you bought Testor's glue, you need to be more specific. From your description of the glue as "gooey", it sounds like you're talking about the traditional tube glue. Testor makes a liquid styrene cement, too. Many modelers today don't use tube glue anymore, because of the strings you can get. But there is an advantage to using it for some parts, because you can adjust a piece as the glue sets. The liquid cements work through capillary action; you can hold two pieces together, like the top and bottom of a wing, or the halves of a fuselage, and use an applicator to flow the liquid cement along the seam and into it. Liquid cements generally set up faster than tube glue, so you can work a little faster.

Tamiya's Extra Fine is good, flows well, bonds well. I use it, though I also use Testor's liquid styrene cement. I have used Plastruct's Weldene and Bondene when I first tried liquid styrene cements, just to get used to the product.

If you go back through posts here in the forum, you can also see mention of other chemical solvents that can be used as styrene cements, for the same reason-they melt the product and form a weld.

Some use cyanoacrylate (CA) glue for assembling styrene parts, but I prefer the weld bond. I use CA glue for attaching unlike materials, like metal or resin to styrene. Or 2-part epoxy glues, or even white glue, as appropriate.

As far as filling gaps goes, there are a lot of different products and they all have their fans. I used the old Squadron white putty for years, but the formula was changed, and it's not as good as it used to be. I use Tamiya's putty now. Bondo is good, as are other automotive body fillers. As far as sanding goes, if you're worried about damaging softer material around the putty, you can use masking tape to protect it.

Some use 2-part epoxy putties, like Aves Apoxie Sculpt (aka A&B). I use this but for sculpting, not on my models. Others will have other suggestions for you, too.

I hope that helps!

Best regards,
Brad
 
I use superglue and plastic weld. Both are very thin.
I also use gel superglue for when I need it to stay put in a specific place.
 
Just a few questions, with so many answers.

Drop the tube glue, there's still a place for it, but liquid glue applied with a small brush is the shiz today. Takes some getting used to (I used Tamiya extra thin for the 1st time a bit over a year ago) but it is pure magic. You can also make it yourself with cheapo over-the-counter chemicals if you are in the US.

Model "putty" was the go to thing for seams when I was last active in the 1990s, many still use it with awesome results. But I hate the stuff, mainly because I lack the skills to do it well, but medium thick cyanoacrylate glue is a great way to seal and fill seams. You can buy it thin or thick, but medium is a good start, add some baking soda to thicken and fill better, but work it quickly because once it hardens, it is...hard.

I'd stay away from automotive bondo, with my limited experience it has too large of a grain and makes too much heat while reacting. Fine for automotive steel panels, but probably not a good thing for plastic. They do make fine-grained hobby epoxies, a popular one is called "milliput" and can be purchased cheap at Hobby Lobby. But there many moving beyond that with newer products.

I'm not a great source for advice on fillers, it is maybe my weakest point in modeling. My best advice is practice and experiment as much as you can.

Just wait until you find out that there are more than two dozen high-quality paint brands/types today that meet or exceed the best of the best just 20-30 years ago.
 
Last edited:
Thanks for the info guys, this helps. For the record I was referring to Testors tube glue, I never realized there were so many variations to this. I kind of like the thought of Tamyia liquid one, it looks easy to apply with a dab. Now paint is another story, what a trial and error road this is turning out to be. So far Ive airbrushed with Testors enamel, MCW enamel and now trying Alclad (no thinning required).
 
Yeah, keep the tube, it won't go bad, not for a long time, anyway, and you may run into a case where you would want to use it.

As far as paints go, there are going to be as many opinions and recommendations as there are modelers.

Some stick with a single brand and prefer that brand over others. Others are like me, and have accumulated paints from many different brands over the years. I don't pitch the contents of my paint box just because some new brand has come onto the market. A new paint is going to have to cover the model magically as soon as I open the jar, for me to chuck the ones I have.

Having said that...I accumulated paints from different brands over the years, because I started out buying specific colors, regardless of the brand and medium. When I was a kid, it was Testor's gloss enamels to start, gradually adding some of the matte Testor enamels as I got older and more experienced. I added Pactra enamels and Pactra acrylic enamels (which thinned with mineral spirits and with water/isopropyl, respectively). Those were great paints! I started adding Model Master acrylics and enamels, too. So I have a good number of Testor and Model Master paints in the box.

I started using Tamiya's X/XF acrylics in the late 80s when I got back into painting toy soldiers. I use Tamiya's proprietary thinner with those, for airbrushing and hand-brushing. Along the way, I added some Gunze-Sangyo colors, enamels and water-based acrylics, and lacquers for the first time. Those were for specific colors that I needed.

Also for painting figures, primarily, I have Andrea and Vallejo Model Color water-based acrylics. Again, many specific colors, though I started to learn to mix colors using these.

For some ship models, I also picked up some White Ensign Model colors, like USN Haze Gray and Deck Tan.

I was given a set of Lifecolor water-based acrylics, US Army colors, ETO 1944.

I also have some Schmike-Mussini oils, from a period where I thought I would paint flats, tin figures cast thin in two dimensions. Now I use them mostly for weathering.

And finally, I have about 2 dozen craft store brands, water-based acrylic paints that you find at Michael's, HobbyLobby, and apparently at WalMart. By the time I started buying these for specific colors, I got comfortable mixing other colors from them. They are cheap, or better, reasonably priced for the volume you get, can be hand-brushed or airbrushed, thin easily with water or isopropyl, and mix well. I use them for finish colors and for weathering.

With hand-brushing my water-based acrylics, I use a wet palette for a consistent....consistency, of the paints. It also makes blending colors simple.

Hope that all helps!

Best regards,
Brad
 
As an Amazon Associate we earn from qualifying purchases. Product prices and availability are accurate as of the date/time indicated and are subject to change.
Perfect plastic putty is what I use. It does have an issue with being hard to impossible to get out of the tube after a short time. My solution was to squeeze the putty out of a new tube into one of the larger empty Tamiya paint bottles I have, to preserve it. I haven't touched the bench in quite some time so I just checked on that putty in the bottle and it is still soft and useable as when it's new. I put it in that jar at least 6 months ago if not longer. So looks like my idea worked. Great stuff in my book especially now that I know the trick to keeping it usable.
 
I use both CA (cyanoacrylate, "super-glue") and Gunze Mr. Surfacer for most of my filling. For large gaps, or where strength is needed, I use Aves™ Apoxy-Sculpt. I'm also trying out several of the newer products now available.

I recommend starting with a single paint brand as much as possible. Learn to use that well, and you will be able to apply what you learned to other paints. My favorite paints are Vallejo and Tamiya. For your clear gloss, consider a floor care product: Holloway House™ Quick-Shine® Multi-Surface Floor Finish. It will do for everything except "candy apple" gloss (usually on cars.)

Please don't hesitate to ask questions. There is an abundance of knowledge and talent here, and we all like to talk about our addiction … erm, hobby.
 
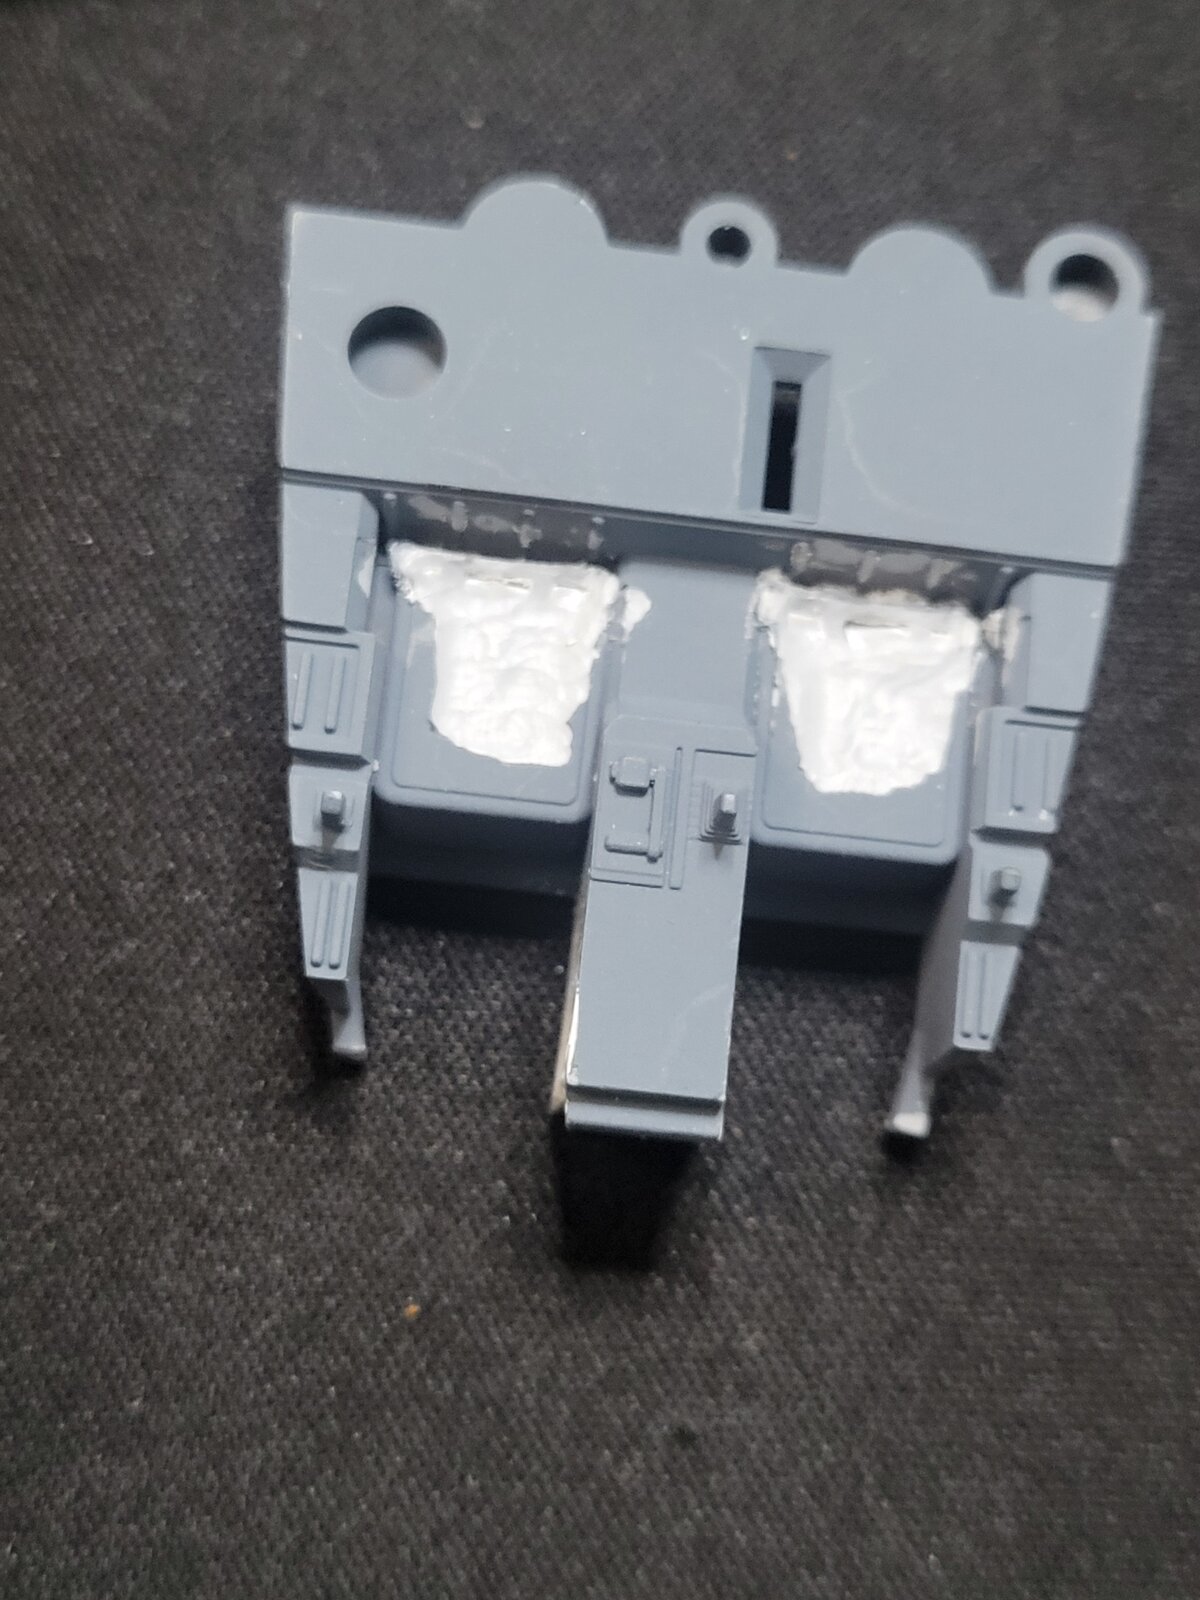
Does anyone have a recommended product and method to use to fill in the divots i made when overzealously using a Dremel tool to grind these seats? I needed to remove the attachment points for the pilots since I will be adding photo-etch seats. And since seats will be added, it doesn't need to be a perfectly smooth end result, but I would like to get it as flat as possible.

The part is maybe 5cm wide and the divots are only maybe 3mm deep at the deepest.

CA glue would probably work if I loaded it into the centre of each seat at the time of fastening them, as pushing down would flow the glue outwards, but there would not be much room for error.

I feel like a putty would be best. Would Tamiya putty work to fill it and then smooth it out? It's the most readily available product in my area so that would be ideal.

Any suggestions are welcome!

1000013139.jpg
 
Last edited:
After looking and reading more carefully, I gather the white is where you cut away material? The photo alone looks like it's a grey part on which you used white filler :)

Tamiya putty will work fine. Smear it into the holes with some kind of spatula (or a knife tip, if you don't have anything suitable) and be sure to put in a little more than needed to make the surface flat, because all one-part putties shrink. Once it's hardened, use a sharp knife and/or a flat modelling file to remove the excess material.
 
Yeah, soft putty like Tamiya's will work to fill the ruts. I use a little acetone, applied with a cotton swab, to remove the excess.

I'll offer some advice about dealing with attachment points like these. I do not use a Dremel/rotary tool for work like this. I find that even at lowest revs, it is too easy to slip and cause damage. I would use X-Acto knives to cut and scrape away the plastic to be removed, till it's gone. It's my preference, but I find it less likely to slip and damage the piece. Then some fine-grit sandpaper to smooth the area out, or even fine files.
 
The filler I use most is Gunze's Mr. Surfacer, 500 for the big gaps, 1000 to 1500 for little stuff. The advantage to it is that you can use 90% isopropyl alcohol to clean it up. Isopropyl alcohol will not attack styrene, as some lacquer thinners and acetone will. Lately I've experimented with Vallejo and AK interactive fillers, but I'm not really happy with the results.
 
Full disclosure: a bit of a long winded explanation! :rolleyes:

...over the years, I have slowly been trying to improve my modeling game.

I like to think of it in terms of activities, independent of the model genre... research, prep, cutting from sprues, shaving or scraping, filling, sanding, priming, etc.

By thinking about it this way, it led me to think about how to optimize each of these tasks.

Focusing on the task of cutting from sprues, yes, a very sharp #11 knife can do it all, cutting and scraping...The mistake I often make is trying to use a knife beyond its usefulness with a dull edge. I buy a large quantity, and am not afraid to throw them out. In the end it saves a lot of grief.

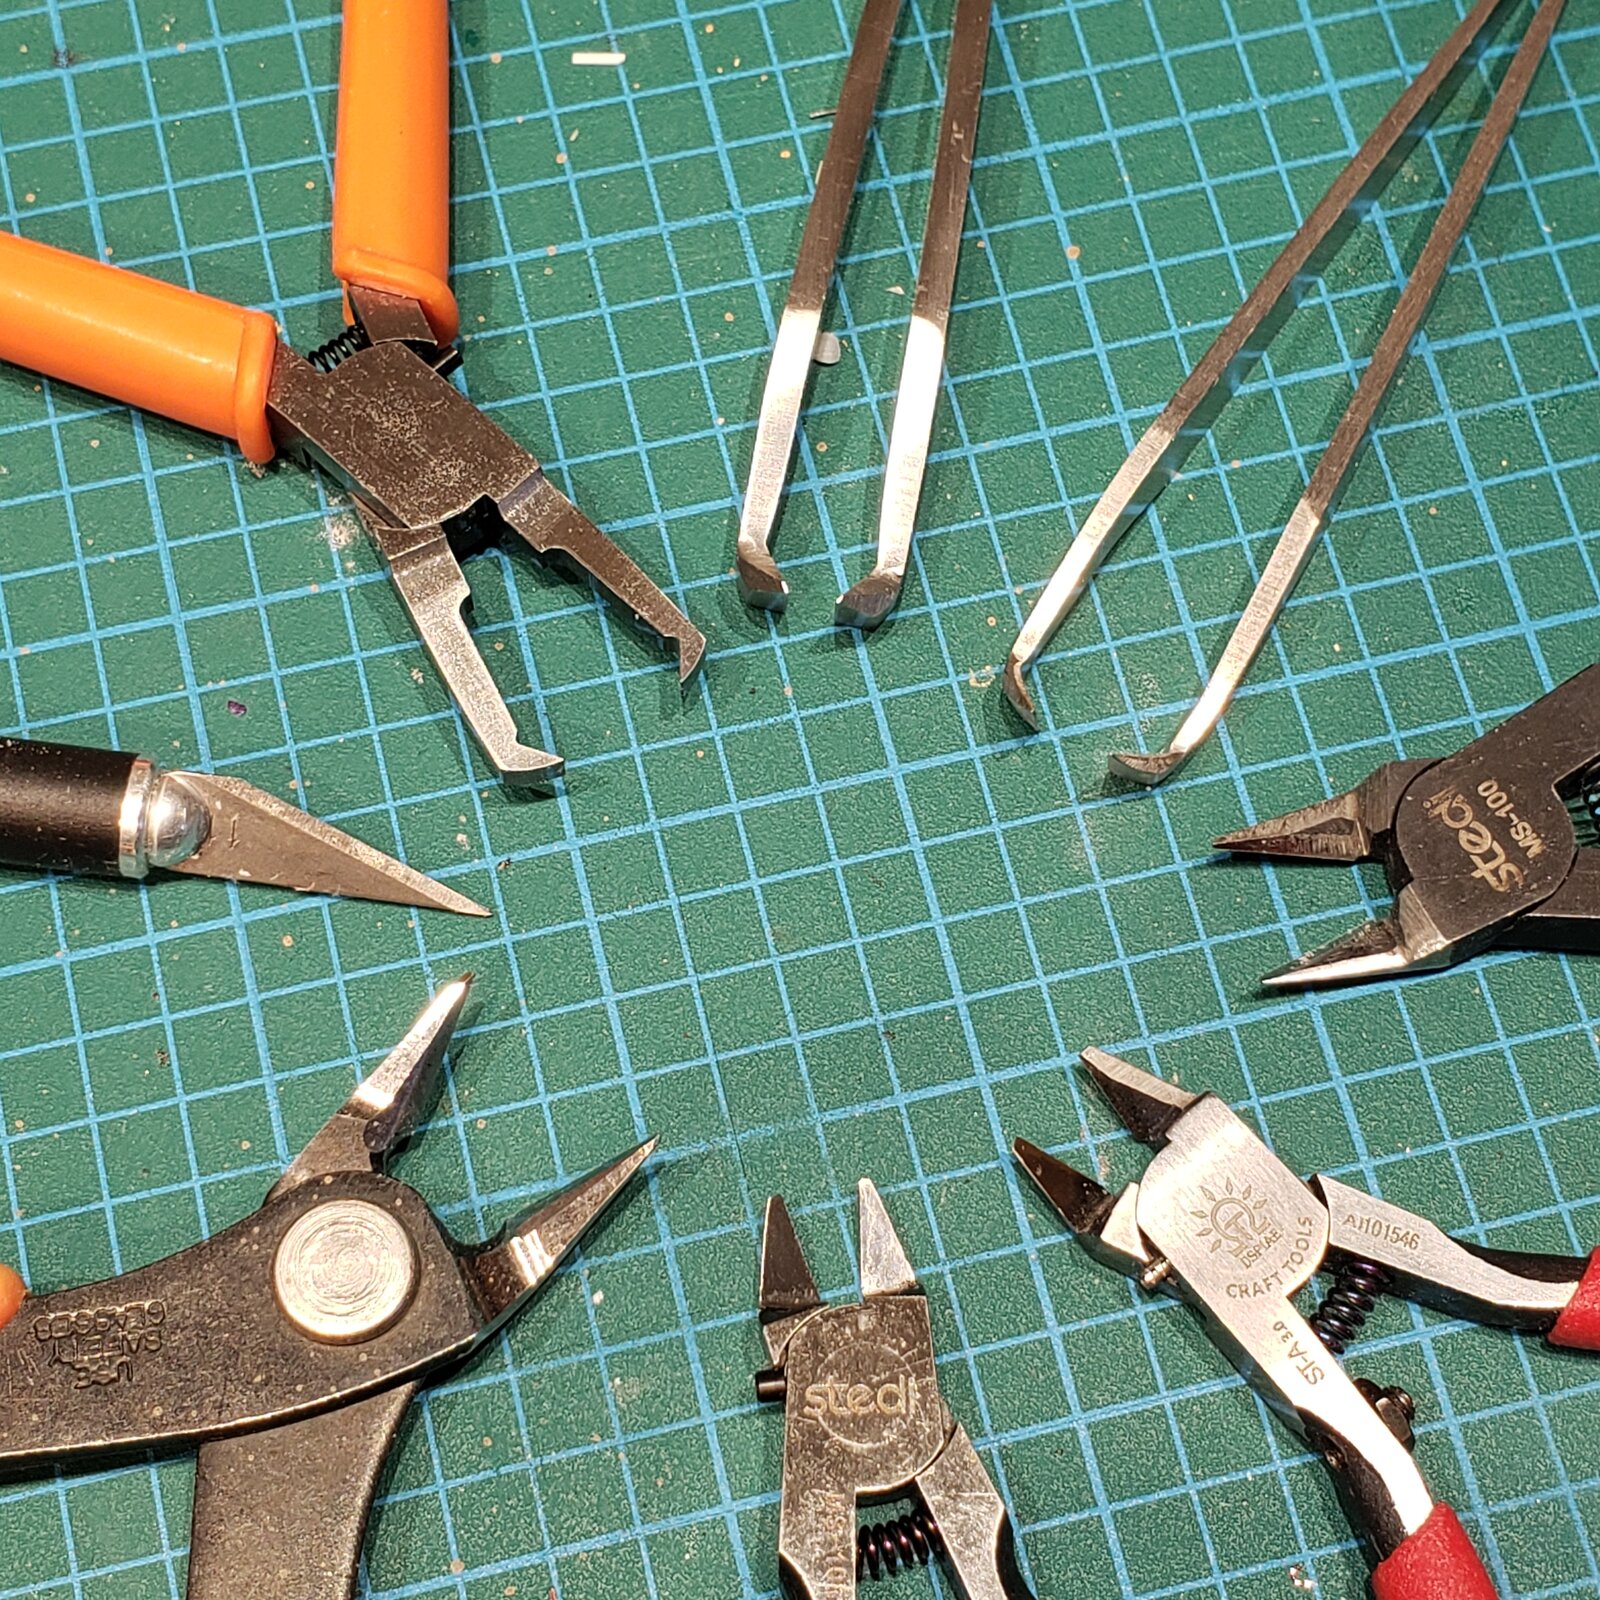
I now have an assortment of tools, chosen for specialization in micro tasks.

Sprue cutters are a good example:
  1. A solid double blade cutter for cutting the actual sprue far from the attachment point. Cut away from the larger sprue, you can more easily get at the attachment points.
  2. Right and left handed single bladed sprue cutters to cut next to the part when the attachment point has a flat surface edge to cut to. Most of the time, my right handed one is sufficient.
  3. Fine double edged sprue cutters (pliers or tweezer type — rounded or flat) for when the attachment point is in the middle of a cylindrical or rounded part: again, depending on the shape, I use the flat or angled sides of the pliers cutter to get as close as possible to the part.
If this all seems like overkill, maybe it is, but I find that by getting the closest possible cut from the sprue, I spend a lot less time scraping, filling and sanding!

17606319172483579954452868406537.jpg


Of course, cutters aren't always the best solution especially with delicate parts... that's when the microsaw blades come out: less chance of bending or breaking.
 
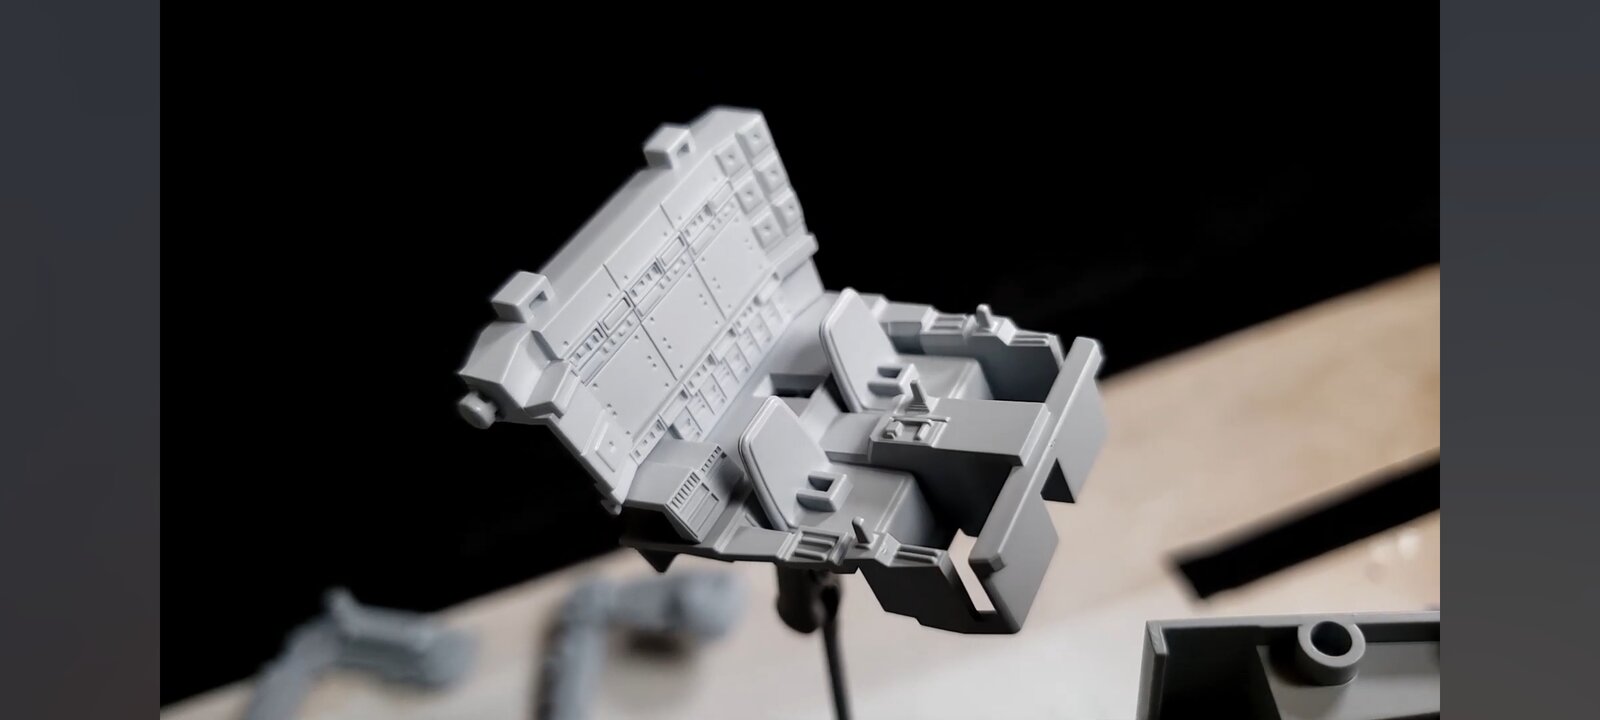
Here's a screen cap of the original part.
I had to remove both seats. The backs were easy to cut out but i had to grind down the attachment points. I felt like coming in from the top with a grinder was safer than using a knife sideways. I'm always looking for suggestions, even in hindsight. I appreciate that there are many engaged members of this forum.

1000013144.jpg
 
You're bound to get as many answers as there are members!

Observation: looks like right angles and flat surfaces.

I would have used a microsaw to cut down the attachment points along the backrest to the seat.
Then I would have used a square hobby knife to 'chisel' layers off, down to the seat; the backs would have served as stops for the blade.
Then I would have removed the backs.
 
You're bound to get as many answers as there are members!

Observation: looks like right angles and flat surfaces.

I would have used a microsaw to cut down the attachment points along the backrest to the seat.
Then I would have used a square hobby knife to 'chisel' layers off, down to the seat; the backs would have served as stops for the blade.
Then I would have removed the backs.
Removing the attachment points before the backs is a veteran move and I wish I'd thought of that.
 
You can get chisel blades for hobby knife handles. Very useful in situations like this.
I was about to suggest that :) A knife and a file are more easily controllable than an electric drill, especially at close quarters like this. Another way to do it, because damage to the seats doesn't matter here anyway, would have been to use snips to cut through the attachment points before removing the seat backs.
 
Back
Top