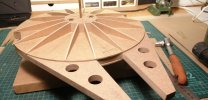
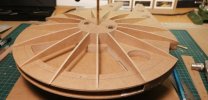
What a piece of junk!
- Thread starter BLT
- Start date
stevethefish
My name's actually not Steve
- Joined
- Jun 12, 2015
- Messages
- 404
I'm confused now. Has this become a full-on scratch build and you've ditched the MPC kit?
In any case, I'm looking forward to the improved, retooled version MPC will be producing soon. The sidewalls detail and height will be improved. I hope the cockpit interior will be redone as well.
In any case, I'm looking forward to the improved, retooled version MPC will be producing soon. The sidewalls detail and height will be improved. I hope the cockpit interior will be redone as well.
Oh S.%@#&... I never realized!I'm confused now. Has this become a full-on scratch build and you've ditched the MPC kit?
In any case, I'm looking forward to the improved, retooled version MPC will be producing soon. The sidewalls detail and height will be improved. I hope the cockpit interior will be redone as well.
They're doing a new one?
Then all this is for nothing?
To be honest I don't have much faith in revell or however is doing it... But I hope I'm wrong.
No there's still a chance to save Han... At the east platform... Wait!
What I meant to say was, yes this is still an attempt to save the old mpc kit. Tho the more I look at it the more I find wrong with it. It's dunne tho, most of the detail is there, it's just not really there, more like suggested. Weird that!
I still see this as a good practice run for later... I'm probably gonna get there but I hope to get a 3d printer and scratch build a ANH 5" in ESB 32' scale.
Anyway I ordered some led's to day, I realized I had to figure the lighting out before I glued the thing together...
See, I learned something.
Thanx for replying.
stevethefish
My name's actually not Steve
- Joined
- Jun 12, 2015
- Messages
- 404
Well, since Bandai has been winding down their Star Wars model releases, Round2 has purchased the Star Wars license and has begun re-issuing their old MPC kits. They re-released their old ROTJ X-Wing snap kit with the robot race car driver pilot molded into the back of the cockpit. Crap. They re-released their B-Wing snap kit which is so-so. They did a good job re-releasing their AT-AT kit and upgraded it. Screws enable the "hips" to be positioned, the rear legs are articulated just as the front legs are, a spring now keeps the head in place instead of a rubber band, plus there are nice decals: the AT-AT's viewscreen, the snowspeeders' windows and stripes, and now decals for the turrets since their smooth surface lacks details. They are releasing their old Slave-I as-is (but maybe with some parts molded in clear), and the old Darth Vader's TIE Fighter has had a makeover with newly tooled parts. The Vader figure is improved, better surface details, etc. It seems like a good buy.Oh S.%@#&... I never realized!
They're doing a new one?
Then all this is for nothing?
To be honest I don't have much faith in revell or however is doing it... But I hope I'm wrong.
They are going to re-release this old MPC Falcon kit too. The sidewalls' details and height will be retooled, and the radar dish too. Again, I do hope the cockpit detail will be improved as well as the figures. This reboot of the MPC kits was announced at last June's Wonder Fest in Kentucky. With you and Andrew starting builds of this old kit since then on this forum, I assumed you two knew about this and were wanting to build what you already have.
What matters is that you guys are enjoying building your kits. I've enjoyed building the MPC Falcon that came with the Hoth Rebel Base diorama model set, lighting it up and scratching new details. It's not very screen-accurate, but I've really had fun sprucing it up. You can find this build in a post of mine on here if you haven't seen it already.
My only question was whether you are going to use the plastic since it appears that you are re-creating a completely scratch-built Falcon from wood. Is the wood just an internal frame that the plastic will sandwich over?
Great answer... thank you.Well, since Bandai has been winding down their Star Wars model releases, Round2 has purchased the Star Wars license and has begun re-issuing their old MPC kits. They re-released their old ROTJ X-Wing snap kit with the robot race car driver pilot molded into the back of the cockpit. Crap. They re-released their B-Wing snap kit which is so-so. They did a good job re-releasing their AT-AT kit and upgraded it. Screws enable the "hips" to be positioned, the rear legs are articulated just as the front legs are, a spring now keeps the head in place instead of a rubber band, plus there are nice decals: the AT-AT's viewscreen, the snowspeeders' windows and stripes, and now decals for the turrets since their smooth surface lacks details. They are releasing their old Slave-I as-is (but maybe with some parts molded in clear), and the old Darth Vader's TIE Fighter has had a makeover with newly tooled parts. The Vader figure is improved, better surface details, etc. It seems like a good buy.
They are going to re-release this old MPC Falcon kit too. The sidewalls' details and height will be retooled, and the radar dish too. Again, I do hope the cockpit detail will be improved as well as the figures. This reboot of the MPC kits was announced at last June's Wonder Fest in Kentucky. With you and Andrew starting builds of this old kit since then on this forum, I assumed you two knew about this and were wanting to build what you already have.
What matters is that you guys are enjoying building your kits. I've enjoyed building the MPC Falcon that came with the Hoth Rebel Base diorama model set, lighting it up and scratching new details. It's not very screen-accurate, but I've really had fun sprucing it up. You can find this build in a post of mine on here if you haven't seen it already.
My only question was whether you are going to use the plastic since it appears that you are re-creating a completely scratch-built Falcon from wood. Is the wood just an internal frame that the plastic will sandwich over?
To be honest I haven't really followed along on the hole rerelease thing... I figured almost as crappy kits but probably more expensive. and since Bandai IS the standard I figured I'd go for them. I have been telleing myself to get my finger out out of my a** before the Bandai stuff is all but gone, but I'll probably F*** that up to and wake up one morning and realize it's too late... LOL.
Anyway, yes it's just the internal frame, I plan on using - what is left - of the old hull. But the mandibles, cockpittube and cone, docking arms and rings and enginedeck, will be rebuild, with some of the old detail, oh and the jawbox as well.
As I said before, it'd be easier to build it from scratch, but it's a great learning experience.
Eagle-1
Well-Known Member
- Joined
- Jan 16, 2014
- Messages
- 1,039
Not much happening in this thread... Must be the topic.
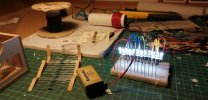
Anyway. LEDs came today, all working.
View attachment 90522
I beg to differ! Looks like you're doing alot in this thread. By the way, I'll need my resistors back. At least they LOOK like some of mine.
Thief.
stevethefish
My name's actually not Steve
- Joined
- Jun 12, 2015
- Messages
- 404
I think this forum is just slower than others. I think more people are attracted to the big shiny object known as Facebook, but as that disgusting platform marches towards its oblivion, this comfy place will continue.
Are those LEDs for the engines? If so, have you considered using LED tape? It's pretty easy to use. I'll be using it for my own Falcon I am working on (Fine Molds 1:144 scale).
Are those LEDs for the engines? If so, have you considered using LED tape? It's pretty easy to use. I'll be using it for my own Falcon I am working on (Fine Molds 1:144 scale).
Eagle-1
Well-Known Member
- Joined
- Jan 16, 2014
- Messages
- 1,039
I think this forum is just slower than others. I think more people are attracted to the big shiny object known as Facebook, but as that disgusting platform marches towards its oblivion, this comfy place will continue.
Agreed and good riddance. I don't know about y'all, but a forum is the way to post this sorta thing. I can come back, as I sometimes do, after several days and FIND things.
Keep posting BLT, you're doin' just fine.
I beg to differ! Looks like you're doing alot in this thread. By the way, I'll need my resistors back. At least they LOOK like some of mine.
Thief.

Thank you Eagle 1. The support is much appreciated.
I think this forum is just slower than others. I think more people are attracted to the big shiny object known as Facebook, but as that disgusting platform marches towards its oblivion, this comfy place will continue.
Are those LEDs for the engines? If so, have you considered using LED tape? It's pretty easy to use. I'll be using it for my own Falcon I am working on (Fine Molds 1:144 scale).
Thank you stevethefish, you're probably right. I must admit I've considered posting on RPF, but I'm not sure this is the right toppic on that forum. And I like the laid back atmosphere on this forum. But yeah there aren't that many active members.
I did consider LED strips yes, tho for some reason I couldn't find the right ones. Now tho I found some that had 1700 lumen per meter and could be cut I 2 cm increments. I also found some that already had some defusion they could only be cut every 20 cm tho.
Only drawback tho is that they require 24 volts. Which means batteries are out.
Thanx for the support man.Agreed and good riddance. I don't know about y'all, but a forum is the way to post this sorta thing. I can come back, as I sometimes do, after several days and FIND things.
Keep posting BLT, you're doin' just fine.
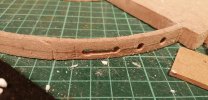
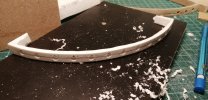
Anyway, I tried cutting the mdf really thin, it worked until I tried drilling it. Now I'm using expanded pvc or something like that. Amazing stuff.
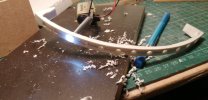
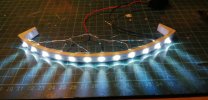
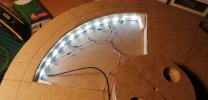
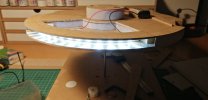
stevethefish
My name's actually not Steve
- Joined
- Jun 12, 2015
- Messages
- 404
Double density LED tape puts the lights closer together, reducing hot spots. I have never owned the MPC Falcon kit, so I cannot speak to that. But for my Fine Molds Falcon (considerably smaller than yours, for sure), I have bought the clear resin parts for the engine and I will be using sandpaper to scratch up the back side of the clear parts, helping to diffuse the light even more.
You certainly have far better skills for working with wood. I'm the son of a carpenter, but I have no patience for the stuff myself!
You certainly have far better skills for working with wood. I'm the son of a carpenter, but I have no patience for the stuff myself!
Thank you stevethefishDouble density LED tape puts the lights closer together, reducing hot spots. I have never owned the MPC Falcon kit, so I cannot speak to that. But for my Fine Molds Falcon (considerably smaller than yours, for sure), I have bought the clear resin parts for the engine and I will be using sandpaper to scratch up the back side of the clear parts, helping to diffuse the light even more.
You certainly have far better skills for working with wood. I'm the son of a carpenter, but I have no patience for the stuff myself!
I gave in and ordered a LED strip. 1750 lumen.
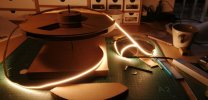
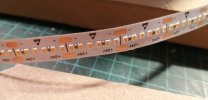
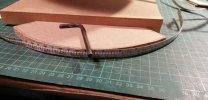
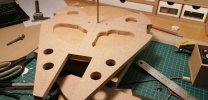
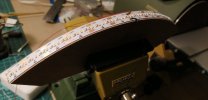
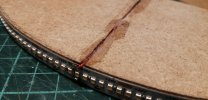
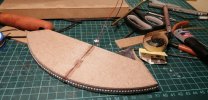
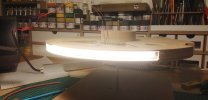
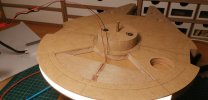
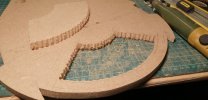
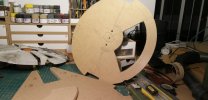
I glued the top plate... Next step is some sanding, and then gluing the underside, some more sanding on the outside....
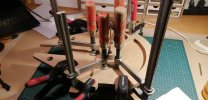
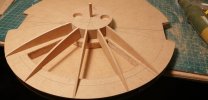
THEN... Somehow optainening the right curvature of the inside support ribs, and gluing them where they somehow won't be in the way of equipment bays and other stuff.
That's the plan, and it'll certainly change.
stevethefish
My name's actually not Steve
- Joined
- Jun 12, 2015
- Messages
- 404
It looks great!
stevethefish
My name's actually not Steve
- Joined
- Jun 12, 2015
- Messages
- 404
This is gonna be amazing when finished. What do you plan to light up? What will you do about the lousy cockpit? Scratch it with styrene?
Thank you for replying.This is gonna be amazing when finished. What do you plan to light up? What will you do about the lousy cockpit? Scratch it with styrene?
I'm lighting it with led strips. The cockpit actually isn't that far off... It's a tad too long.
But the consensus is that the calculations of the diameter are a bit off... The tube is indeed 6' not 5,75 on the ANH 5 footer. Converting it to the size of the mpc gives you 42 mm instead of 40mm.
But the overall flatness of the tube closer to the center of the hull is an issue.
So... I'll either layer some styrene on top of the existing tube or scratch one... Not sure yet.
Thanx for asking.
Sides are sanded.
I tried heating up the cockpit tube, to correct the flat shape. I was going to scratch it, but I'm considering just adding to it or maybe covering it with styrene sheet to add the extra mm all around.
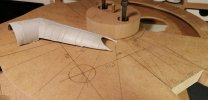
I realized I had too fit the docking arms before I added the ribs to correct the curvature.
Bit of trial and error, but copying the shape should be a bit easier.
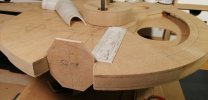
Again I was considering scratching the details completely, but the goal is to actually use most of the model... Lol. So I guess I'll have to make due.
I tried heating up the cockpit tube, to correct the flat shape. I was going to scratch it, but I'm considering just adding to it or maybe covering it with styrene sheet to add the extra mm all around.

I realized I had too fit the docking arms before I added the ribs to correct the curvature.
Bit of trial and error, but copying the shape should be a bit easier.

Again I was considering scratching the details completely, but the goal is to actually use most of the model... Lol. So I guess I'll have to make due.
Similar threads
- Replies
- 6
- Views
- 436
- Replies
- 5
- Views
- 763

