Wave 1/20 Ketzer build up

MrNatural

my head is falling off my head
Joined
May 27, 2009
Messages
983
Alright! Totally inspired by the new Hobby Link vid series on the forum. Got him in last week and have been steady working on it. This will be my third Ma.K build. Check it...

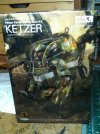
Totally rad box art
004-32.jpg

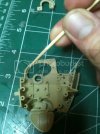
It is possible to install the clear parts after you paint but it just seems a little too tricky for me so I went ahead and installed them.
008-24.jpg
009-17.jpg

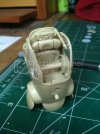
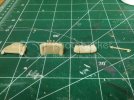
Next up was the cock pit and pilot. Went together very easily
010-11.jpg

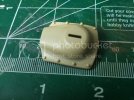
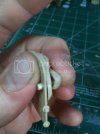
I didn't like how you could see the hollow pilot seat from the back
011-9.jpg

Filled it up with some milliput
012-13.jpg

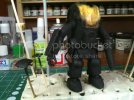
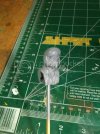
Pilot went together really easily used a little filler to take care of seams on the shoulders and at the top of the head where it meets the helmet there was a tiny gap. Probably cause I was too aggressive with my trimming. He's sitting in some testors grey primer. Stuff takes forever to dry.
5545453.jpg


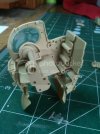
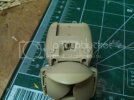
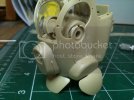
main torso parts are together
013-6.jpg

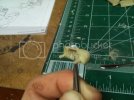
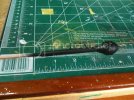
Trying my hand at creating weld beads on top on the seams with stretched sprue. Its a little tricky. By the third or fourth one I sort of got the hang of it. Some of them definitely look like a green horn welded up this armor ;)
1515511.jpg
1515512.jpg

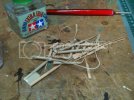
It took me many tries to get my sprue stretching technique down
1515513.jpg

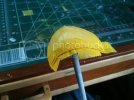
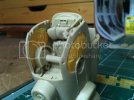
Went ahead and masked off the two side windows inside and out. I actually have learned to like doing tricky masking like this, its kinda fun
5545454.jpg

Then airbrushed Citadel Chaos Black as a primer just in the cockpit.
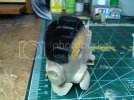
5545451.jpg

Then a mix of Tamiya acrylic flat brown, gloss brown, and olive drab.
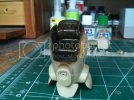
5545452.jpg

Well thats it for now more to come soon.

This is a really nice kit and just pure fun to work on.
 
Cool! 8)

Nice job with the masking. I've only recently learned that putting the tape down on the mat and cutting it into small segments works best!
 
Most excellent. Really need to pick one of these up, Sci Fi & my new found love of armour...perfect ;)
 
Looks great. Super cool to see another one of these getting the buildup.
 
Mr. Natural ,

Cool Dude ! This is a Great lookin kit. Great Start. I really dig th weld beads. Ya' know , I never got th hang of stretchin' sprue, but You nailed it ! I have heard that it depends of th sprue , how well it stretches or not ??

Totally Diggin' this & will keep an Eye on this one !!
 
Thanks guys. Having a blast with this one.

After looking at Ken's build, I realized that I forgot to paint the inside shoulders before I installed the side windows. So I ended up popping them out which wasn't as difficult as I thought it would be. I then painted the shoulder parts with some model master raw umber. As the raw umber cured it left little cracks which would usually ruin my day, but in this case I think it lends to the aged look of the cock pit. A happy accident.
003-37.jpg

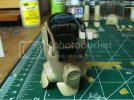
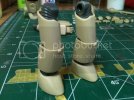
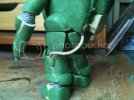
Got the arms and legs together, I decided to go ahead and close up the seams on them instead of putting weld beads because I just prefer this look better. When examining the kit I noticed there are molded on hinges and panels which suggest where the armor would be taken apart upon repair. I followed suit with ken and replaced the bolts on the shield with the extra ones included with the kit.
002-42.jpg
001-41.jpg

Then replaced some more bolts on the back armor.
004-33.jpg
005-30.jpg

Thats it for now, should be getting to paint soon ;D
 
Glad to read you managed to get the 'glass' out and paint those shoulders.

I mentioned the hinged parts on maybe page four of my build (if I recall correctly) and that I tried to avoid placing welds on the parts with hinges but there were really only two major areas like that (the upper arm parts and the lower leg parts) and one other small section of the gun hand. All the hinged parts have two corresponding straps or latches on the opposite side of the hinges so I didn't put welds there. Except for the lower leg part which has an odd overlap thing going on so I just welded those since there were no 'straps'.

Gotta' love happy accidents.
 
This is great- I would really like to have one of these MAK kits but so far have missed out. If I may, your stretching sprue to make weld seams is a good cheap way to do this, but like you I have trouble getting it to the right thickness...

Try what a friend of mine, who is addicted to armor, does. He takes thin solder and glues it to the kit then distresses that with an Xacto blade. Of course you cant sand it but it takes primer for painting.

Killer kit here- I am jealous! :D
 
Very nice Mr N those bolts look pretty good. Looking forward to seeing some more
 
Hey great build so far Mr. N ;)
Glad to see some Ma.K. love.
Just a side note, the arms swing down when the suit is open and that area would not be welded.
Hey, but that's like rivet counting so go on good sir ;D
 
Maknifiso said:
Hey great build so far Mr. N ;)
Glad to see some Ma.K. love.
Just a side note, the arms swing down when the suit is open and that area would not be welded.
Hey, but that's like rivet counting so go on good sir ;D

Thanks man appreciate the heads up :). Are you talking about the two vertical welds on the side of the suit? That would make sense if the arms swing down. So would there just be panel lines there? I've looked at a few different builds of this kit and I've seen people just leave the panel lines, fill them in completely, and weld them.

Im thinking about taking the welds off that part and welding up the side skirts on the hull instead.
 
I did a lot of searching on the Ma.K. forum before I started mine and I read that much of the artwork showed that area smooth with no seams and that's why some choose to fill those seams and sand them smooth.

BK's outstanding build thread is a perfect example of this.


Besides... it's fictional after all, eh? ;)
 
Cool. Rolling right along with this. Thanks guys for all the comments. I would definitely encourage anyone thinking about getting into Ma.k models to go for it. You wont regret it.

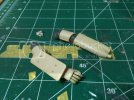
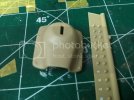
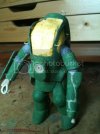
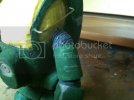
Decided to get ride of weld beads on the sides and sand them smooth, just wasnt totally digging how they turned out, I also decided to add some weld seamds of the lower right arm. Textured the armor with some Squadron Green putty thinned down with lacquer thinner. Masked off the painted cockpit and windows. Replaced the side bars (grab bars) not sure what you'd call em' with brass rod. Im not a huge fan of the rubbery plastic parts tree PE that contains all the arm and leg joints, so I sculpted over them with some Pro-Create putty.
003-38.jpg
004-34.jpg

Replaced the power tube's with some old Mecha Skunk stuff I had, I dont think this guy is in business anymore, its a shame cause he had some really cool detail parts.
006-29.jpg

Airbrushed Citadel chaos black as my primer
007-24.jpg
008-25.jpg

Masked off and painted the main windshield.
009-18.jpg

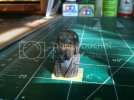
Pilot is painted up
adth.jpg

Thats it for now, probably wrap up the build by my next update and start making a base
 
Looking great! Nice work on that texture effect.

Any idea where to get more of that small braided hose? I've been trying to find some in 2.5mm or 3mm diameter and no luck. I need some asap!
 
Scott Girvan said:
Looking great! Nice work on that texture effect.

Any idea where to get more of that small braided hose? I've been trying to find some in 2.5mm or 3mm diameter and no luck. I need some asap!

Detail Master makes it....I can bring it in for you. They go up to .100" (2.54mm), but unfortunately the biggest available at the moment is .060" (1.5mm)

Runs about $4.50 per pkg and you get about 12" of product.
 

Latest posts

Back
Top